
Yes, that’s right, you can make DIY buttons from avocado pits and then make jewellery from them.
I’ve grown avocado plants from the pits/seeds before, but we eat many avocados, so I wanted to find another use for them.
Getting an avocado pit to sprout and grow into a lovely green plant is relatively easy. A homegrown avocado plant won’t fruit, as it has to be pollinated. And that’s quite complex.
My household gets through many large avocados a week. As someone obsessed with crafting with upcycled materials and nature crafts, I knew I had to make something out of the waste pits.
I have seen stones carved into intricate designs, but you must be highly skilled. However, crafting DIY buttons from avocado pits/stones is easy. Use the buttons to make fun DIY jewellery, such as bracelets and necklaces.
(There is a printable how-to card for this craft at the end of the post.)
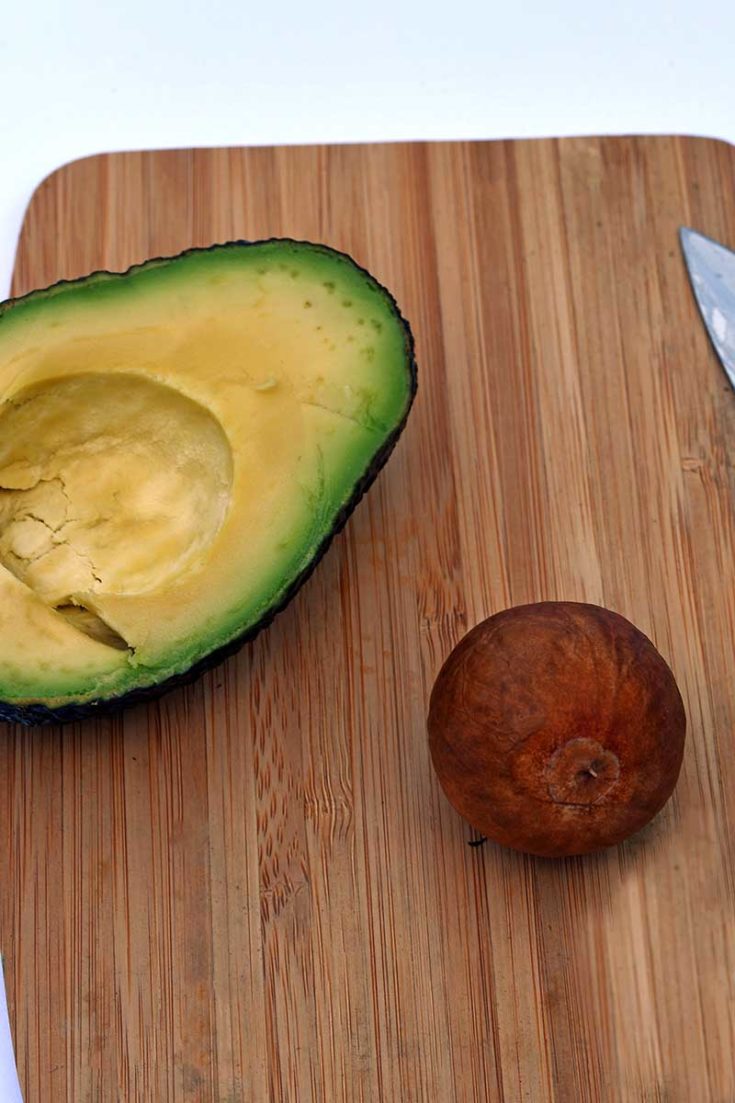
How To Remove the Pit From An Avocado
There is a super-easy way to remove the large seed from an avocado without damaging it or yourself!
- First, run a knife around the middle of the avocado lengthways, leaving the stone intact.
- Then twist the two avocado halves until they separate. One-half of the avocado will contain the pit.
- To remove the pit from that avocado half, place it so that two fingers hold the green flesh on the front and your thumb in the middle on the back.
- Then gently push your thumb into the skin of the avocado, and the seed will pop out.

We’re a participant in the Amazon Services LLC Associates Program, an affiliate advertising program designed to provide a means for us to earn fees by linking to Amazon.com and affiliated sites. As an Amazon Associate, I earn from qualifying purchases.
How To Make Avocado Buttons
What you need
- Avocado pits – The size of the pit/stone will determine the size of the buttons. Each avocado stone will make 3-4 buttons.
- Sharp knife
- A rotary tool with a small drill bit and a sanding attachment
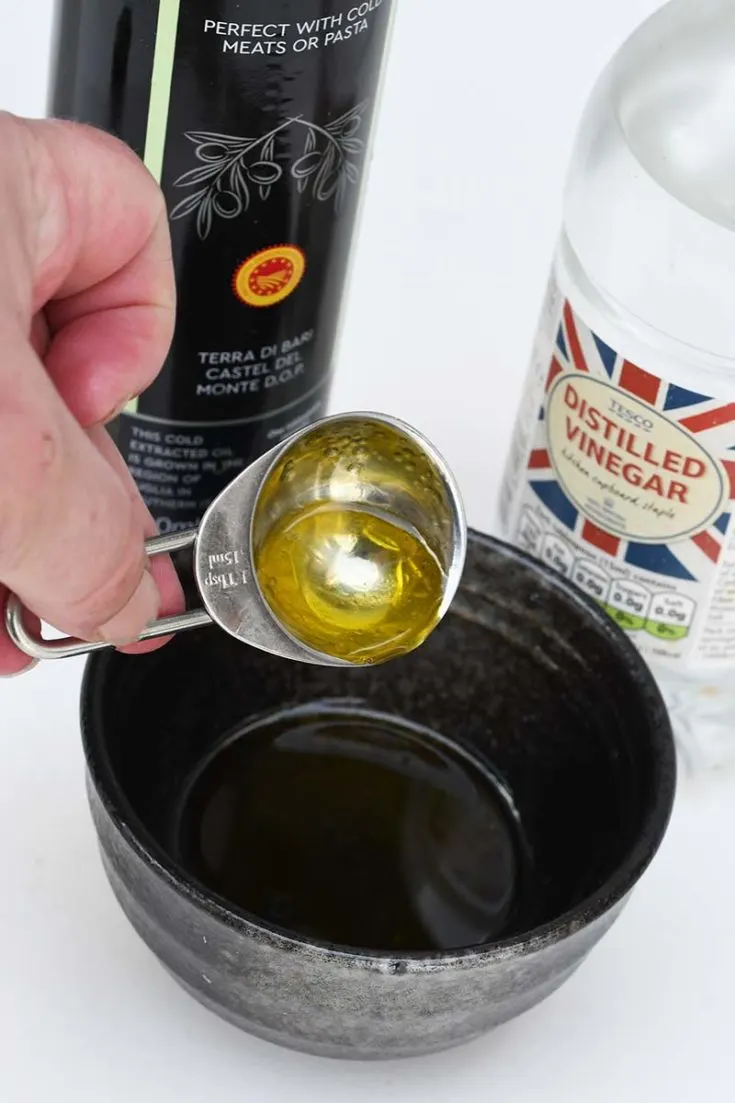
- Tablespoon of each olive oil and white vinegar
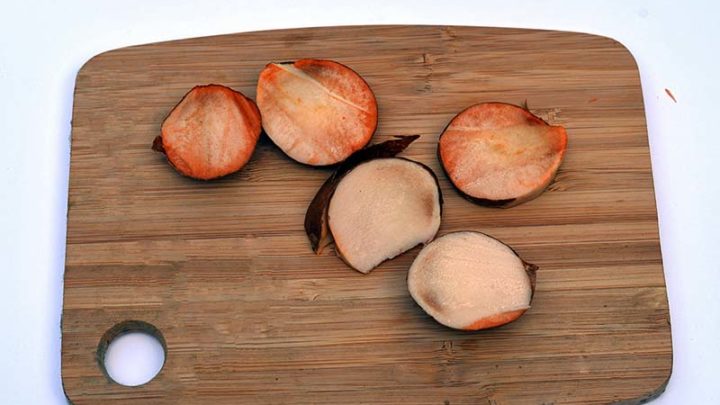
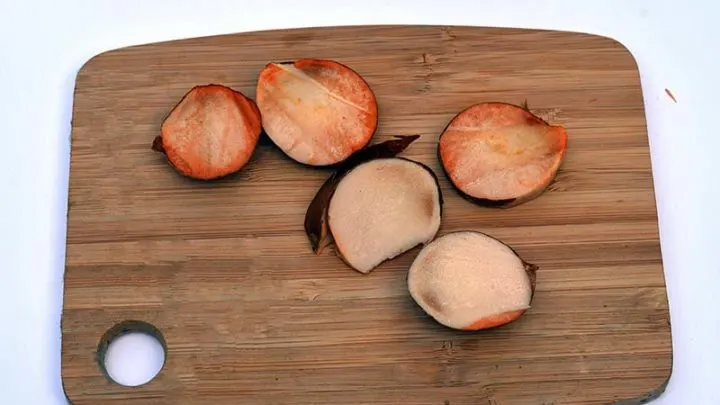
Step 1: Remove the avocado pit from the fruit (see above). Then wash and dry the seed.
Step 2: Hold the pit firmly and then slice it lengthways into five slices, each approximately 5mm wide. Discard the two end slices. Occasionally one of the avocado stone slices will split when cutting; I’m afraid you must discard these.
Top tips for slicing avocado pits:
- Ensure you wash any avocado flesh off the pit and it is dry, making the pit less slippy and easier to hold.
- Cut a fresh pit; the longer you leave it, the more it will dry out and the harder it will be to cut.
- Use a sharp knife. I use a large bladed knife and push it down through the pit.
- Keep your fingers out of the way!
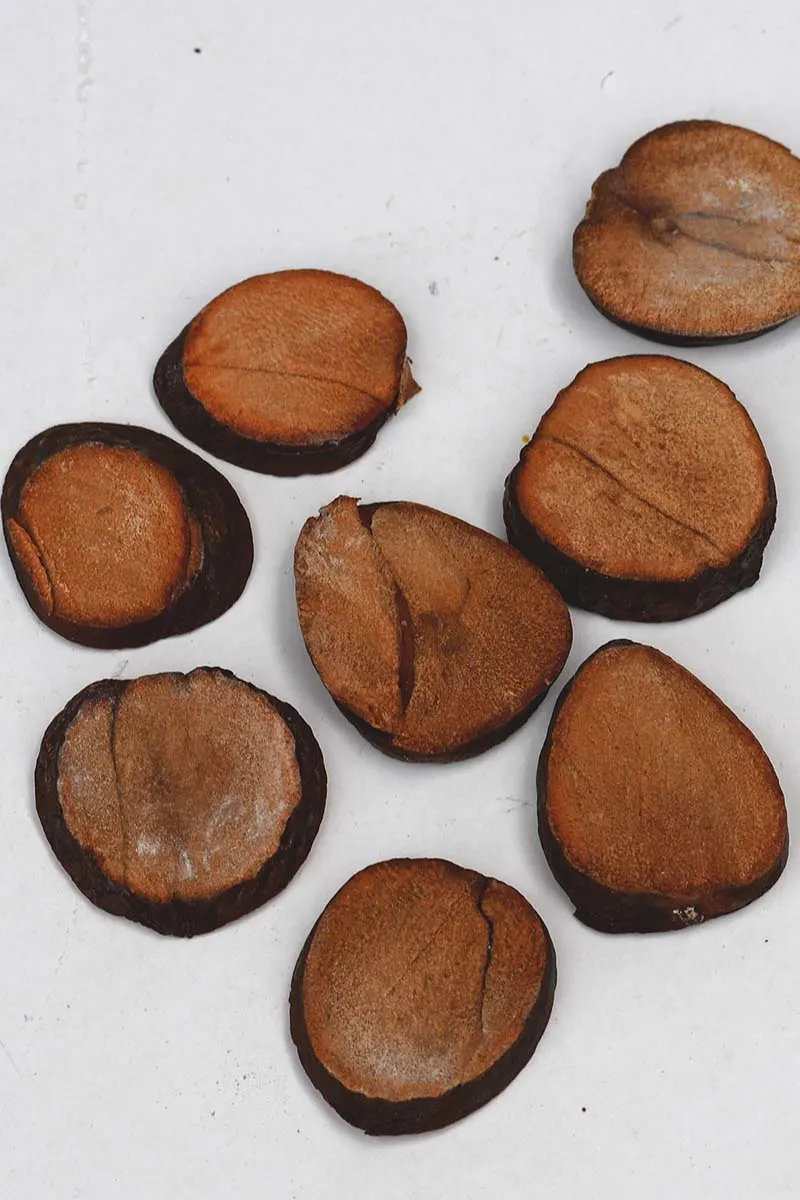
Step 3: You must leave the sliced avocado stone to dry. I cut up pits whenever I eat the fruit and leave the slices to dry naturally. It can take a week or two, depending on your climate.
It is possible to speed up the drying process by placing the pits in a low oven for several hours.
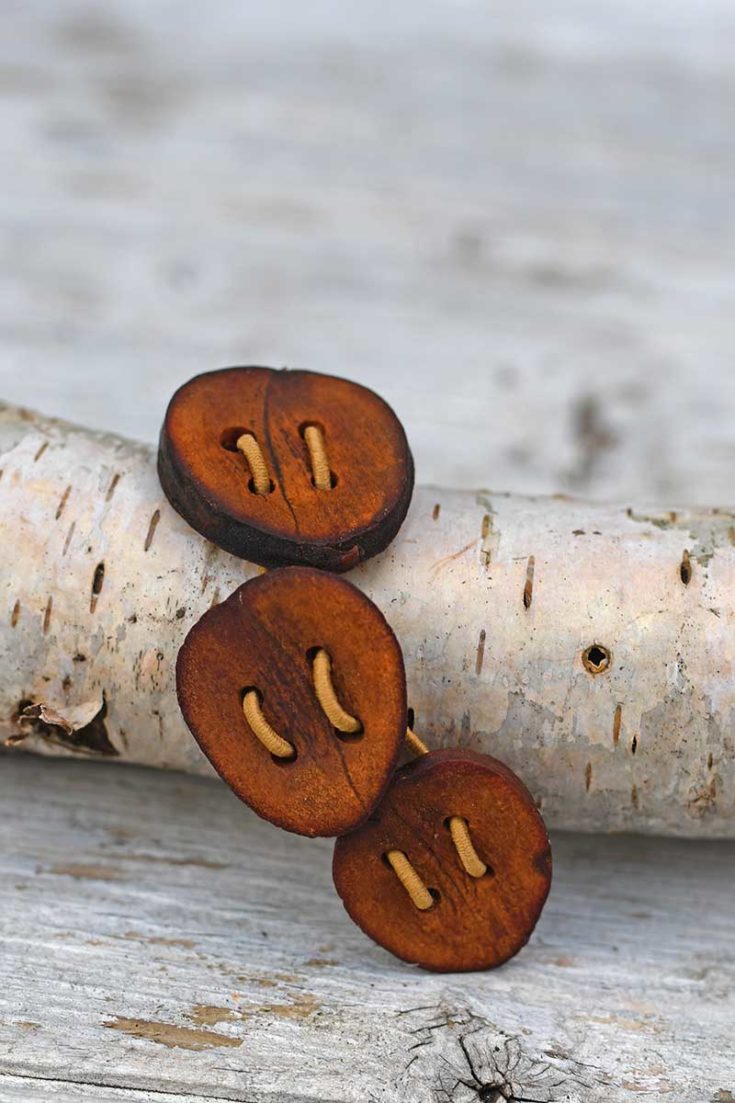
The avocado stone slices will darken and become more wood-like as they dry. The skin on the outside of the seed will loosen and crinkle. Remove any loose skin from the slices.

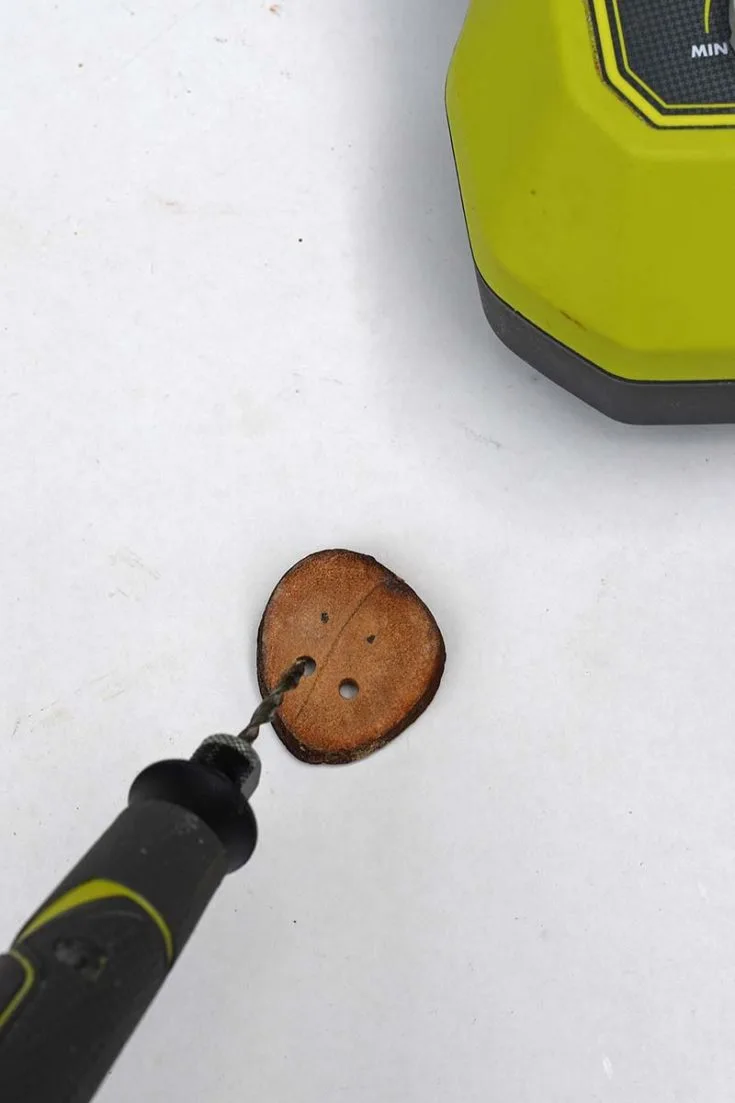
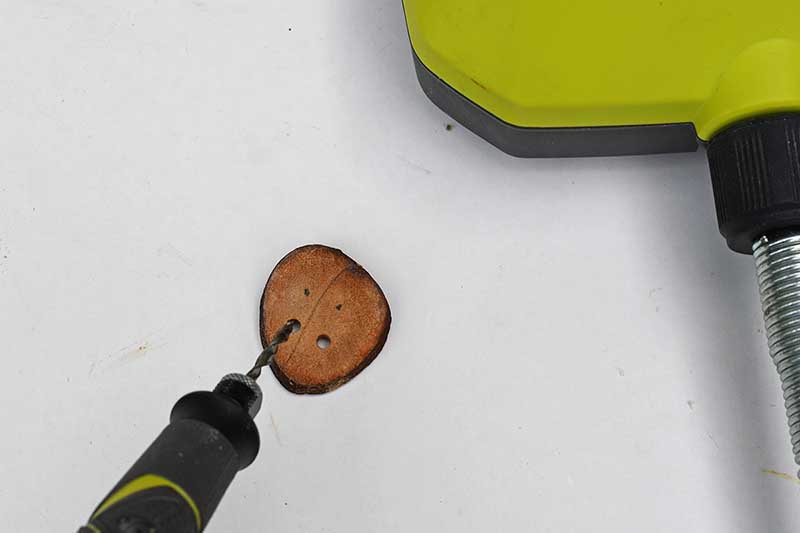
Making Button Holes
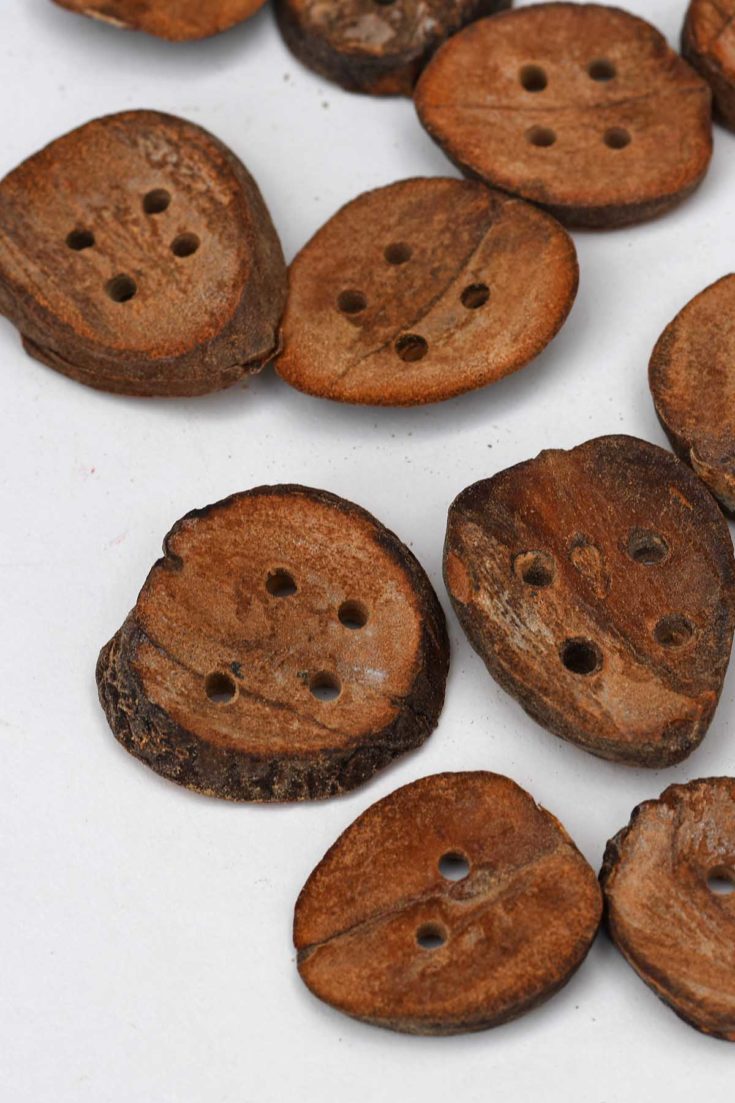
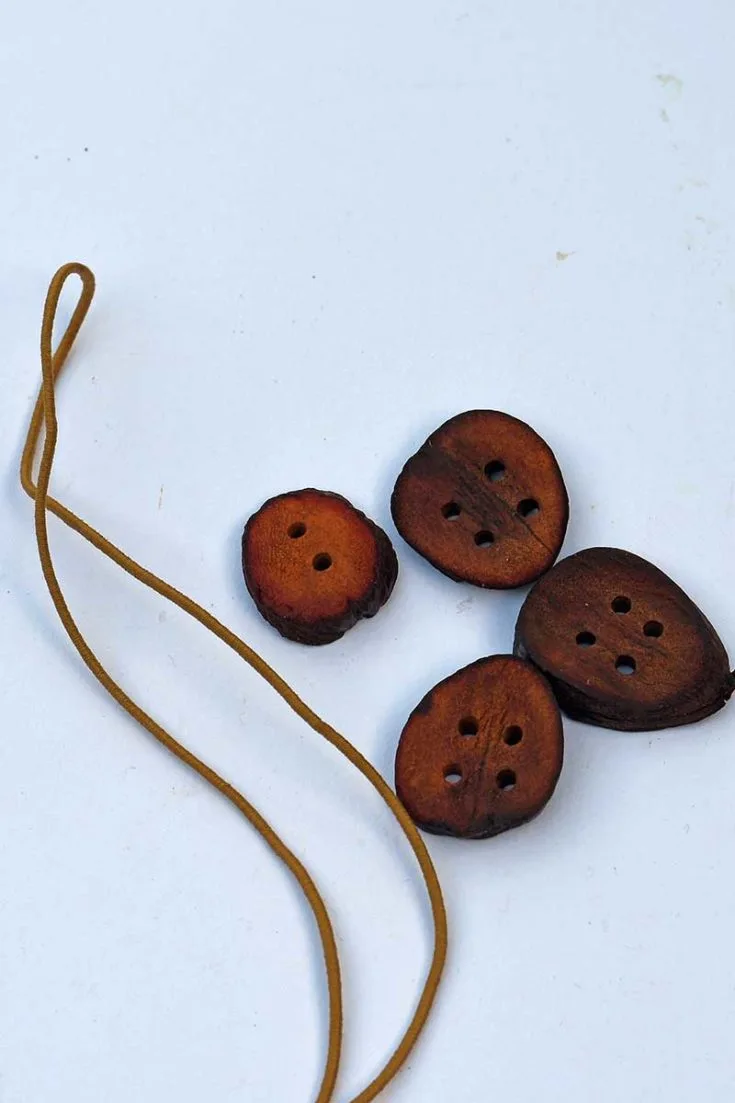
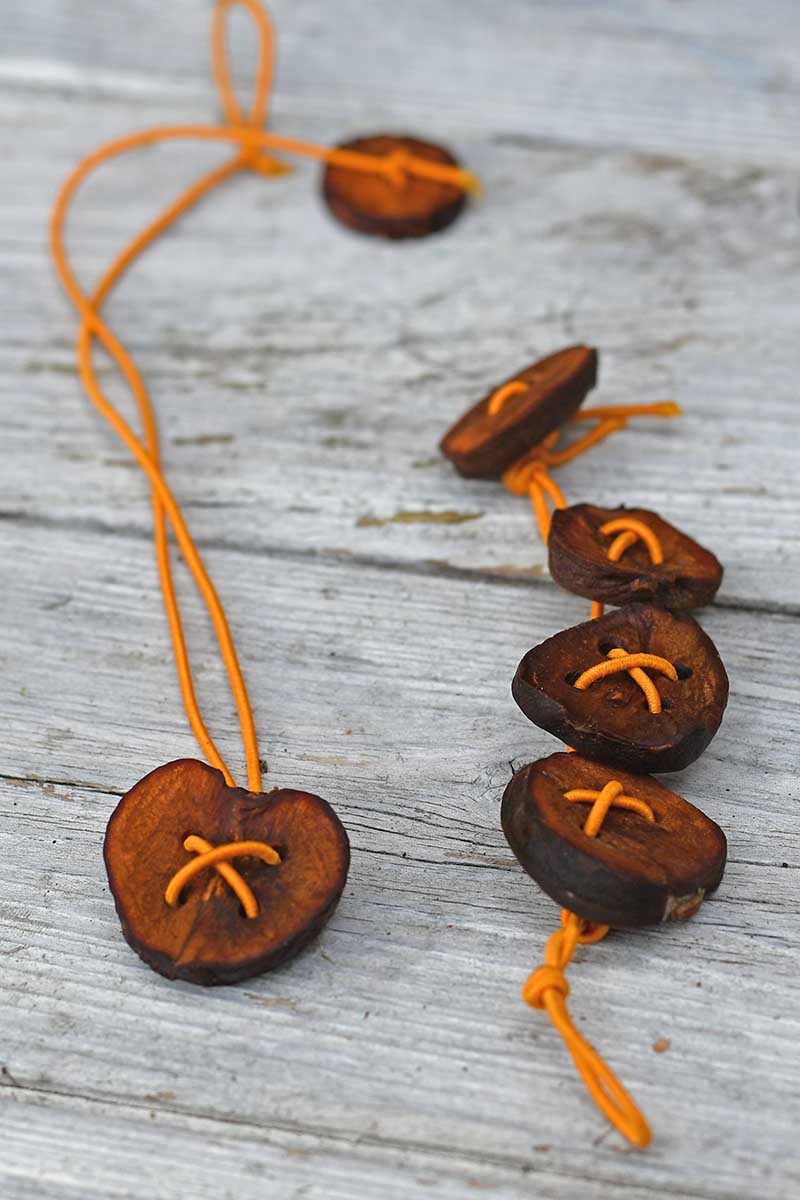
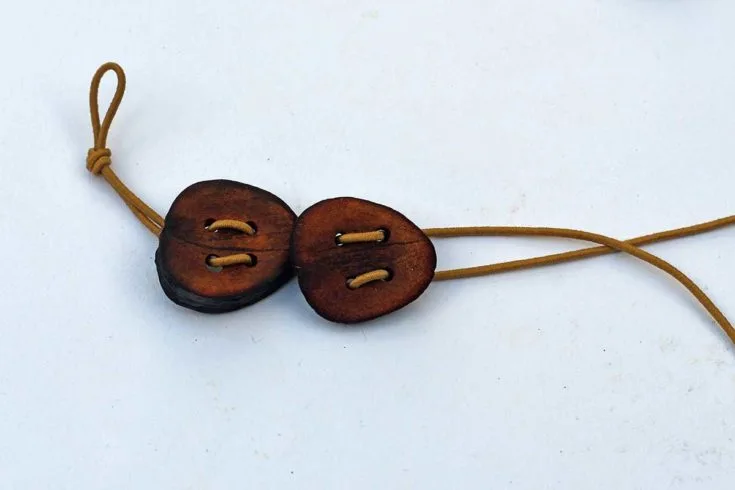
Step 4: Next, turn these slices into DIY buttons by adding holes. You can either make two-hole or four-hole buttons. I tend to make the smaller slices two-hole and the larger four-hole.
First, I mark where I want the buttonholes to be with a pen. Then using a rotary tool, I drill small holes.

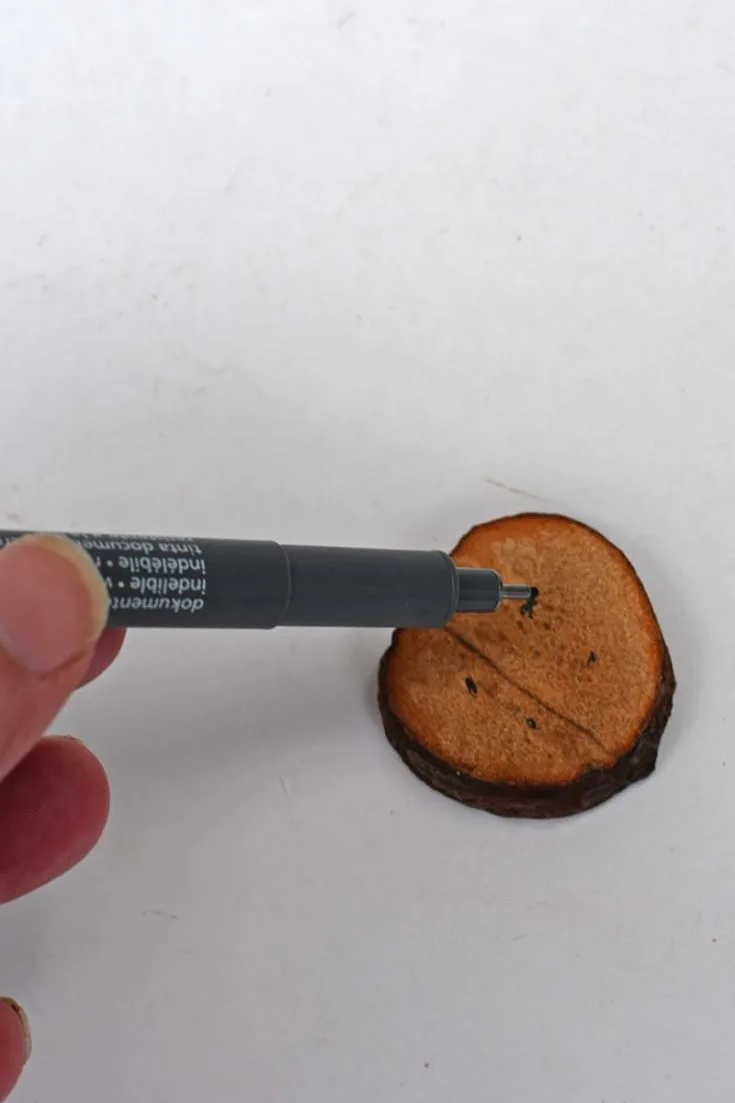

Top Tip: If you don’t have a rotary tool, you can make the DIY buttonholes with a skewer. You must do this before drying, as once the slices are dry, they will be too hard. The downside of this method is that the slices have a greater risk of splitting when making the holes, and you’ll get more wastage.

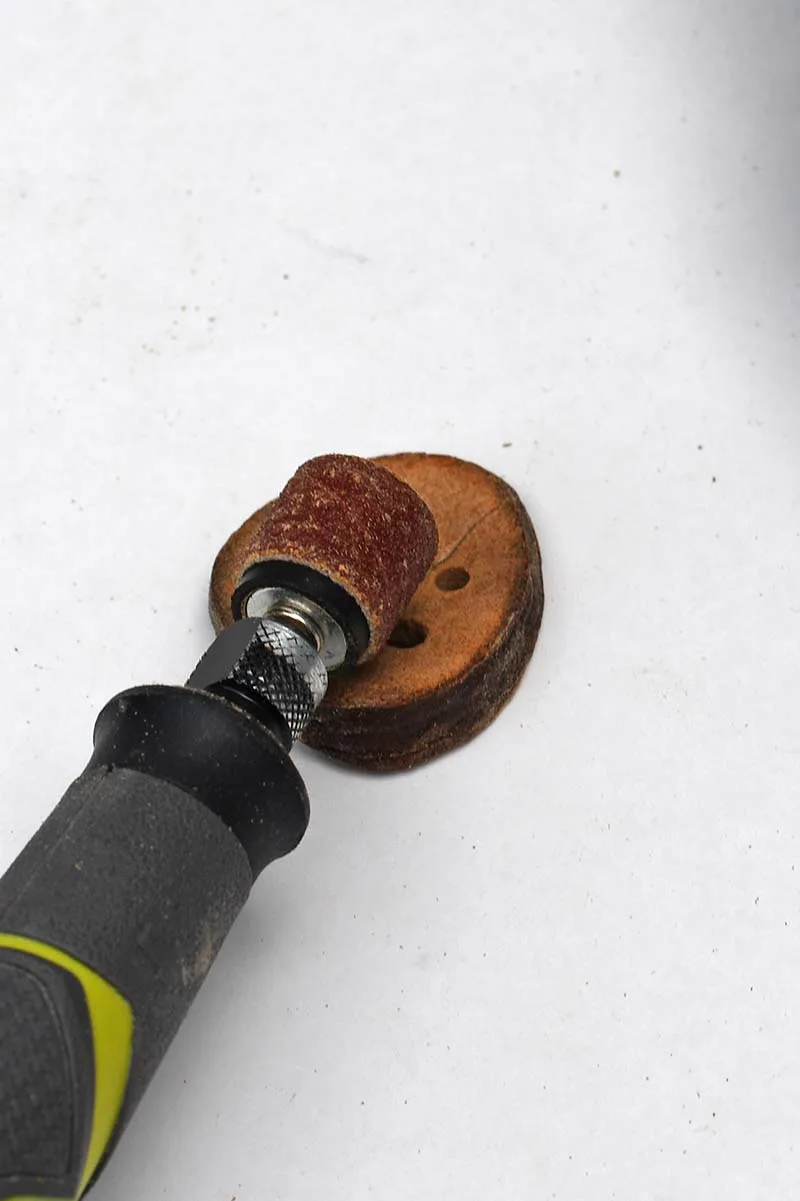
Finishing off the buttons
Step 5: Next, using a rotary tool or by hand, sand the face of the avocado buttons smoothly.

Step 6: Finish off by giving the avocado buttons a nice sheen. Make a mixture of 50/50 olive oil and vinegar, then rub this into the face of the buttons with a kitchen towel or a lint-free cloth.
Top Tip: I use this homemade natural wood polish to clean and polish many different wood pieces in my home.

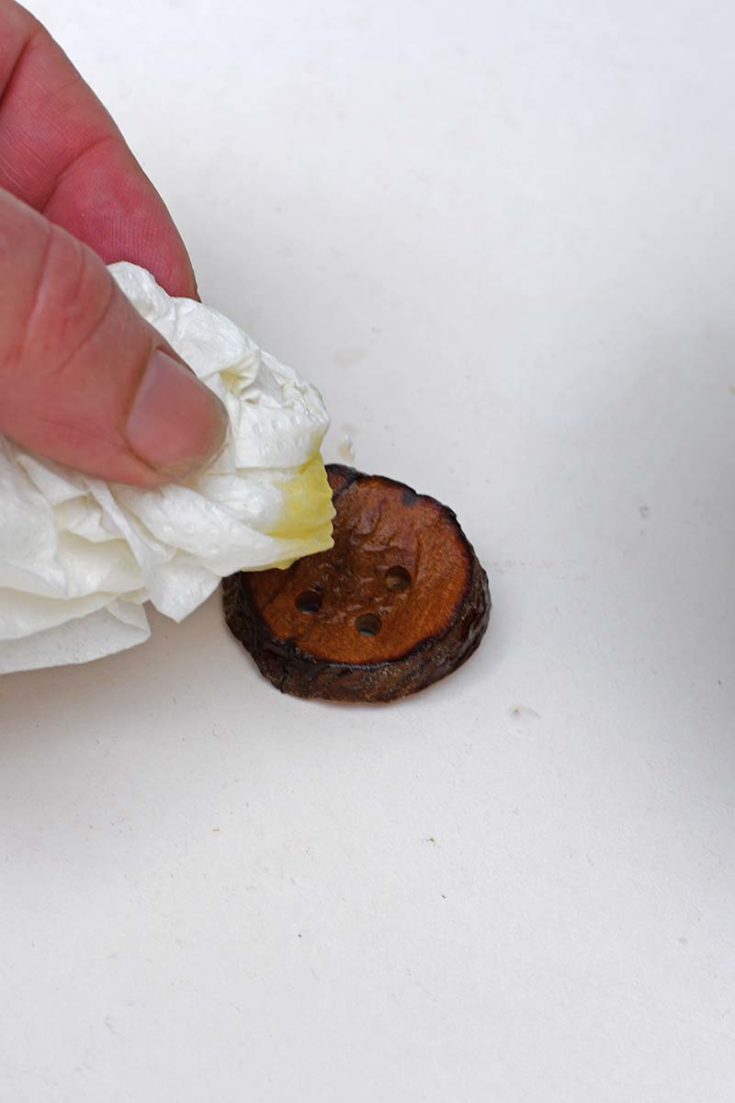
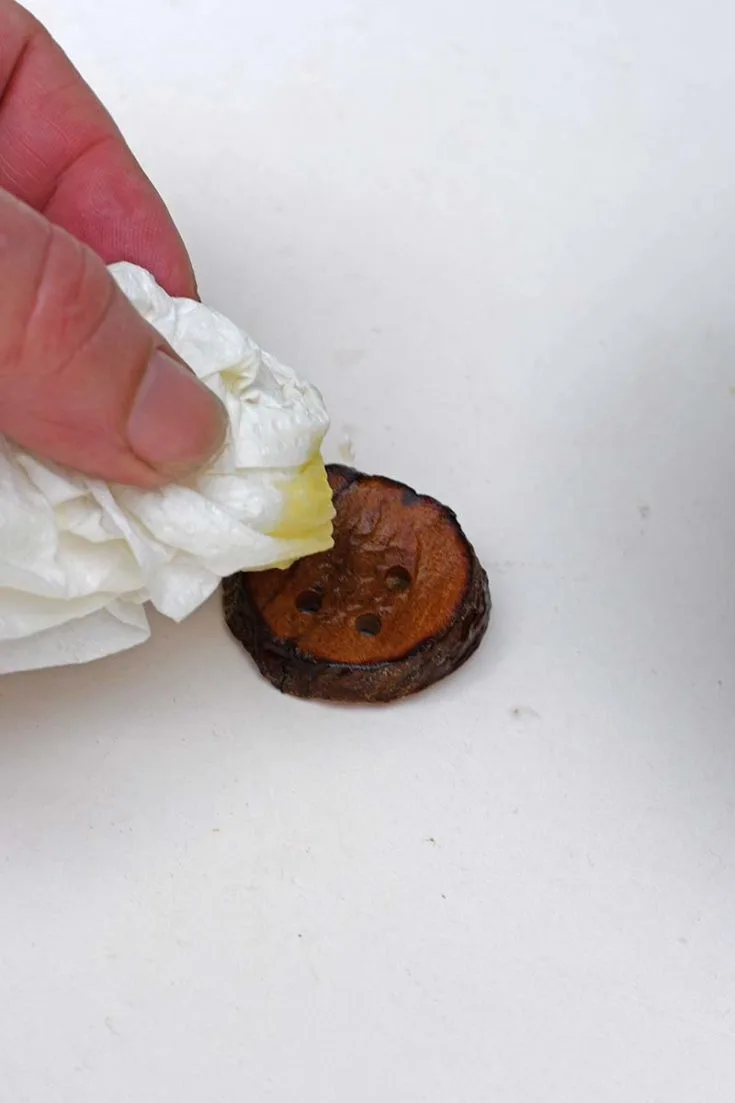
Step 7: Rub away any excess polish to finish. If you want to decorate the buttons with decoupage or paint, polishing them is unnecessary.
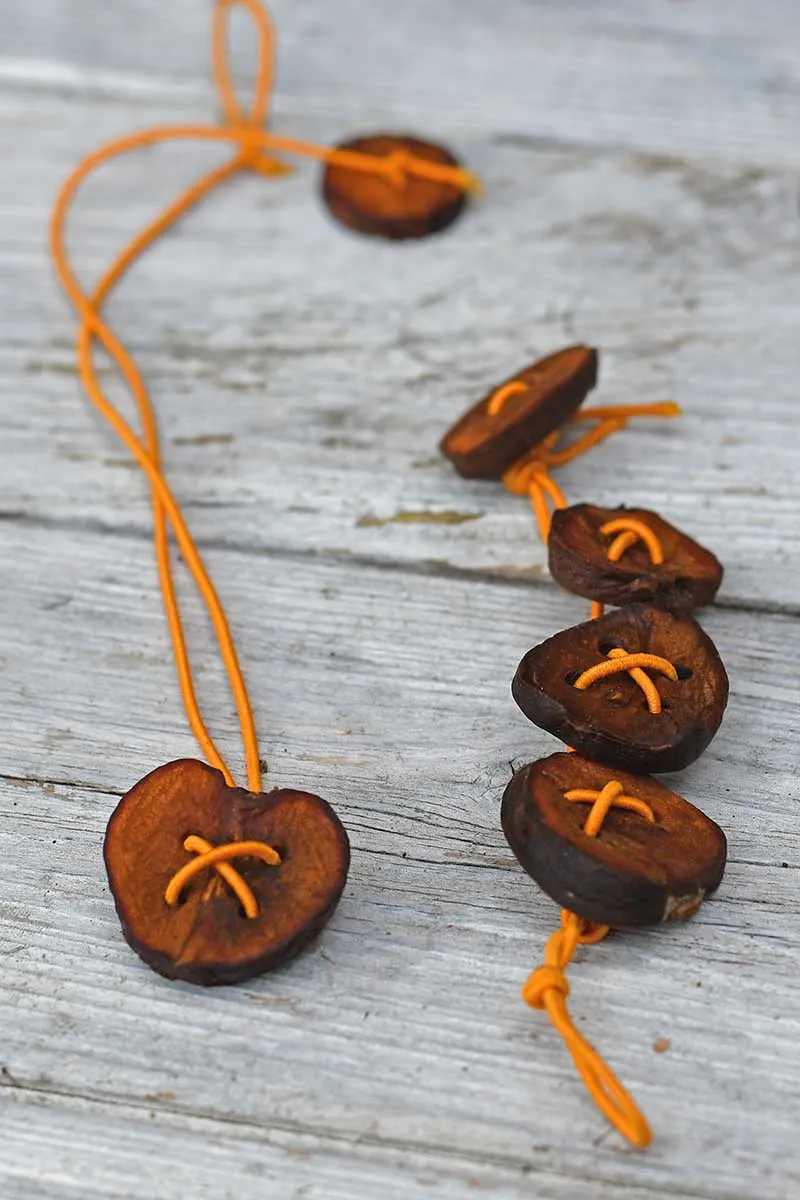
How To Make A Button Bracelet
The natural wood look of these avocado buttons makes them great for crafts and DIYs. I think they would look good on homemade denim bags and hand-knitted cardigans. They can be used to make simple DIY bracelets, necklaces and keychains.
All you need to make an avocado pit button bracelet, necklace and keychain are a few buttons and some jewellery elastic cord.
For the bracelet, I used:
- 3 large four-hole buttons
- 1 smaller two-hole button
- 50 cm of 1.5mm coloured elastic cord

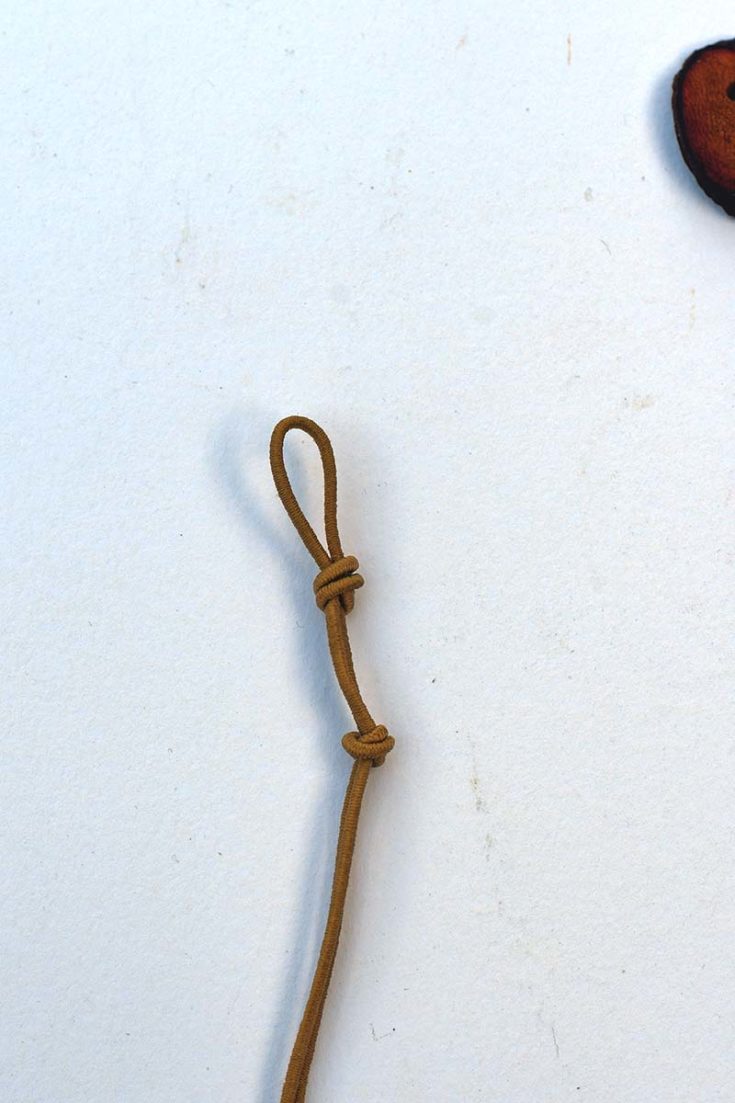
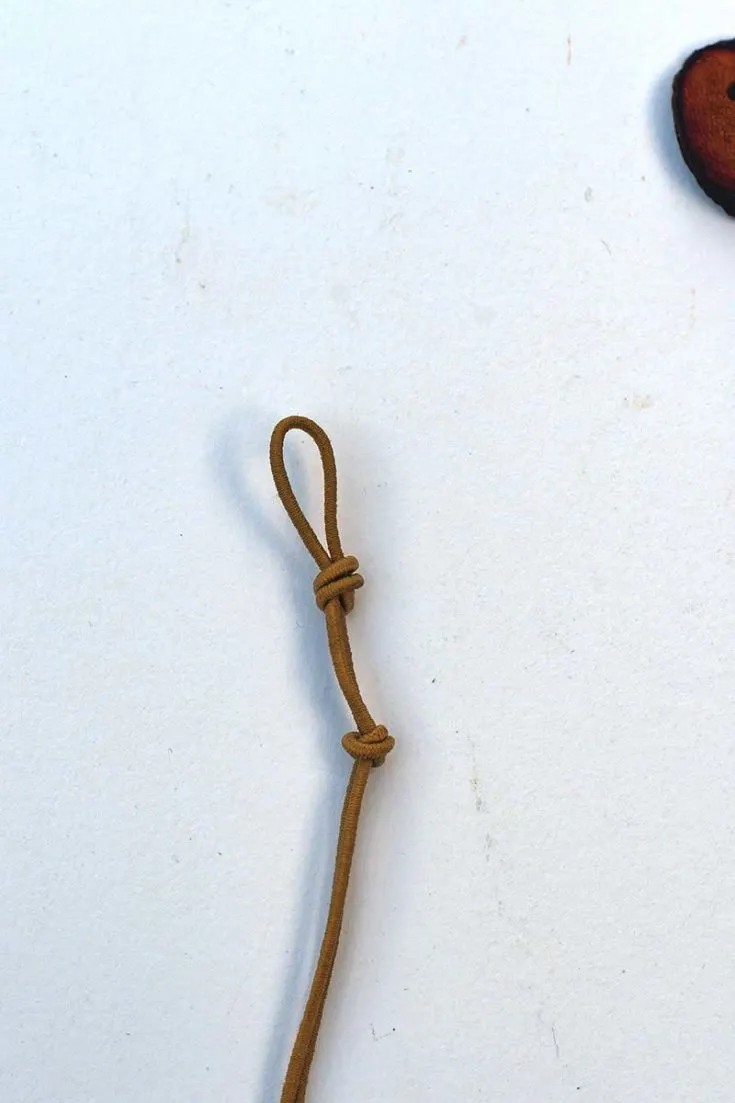
Step 1: First, fold the elastic cord in half and then knot a small loop in the folded end. Follow this with a stopper knot about 1cm further along the cord.
Step 2: Next, thread the three large avocado pit buttons onto the cord, one by one.
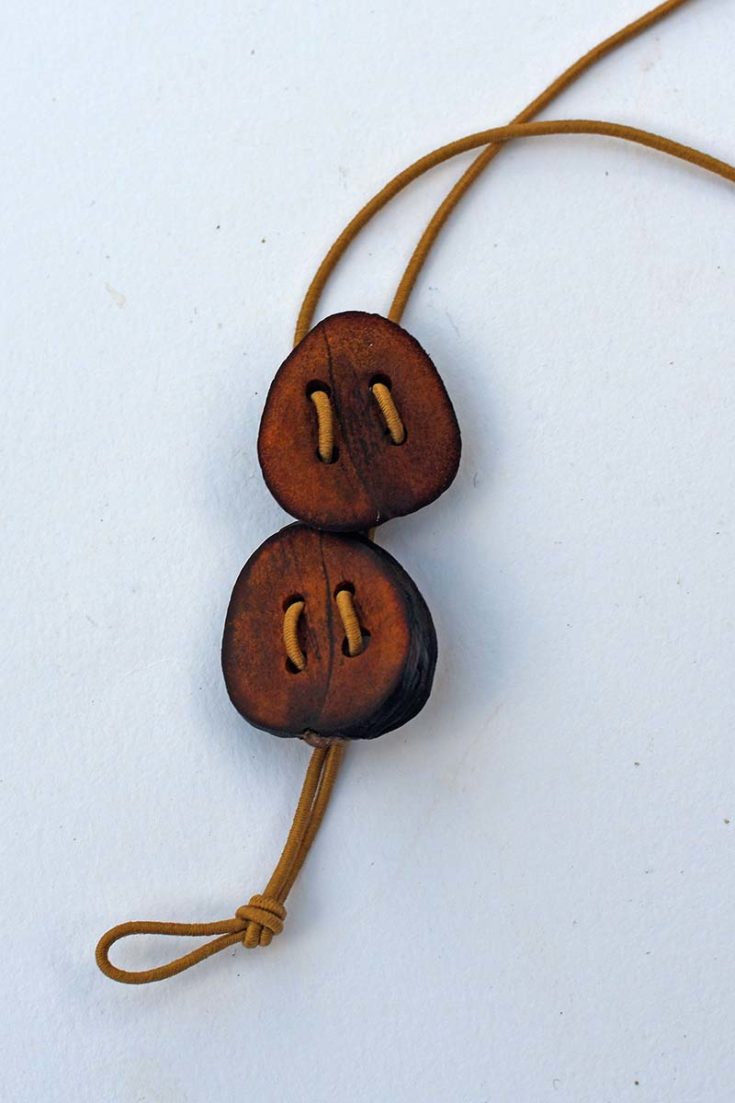
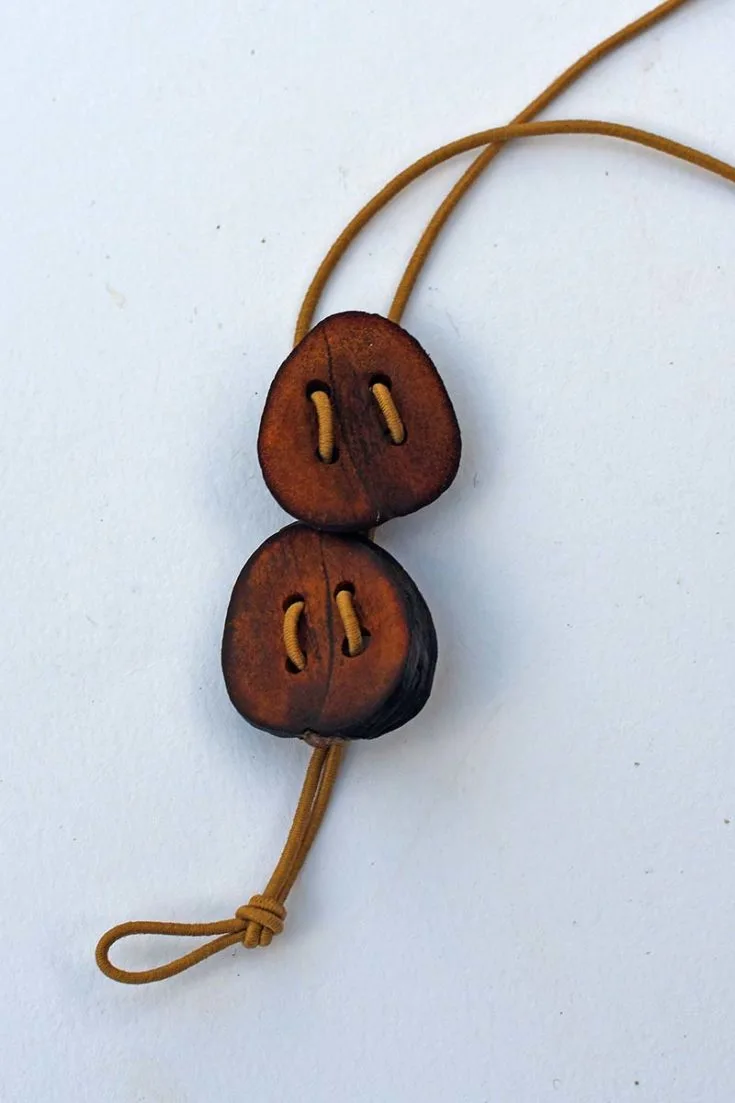
Step 3: Tie a stopper knot next to the last button to stop them from moving along the cord. Then add another stopper knot about 1cm further along the cord.
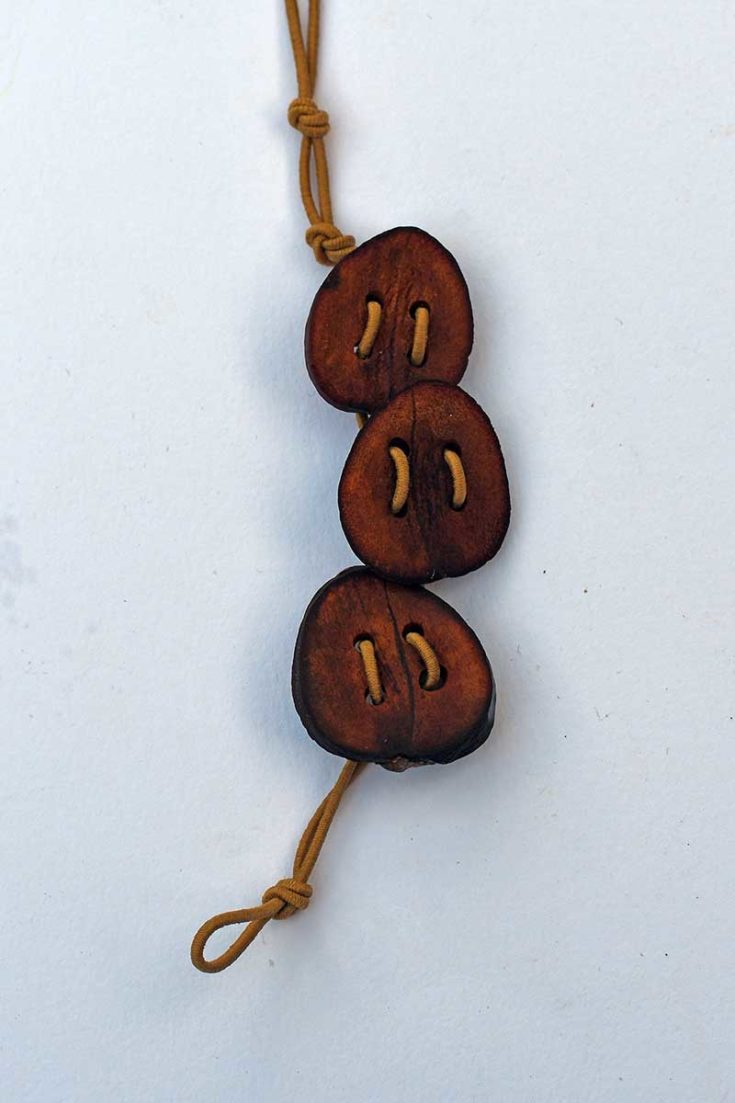

Step 4: Finish off by threading the small button on the end. Tie off the cord and cut away any excess. The bracelet is fastened by threading the small button through the end loop.
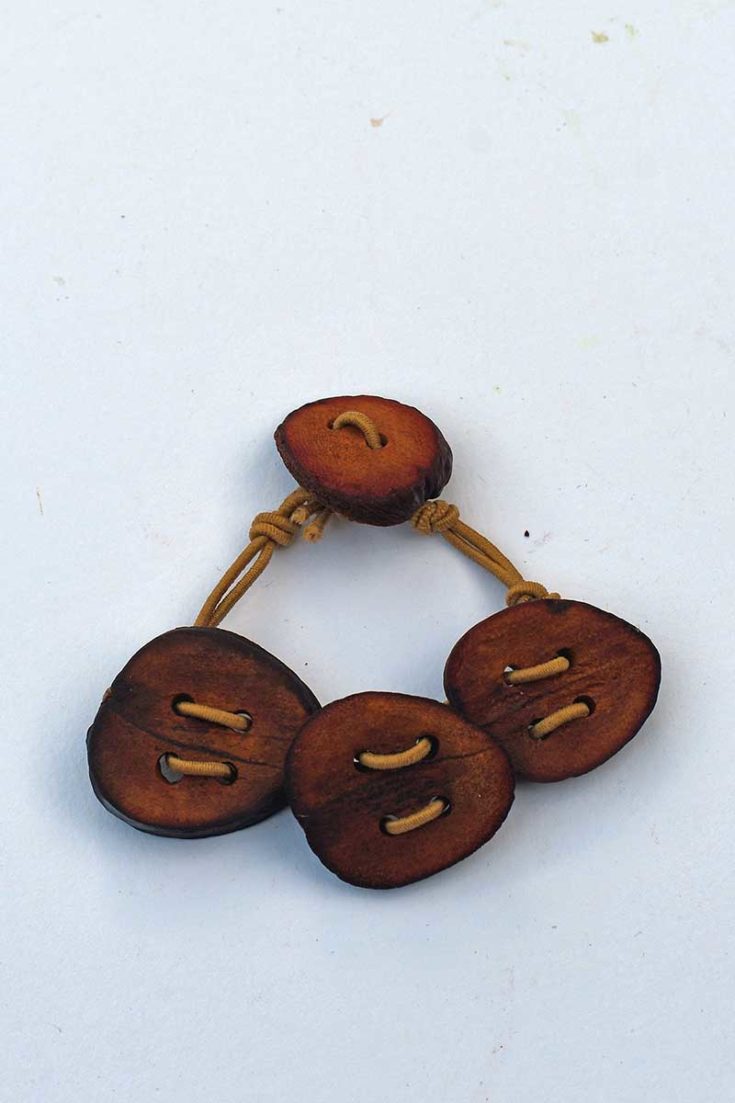


Other DIY Jewelry Ideas
Change up the bracelet by using a different coloured cord and threading the buttons differently. Make a pendant necklace with a single avocado pit button. A string of buttons on a coloured cord would also make a cool key chain.
These button jewellery ideas would make a great homemade gift idea for everyone.
If you liked these eco DIY jewellery ideas, you might want to check out some of my other upcycled jewellery. This includes a denim bracelet, map paper bead bracelets and world map necklaces made from old eyeglasses. These would all make lovely handmade friend gifts.
For more natural-themed crafts, I have many pinecone crafts and acorn crafts on the site. There are some beautiful free watercolour avocado prints here.
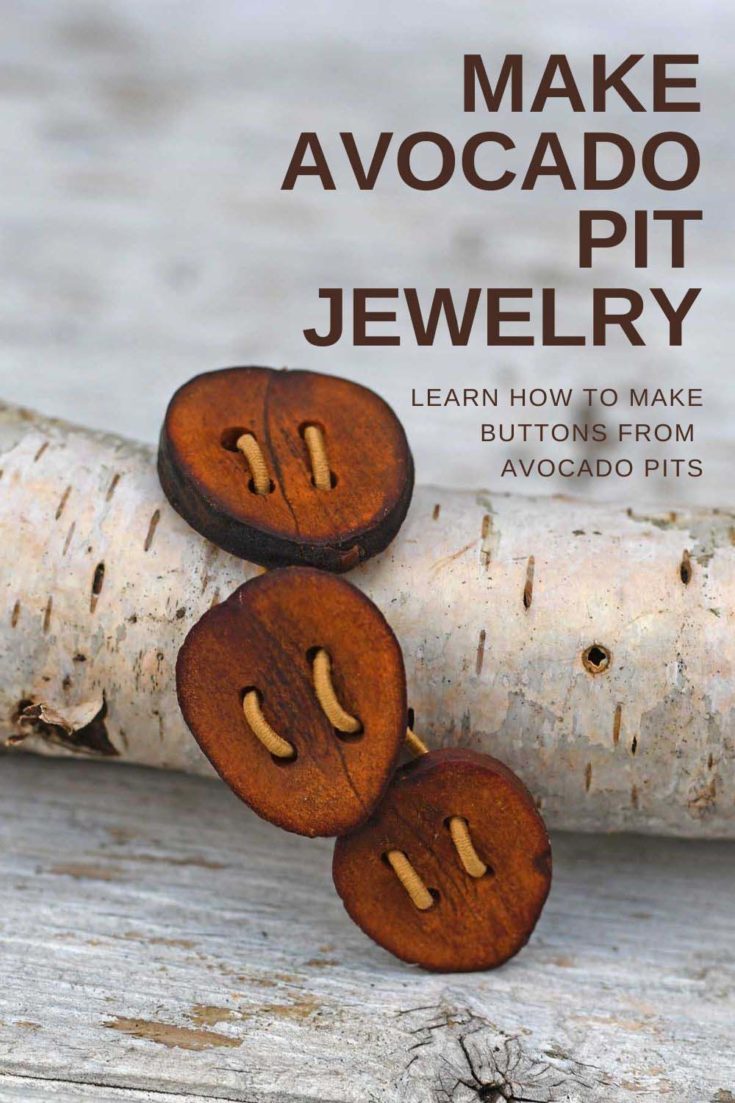
Make Avocado Pit Buttons

Use discarded avocado pits/stones to make some gorgeous natural buttons for sewing crafts and to make cool jewelry.
Materials
- Avocado pit
- Tablespoon olive oil
- Tablespoon vinegar
Tools
- Sharp knife
- Rotary tool with both a small drill bit and a fine sander attachment
Instructions
- First, remove the avocado stone from the fruit. The best way to do this is to hold half of the avocado with fingers at the front and your thumb on the skin at the back. Gently push with the thumb and the pit will just then pop out.
- Wash and dry the avocado pit and slice it lengthways with a sharp knife. Each slice should be about 5mm thick, aim to get 4-5 slices from each seed.
- Either leave the sliced pit to dry naturally over time (about a week), or in a low oven for a couple of hours.
- Next, rub away any loose crinkled skin from the dried avocado pits.
- Once the pit has dried and hardened, mark buttonhole positions with a pen.

- Drill small holes on the marked spot.
- Next, using either the rotary tool or by hand, sand the faces of the button smooth.
- Then, make a 50/50 mix of olive oil and vinegar.
- Polish both sides of each avocado button with the mixture using a lint-free cloth or kitchen towel.

Grandma's House DIY
Monday 6th of June 2022
Thanks for sharing with us at the To Grandma's house we go link party! I'm featuring you when the next party starts!
Claire Armstrong
Tuesday 7th of June 2022
Thank you so much, I look forward to seeing it.
Donna via Funky Junk
Friday 3rd of June 2022
This project is SO FUN! I love the look of the live edges on your avocado pit buttons so much!
Claire Armstrong
Saturday 4th of June 2022
Thank you, Donna. The buttons look really good with denim so I'm currently trying to think of a jeans upcycle to use them with.
Regina @ Saved From Salvage
Friday 3rd of June 2022
I love these. I'm like you, love to use nature and waste. Great job! Visiting form Creatively Crafty Link Party.
Claire Armstrong
Saturday 4th of June 2022
Thank you, it's more fun to craft with the free things around you than to spend a ton at the craft store.
Julie
Tuesday 31st of May 2022
That's quite brilliant! I am one of the few people on earth who are not actually that keen on avocados (gasp!) but i can always appreciate a good "waste not want not" idea :-)
Claire Armstrong
Tuesday 31st of May 2022
Thank you. My kids aren't too keen on Avocados but my husband eats loads.
Sara
Friday 27th of May 2022
These are awesome; we eat some many avocados and now I have a way to upcycle them! Thanks for the inspo Claire!
Claire Armstrong
Sunday 29th of May 2022
Have fun making them, make sure you have a sharp knife. You can also try growing a plant from the seeds too.