
If you need an amazing gift for players or coaches, try making custom painted basketballs for the perfect personalized momento!

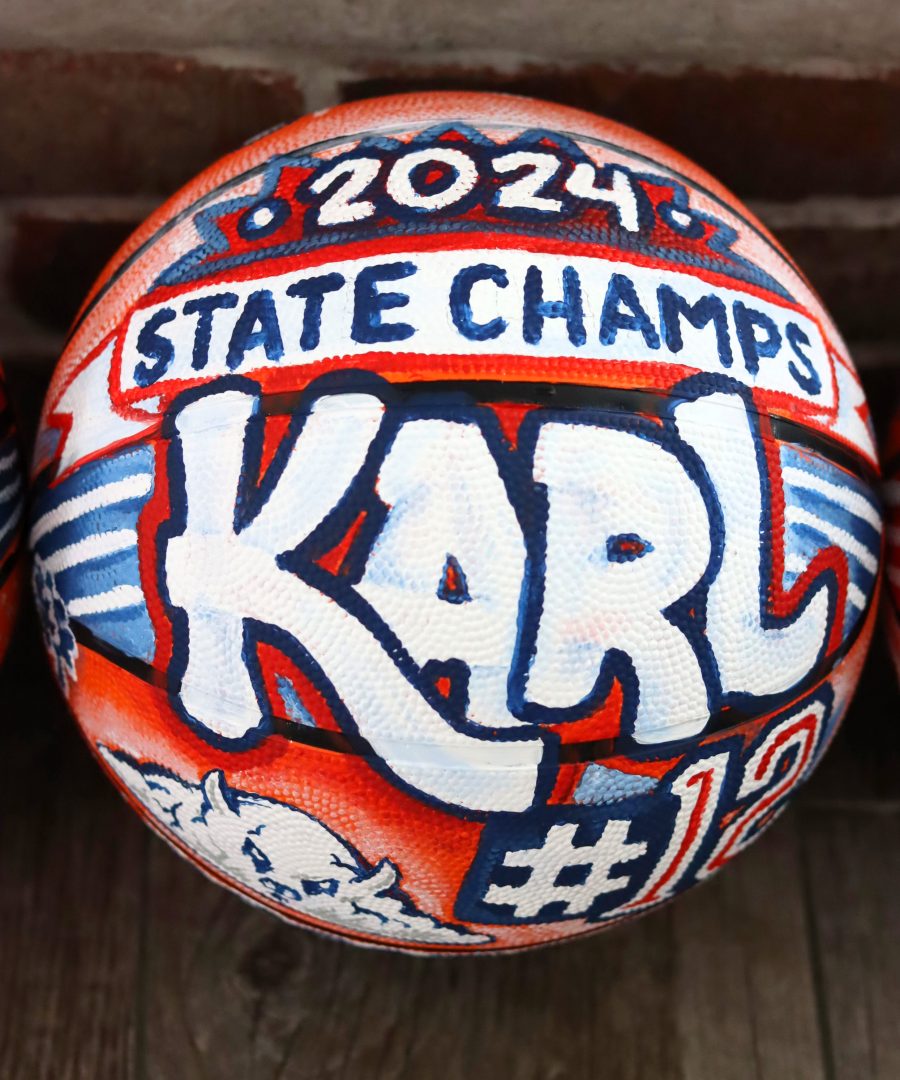
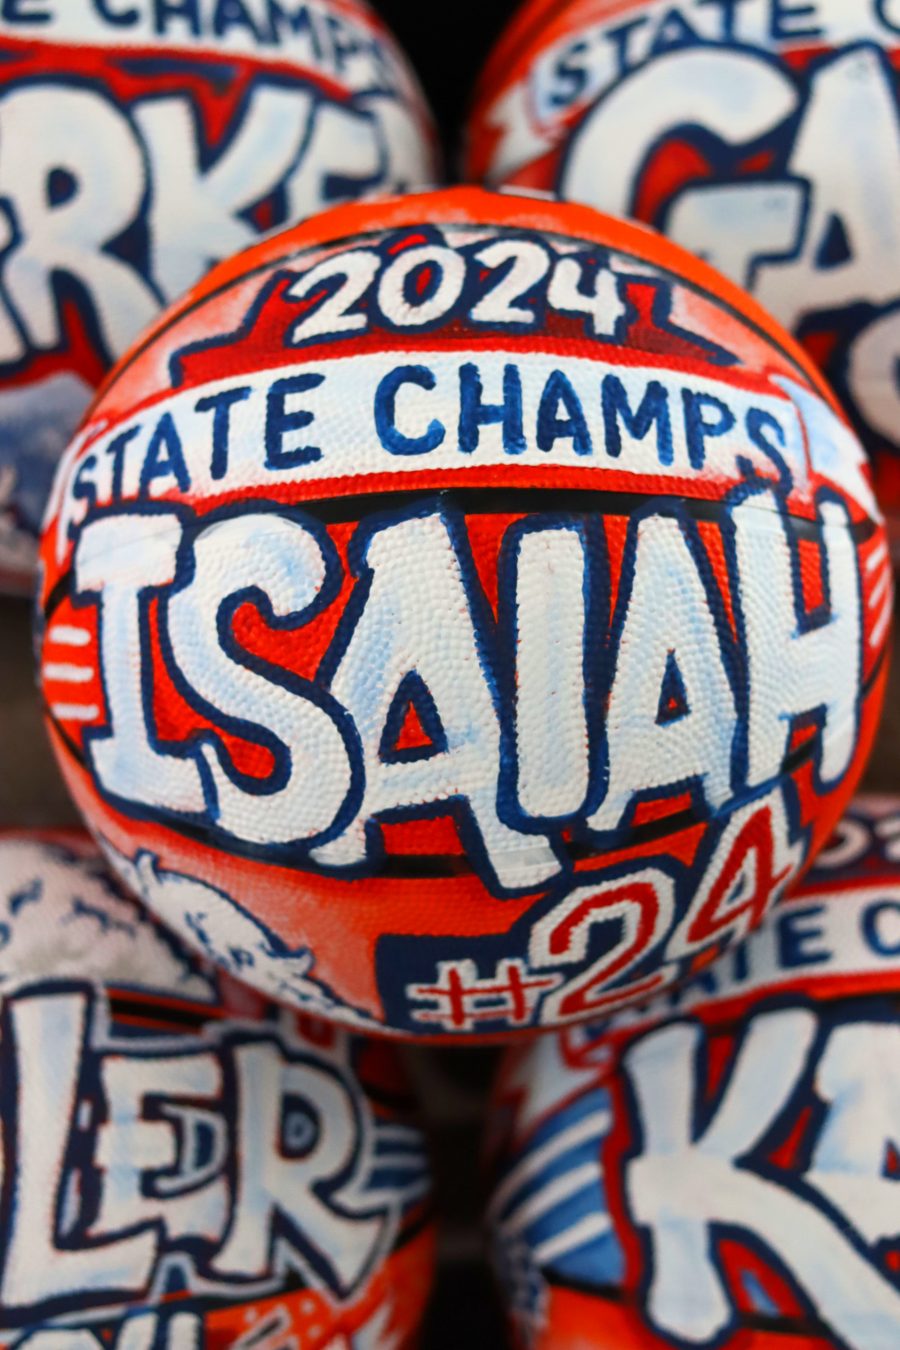
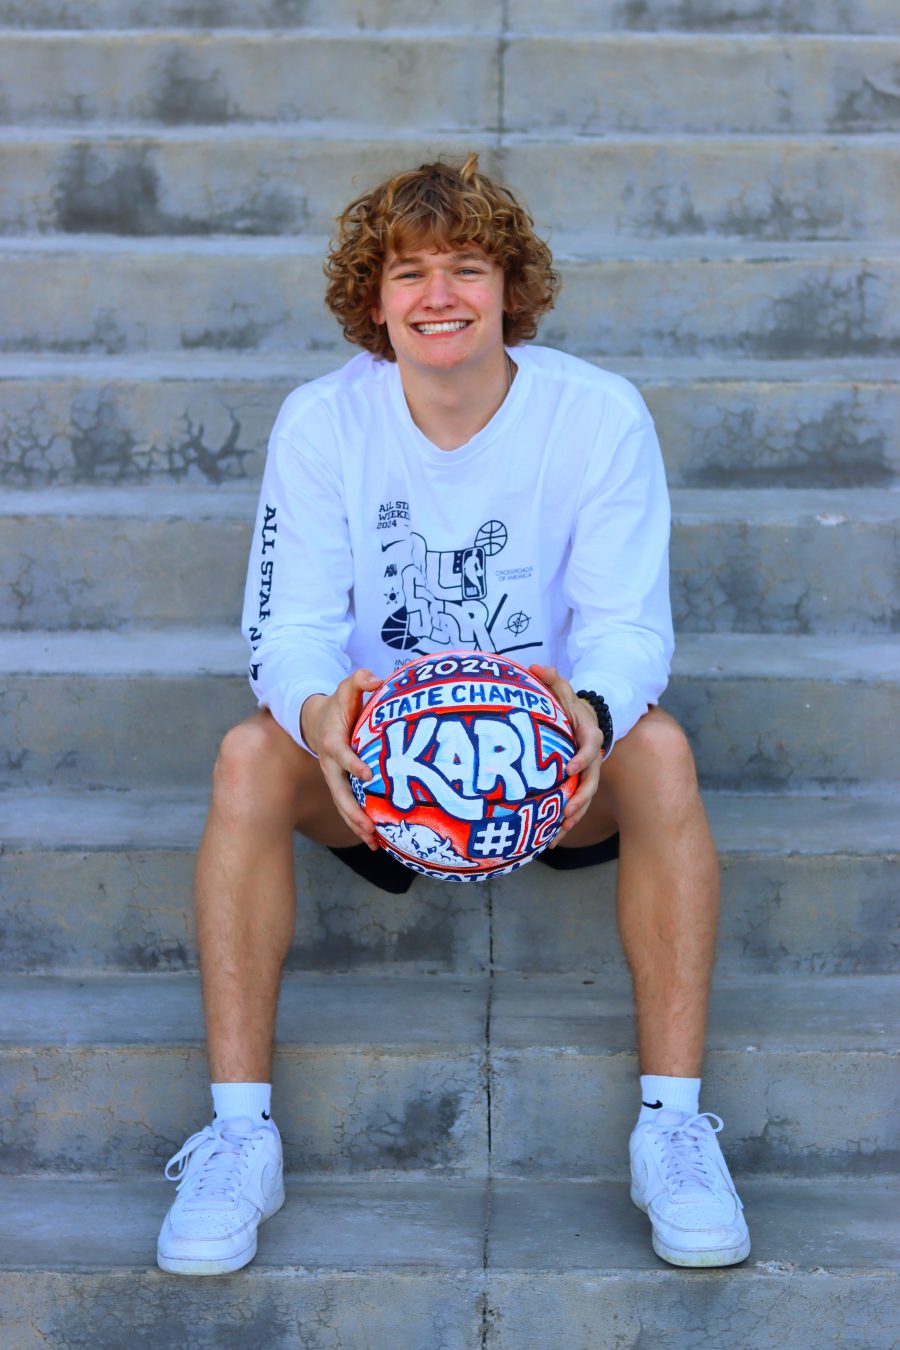
My son basketball season is over (2024 state champs!) and when we were planning the basketball banquet for players and parents, we decided to paint some personalized basketballs for each of the senior boys. It was such a great idea- until I remember that there are 8 seniors! Ha! I got to work and painted all the basketballs and while it was time consuming, it was well worth it! They turned out so cool and made such a unique gift!
Custom painted basketballs is a trend that is sweeping the sports industry by storm. From intricate designs to stunning artwork, these one-of-a-kind basketballs are capturing the attention of athletes and fans alike. In this article, we will dive into the world of custom painted basketballs and explore the creative process behind them. Get ready to elevate your gift giving game and your style with custom-painted basketballs.
Supplies to make custom painted basketballs
- acrylic paint
- chalk marker
- basketballs (I found non branded ones from walmart- they were the cheapest and had no logos to paint over!)
- clear spray paint sealer in matte
- paint brushes
You can also use paint pens- I did buy a pack of sharpie paint pens but the blue was a little too royal blue instead of navy blue. I did use the white and red to outline some of the designs!
How to paint Basketballs
I am not going to lie-Painting the basketballs takes some time-There are a few coats of paint to get good coverage plus dry time in between. But when you see the finished product- it’s well worth it!
I grabbed a mason jar lid to hold the basketball up while I painted. I also 3-d printed a round cookie cutter with my silhouette Alta. Either option works great and then the boys have a stand to keep their basketballs on.
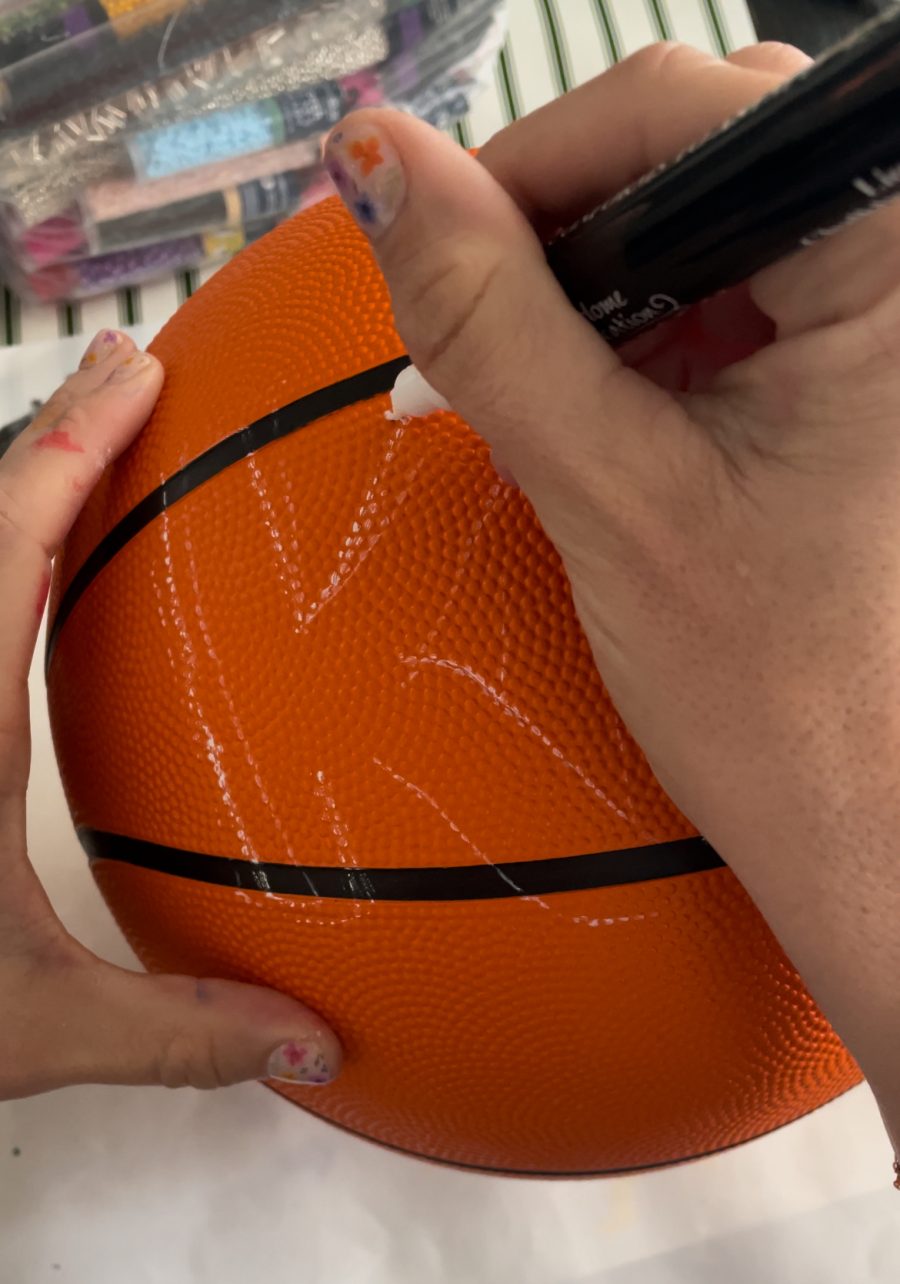
First: Prep the basketball
I took an alcohol wipe and cleaned the basketball surface to make sure there were nothing dirty on it and prep it for the paint.
I had a piece of paper that I wrote down everything I wanted to include on the basketball- things you can include:
- Name
- Number
- Nickname
- School or team name
- Mascot
- Mottos
- records
- Stats
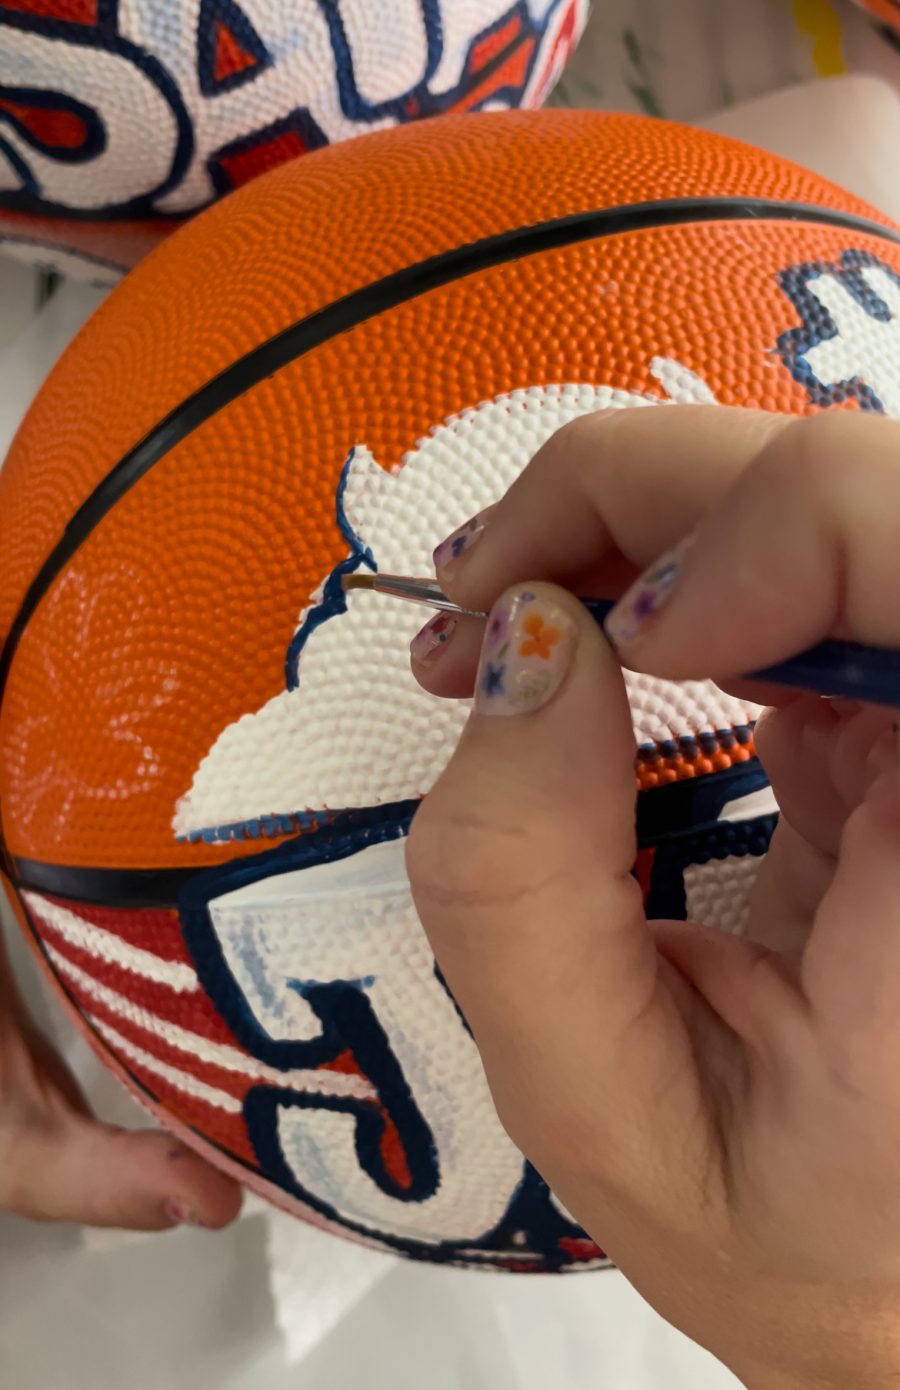
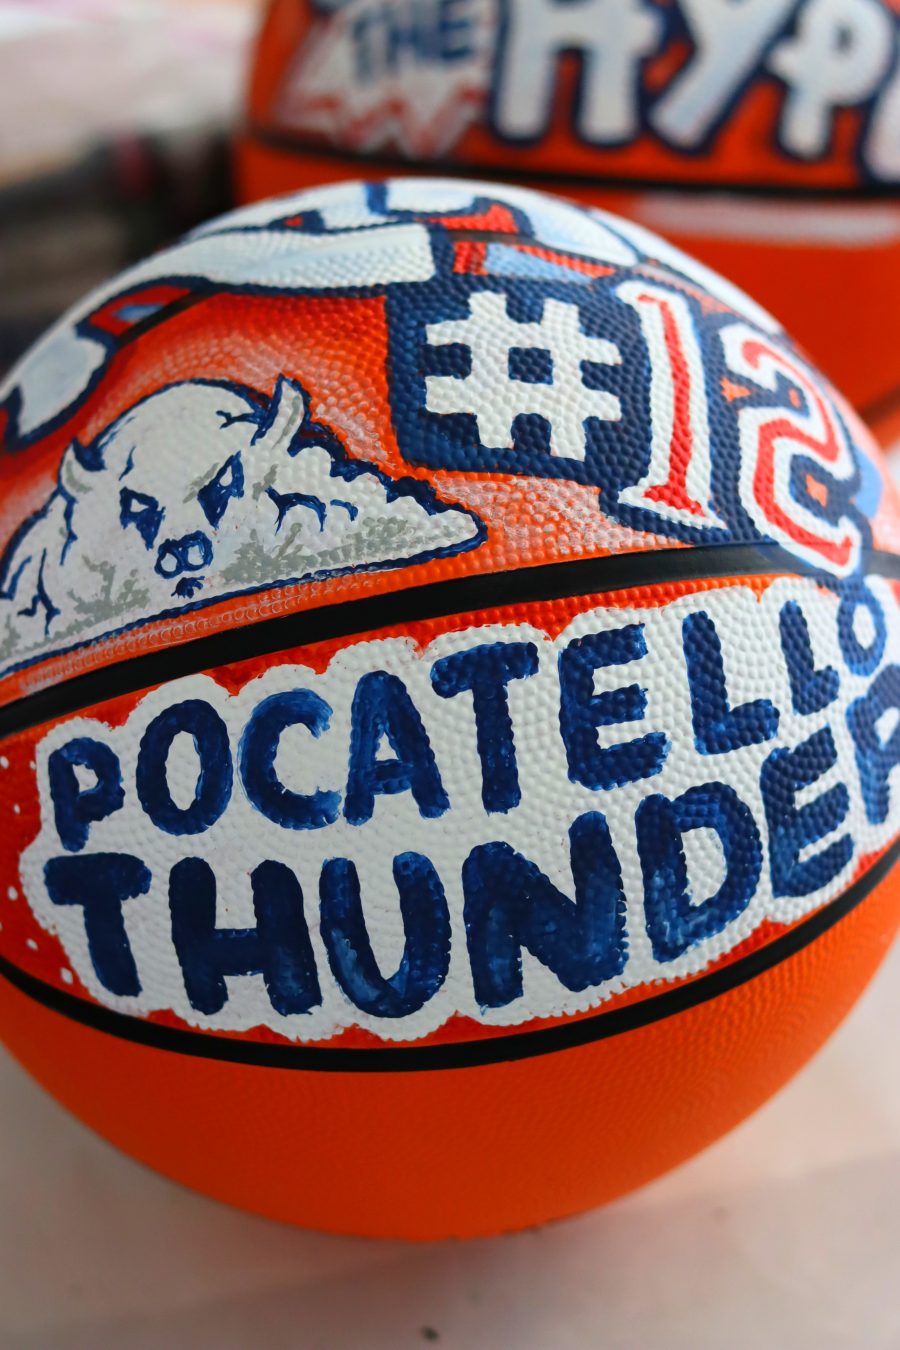
After I had all my items, I took a chalk pen and just sketched out the placement. The name and number is on the front and center and then I just worked my way around the ball. Each ball is a little bit different since the names are all different sizes so you have to adapt as needed!
Painting the Basketballs
I went over my sketches in white paint. Our team colors are blue and red and the navy blue looked almost black on the orange ball and the red was hard to see. The white base layer made everything pop.
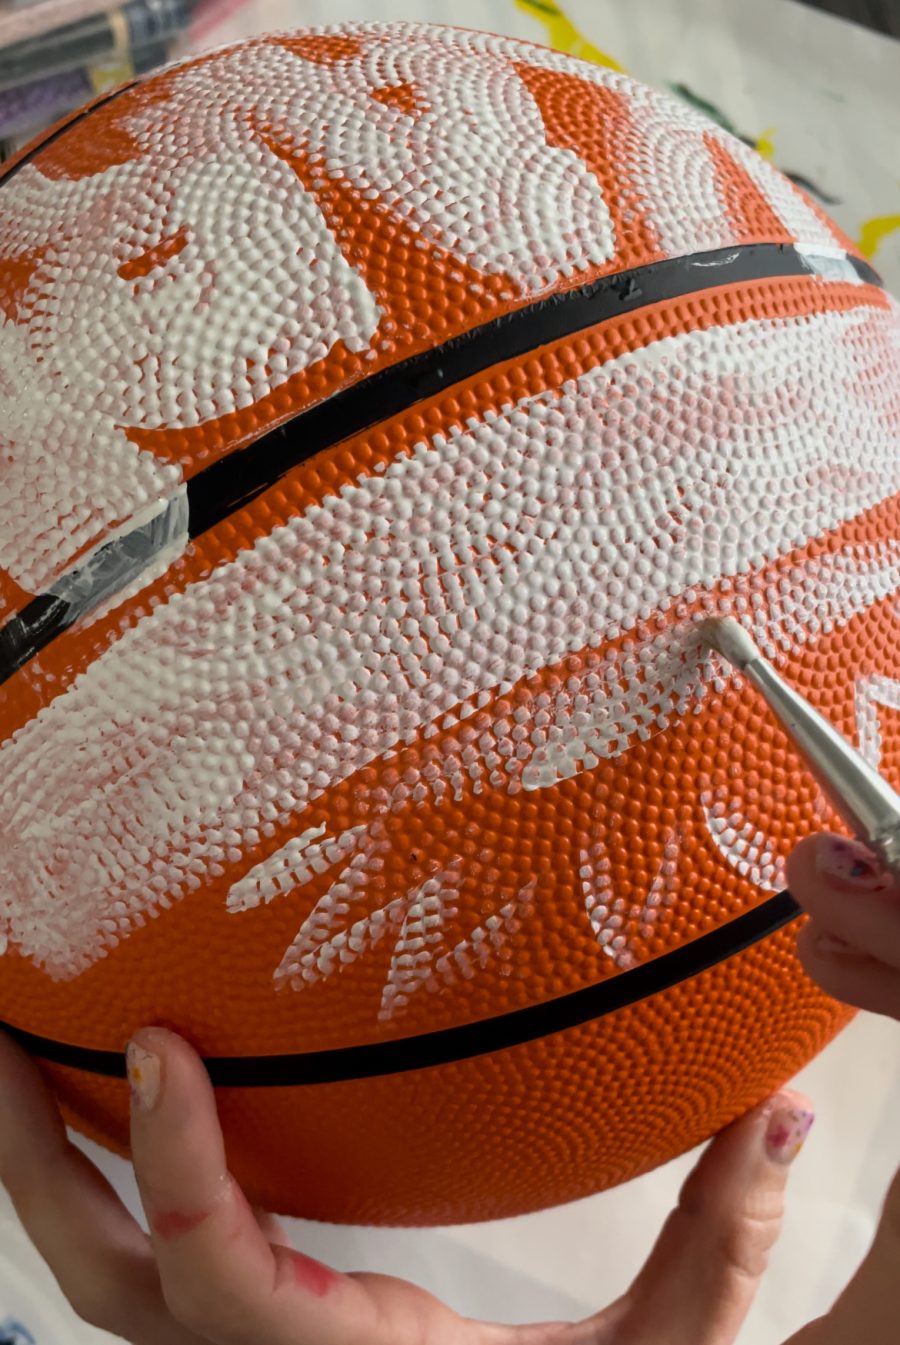
The white needs two coats because of the bumps on the ball but it went quickly since there weren’t too many details with that layer.
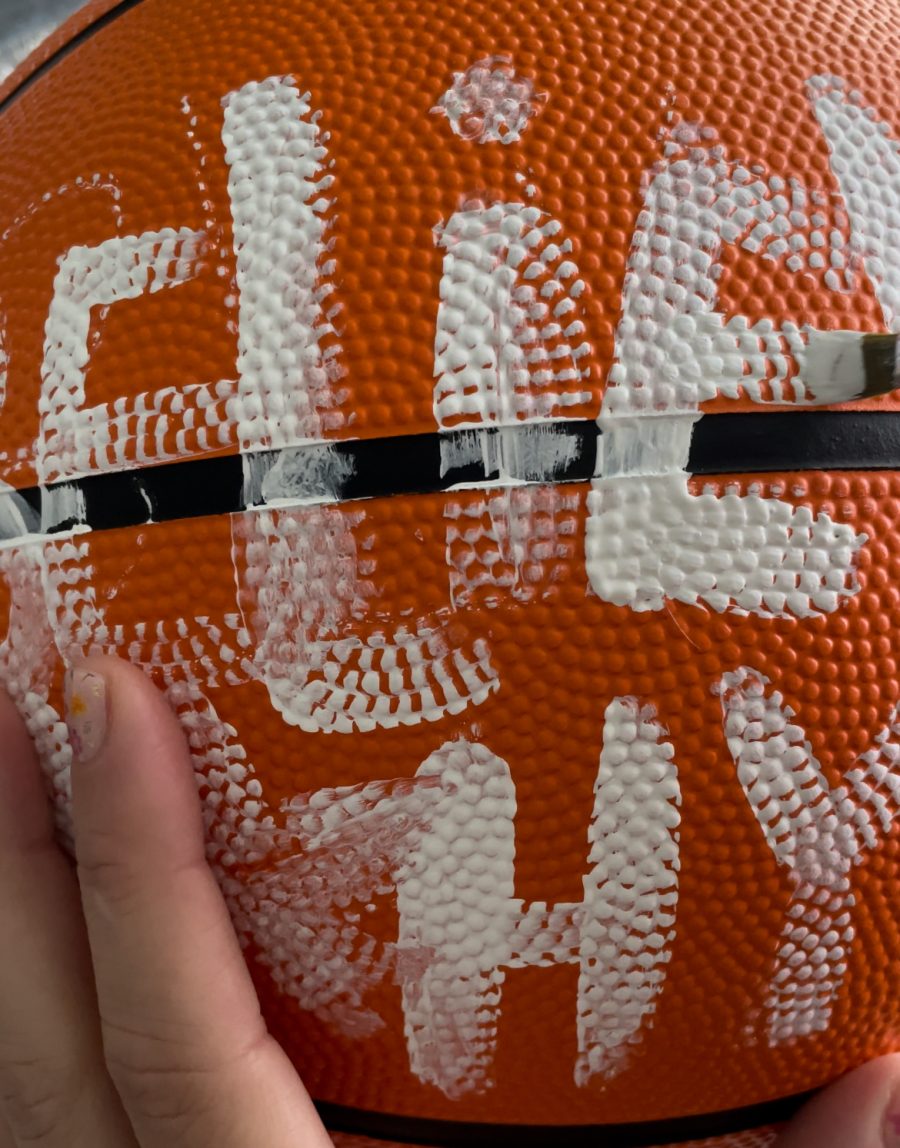
After the white dries- it’s time to paint all the details! This is the most fun part- and the most time-consuming! Ha! I had a few different sizes of paint brushes- small to get the little details and a larger to help outline!
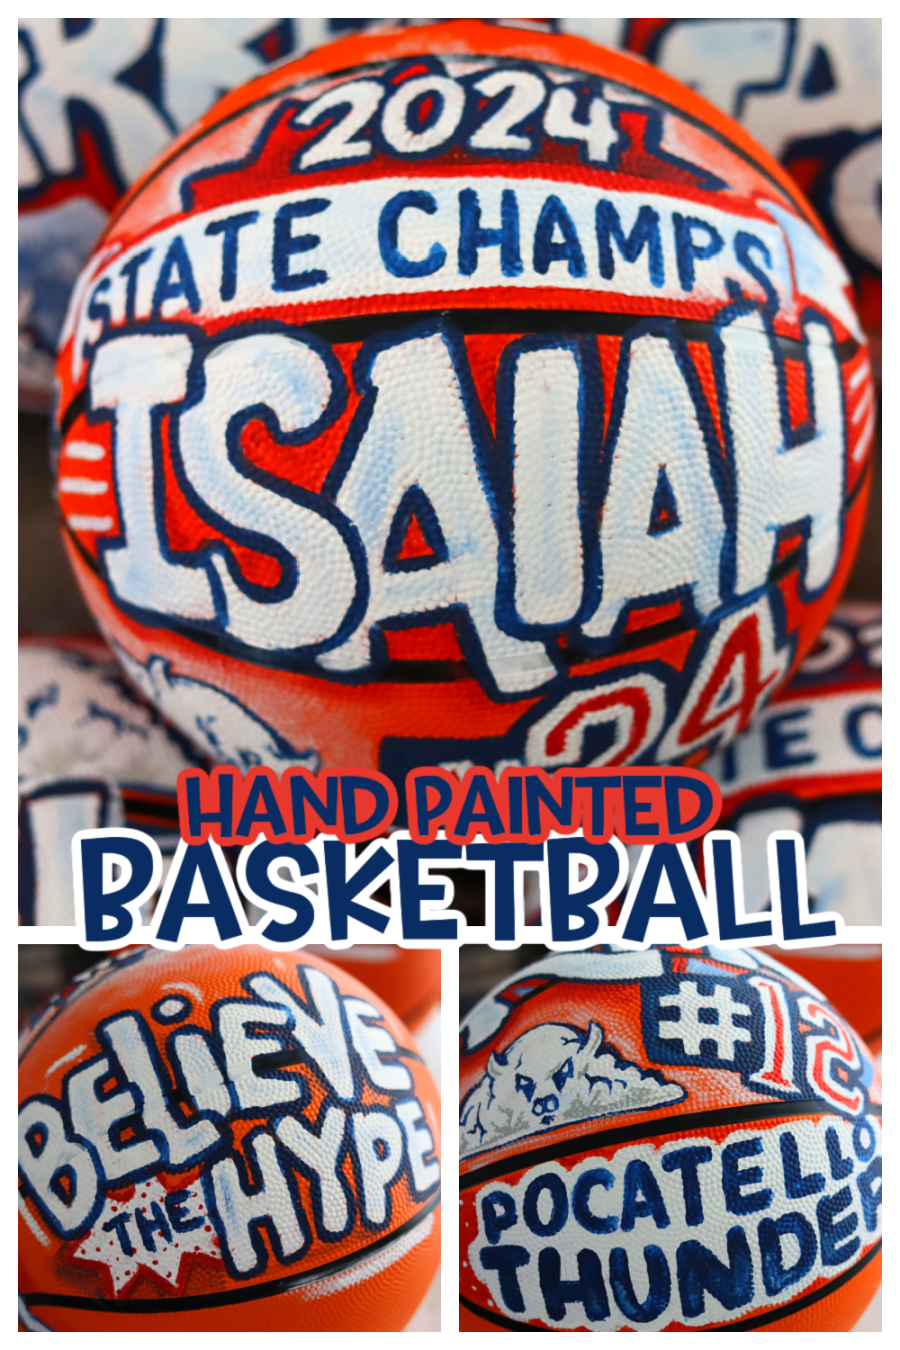
In case you were wondering about the lines of the basketball- I just painted right over them! When it’s all painted in, it’s hard to even see them! If you can’t find a ball with no logos- just paint right over the logos! You can see below the believe the hype is right over the seam!
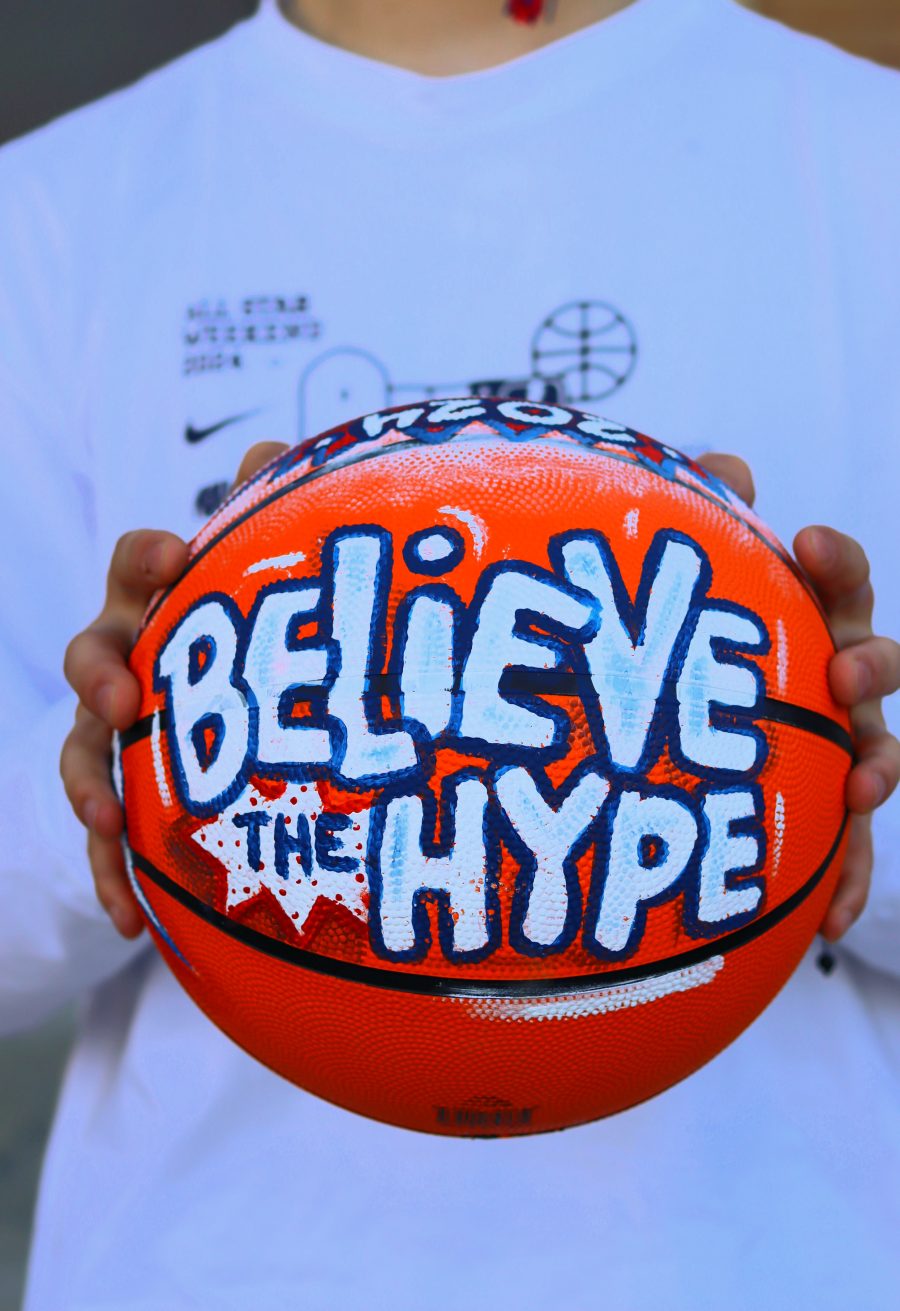
You can see a little wear on the ball (right by the H!)- we took my son’s ball out for a senior picture and my son kept bouncing it on the concrete!
Tip: If you make a mistake or paint outside the lines, you can take a q-tip and add a little rubbing alcohol and rub it on the paint you want to erase. Scrub with a paper towel.
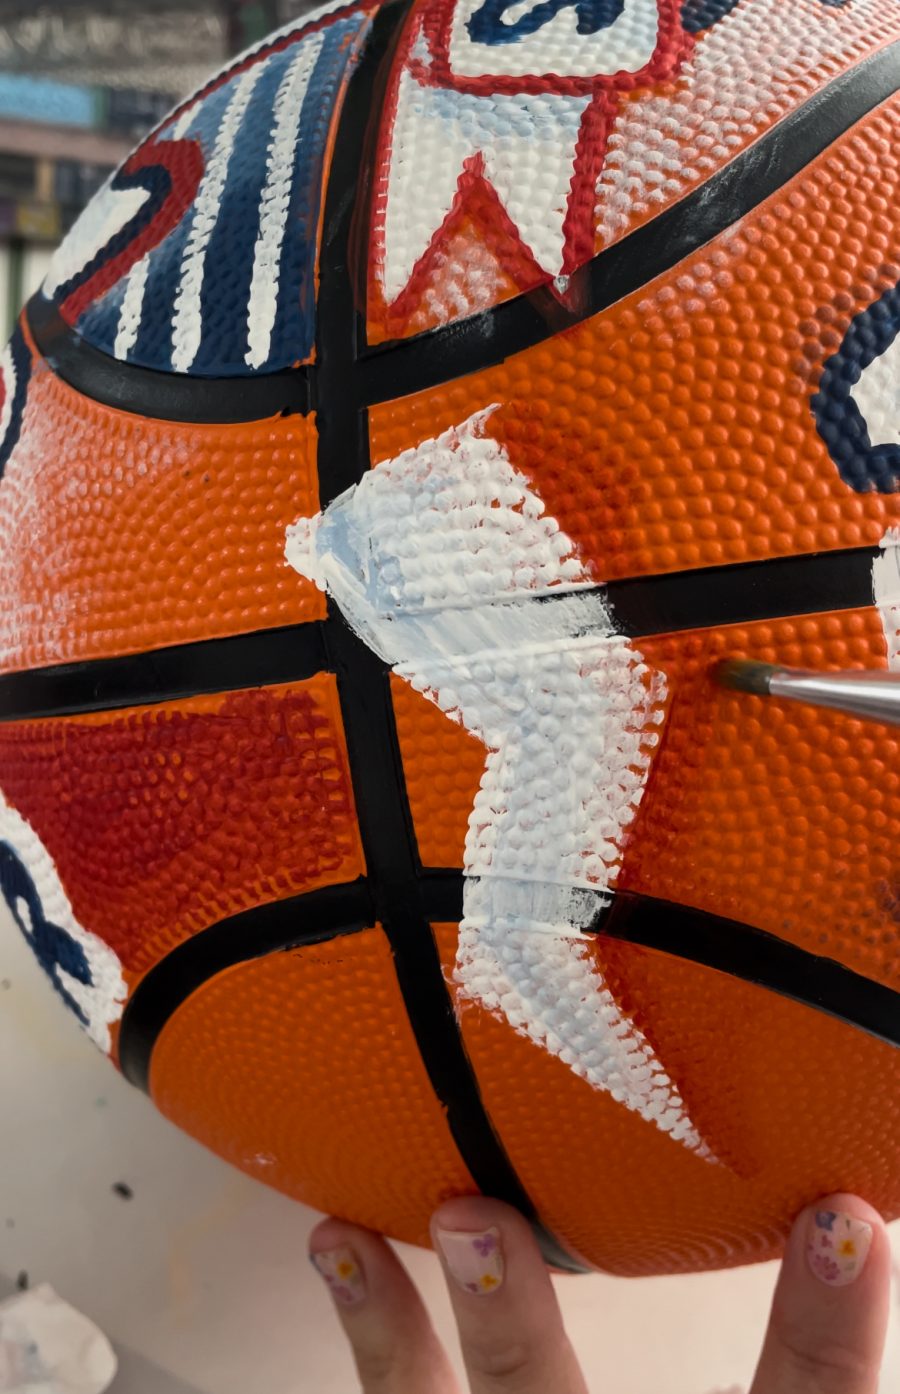
I did add a little dimension by fading out the paint around some of the designs. Mostly it’s a dryish paint brush that I use to paint around the items. This technique just helps things pop!
I didn’t end up painting on the bottom two panels. A. It’s on the bottom where it sits so it’s not visible. B. I thought they could pass the balls around at the basketball banquet and sign each other’s basketballs. If you were making a custom basketball for a coach- this would be a perfect for all the team to sign!
Sealing the custom basketball
These balls are made to be put on a shelf and not played with- but I did want to add in a little bit of protection so I did spray a clear sealant over each one. This is optional but since they took so long- I wanted to make sure they held up for long time!
The finished Basketball
We took the ball out with us when we snapped some senior pictures- and we plan on using it as part of our graduation decorations!
Too busy to get crafting today? No problem! Pin this post to remind yourself about this project later! Sharing my projects helps me reach more people, allowing me to continue sharing free content!
Leave a Reply