
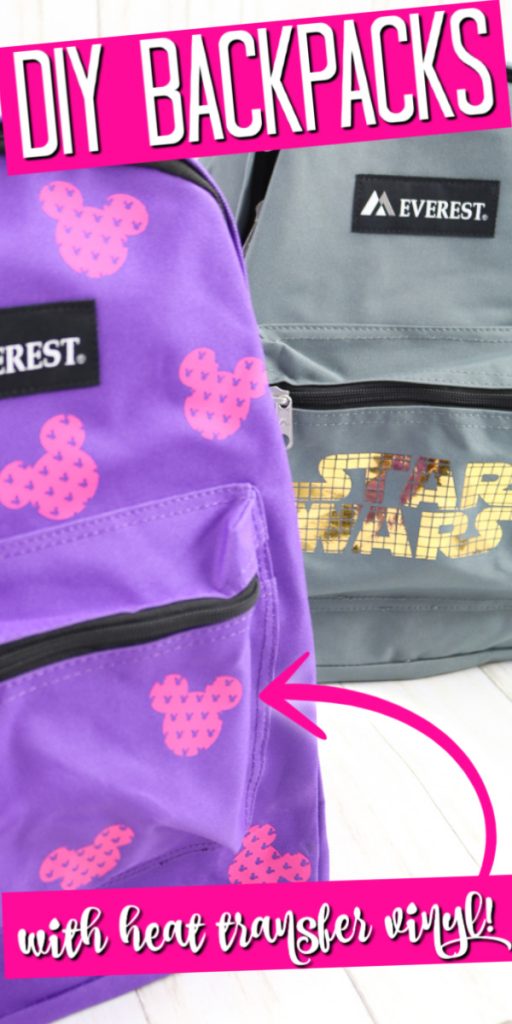

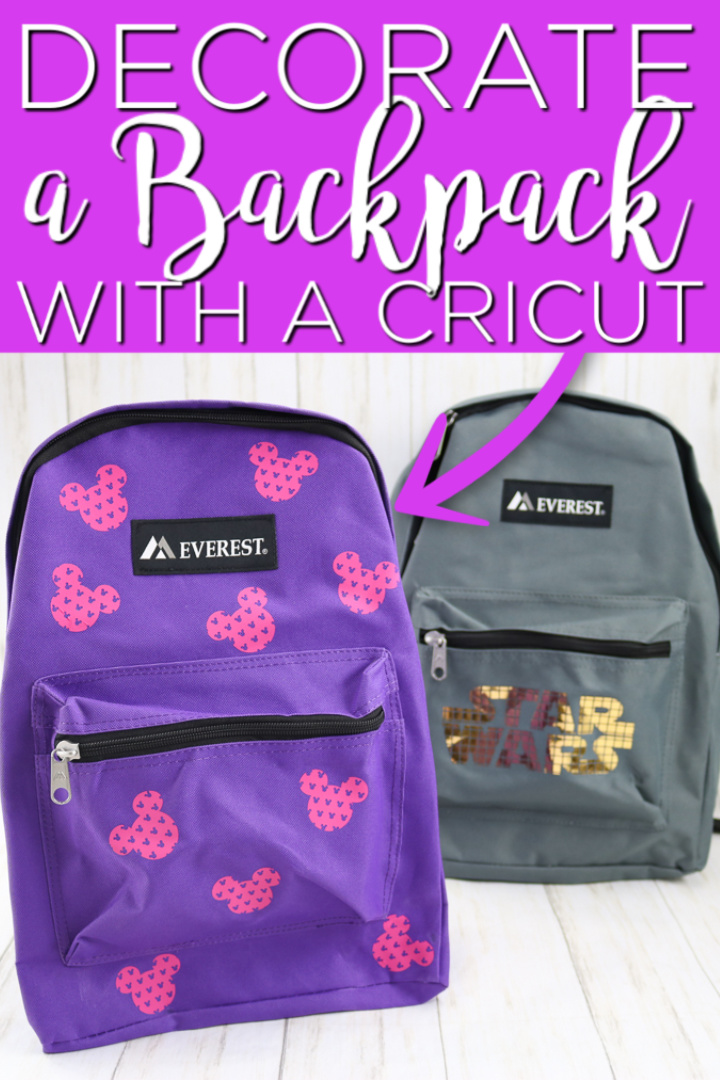
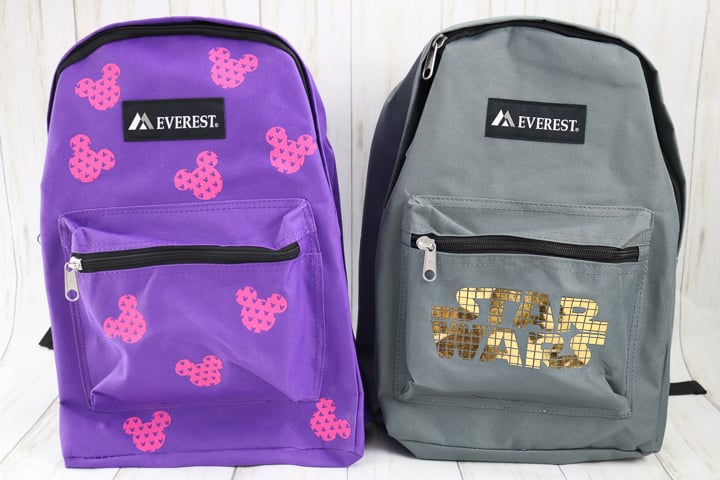
DIY backpacks are easy to make with your Cricut machine. I am going to give you two options for designs today including one with Mickey Mouse and another with the Star Wars logo. You can use either of these or make your own personalized design. I am partnering with Cricut today to make these backpacks and talk a little about the Blue Ribbon Projects which collects backpacks like these to give to those going into foster care. This is a great way to craft from home but give back to those in need.
This is a sponsored post written by me on behalf of Cricut. All opinions are 100% mine.
Back to school means new school supplies, and you know the kids will be begging for a fresh, new backpack!
But, as I browsed through the selections on Amazon, I realized how expensive backpacks have gotten! I know that kids love the newness of fresh school supplies and a brand new bag, but some families aren’t able to spend upwards of $50-$75 on a new backpack for each kid – every year.
Plus, there are so many kids in our communities that use backpacks to carry their essentials as they enter the foster care system.
So, I had the idea to transform plain, inexpensive backpacks into on-trend styles so it looks and feels like a brand new bag!
When Cricut offered to sponsor this post and share more about the Blue Ribbon Project, I knew this would be the perfect DIY project!
What is the Blue Ribbon Project?
There are approximately 440,000 children in Foster Care nationwide. When most children enter Foster Care, it’s an emergency situation. Children can be taken from their homes with as little as the clothes on their backs. And to add insult to injury, children are given trash bags to carry the few belongings that they may have.
That is where the Blue Ribbon Project comes in. They provide backpacks with essentials to those entering foster care. This is how each of us can help someone else right from the comforts of our own home. Pick up a few backpacks (see below for suggested Amazon listing) and decorate them with your Cricut machine. Fill them with the suggested items and mail them off to the Blue Ribbon Project to be given to foster children in need.
Please note that the Blue Ribbon Project is currently asking that you hold all donations but they will be accepting them again as soon as they can get back to business as usual. So, make your backpacks and send them when they re-open!
Personalizing a Backpack with a Cricut
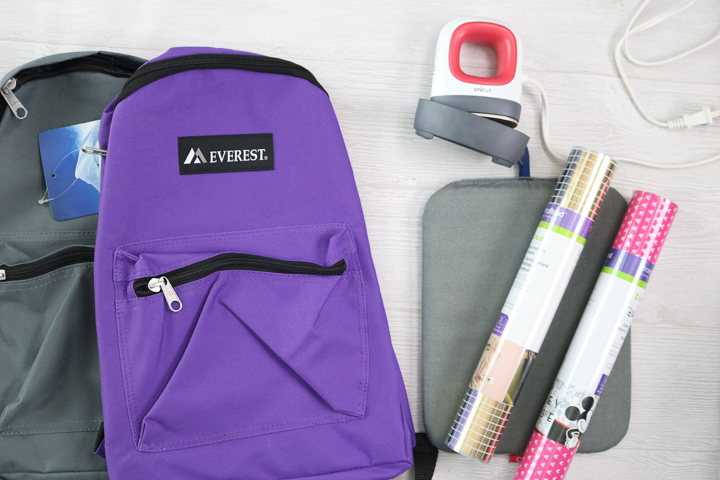
Supplies to make DIY backpacks:
- Backpack (this is the recommended one from Amazon)
- Cricut machine
- Cricut cut file (you can find them both here)
- Mosaic iron-on
- Mickey mesh iron-on
- EasyPress Mini
- Weeding tools
- Iron-on protective sheet
- EasyPress mat
- Other supplies to add to the backpack (see below for the links to the suggested lists)
Steps to make a DIY backpack design
It is easy to add some personalization to a backpack when you have a Cricut. Just cut your iron-on into shapes and use the EasyPress Mini to press them on.
You can actually watch me make both of these DIY backpacks in the video below.
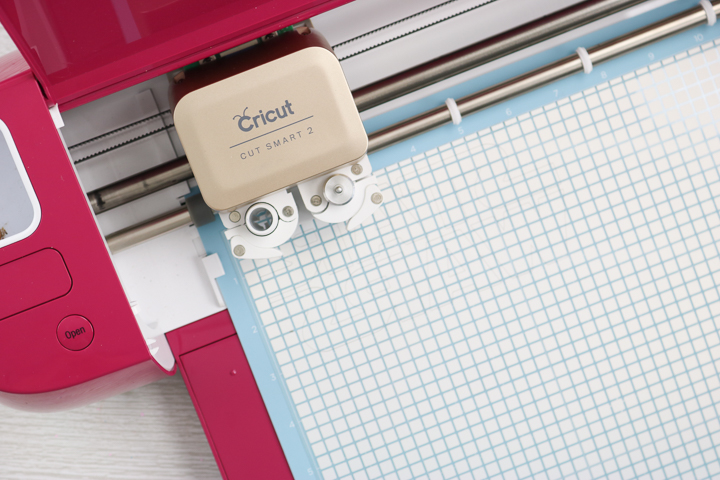
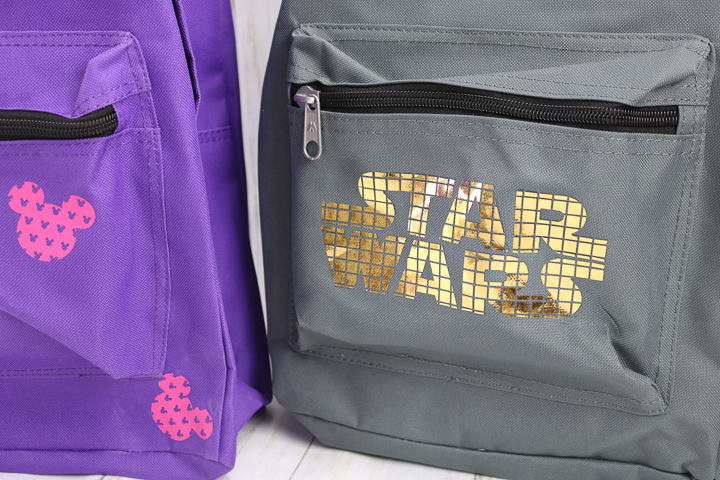
Start by cutting your design with your Cricut machine. You can cut either the Star Wars design or the Mickey Mouse heads or come up with a different idea that is all your own.
If you have not worked with mosaic iron-on before, you may want to start with my post here.
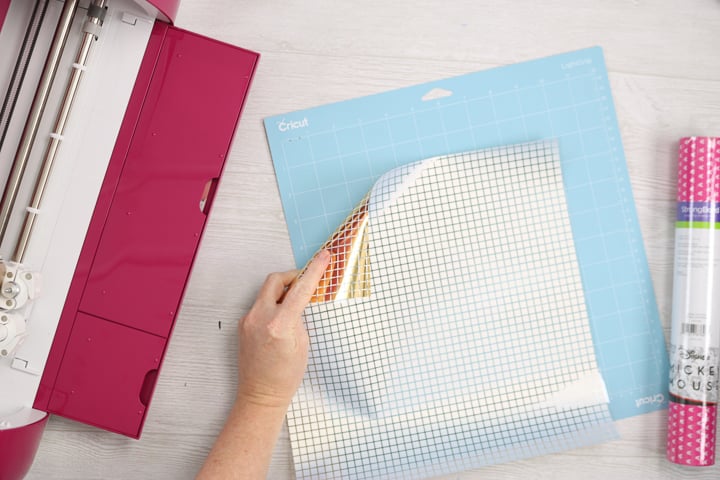
Be sure to put your material face down on the mat and mirror the cut. Then load the material with the mat into your Cricut machine. Please note that ANY of the Cricut machines will make this project. I am using a Cricut Explore Air 2 but you can use a Maker or a Joy for these DIY backpacks.
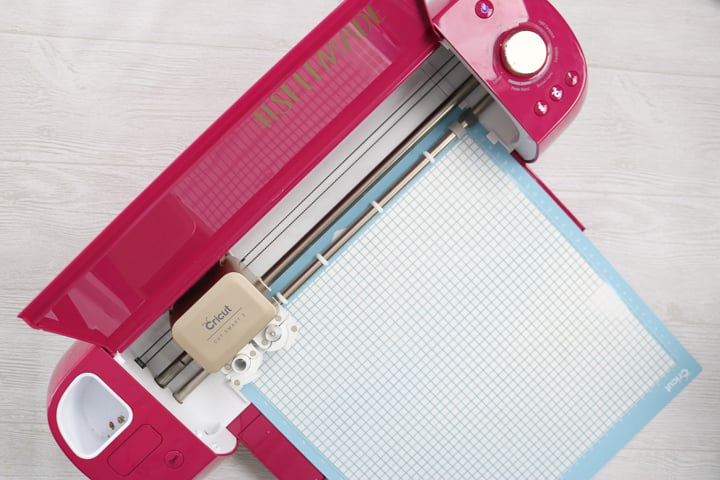
Next, cut your design from iron-on.
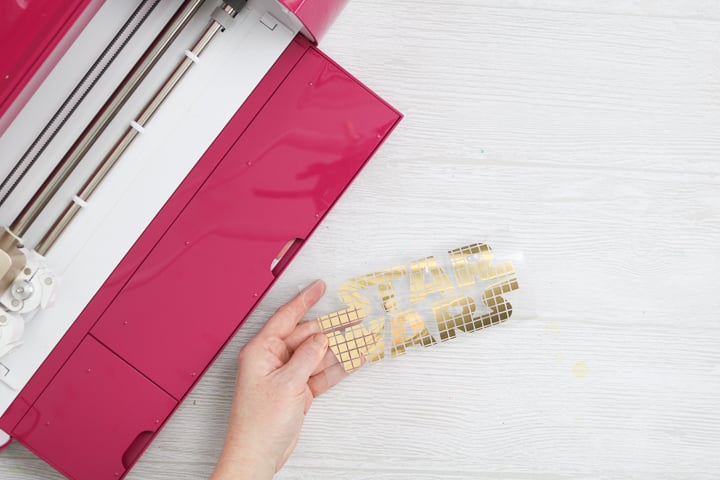
Weed away all of the excess iron-on around your design. The double liner of the mosaic iron-on is a bit different so either watch the video above or see my post here on how to use it.
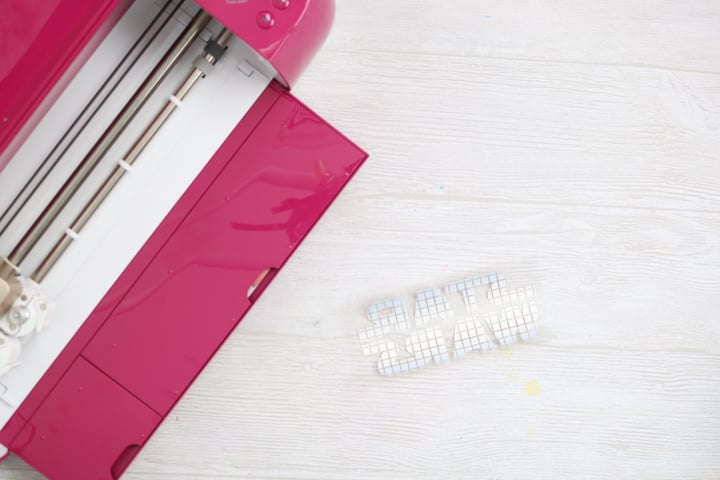
Weeding tools make weeding a bit easier but they are not required. You will want to weed around the outside as well as the centers of any letters. You need to be left with only what you want to be transferred to your backpack.
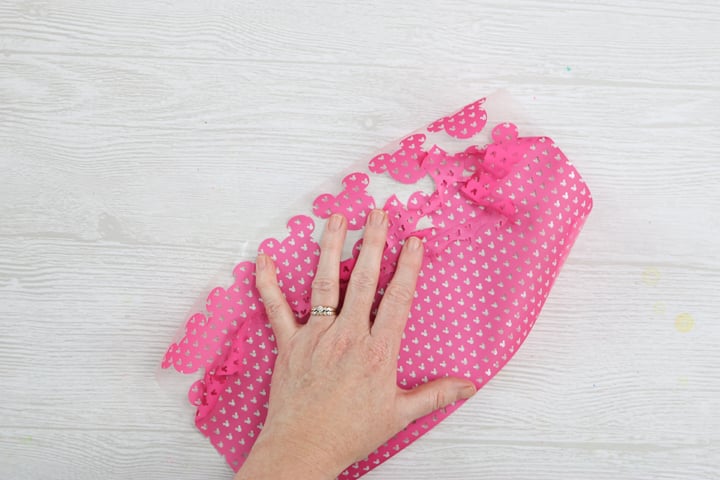
The mesh iron-on that has the Mickey heads weeds in the same manner as everyday iron-on. Just remove the excess by pulling it up.
To add the designs to the backpacks, add the EasyPress mat to the inside of the surface if possible. Then, press the material for a few seconds to remove any wrinkles as well as any moisture.
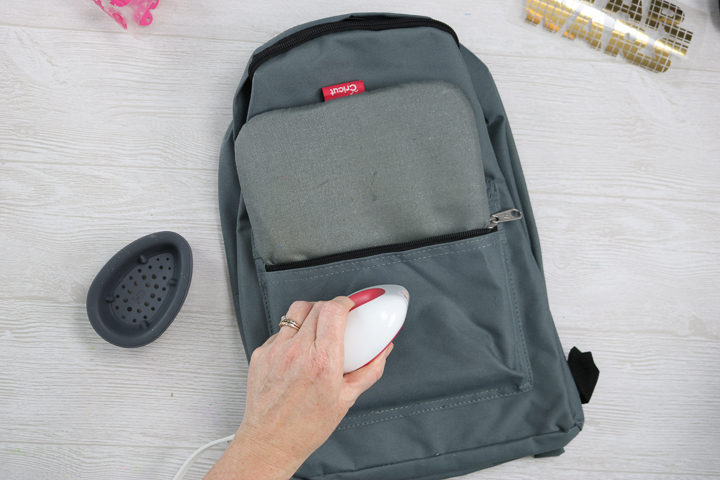
Be sure to check the Cricut Heat Guide for the time and temperature to use with your iron-on. Then add your design in place and start pressing. Be sure to keep the EasyPress Mini moving while pressing.
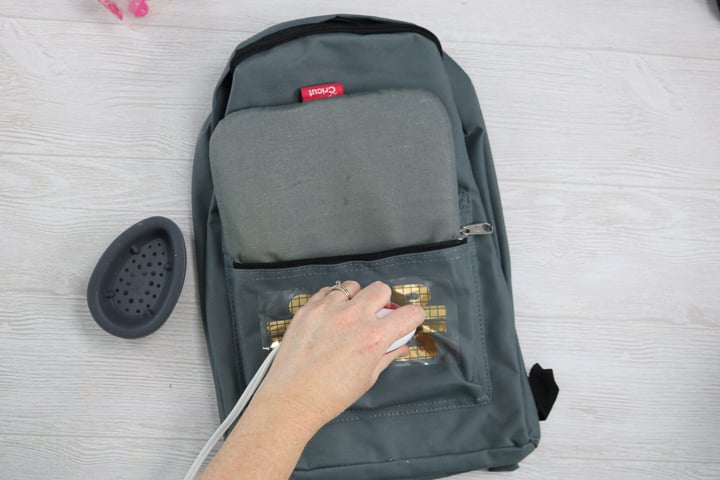
Press for the full time then allow to cool. Remove the carrier sheet from your iron-on. In the case of the mosaic, the first liner may come off and leave the second behind.
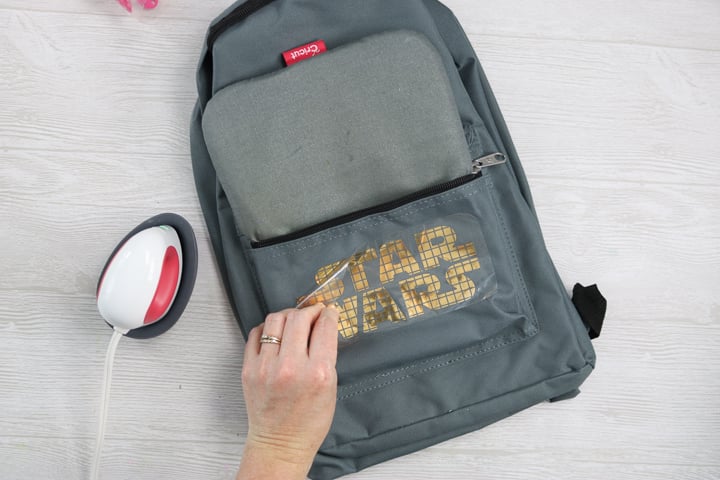
Remove the second liner after you remove the first. If any of the squares start to pull up, just press again then try to remove them just as before.
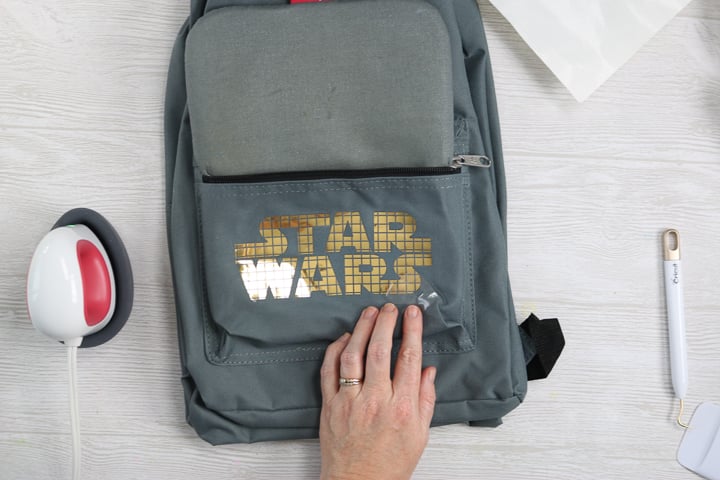
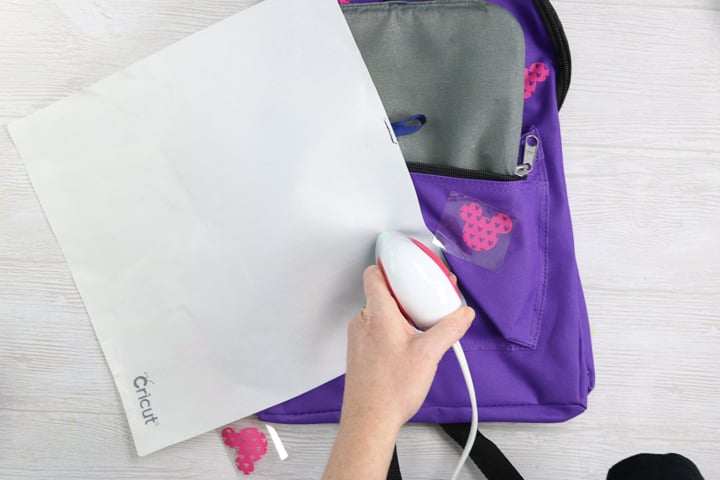
After removing both liners, I like to add the protective sheet over the top and press once more to ensure it is in place.
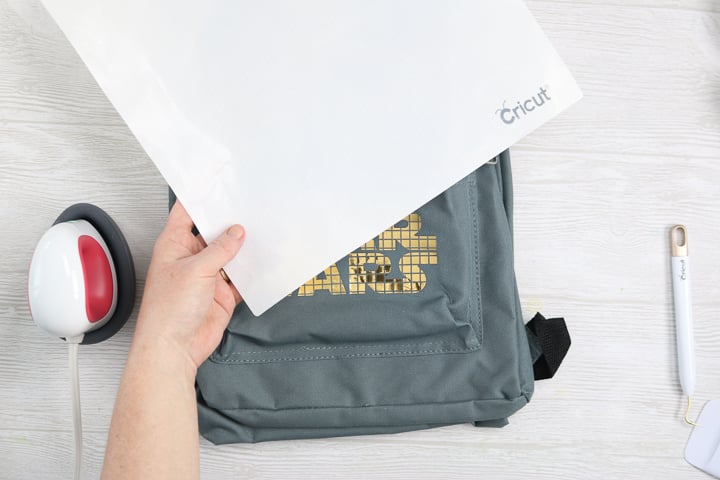
For the Mickey heads, the EasyPress Mini is actually larger than the heads. So, I used the protective sheet to help shield the backpack material from the heat while I pressed.
I would also recommend pressing one head, then pressing the second, then go back to remove the liner of the first. This gives the first Mickey head adequate time to cool.
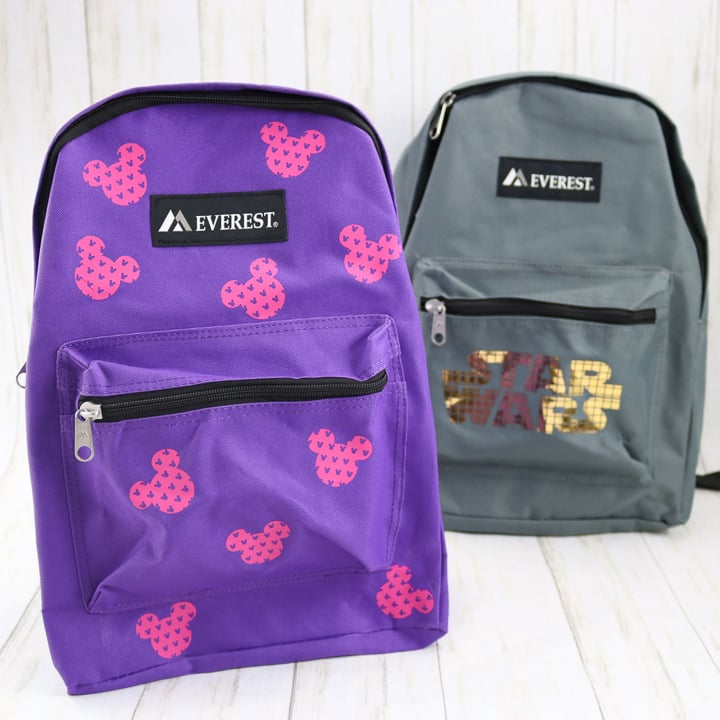
Once your DIY backpacks are complete, they are ready to give to the Blue Ribbon Project or to your child for school.
Can’t watch the video or missed some of the steps? I am also outlining how to customize backpacks below.
Equipment
- Iron-on protective sheet
- EasyPress Mini
Supplies
- Backpack this is the recommended one from Amazon
- Cricut cut file you can find the cut files here
- Mosaic iron-on
- Mickey mesh iron-on
- Other supplies to add to the backpack see below for the links to the suggested lists
Instructions
- Start by cutting your design with your Cricut machine. You can cut either the Star Wars design or the Mickey Mouse heads or come up with a different idea that is all your own. If you have not worked with mosaic iron-on before, you may want to start with my post here.

- Be sure to put your material face down on the mat and mirror the cut. Then load the material with the mat into your Cricut machine. Please note that ANY of the Cricut machines will make this project. I am using a Cricut Explore Air 2 but you can use a Maker or a Joy for these DIY backpacks.
- Then cut your design from iron-on.
- Weed away all of the excess iron-on around your design. The double liner of the mosaic iron-on is a bit different so either watch the video above or see my post here on how to use it.
- Weeding tools make weeding a bit easier but they are not required. You will want to weed around the outside as well as the centers of any letters. You need to be left with only what you want to be transferred to your backpack.
- The mesh iron-on that has the Mickey heads weeds in the same manner as Everyday iron-on. Just remove the excess by pulling it up.
- Then you can add your designs to the DIY backpacks. Start by adding the EasyPress mat to the inside of the surface if possible. Then press the material for a few seconds to remove any wrinkles as well as any moisture.
- Be sure to check the Cricut Heat Guide for the time and temperature to use with your iron-on. Then add your design in place and start pressing. Be sure to keep the EasyPress Mini moving while pressing.
- Press for the full time then allow to cool. Remove the carrier sheet from your iron-on. In the case of the mosaic, the first liner may come off and leave the second behind.
- Just remove the second liner after you remove the first. If any of the squares start to pull up, just press again then try to remove.
- After removing both liners, I like to add the protective sheet over the top and press once more to ensure it is in place.
- For the Mickey heads, the EasyPress Mini is actually larger than the heads. So, I used the protective sheet to help shield the backpack material from the heat while I pressed. I also would press one head, then press the second, then go back to remove the liner of the first. This gives the first adequate time to cool.
- Once your DIY backpacks are complete, they are ready to give to the Blue Ribbon Project or to your child for school.
Adding in supplies for the Blue Ribbon Project:
Now that you have your decorated DIY backpacks, you will want to add in supplies for foster care children. The additions to each backpack will depend on the child’s age you choose. I did the Star Wars backpack for a 10 – 11 year old boy and the Mickey backpack for a 4 – 5 year old girl. You can find lists for each age group here.

Drop in supplies then ship or drop off at the Blue Ribbon Project. You can add a smile to the face of a foster care child with this simple act of kindness.

Give this Mickey backpack design a try or add the Star Wars logo. Either way, you will love how easy it is to make personalized backpacks with your Cricut.
So, will you be adding DIY backpacks to your craft list this week?
Check out these other DIY projects you’ll love:
- DIY Cork Board with Cricut Iron-on
- 25 Homemade Gifts for Kids with a Cricut
- DIY Cosmetic Bag Using T-Shirt Transfers
New to Cricut?

Sign up for our email list to download the Beginner's Guide to Cricut Design Space for FREE today!
Sign up to get the guide emailed to you!


What do you want IN the backpack? Can this be shared with the different Cricut groups?
You can share wherever you like. Here is what to put in each: https://blueribbonproject.org/how-to-help/build-a-backpack-of-love.html
I did make a similar backpack for my grand daughter using a very inexpensive bag. I got a free Mickey Mouse Head SVG and used hearts on a plain pink HTV. It did work out very well. She loves it.
I love hearing that. Personalizing things for children has to be one of my favorite crafting activities 🙂