


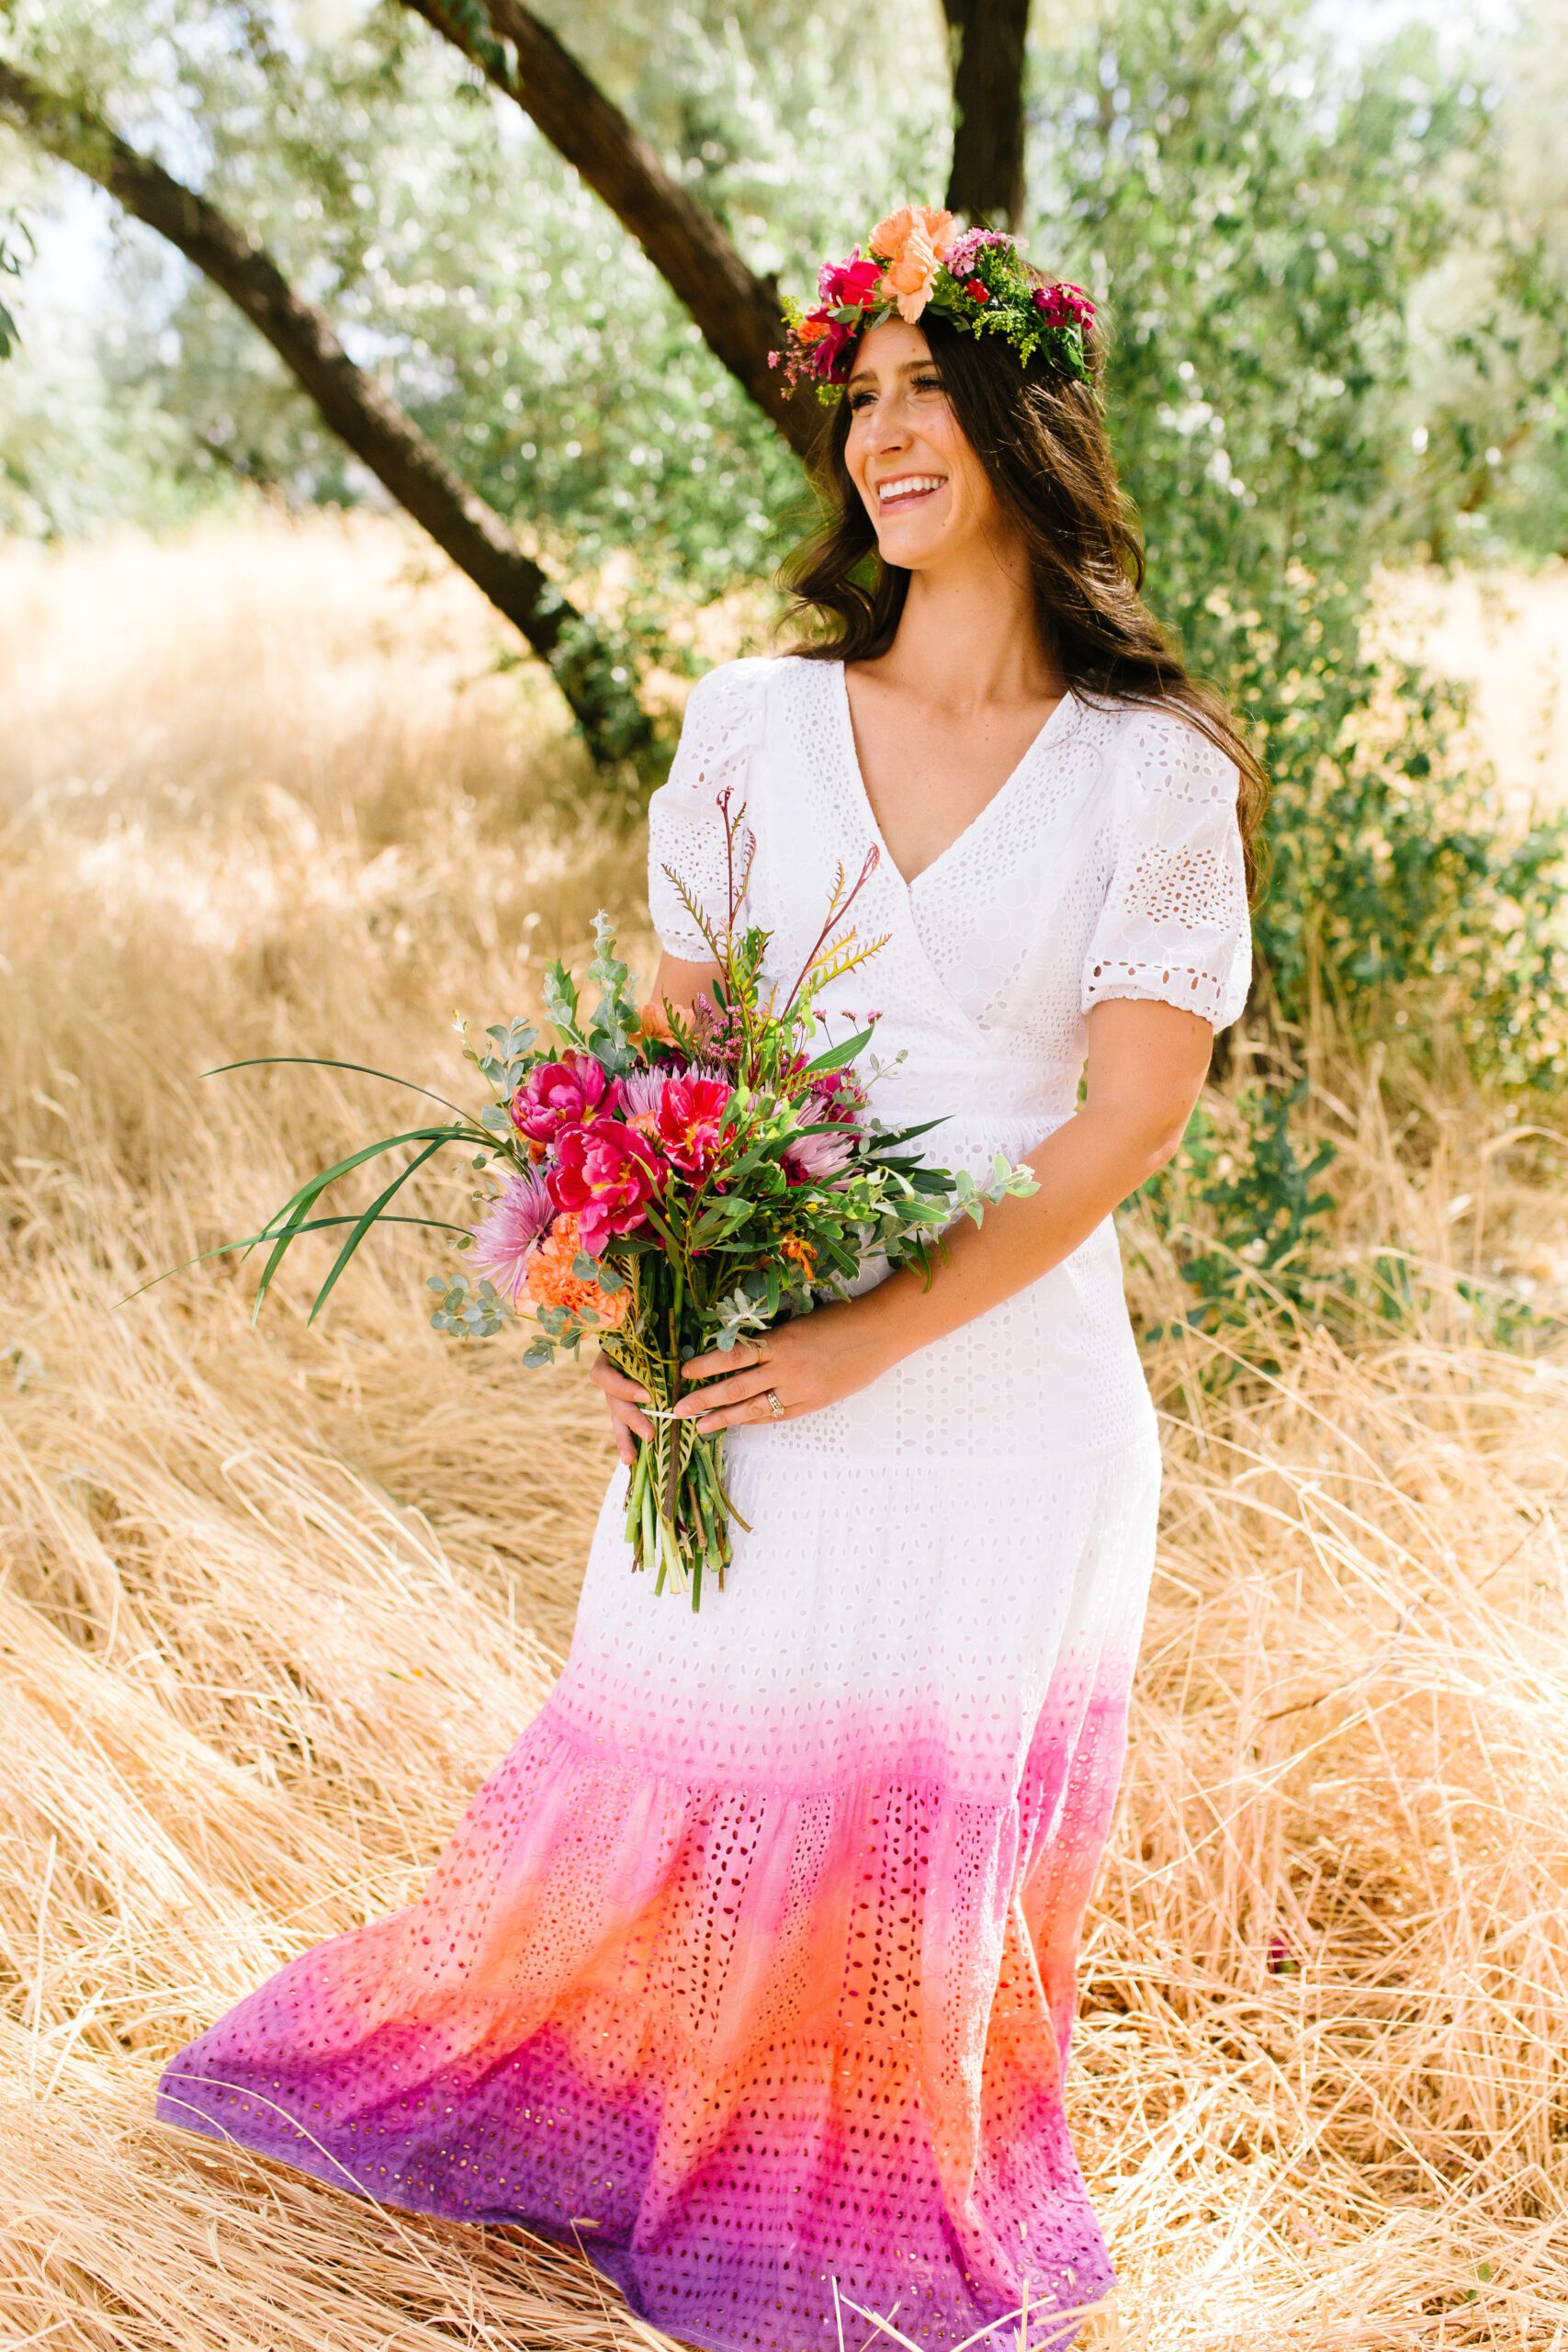
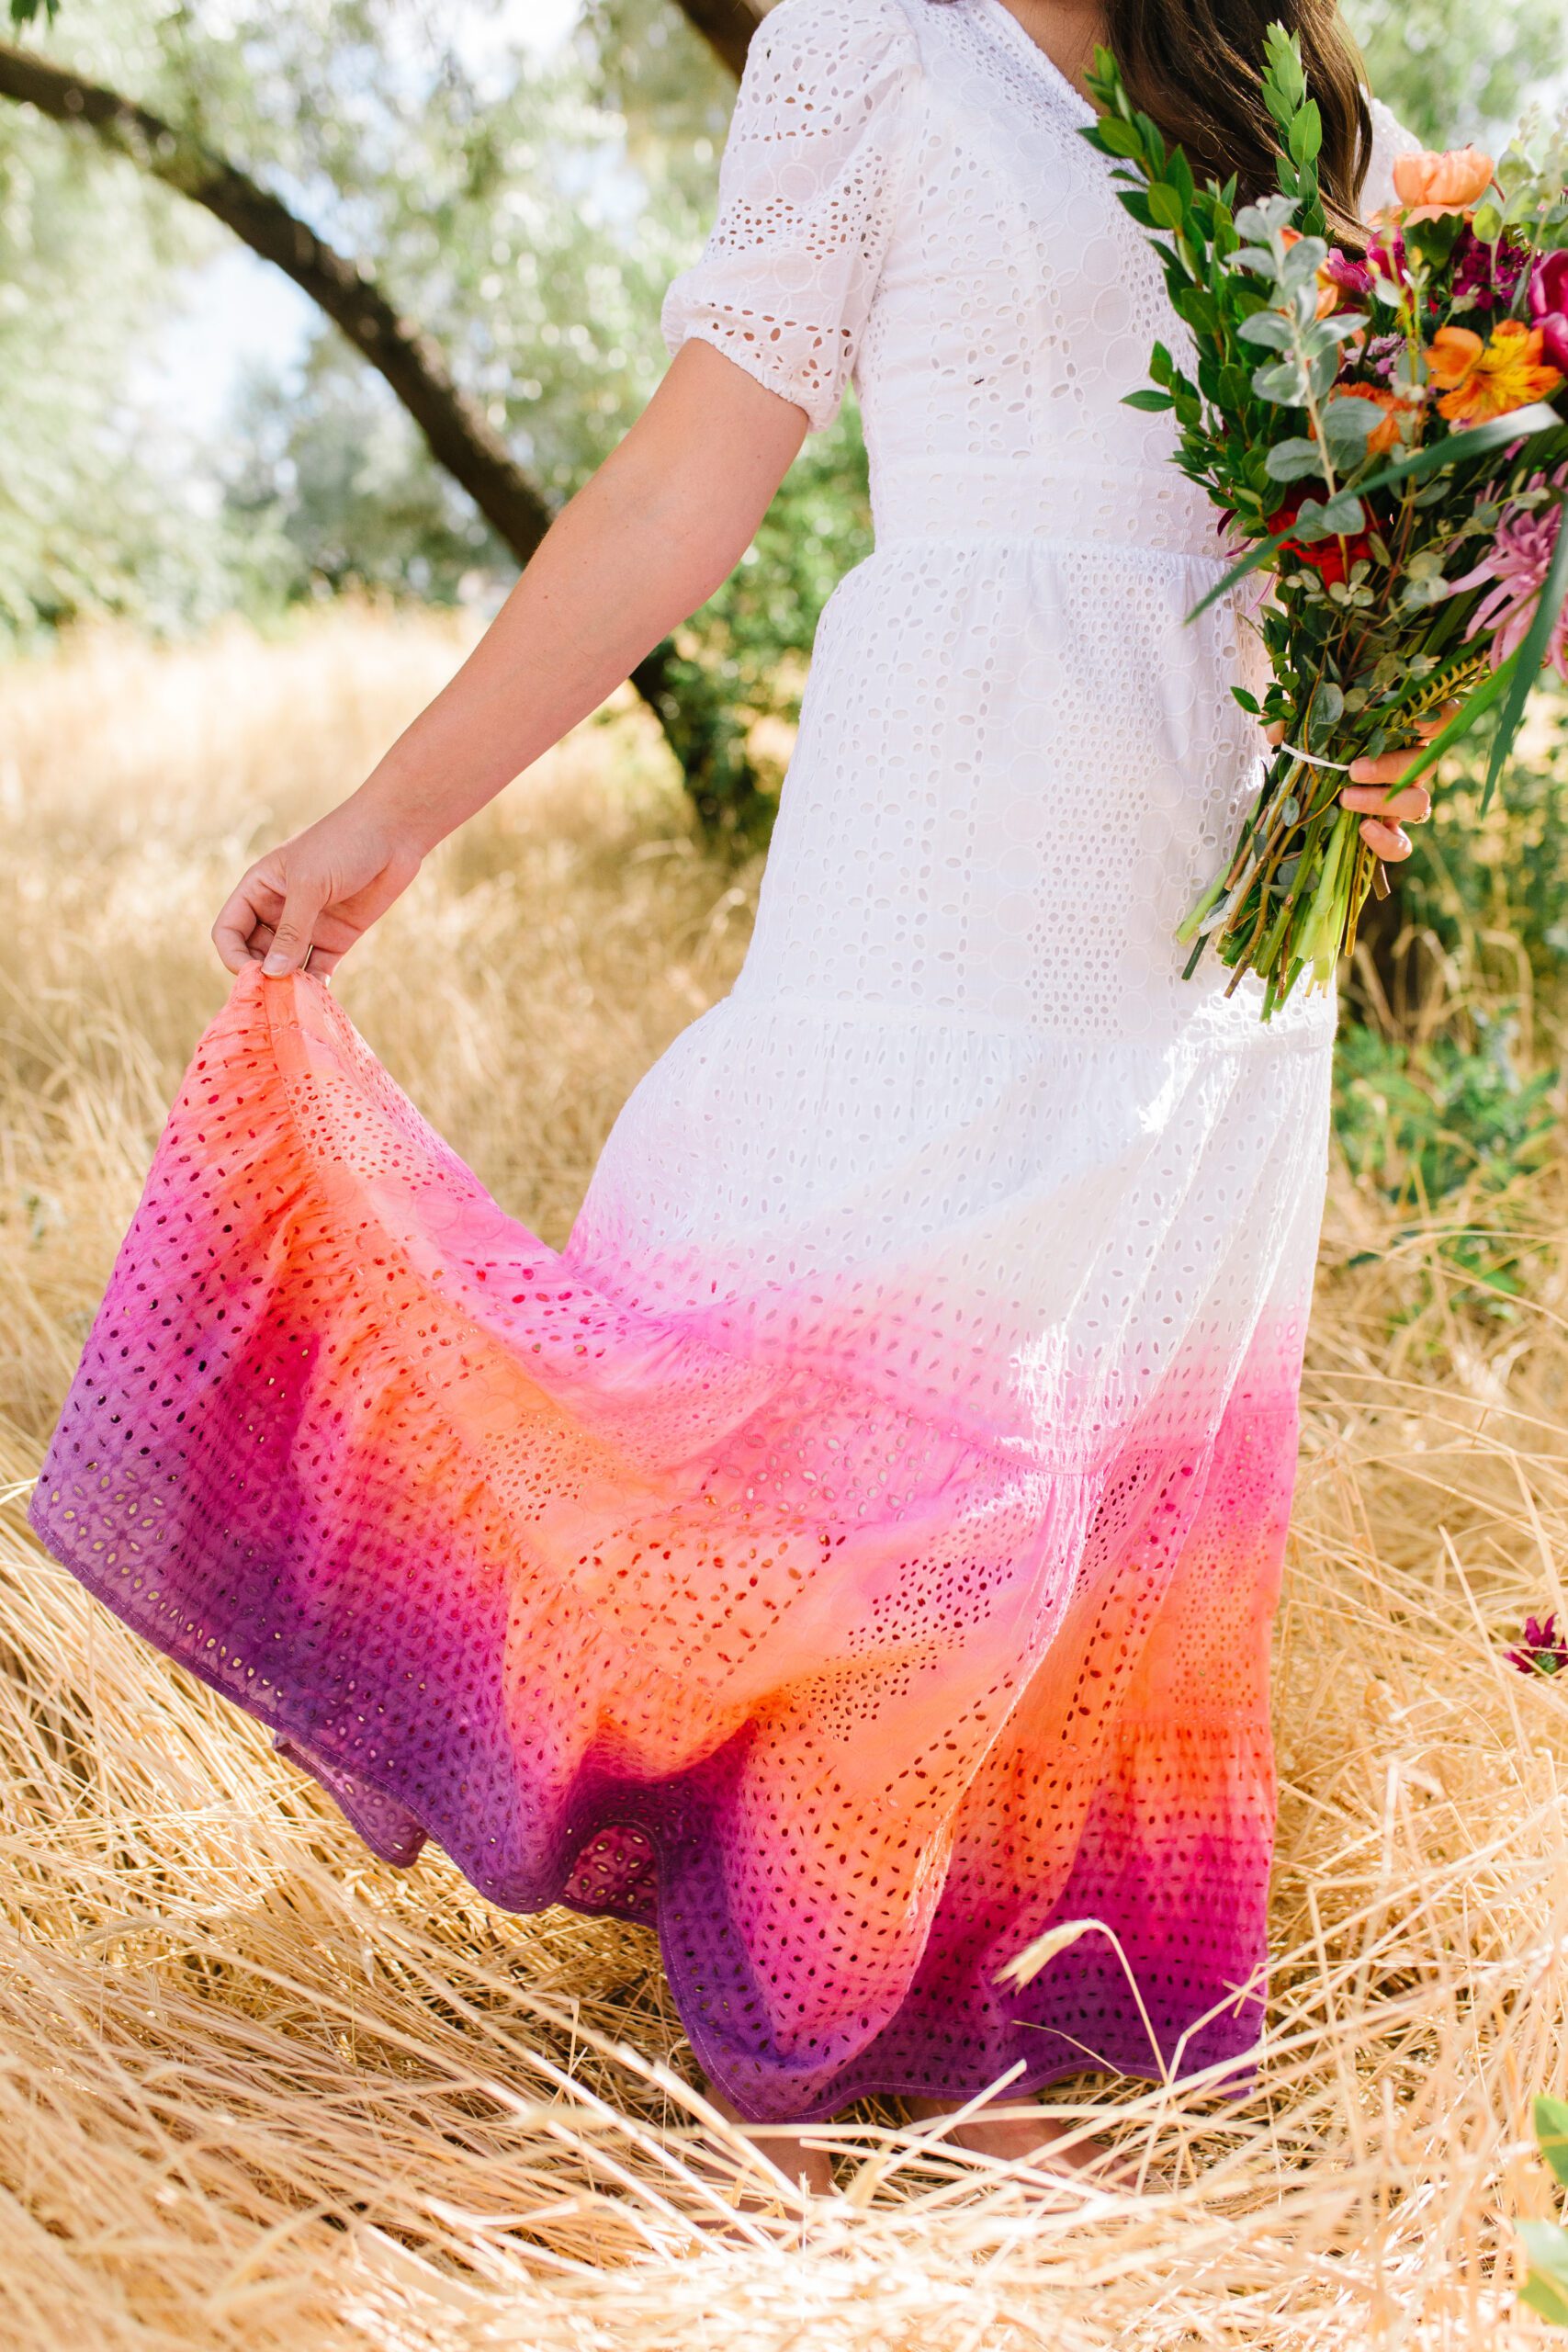
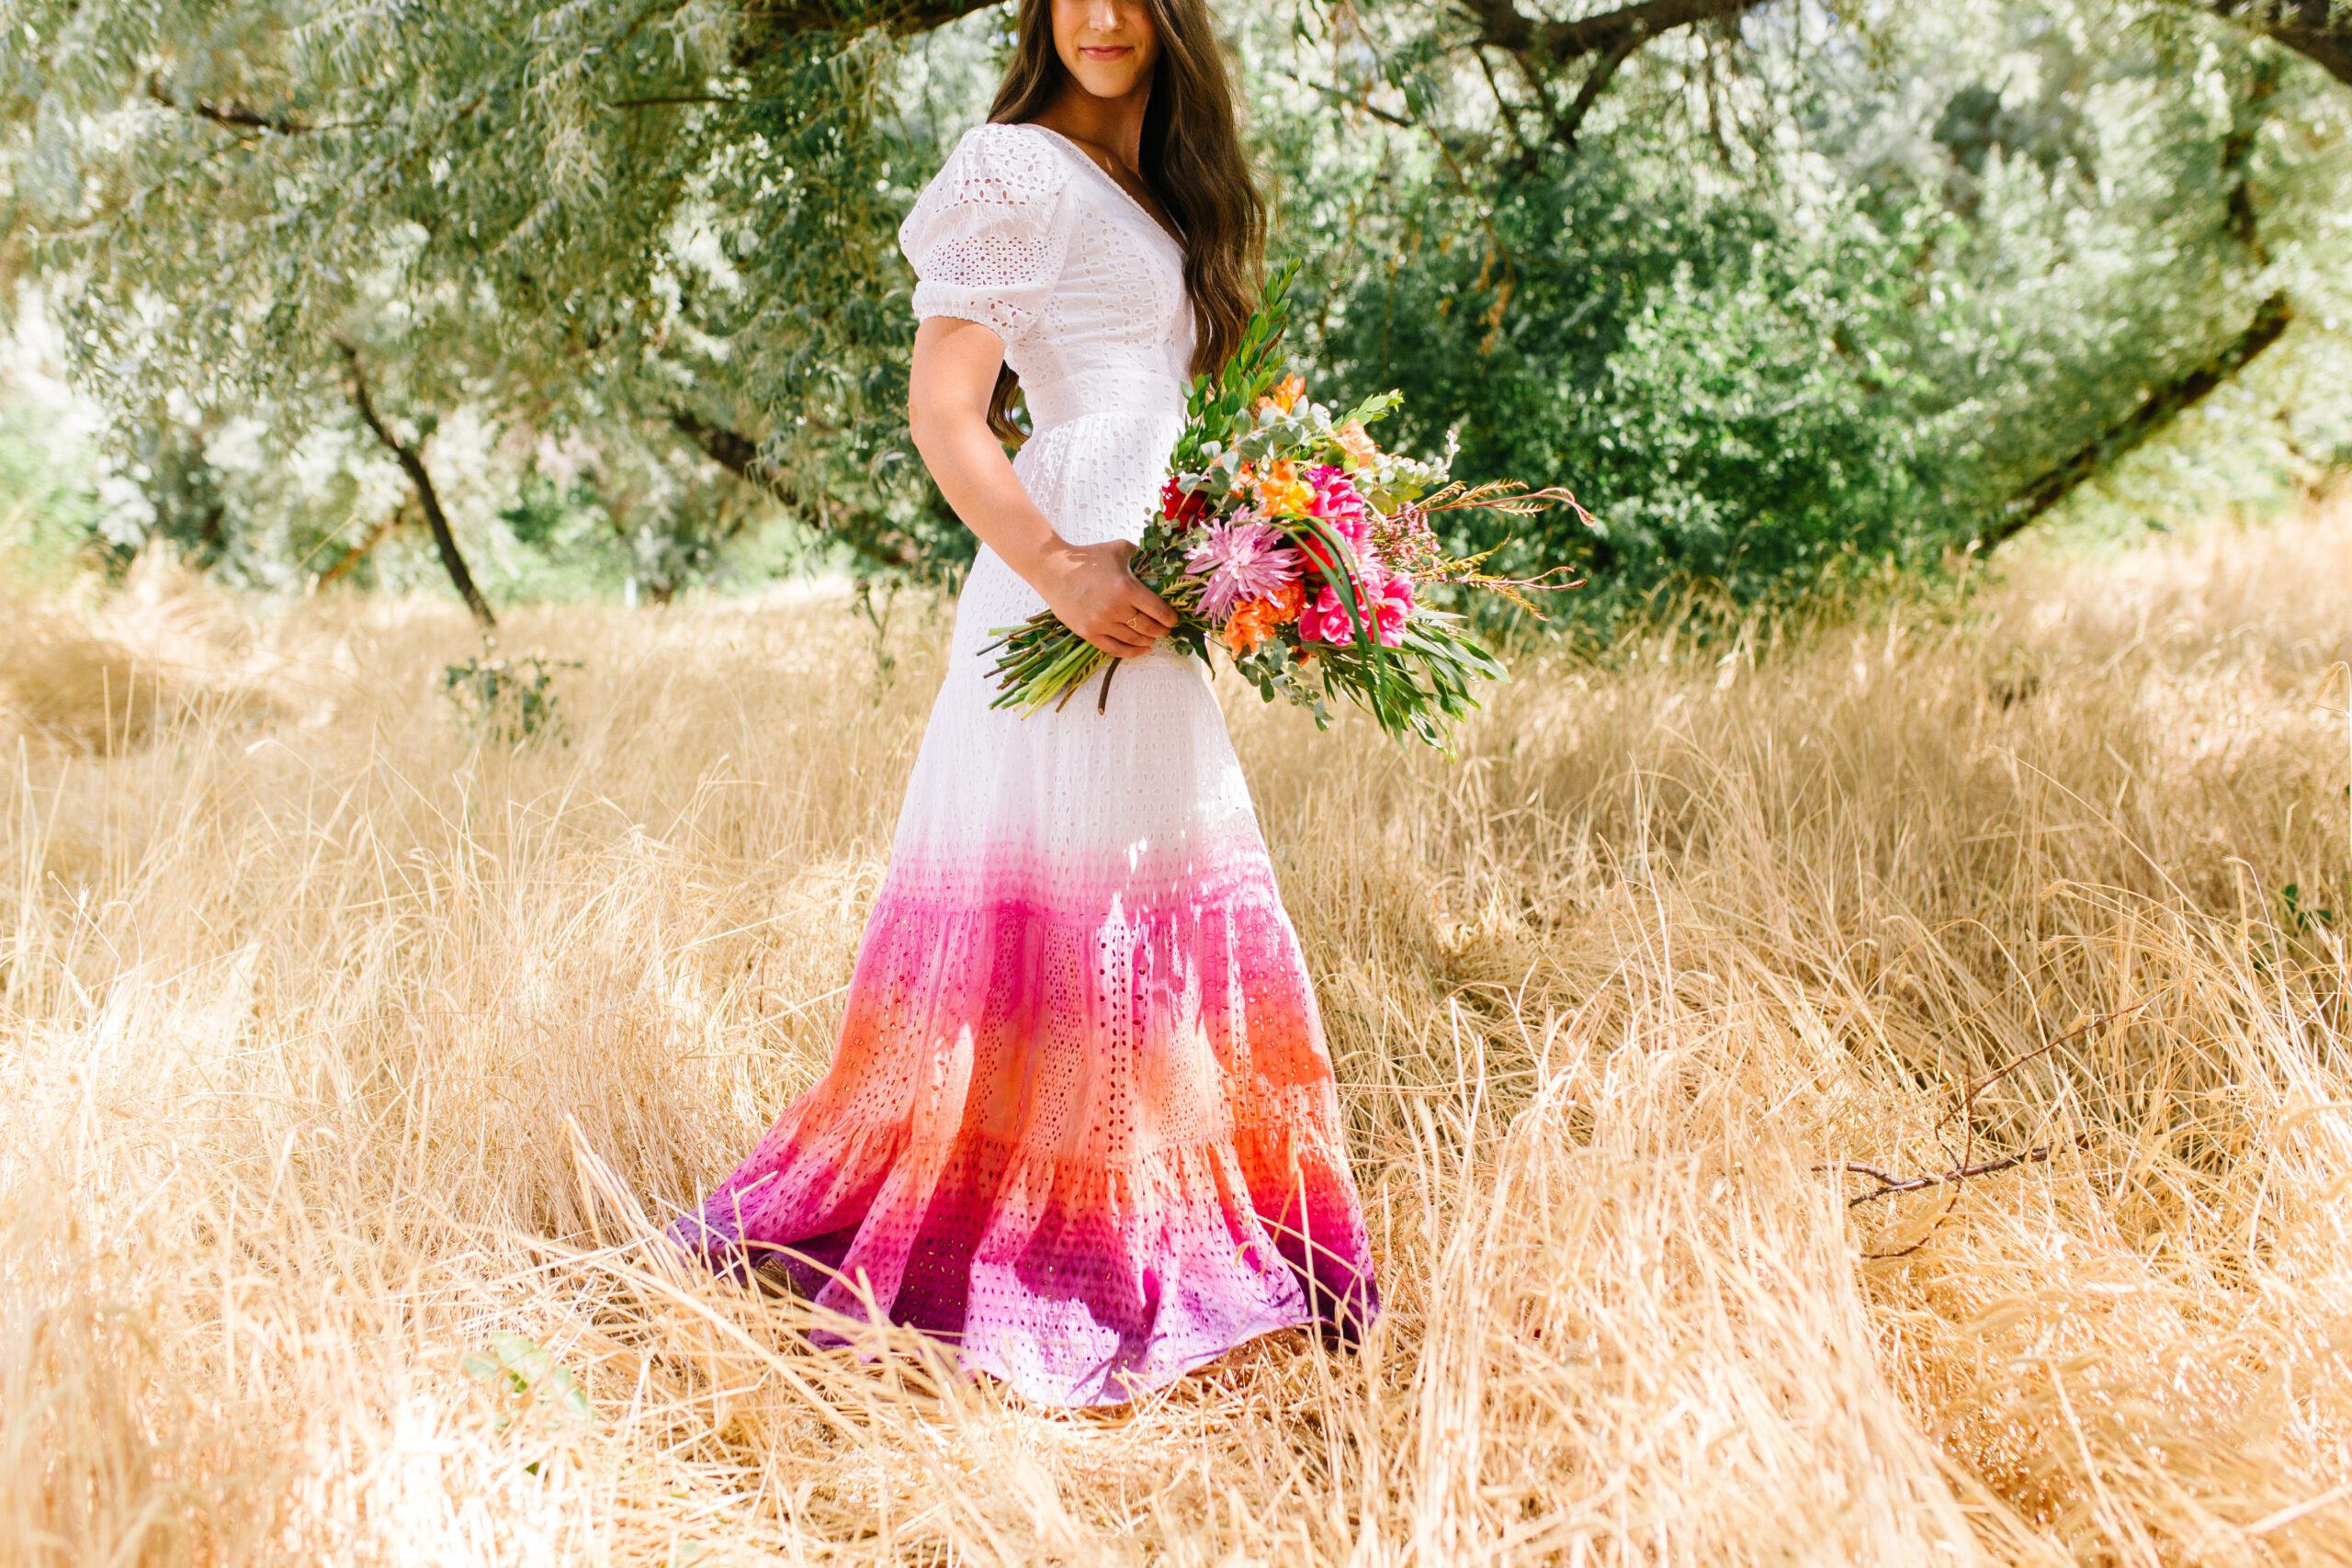
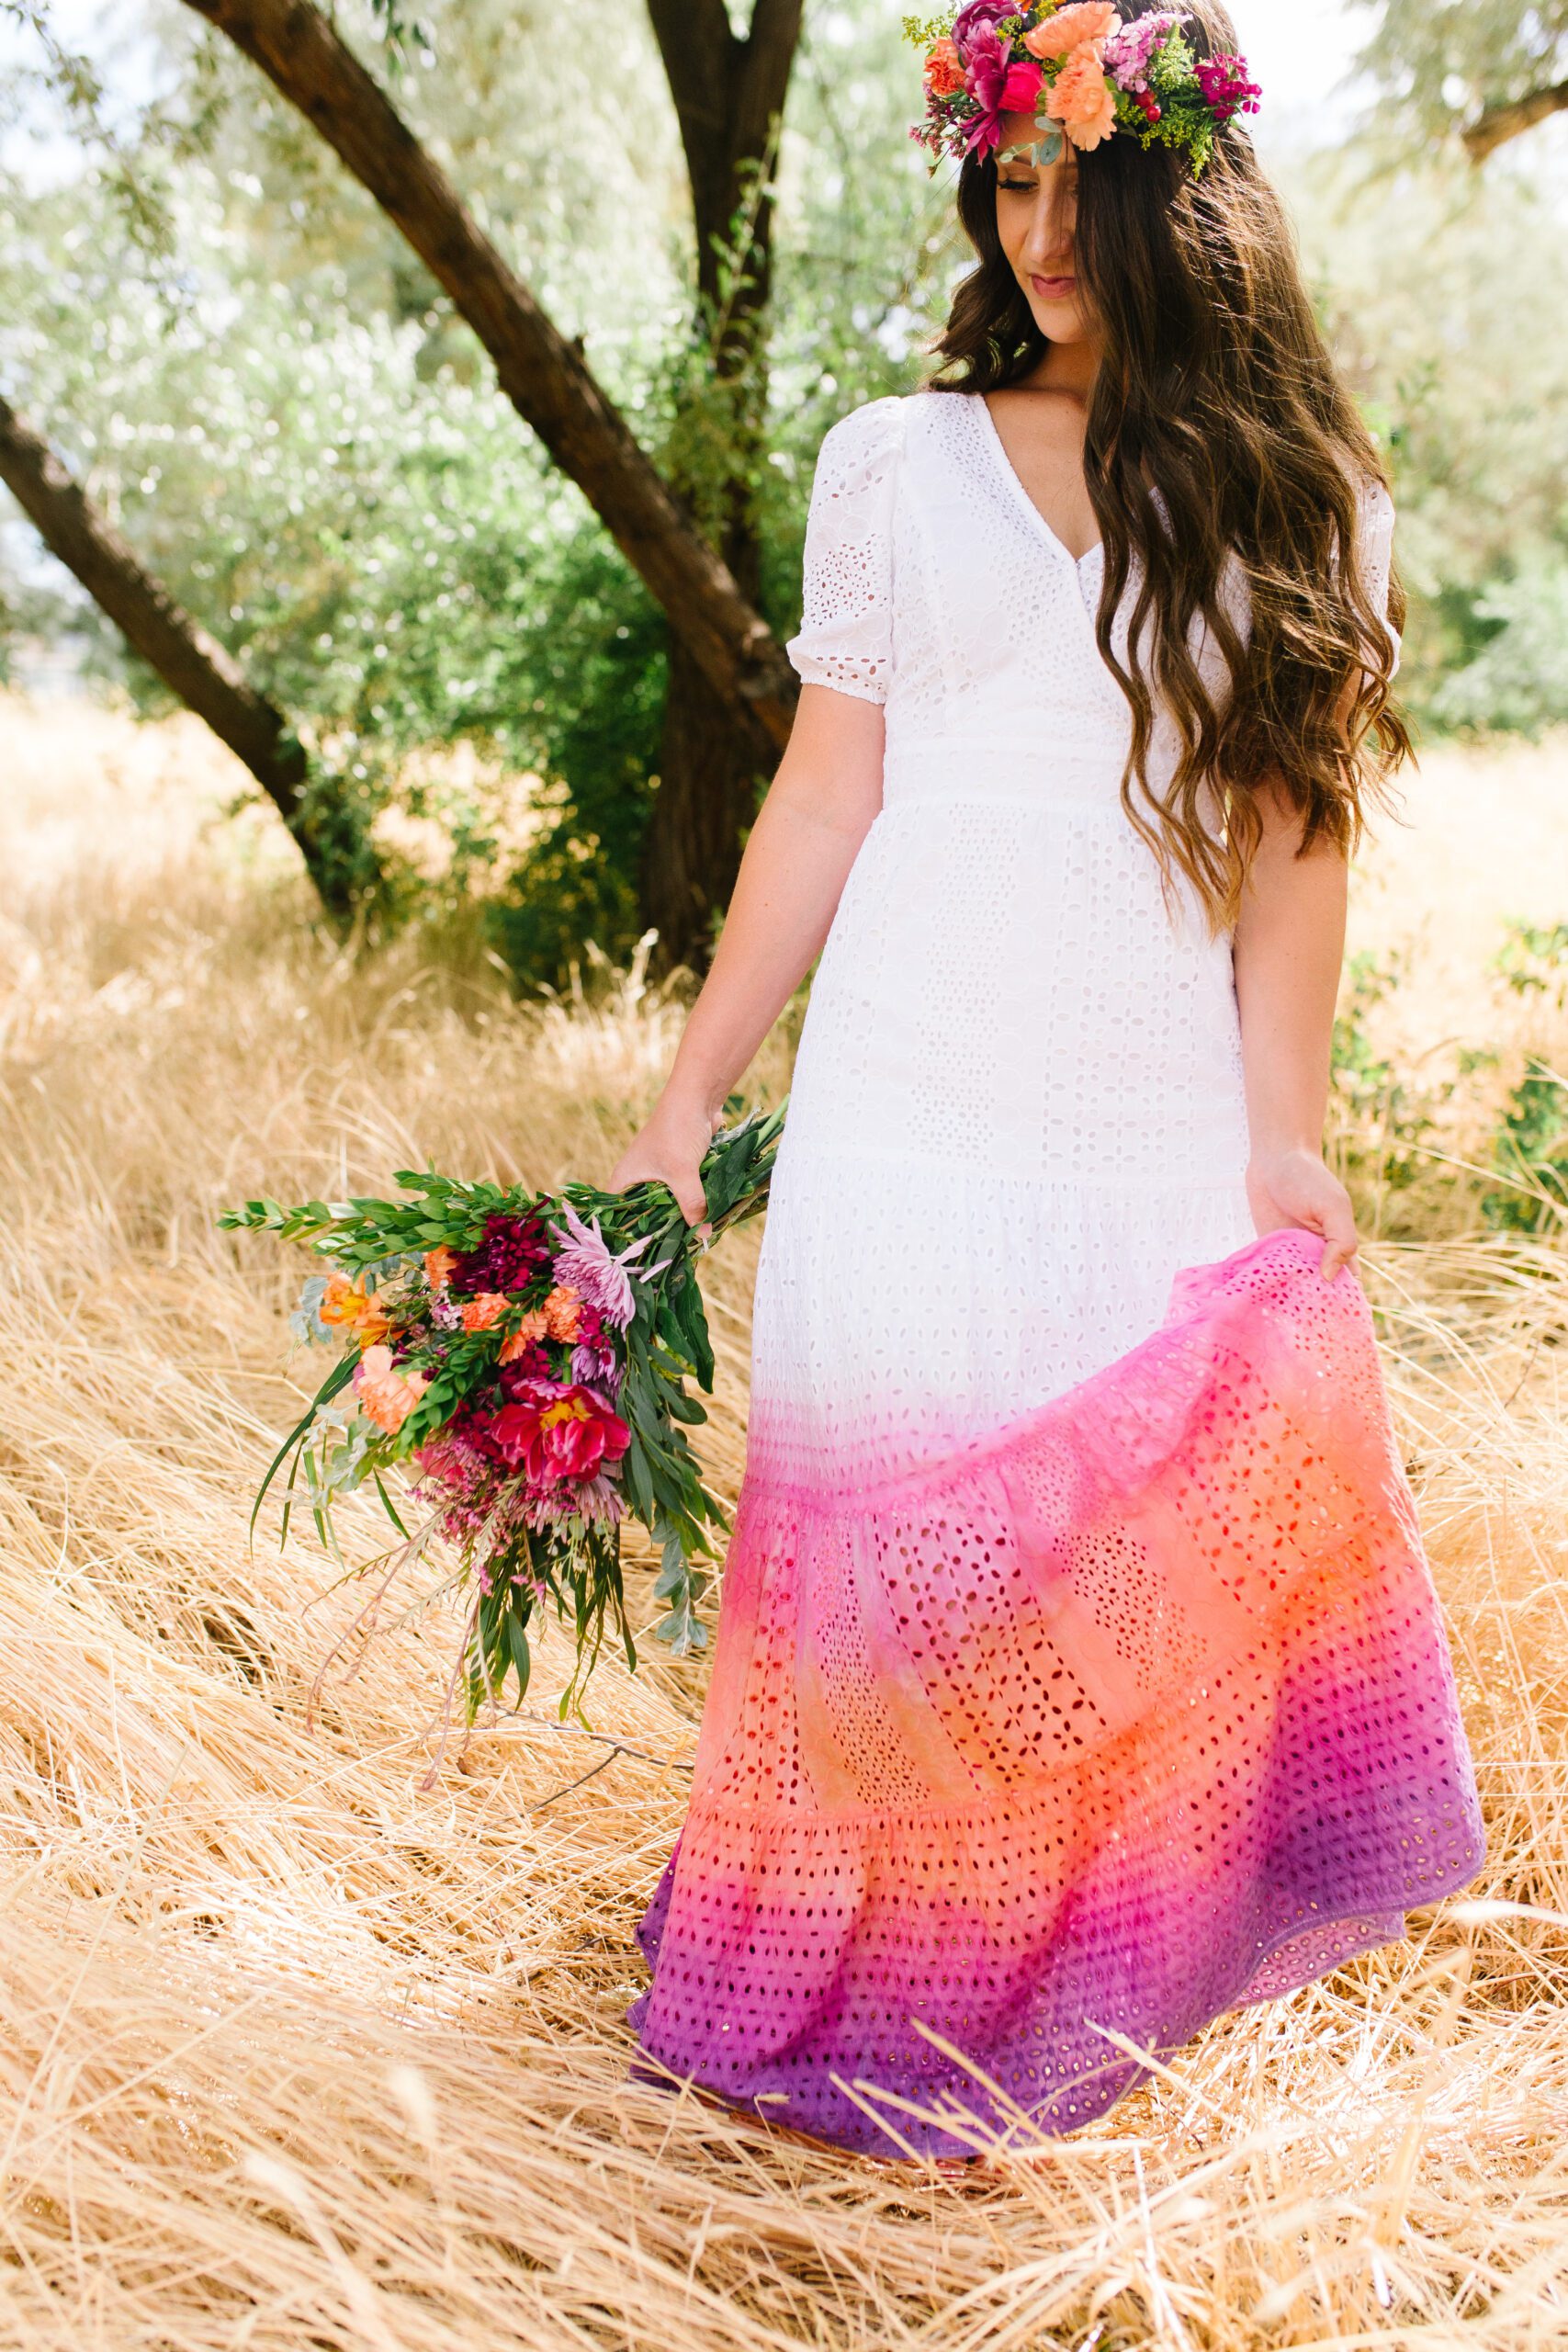
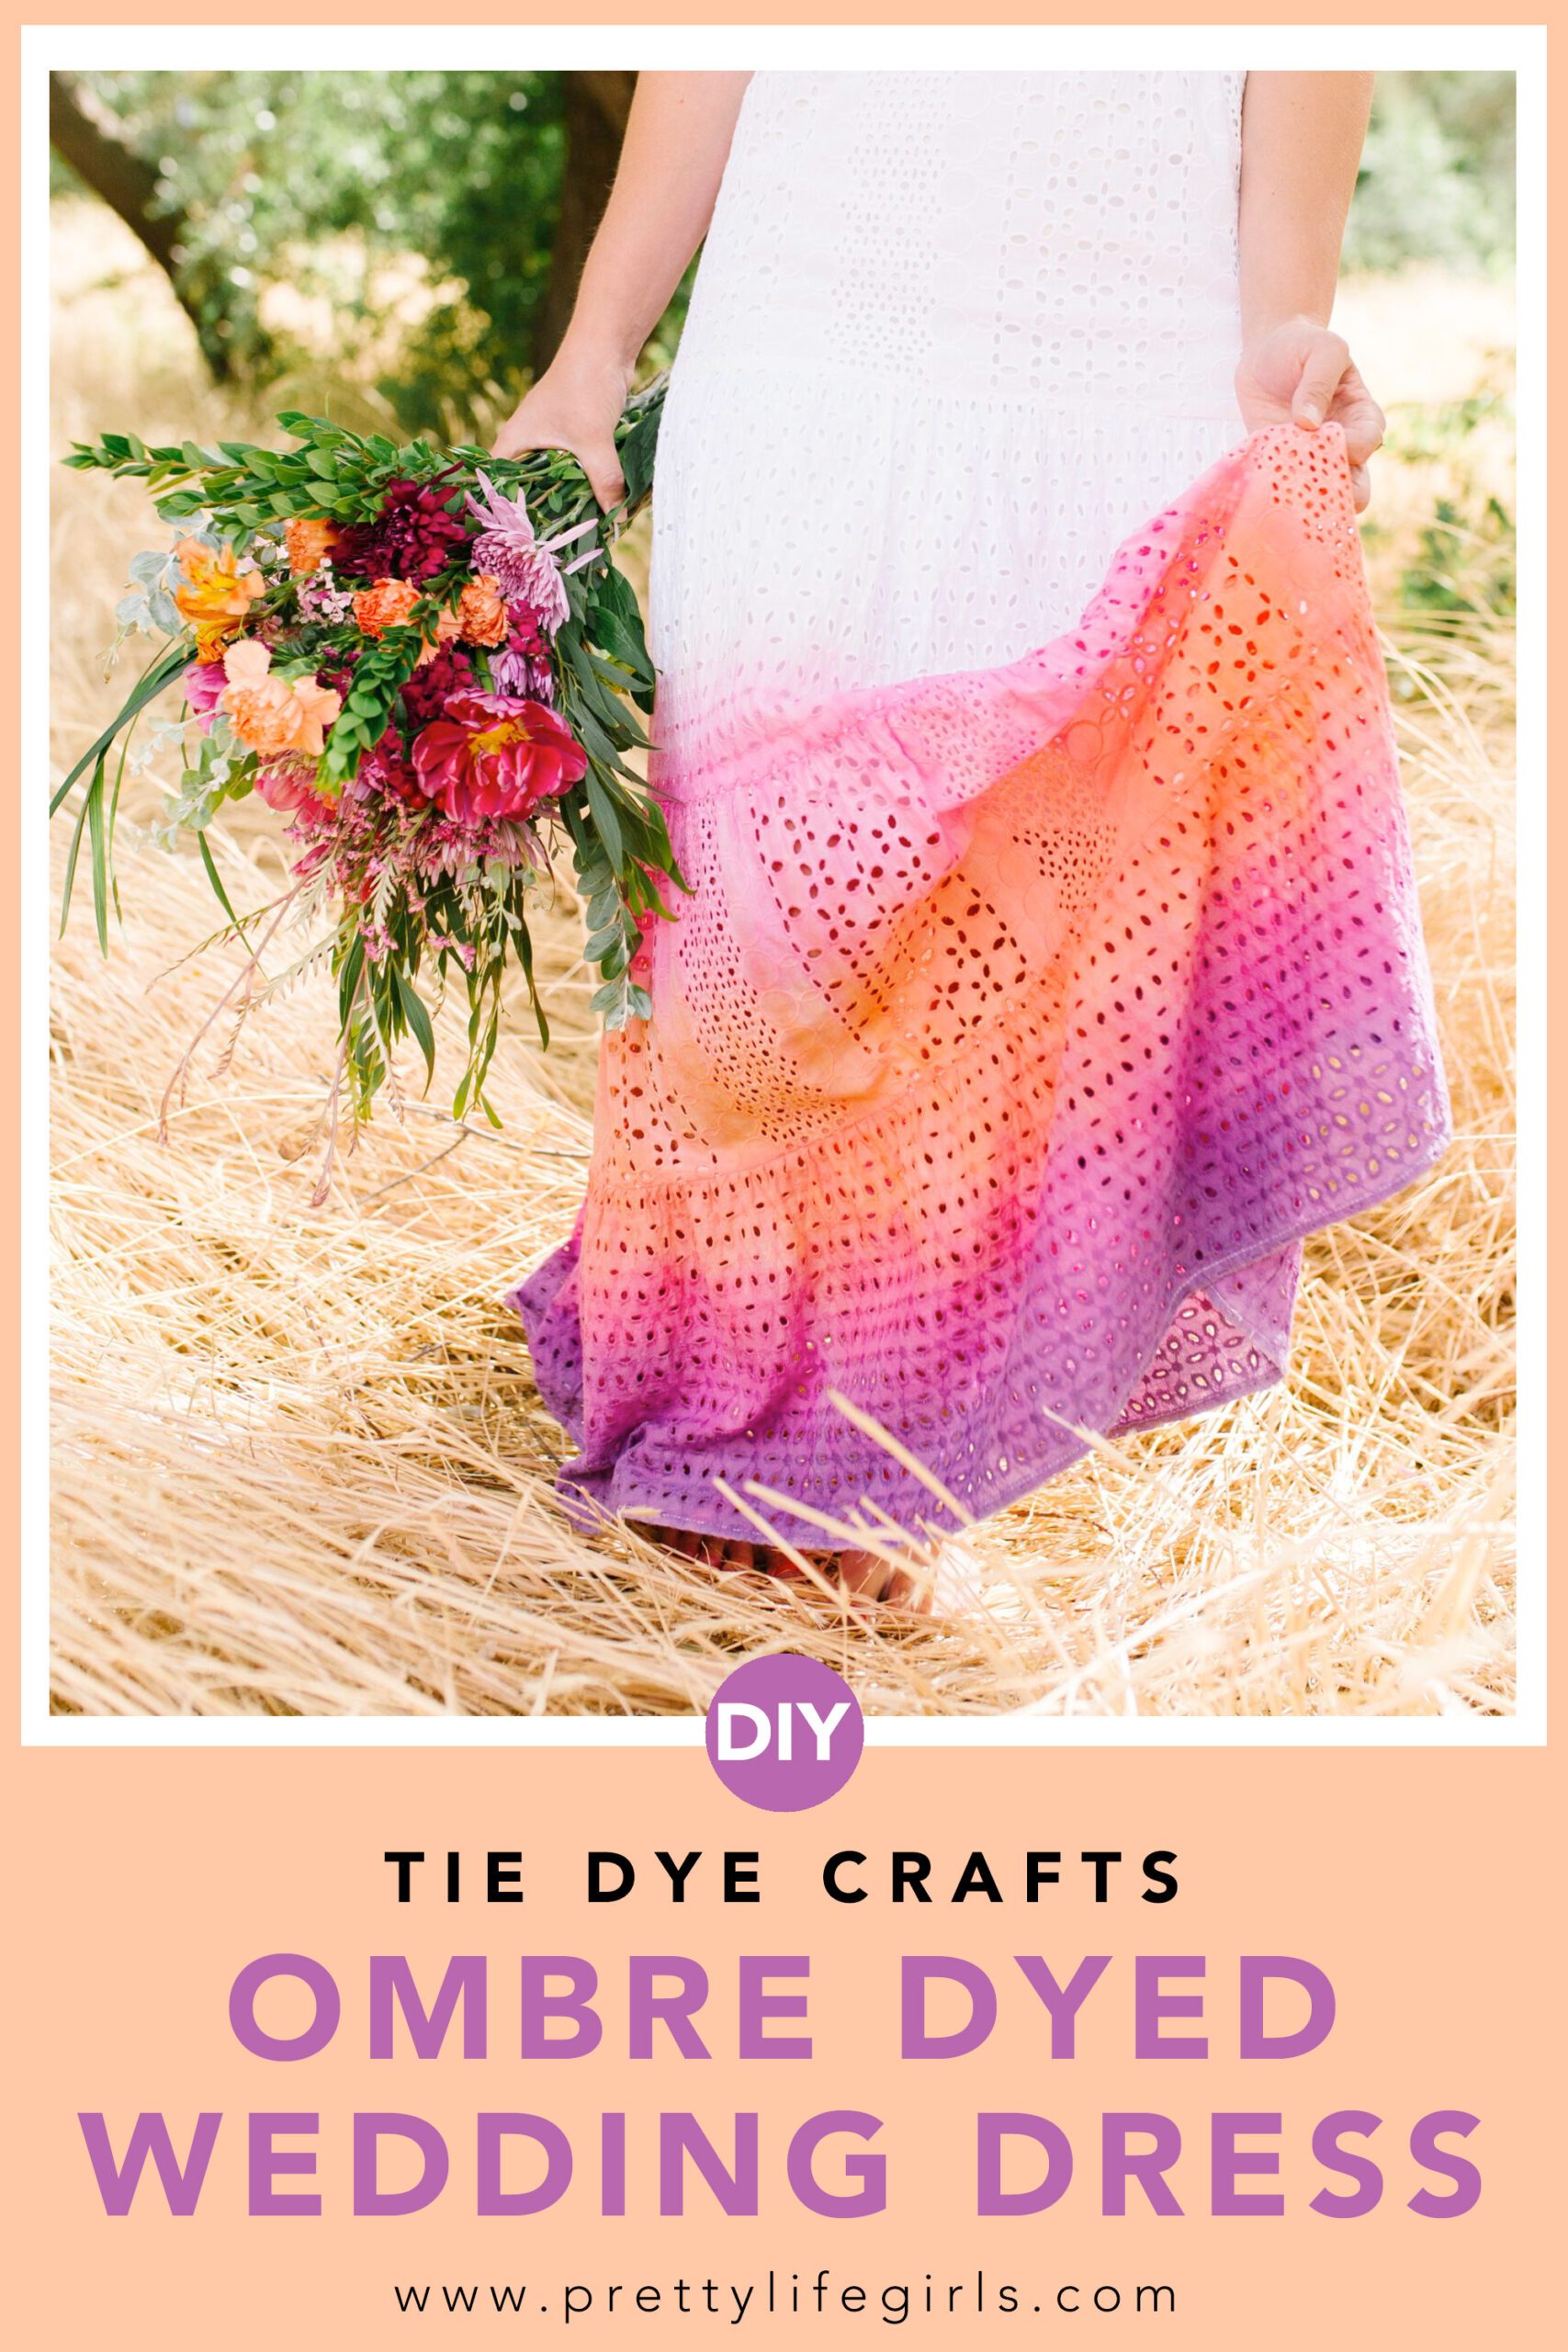
In this tutorial, we’ll show you how to dip dye a wedding dress to get a beautiful ombre effect! This is such a fun way to be creative and incorporate color into your special day!
Our tie dye journey has led us to a lot of colorful places. We’ve experimented with interesting methods (or combinations of methods), applied dye to unique surfaces, and, as a result of those now hundreds of attempts, we eventually wrote what we think is the most gorgeous book of tie dye projects around!
We have both failed and triumphed in our experimenting, but with every project we pick up more tricks and tools to help us the next time we get a hare-brained idea to apply tie dye to a fabric or surface or space that seems ill advised.
Today’s dip dye wedding dress project definitely fell into that category, but we are very pleased (and relieved) to say that the results were not only successful, but so gorgeous they made us giddy.
How to Dip Dye a Wedding Dress
With our other tie dye projects, our motto is typically to try and relax and embrace the inevitable–let the dye do what it’s gonna do, and plan on embracing the results. And while we still recommend harnessing that mentality for this project since tie dye can’t be controlled completely, the key to success when dyeing something with this high of stakes is planning and precision.
First, it’s critical to identify the fabric makeup of your dress. In our search for a wedding dress to dye, we found that most were made of synthetic materials which won’t work with all tie dyes. As a result, we searched for a cotton dress because we wanted to use Tulip One-Step Tie Dye for the dress and we know it works best on natural fibers like cotton or silk.
We recommend Tulip One-Step Tie Dye because it comes in every color you can think of, is easy to apply, the results are consistent and vibrant, and it is truly one step–no soda ash, vinegar bath, or salt soaking required. You can trust Tulip One-Step Tie Dye with this project. We promise.
Next, we recommend testing dye colors before applying them to the dress to ensure you like the shades and the way they blend. You can do this on a scrap of fabric similar to your dress fabric or even on a paper towel.
In short, do the prep work, because not all dyes work with all fabrics and not all dye colors blend well.
What you will need to dip dye a wedding dress
White cotton dress
Tulip One-Step Tie Dye
Large paintbrush
Water
Cups or bowls
How do you dye your wedding dress 0mbre?
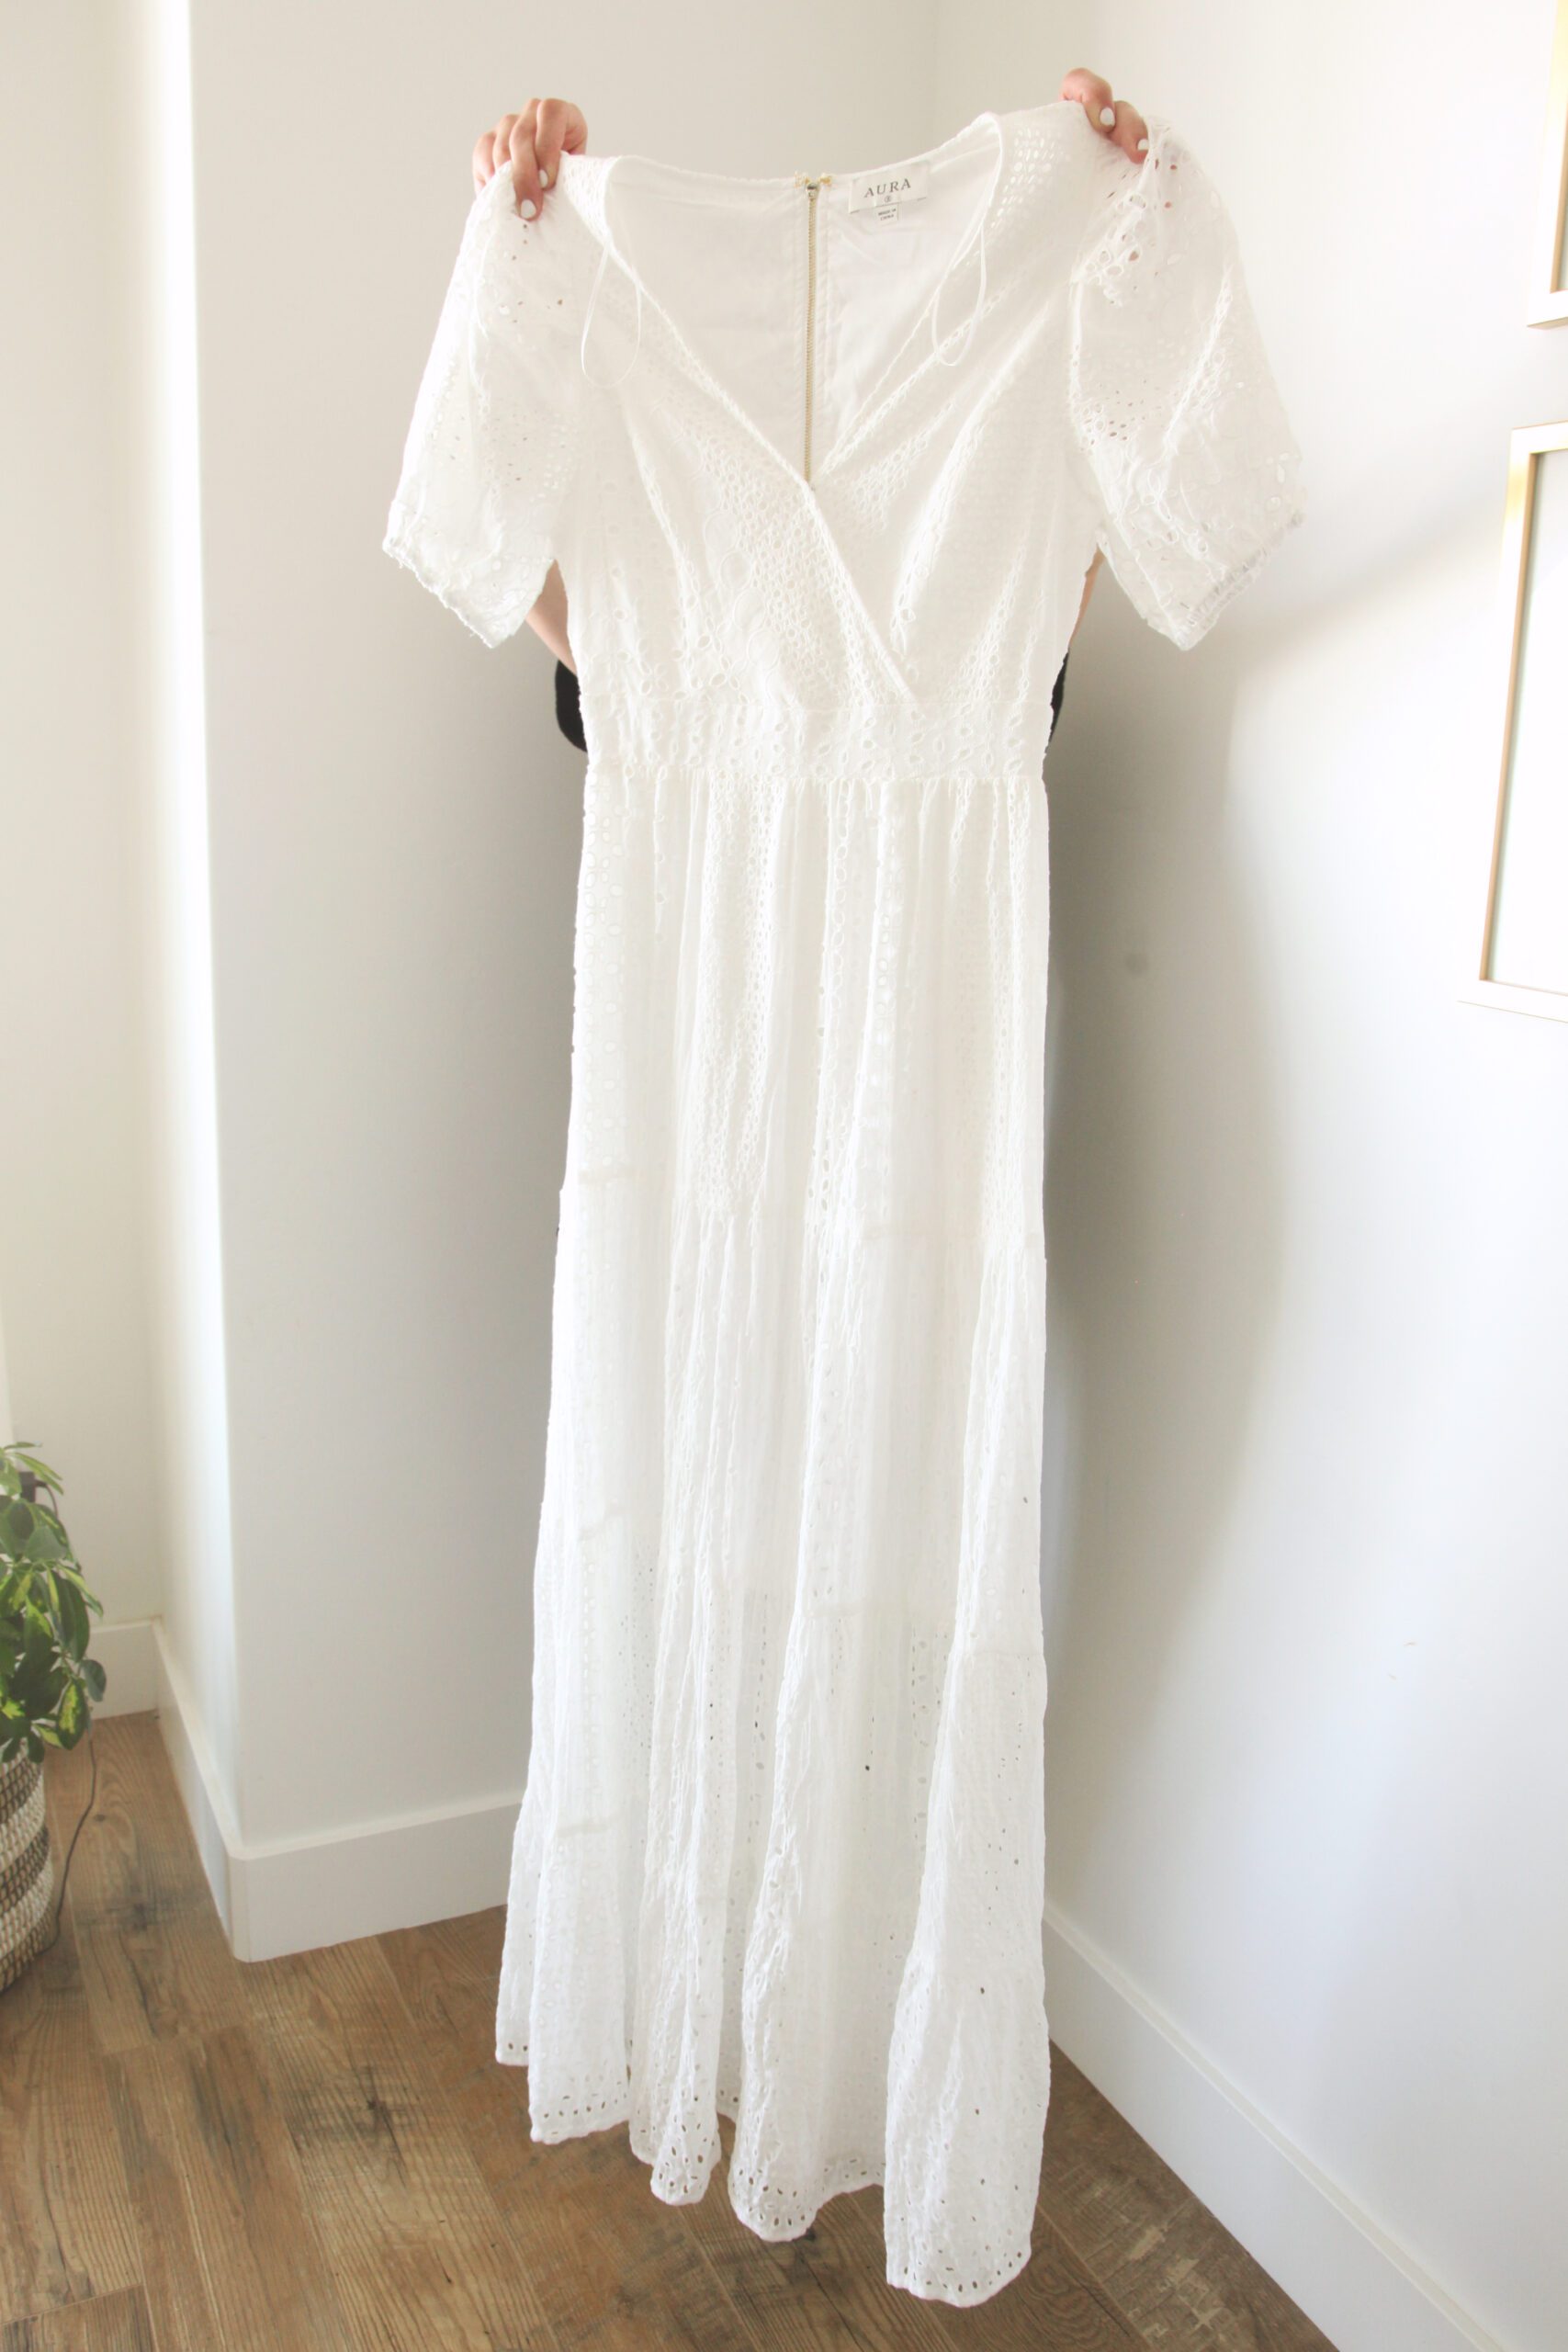
Step 1: Wash and dry your dress in order to remove any coating that may repel dye. Prepare a large surface where the dress can be laid flat and dye can be applied.
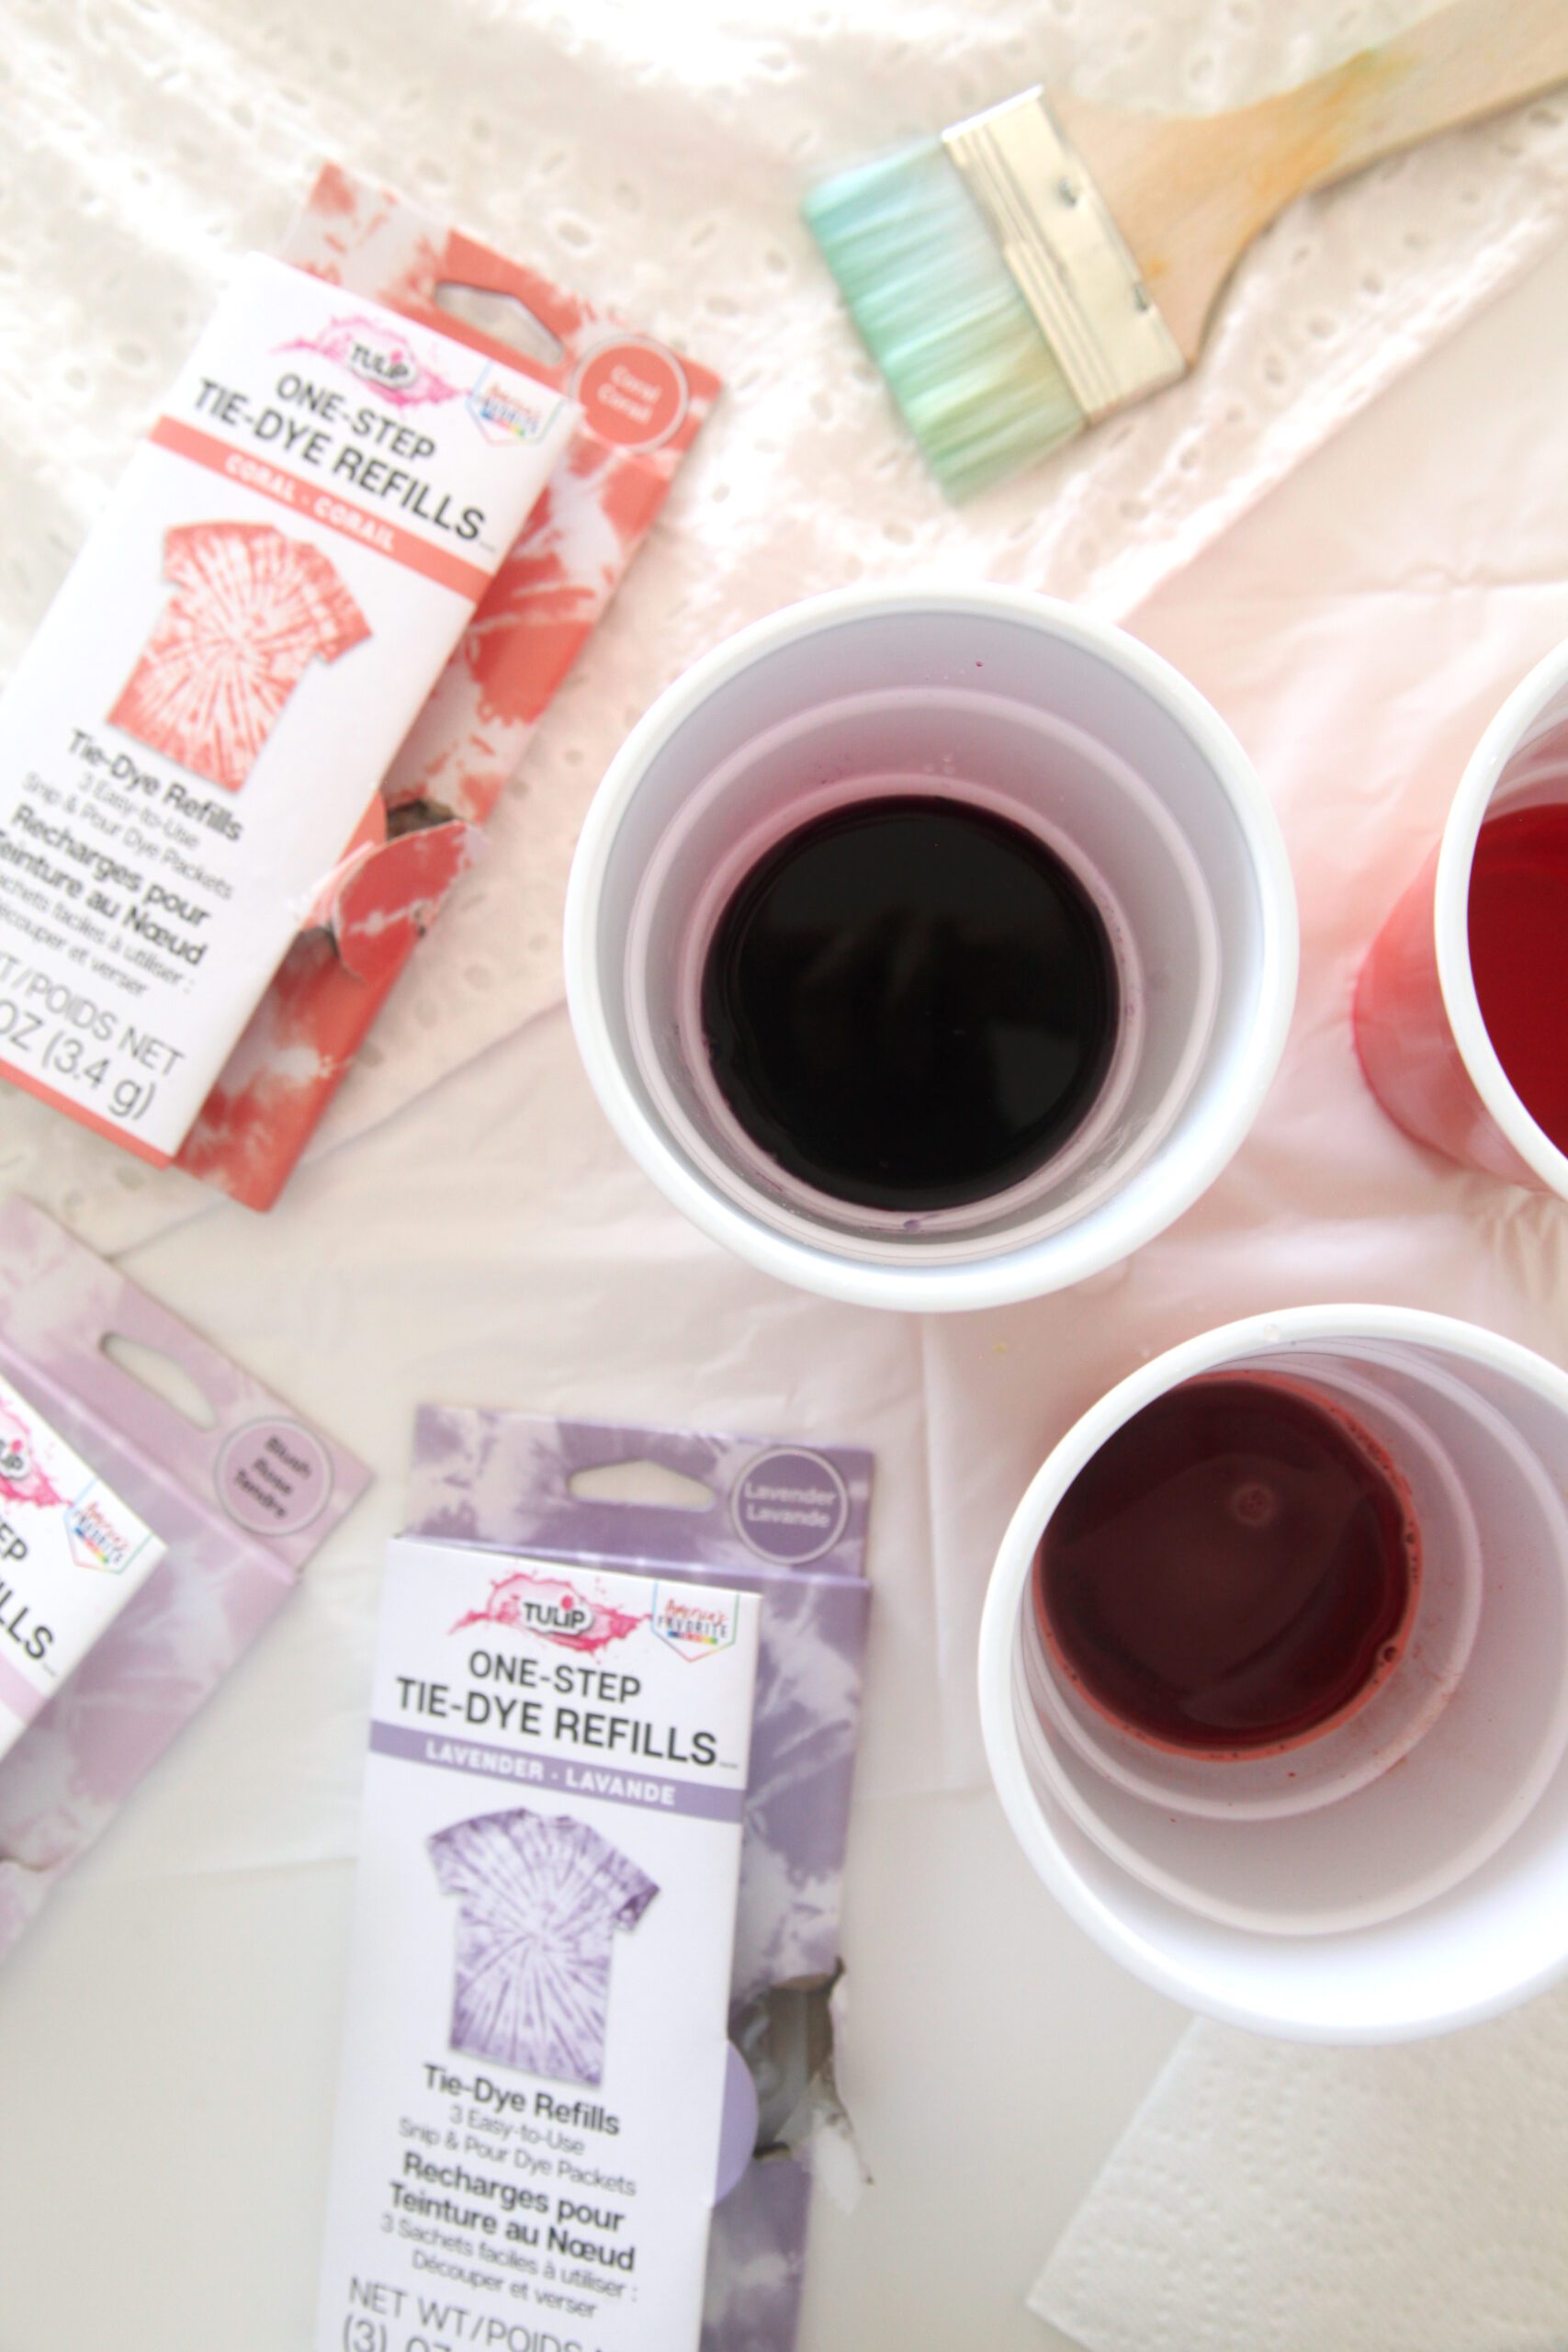
Step 2: Prepare your dye according to package directions, but instead of preparing it in a squeeze bottle, mix it in a disposable cup that is wide enough to dip your paint brush.
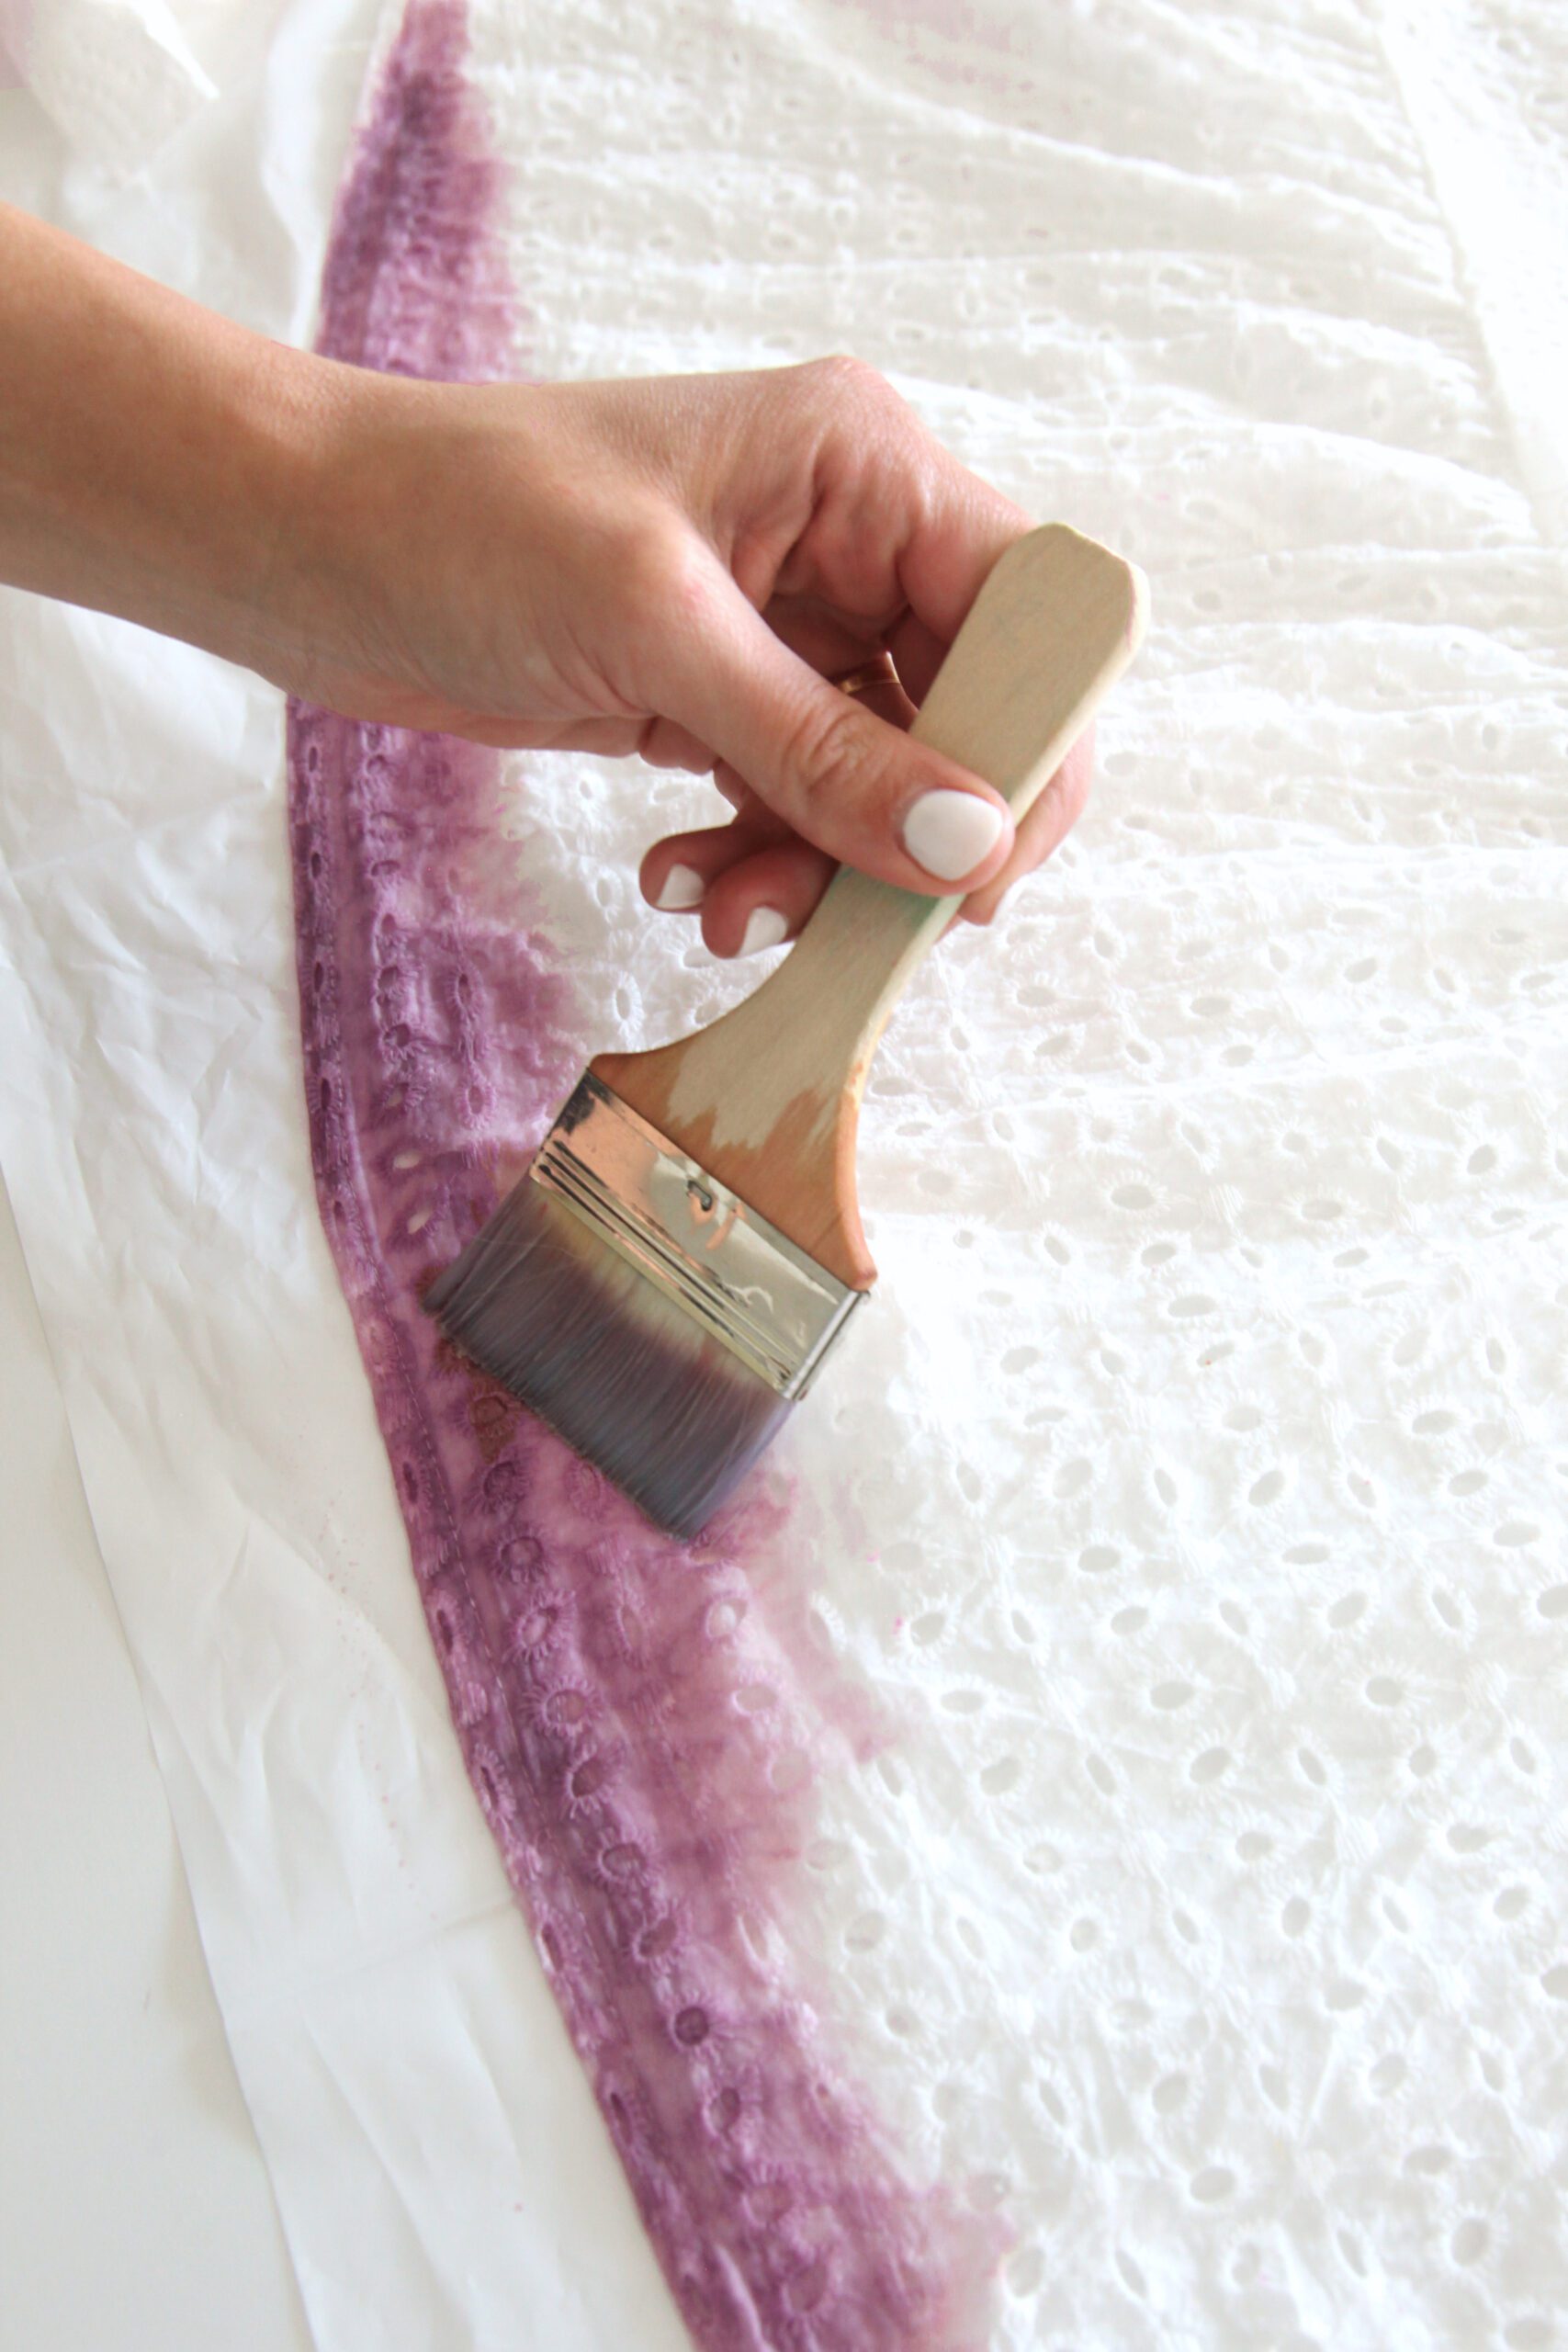
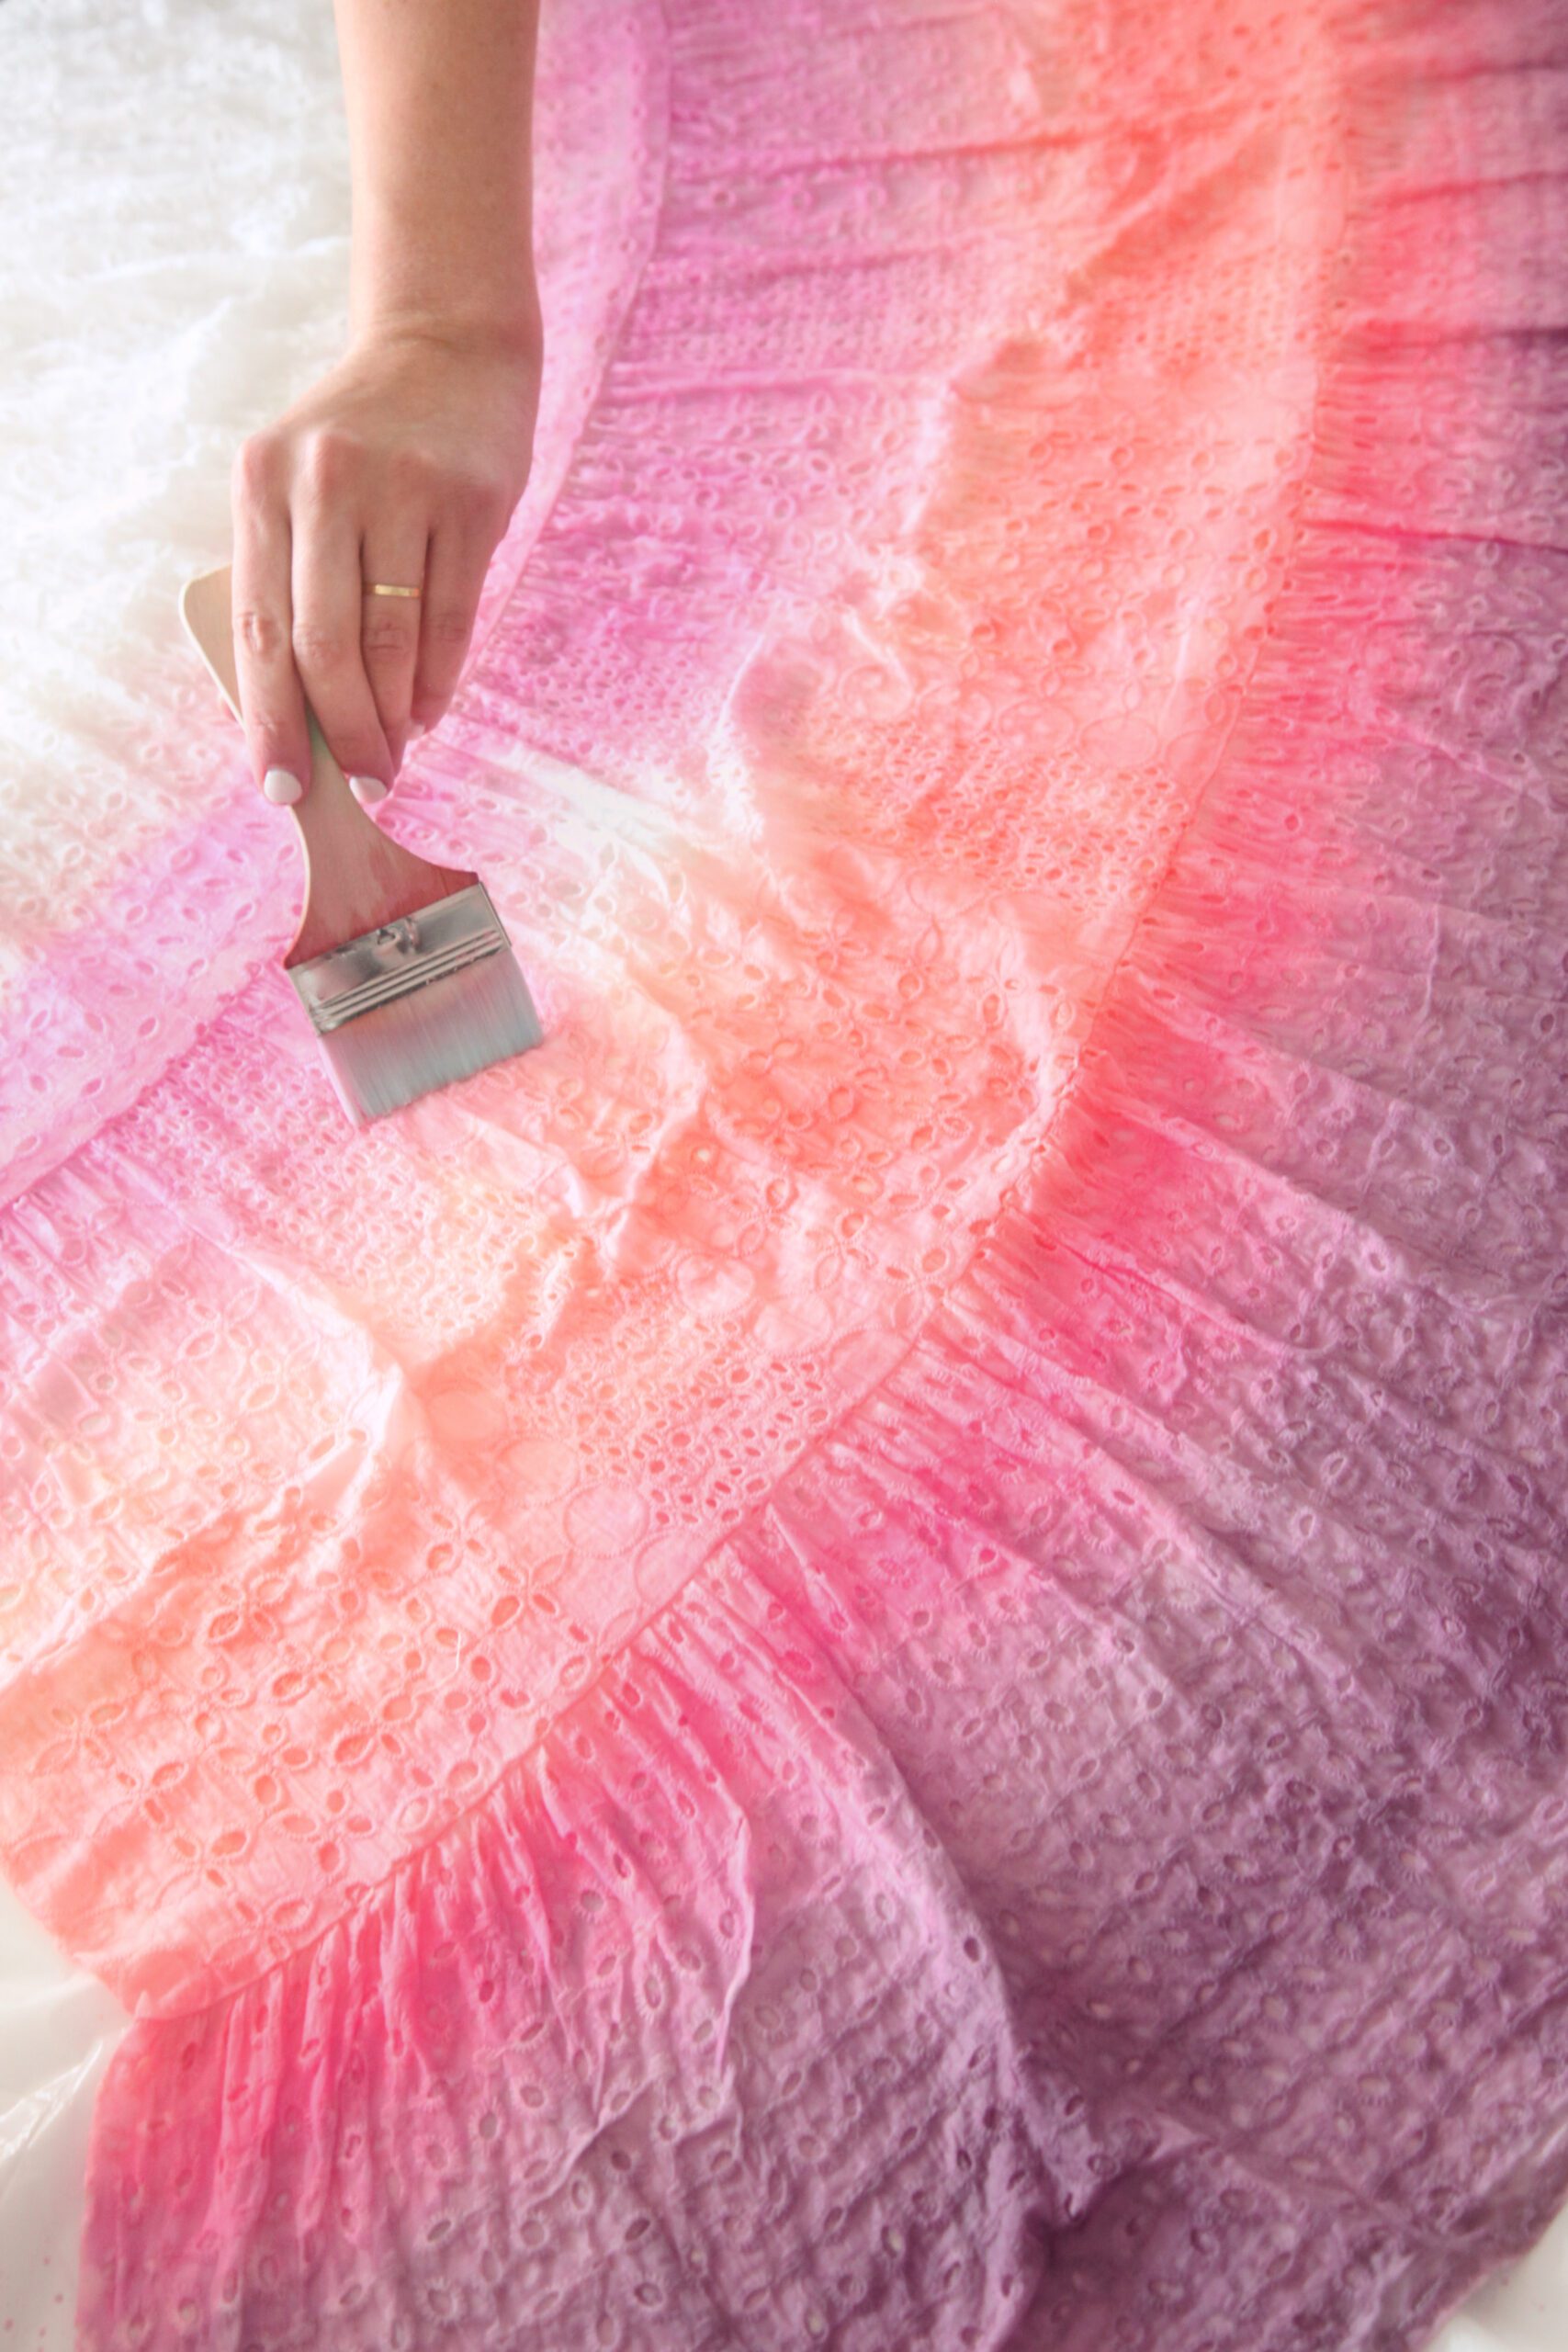
Step 3: Fan out the skirt of the dress on a flat surface and begin applying y0ur dye to the dress using a paint brush. Start at the hem of the dress and slowly paint across the base of the dress, working up as high as you’d like the first color to go.
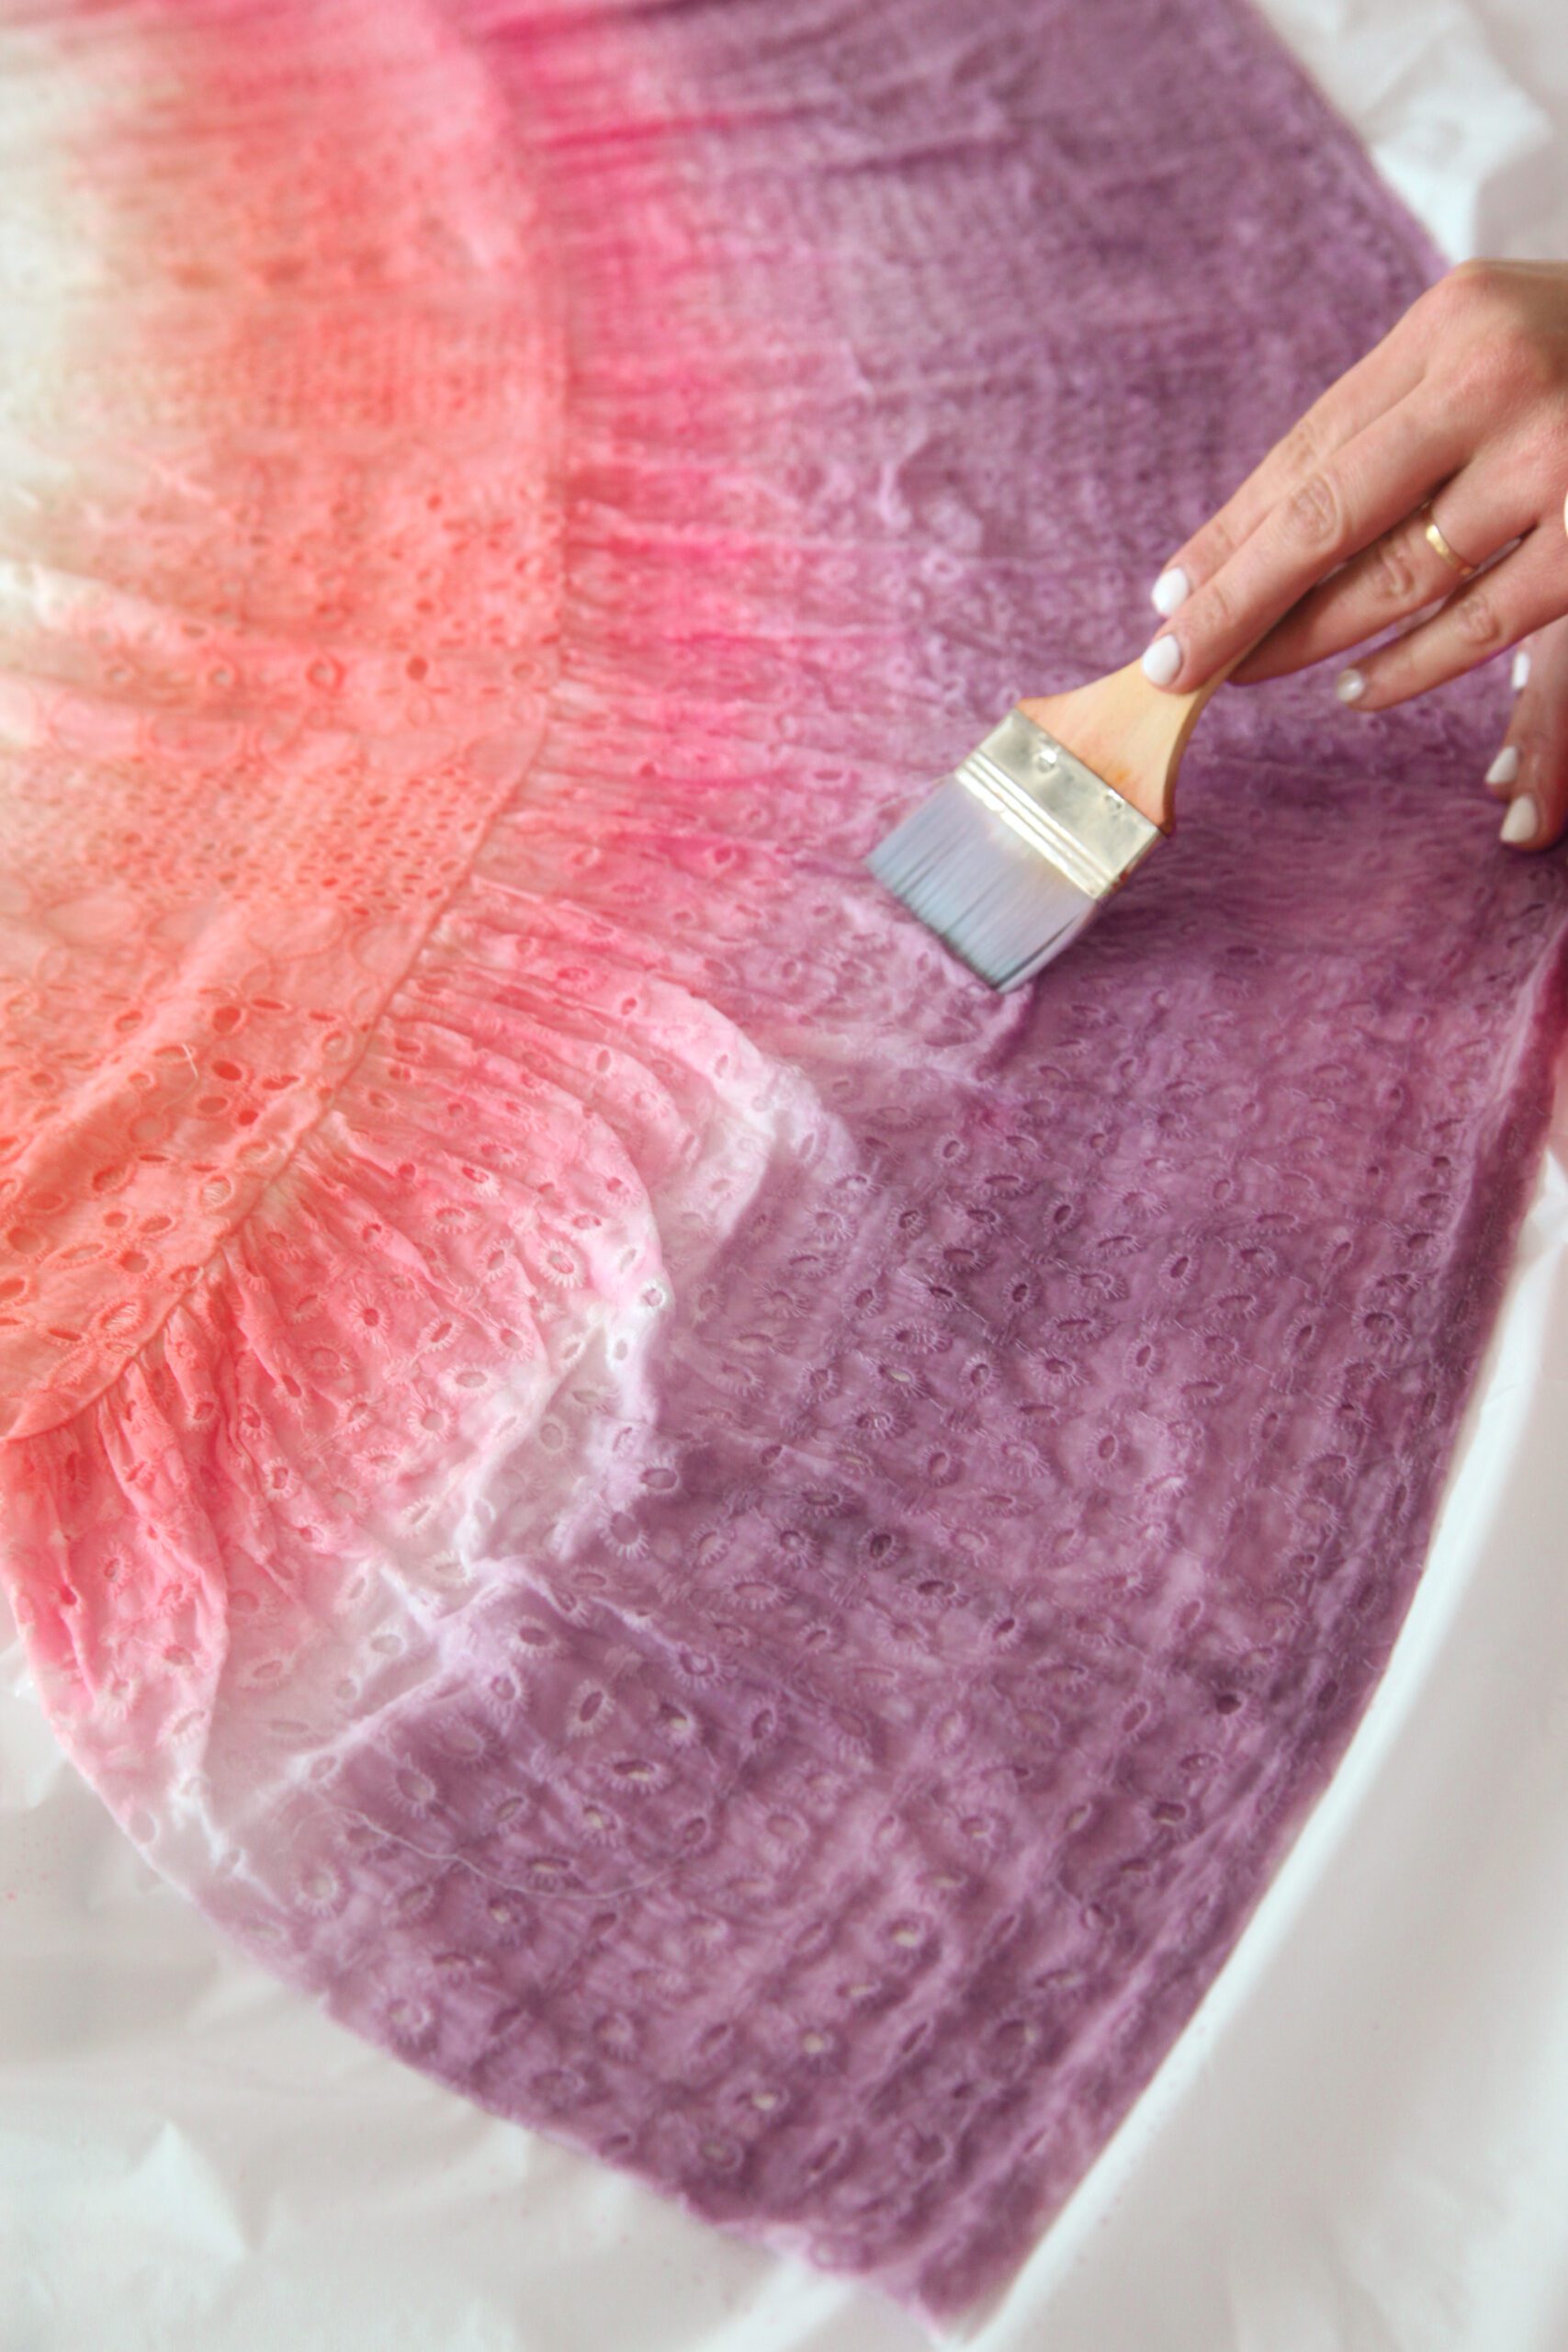
Step 4: After you’re satisfied with the first block of color, rinse your brush and begin applying the second color, blending it into the first color with the paint brush in order to create a blended transition, then working across and up the dress, repeating this process for each of the colors. Once each of the colors have been applied, set dye to the side (do not throw away).
Step 5: Once all of the dye is applied, hang the dress to set the dye (according to package directions, about 8 hours), then carefully rinse and wash only the dyed portion of the dress in the sink with gentle detergent. Once washed, hang the dress to dry completely.
Step 6: Once the dress was washed and dried, apply additional coats of dye for more color vibrancy, if desired. This is not a required step but one to consider if the dye dries lighter than your desired shade. To do this we repeated steps 3-5 using the remaining dye.
Tip: If you are nervous about the results with a more high-stakes project like this one, start with a lighter application of dye, set it, and then determine how you feel about the color. Don’t apply the highest vibrancy on the first application. This will give you more control over the final colors.
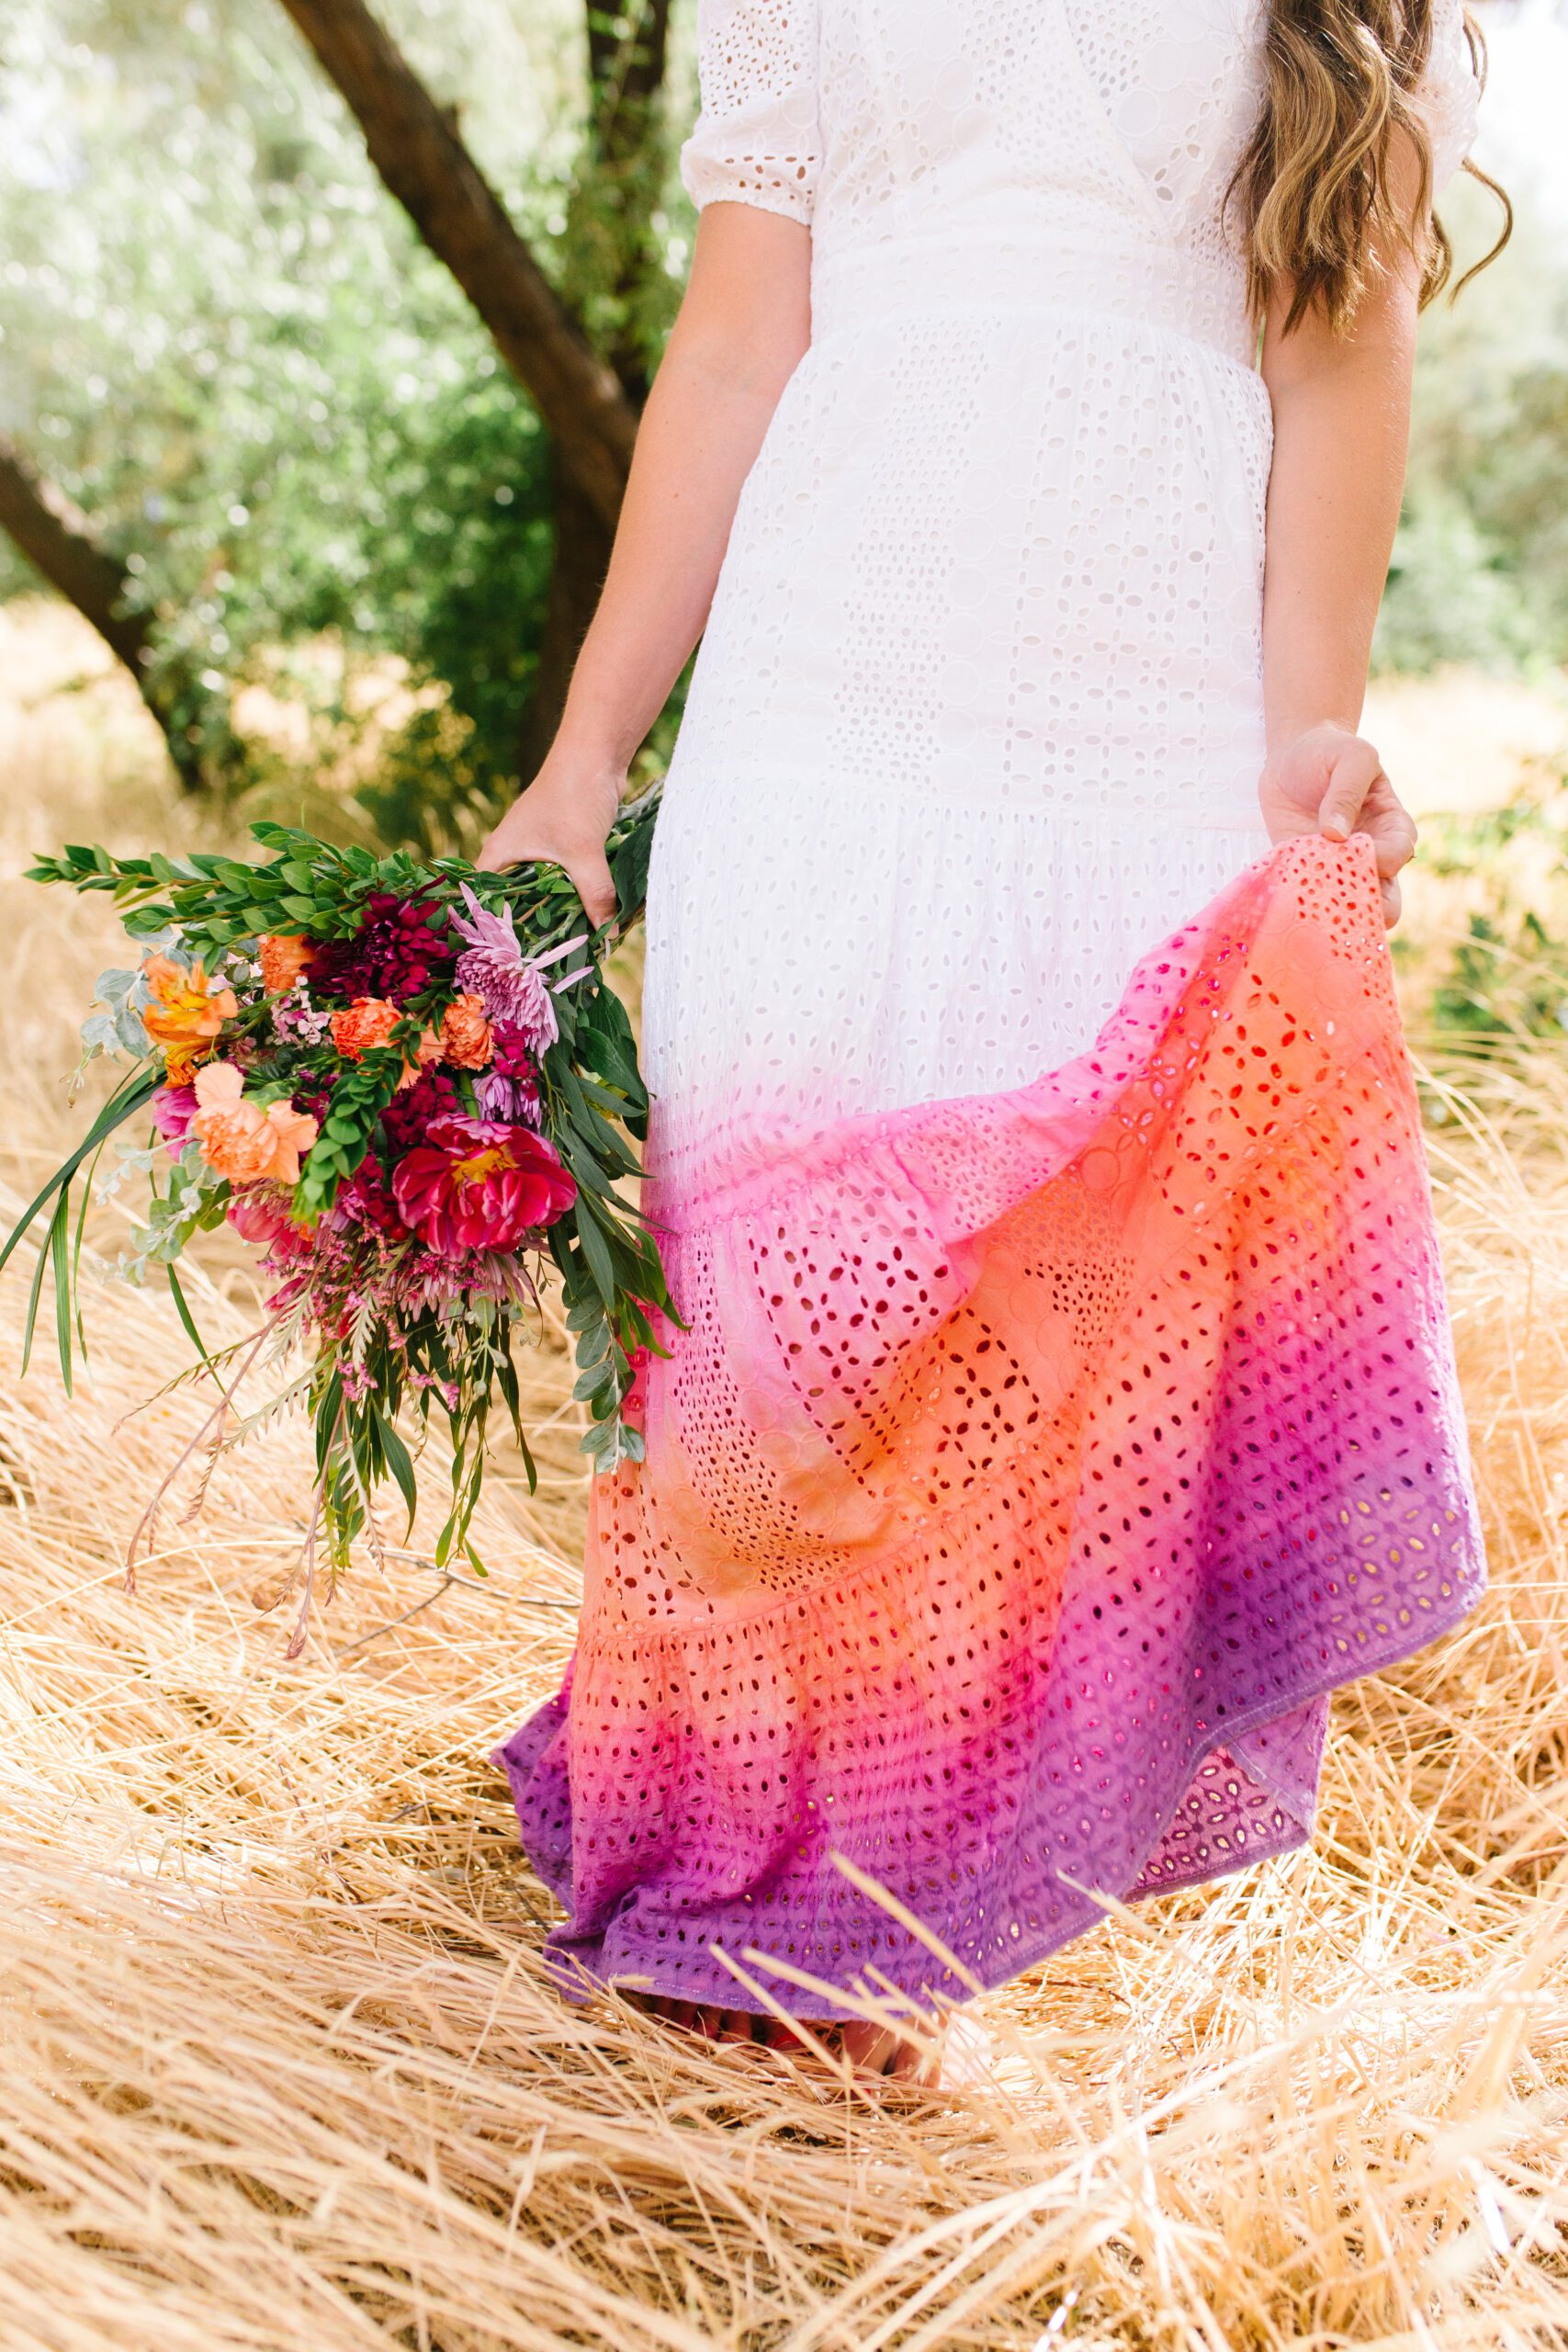
Can you believe it? We tie dyed a wedding dress! We are so obsessed with the results of this project and only wish we could get married again so that we could bask in this colorful, bohemian gorgeousness.
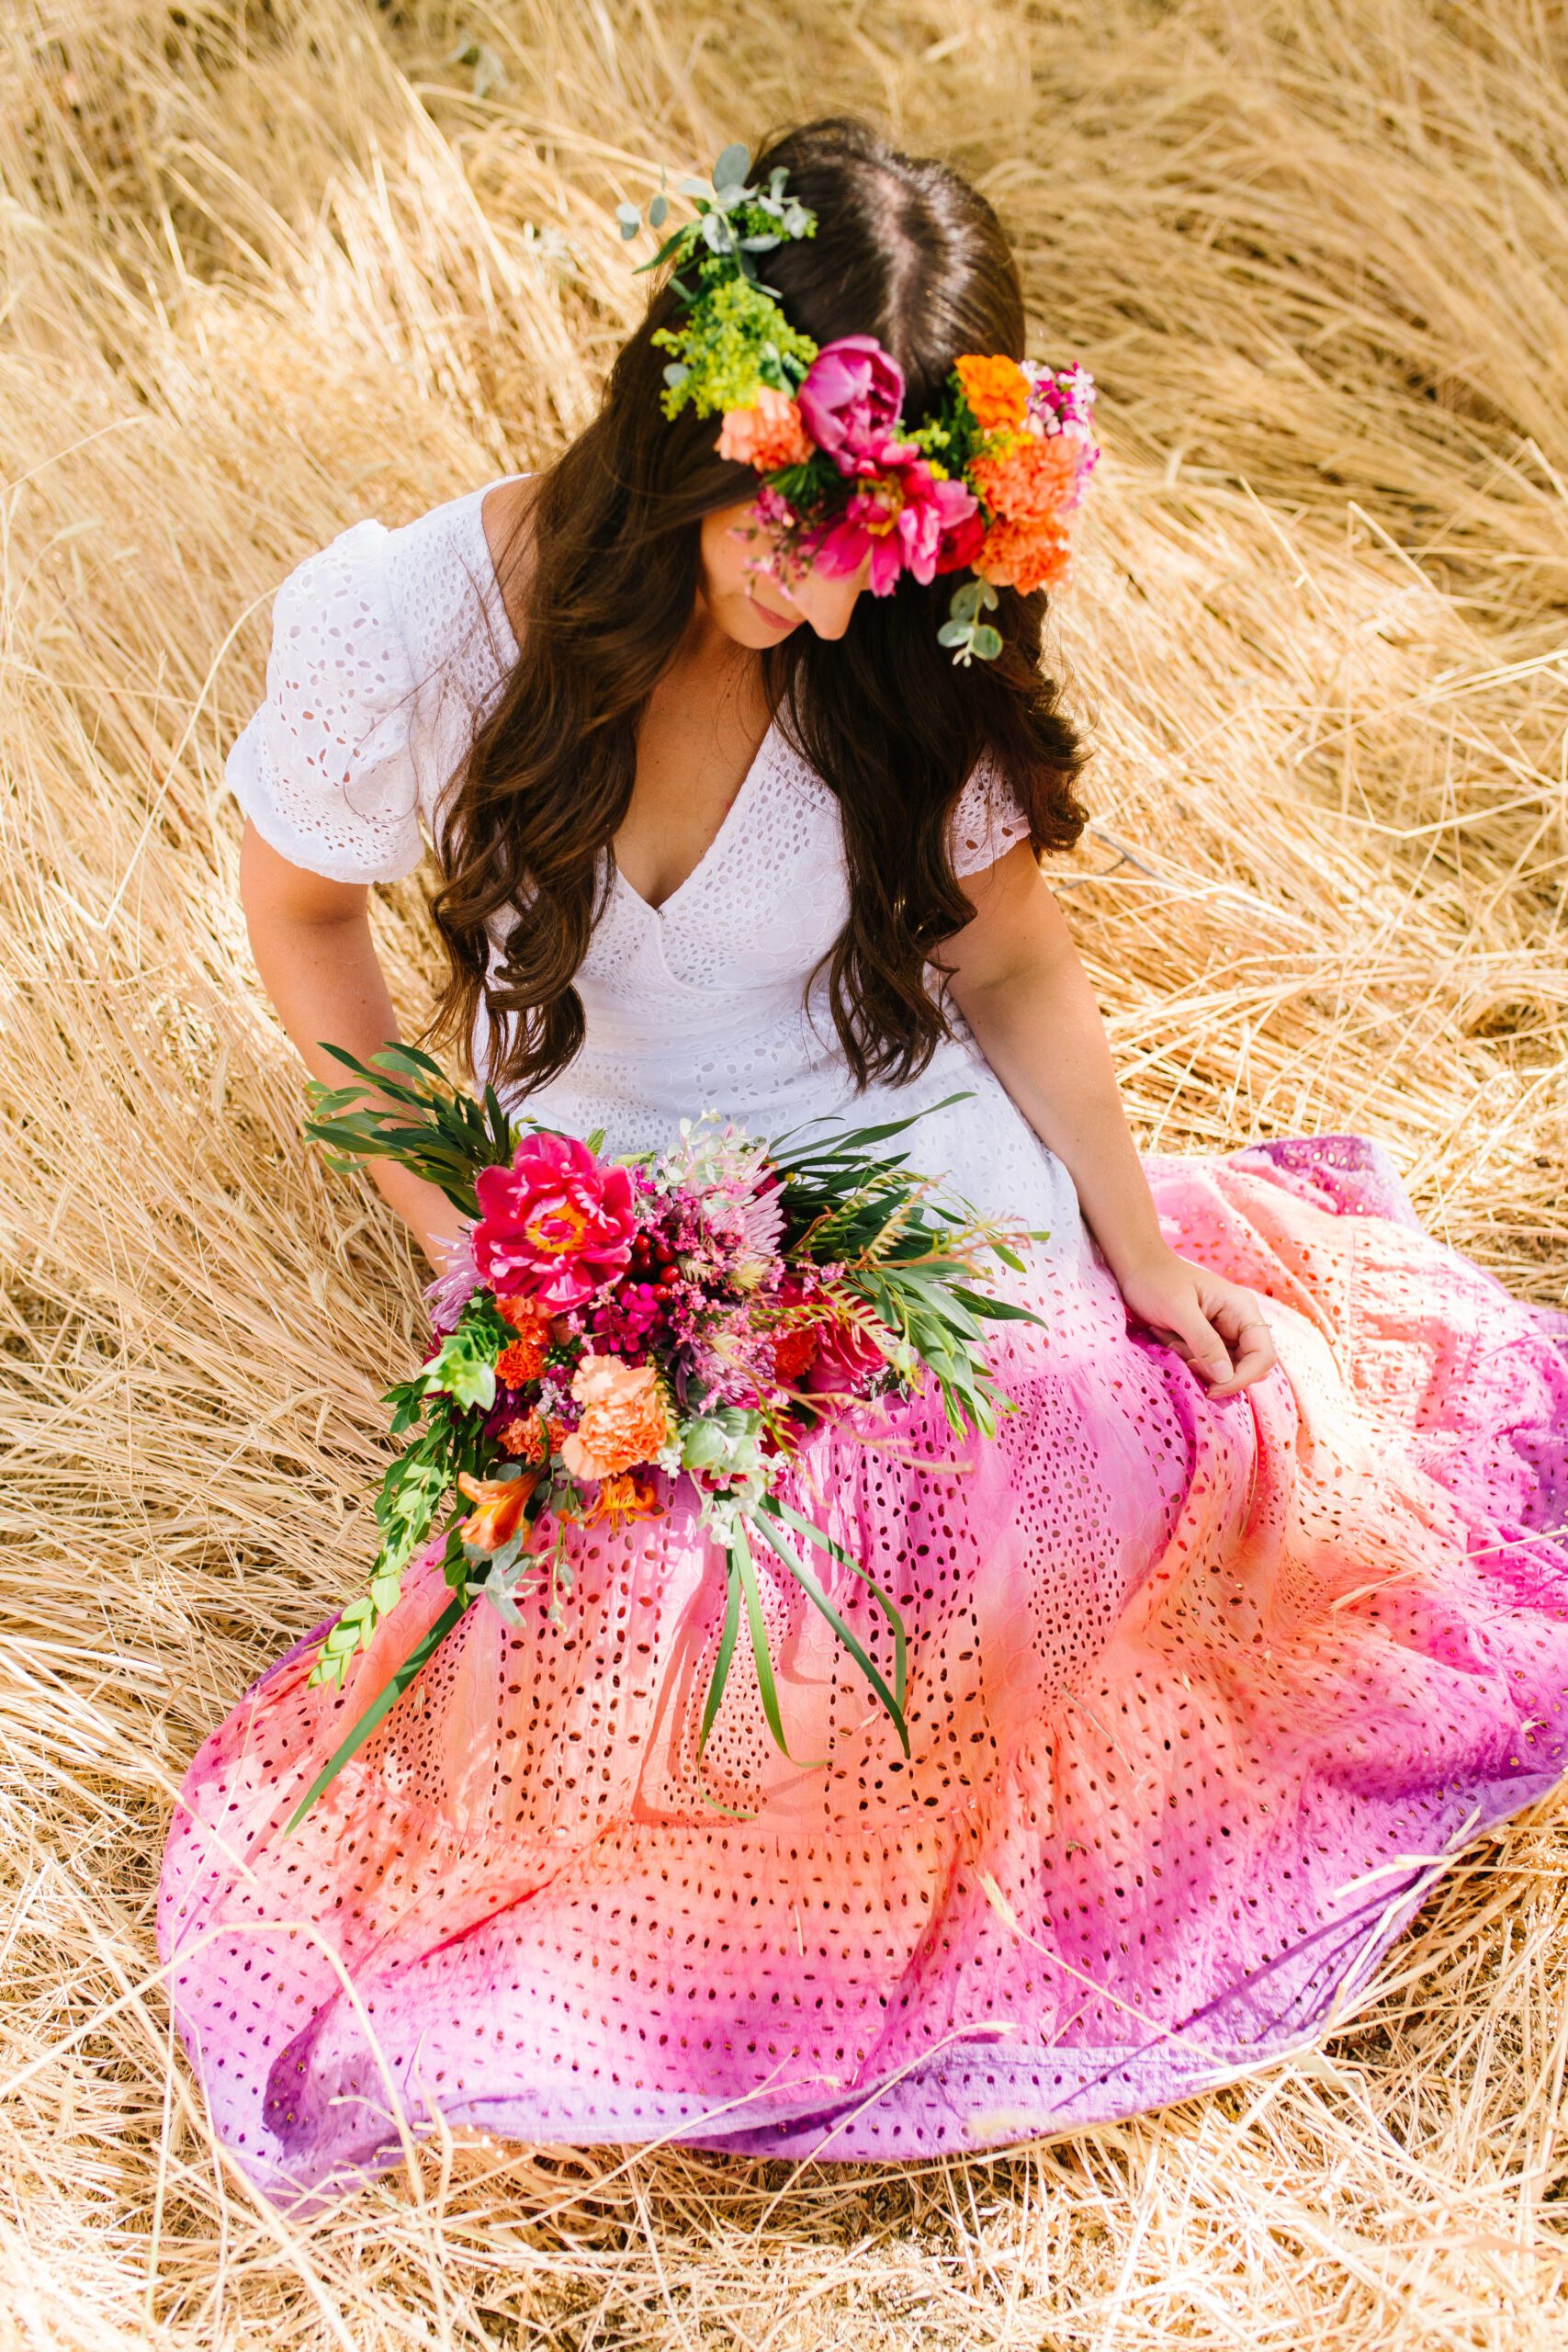
This project is so exciting for brides to consider because the results are so unique and colors can be chosen to compliment any wedding color scheme! And don’t even get us started on the possibilities for bridesmaid dressed that compliment this one. The mind REELS.
 Learn more about tie dye in our book DIY Guide to Tie Dye Style: The Basics and WAY Beyond!
Happy Making!
-Sam and Liz

