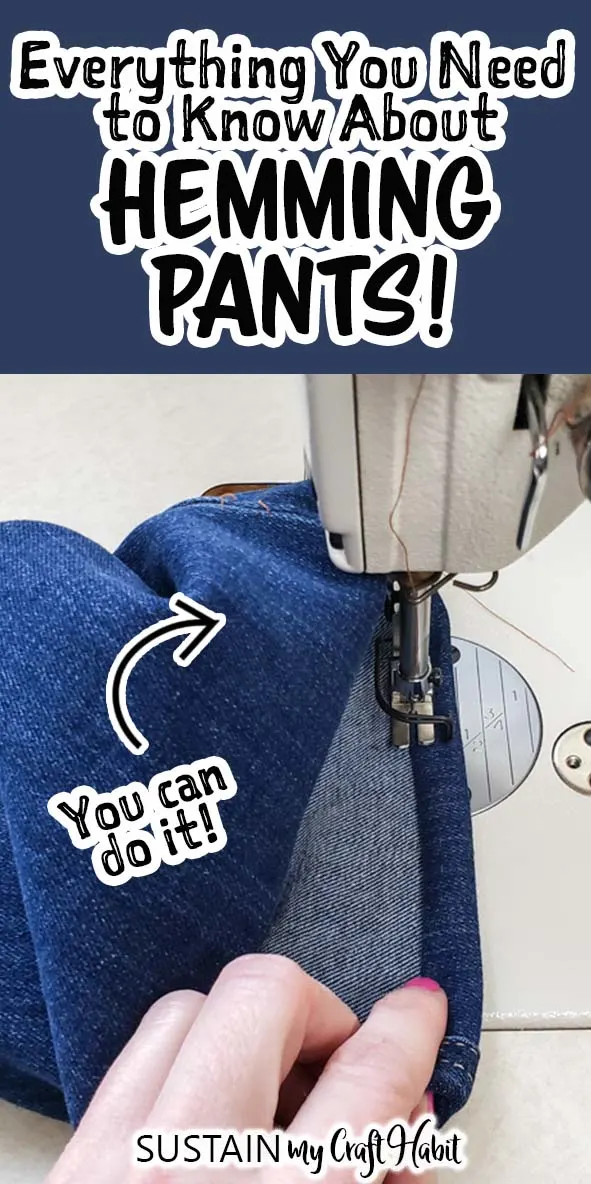
Whether they’re tapered, straight leg, bootleg, flared or jeggings, jeans or leather we have you covered with our ultimate guide of everything you need to know to hem pants! We show you how to hem pants by hand or machine including a blind/invisible hem, stitched hem, taped hem and even frayed hem!

There’s (almost) no pant you can’t hem!
I love this time in fashion…anything goes! Although it’s true there are noticeable trends but whether you decide to follow them or not is entirely up to you. Comfort is key and it’s about what you feel good in and what suits your personal style.
Want to receive a ton of inspiration and money saving ideas for decorating, gift-giving and crafting? Join HERE!
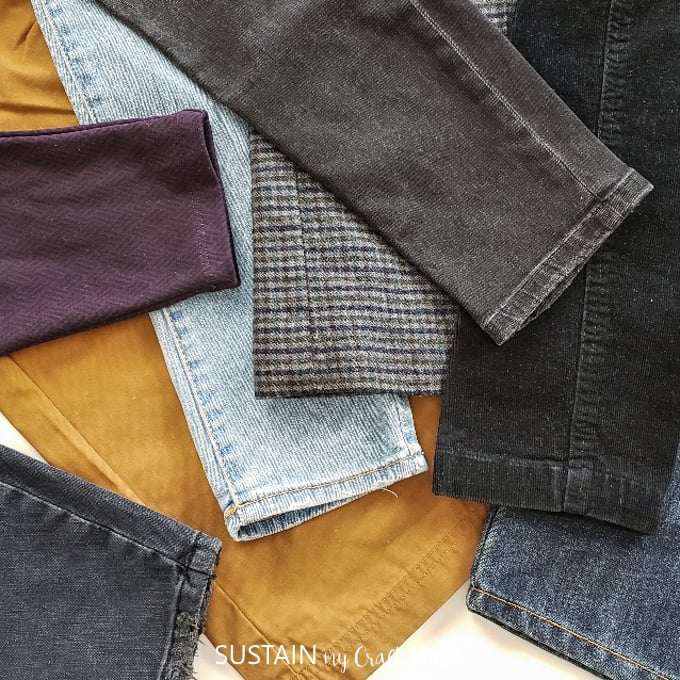
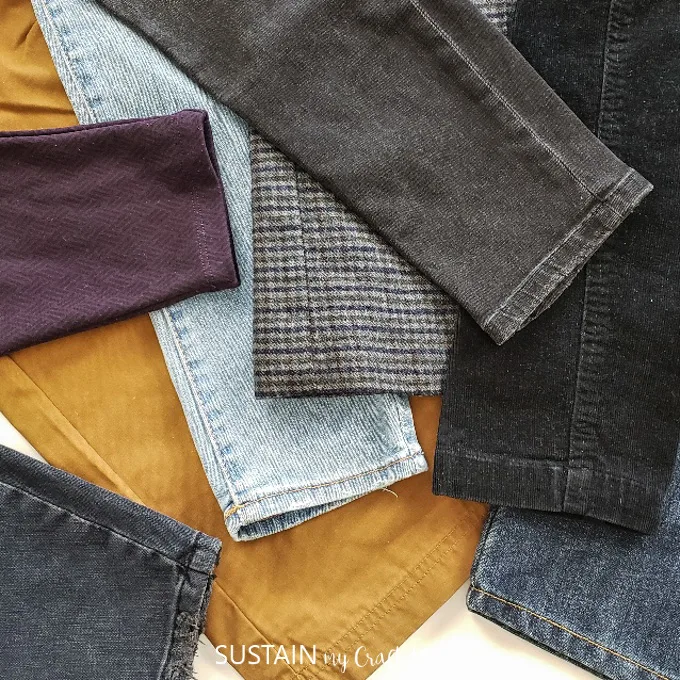
As the designated “sewer” in my family, I am often given pants from all my family members to hem. I’ve come across all types of pants from casual pants like jeans and work pants to dress slacks and jeggings.
Different Types of Pant Hems
Let’s start by defining the different types of hems so you can better understand how to properly shorten your next pair of pants.
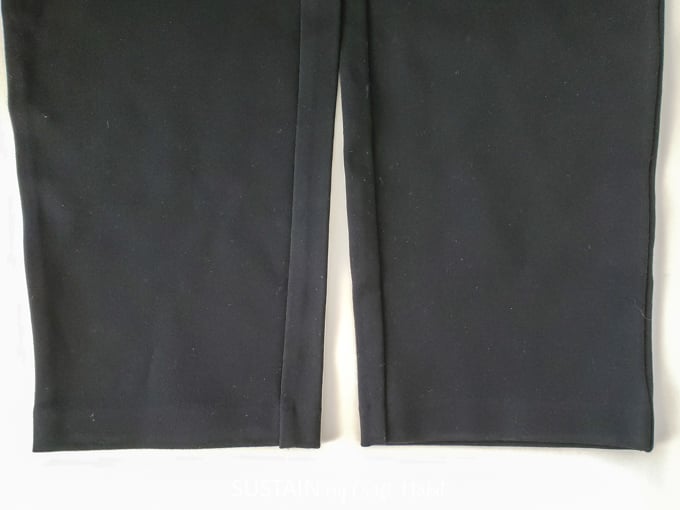
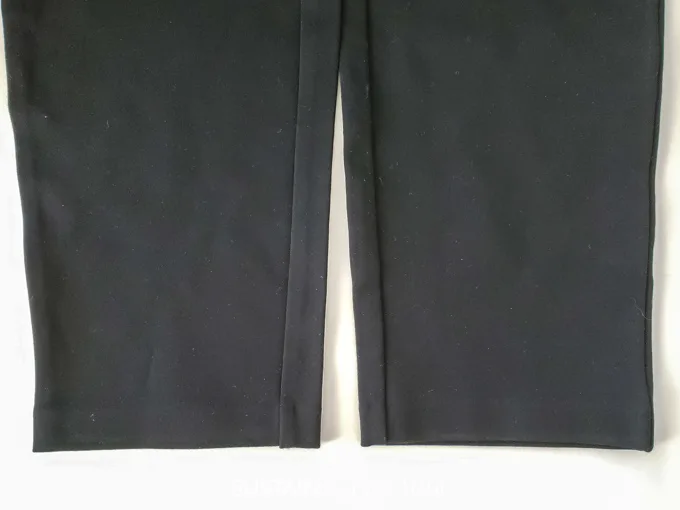
- BLIND / INVISIBLE HEM – this is a stitch that is NOT VISIBLE on the right side of your leg opening. The apparel companies use a blind stitch machine to finish the hem BUT it can be replicated with sewing by hand. An example would be a pair of dress pants. Skip to How to Sew an Invisible Hem
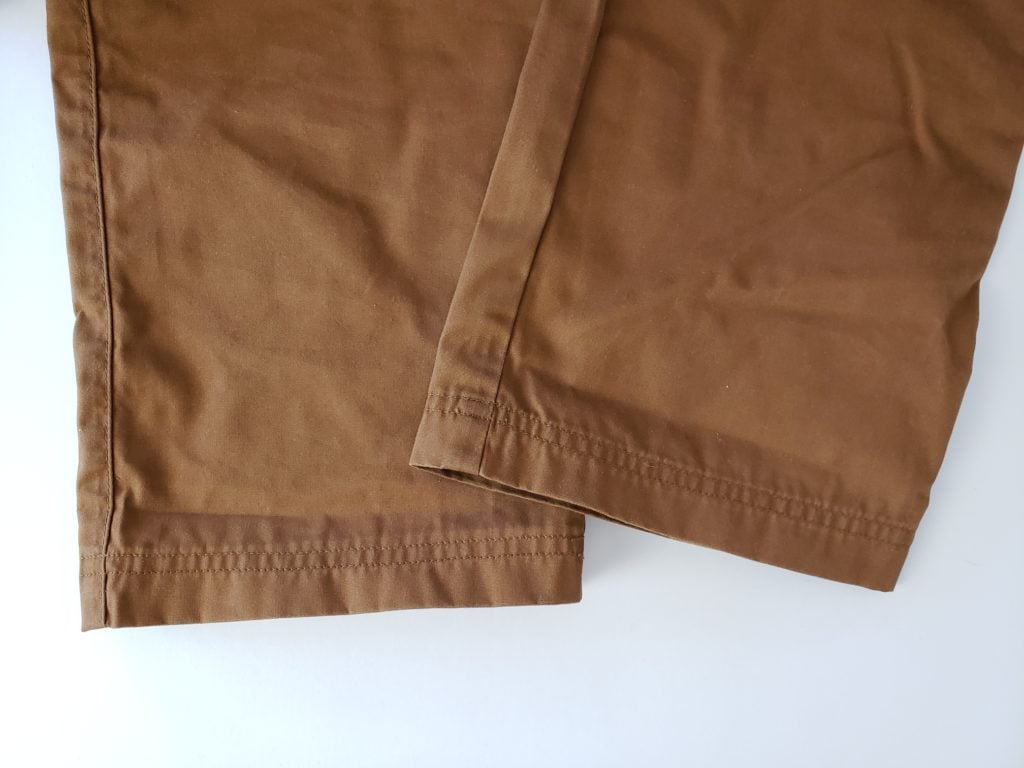
- STITCHED HEM – this is a stitch that IS VISIBLE on the right side of your leg opening. It could be a single stitch or double stitch. It is sewn using a regular sewing machine. Some examples would be jeans, jeggings, cargo pants and pajama pants. Skip to How to Make a Stitched Hem.

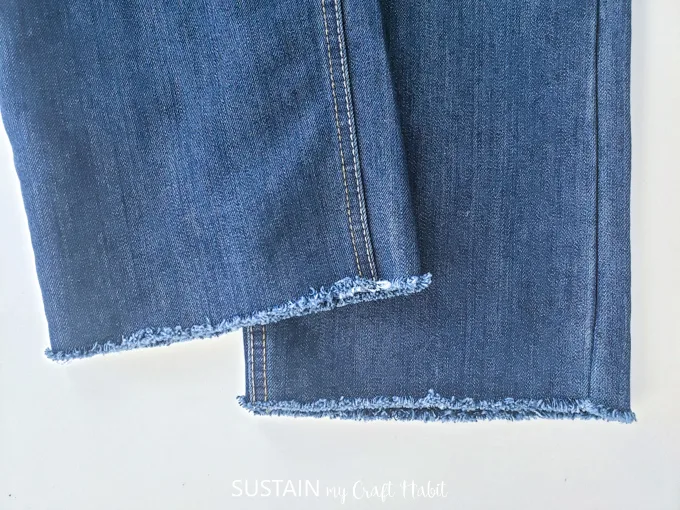
- FRAYED HEM – this is a hem that is left unfinished (not sewn) and is left to fray and unravel. An example would be a pair of ripped jeans or a denim skirt. Skip to How to Make a Frayed Hem.

- TAPED HEM – this is a type of hem that is not visible on the right side. Instead of using a sewing machine, you would use a piece of double sided fabric tape. For example, I would use this method to hem a pair of leather pants. Skip to How to Make a Taped Hem.
Other things to consider when hemming pants:
When deciding how to hem pants, it is best to try and mimic the original hem to maintain the style. So for example, if you have a pair of dress pants with a blind hem in need of hemming, do an invisible stitch by hand as opposed to a machine stitch. An exception to this might be with jeans if you want to change the look and go from a finished hem to a frayed, deconstructed hem because that style is in fashion.
In addition to looking at the type of hem, you need to consider the silhouette of the pant. This will also play a factor in how to hem pants. So ask yourself, is it one of the following:
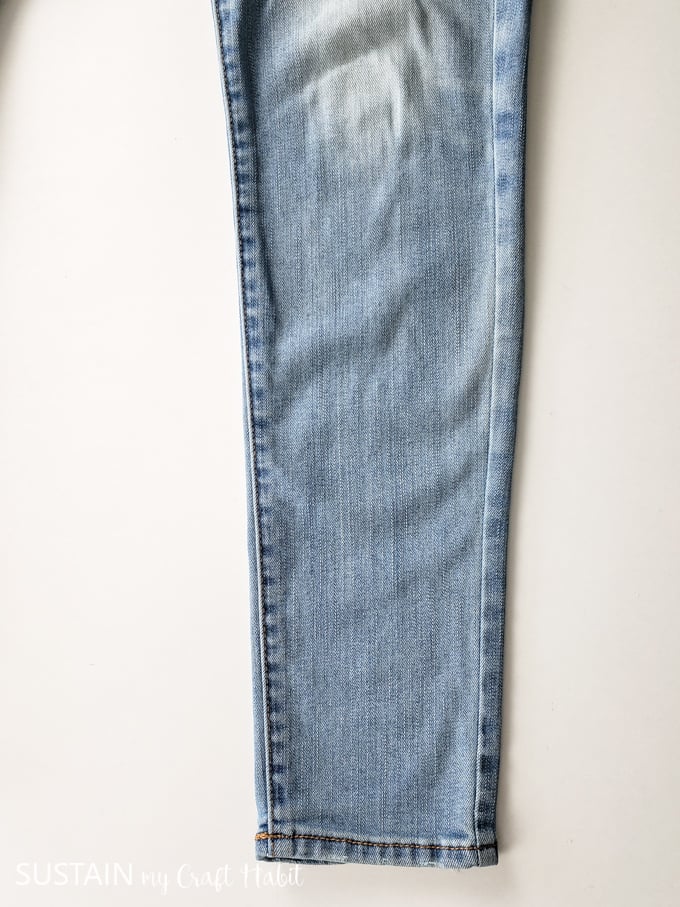
- TAPERED LEG – also known as a skinny leg as in skinny jeans, this style of pant fits slim around the whole leg and ankle.
- STRAIGHT LEG – wider than the tapered/skinny leg, it narrows towards the ankle but not as drastically as the skinny leg
- BOOTLEG – is a wider leg pant, meant to fit over a pair of boots. The leg opening is about the same or slightly wider than the knee width.
- WIDE LEG – is a style of pant where the leg shape is straight but fits loose from thigh to leg opening .
- FLARED LEG – this type of leg is wider at the leg opening than at the knee creating a flared effect, picture a pair of 70s bell-bottom jeans.

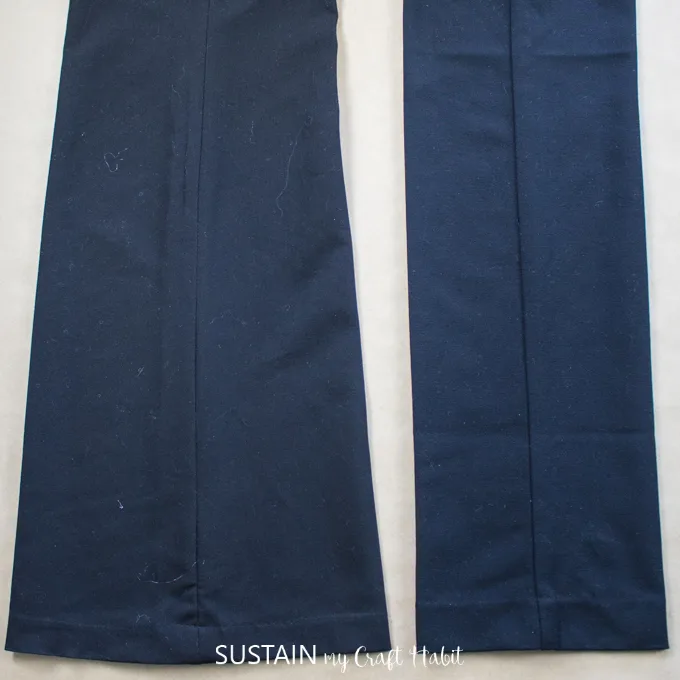
Tapered Leg 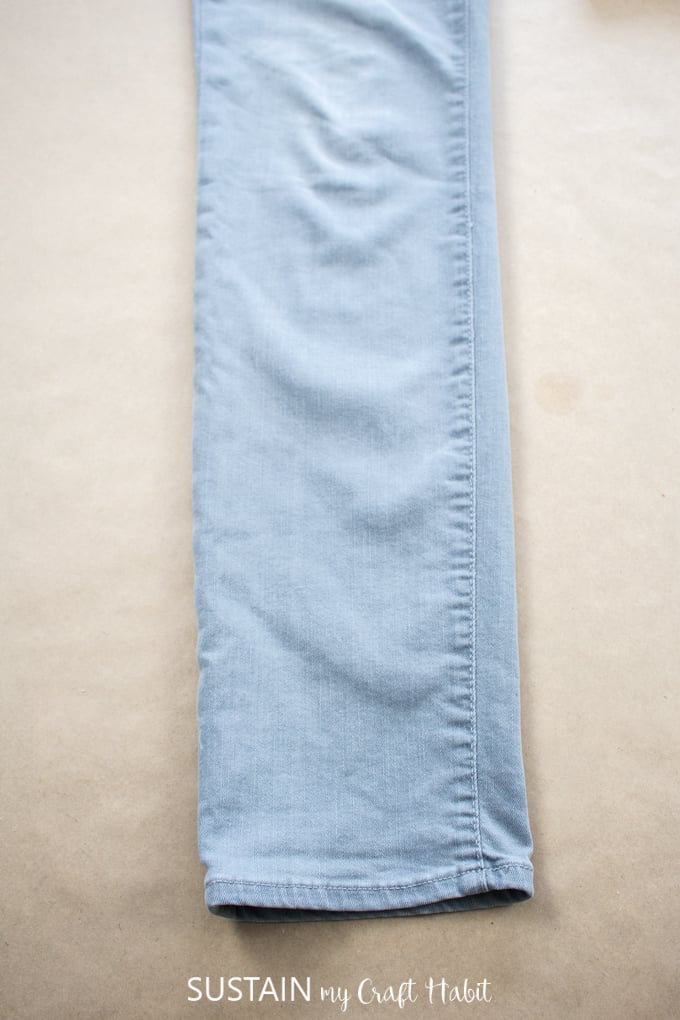

Straight Leg 
Flared leg

Now for the ULTIMATE how-to hem pants guide….
1. Making an Invisible Hem with Hand Sewing
Most often, dress pants have a blind hem meaning there are no visible stitch lines at the hem. This is because they use a blind stitch machine which creates an invisible seam. Since we don’t have these machines at home, the best way to get the same effect is by hand sewing.
The downside here is that it’s not entirely done by hand…some sewing with a machine is still needed (see below for more on that).
Supplies Needed to Make an Invisible Hem with Hand Sewing:
- Hands 🙂
- Sewing machine with zig zag stitch or serger for finishing the cut edge
- Sewing needle
- Sewing thread in matching color
- Measuring tape or ruler, pins, chalk
- Fabric scissors
How to Hem Pants by Hand:
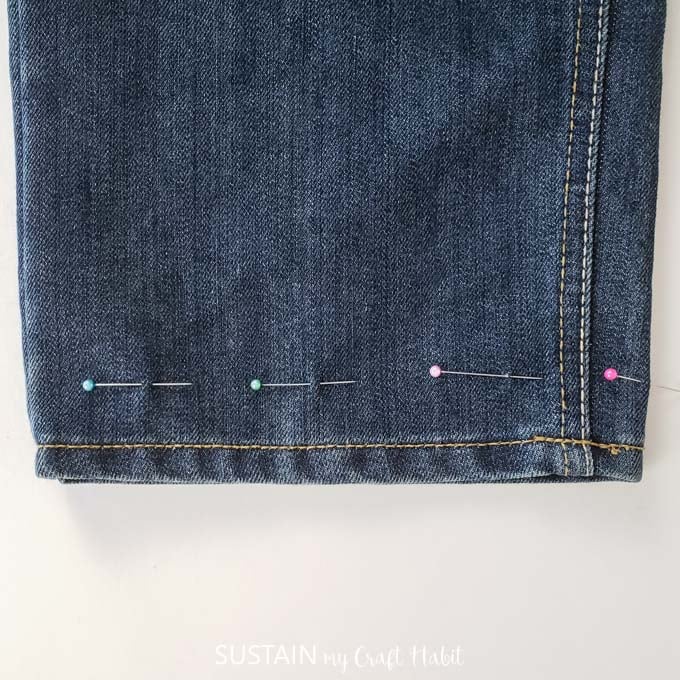
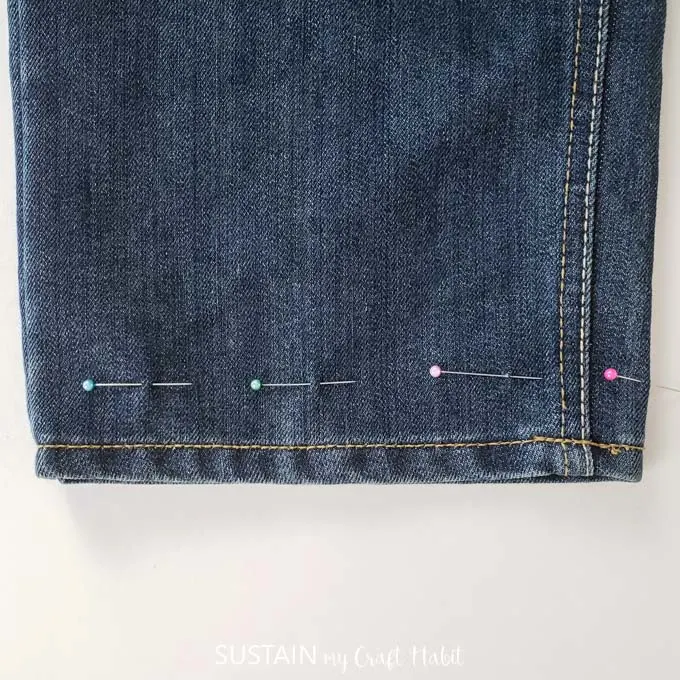
The first step is to figure out where you want your new hem to be. Try the pant on with a pair of shoes. Fold under and pin in place to mark where you want the new hem to be.
Before continuing, ask yourself: “what type of pant leg is it?”
For Tapered / Straight / Bootcut / Wide Leg
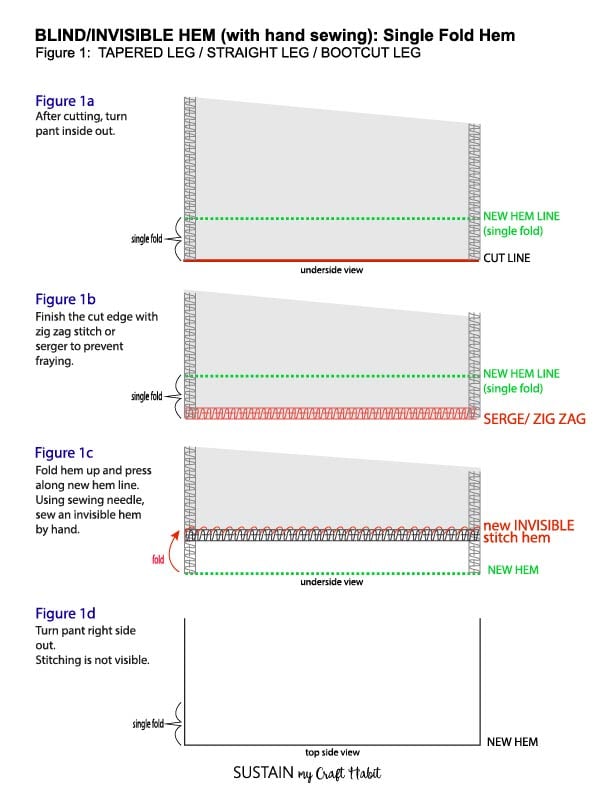

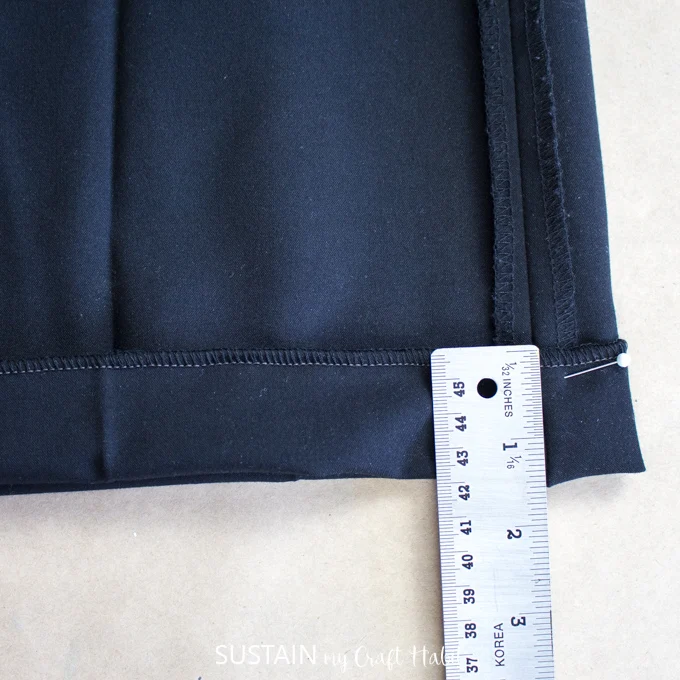
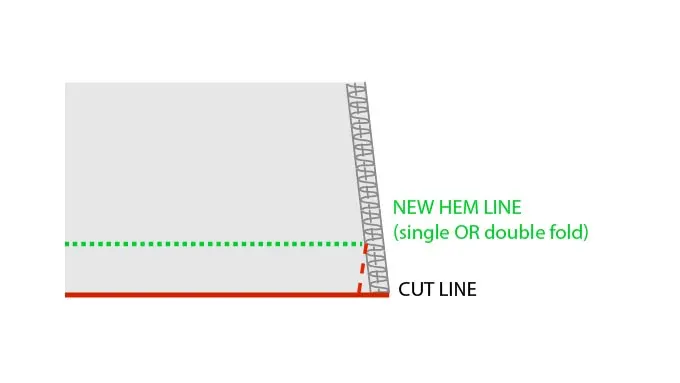
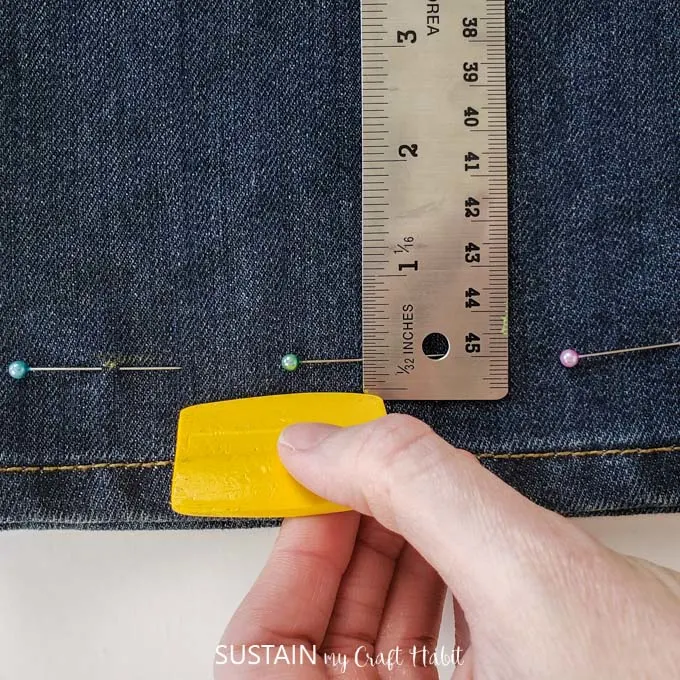
Remember that the marked point or folded edge is the new hem line. Add at least an extra 1” (or keep the same fold-over amount as the original hem had) to the length for the fold-over amount. Remove the previous stitch and unfold to get the full length if necessary.
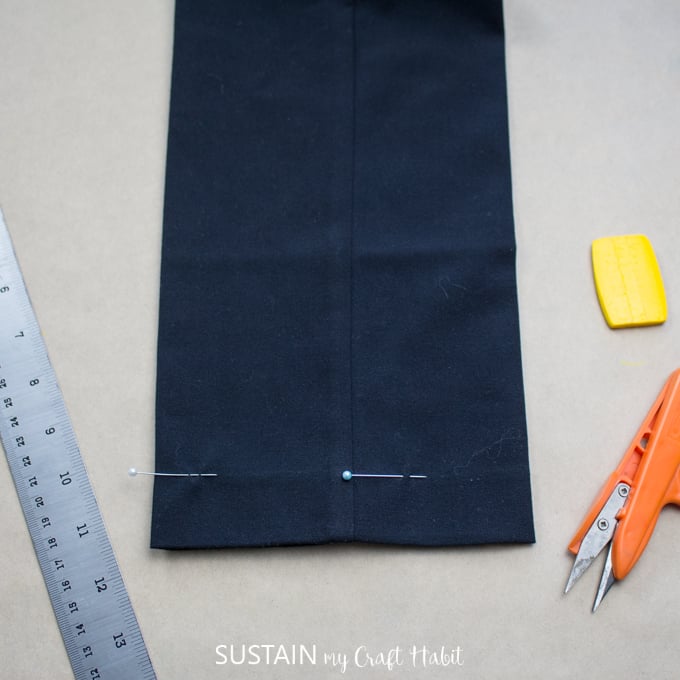
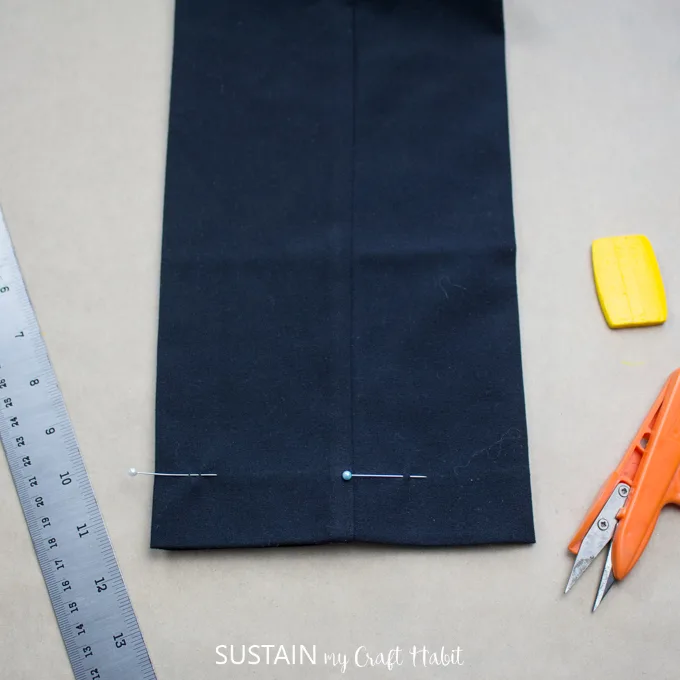

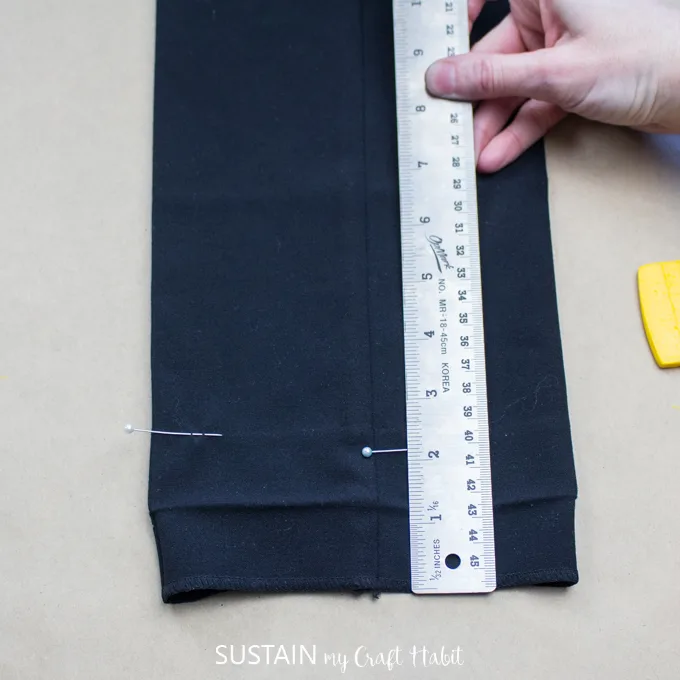
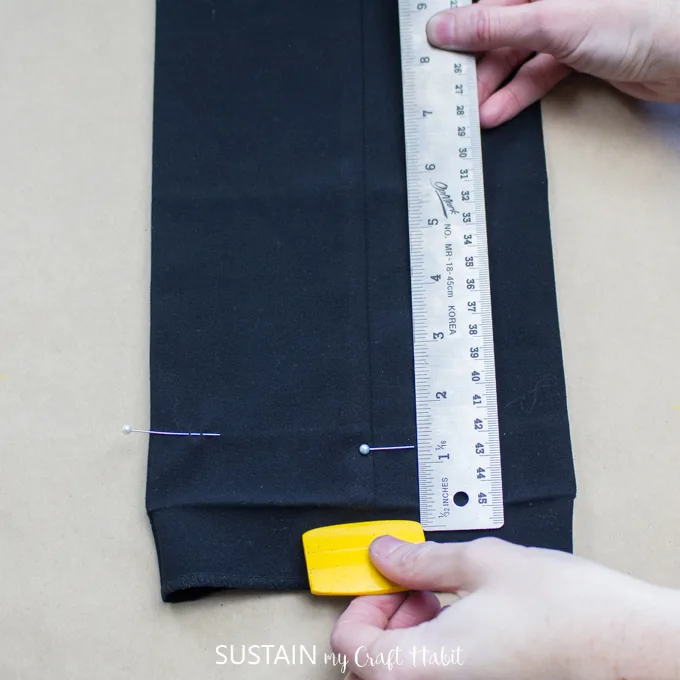
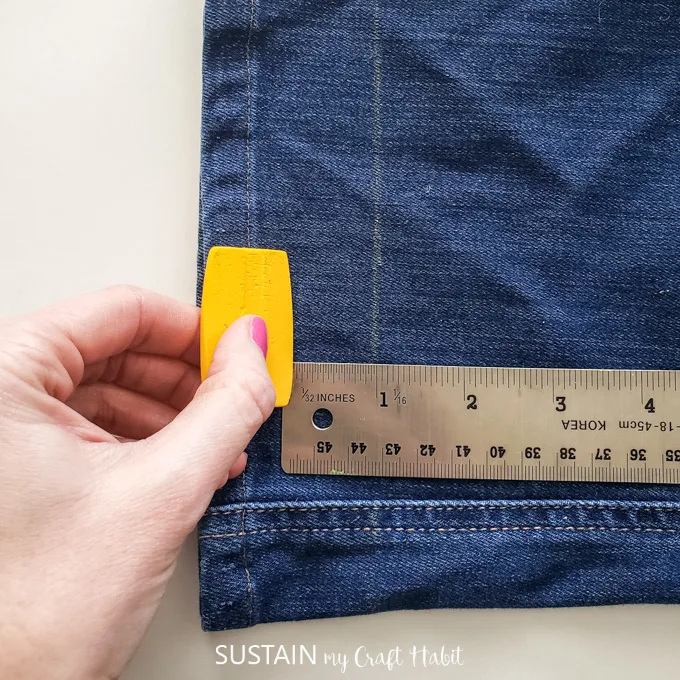
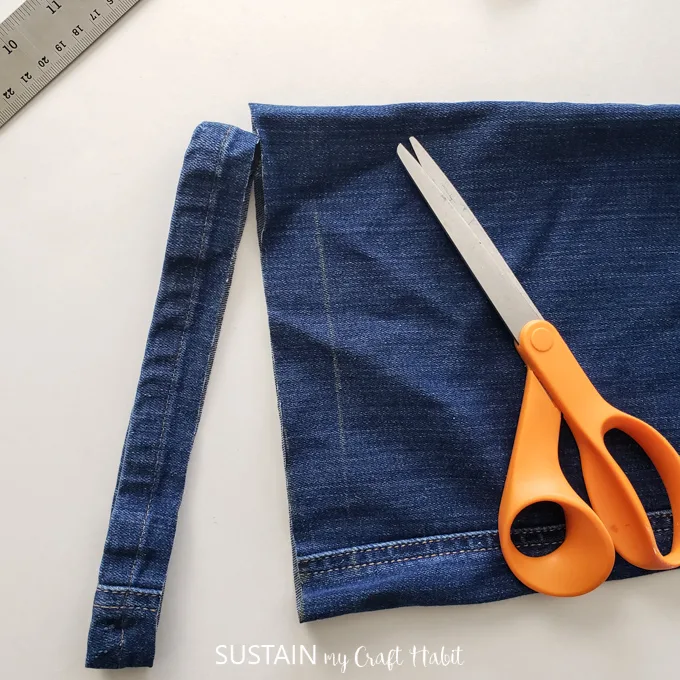
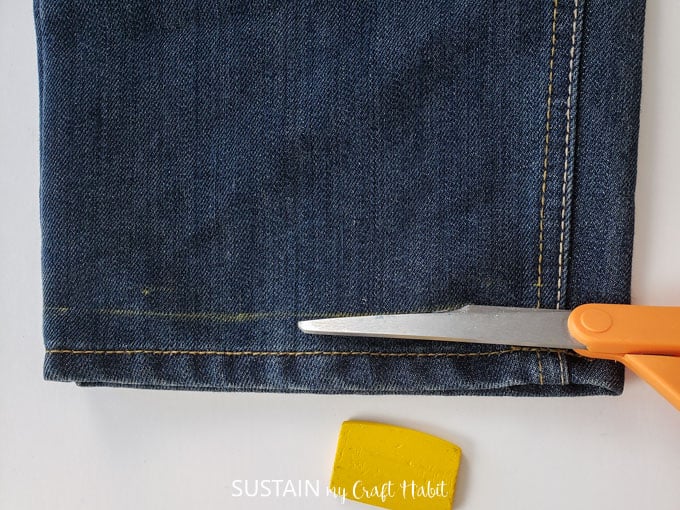
Mark the cut line using a ruler and washable chalk or wax. Cut along the marked line and discard the extra length. Repeat for the other pant leg.

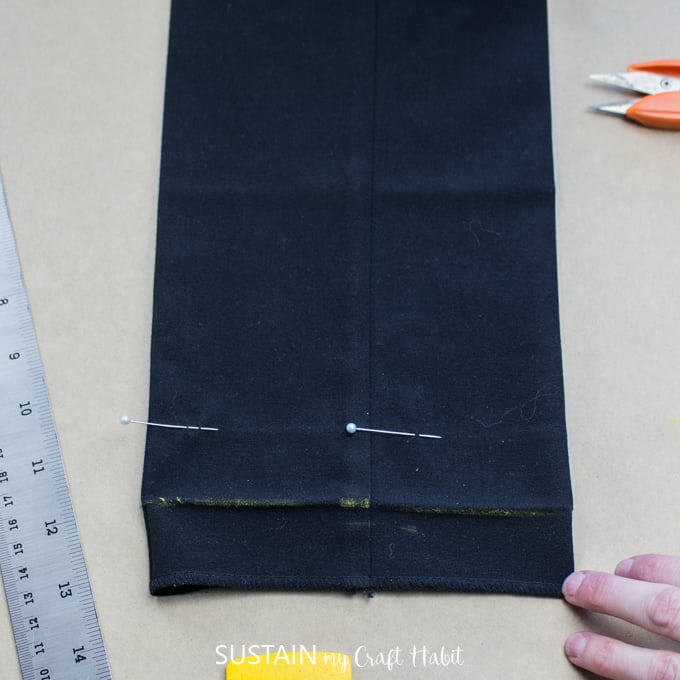
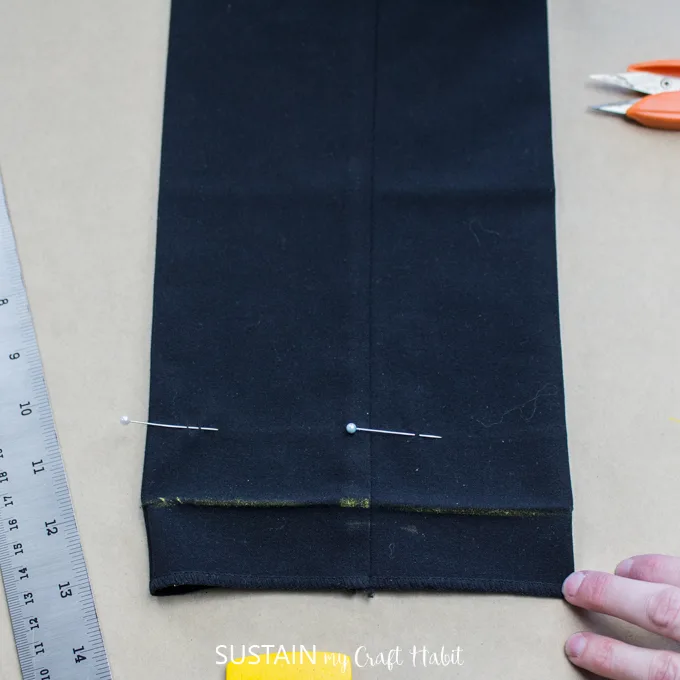


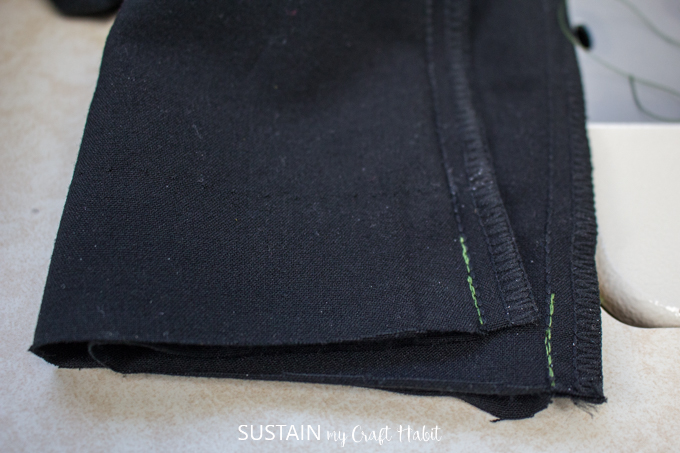
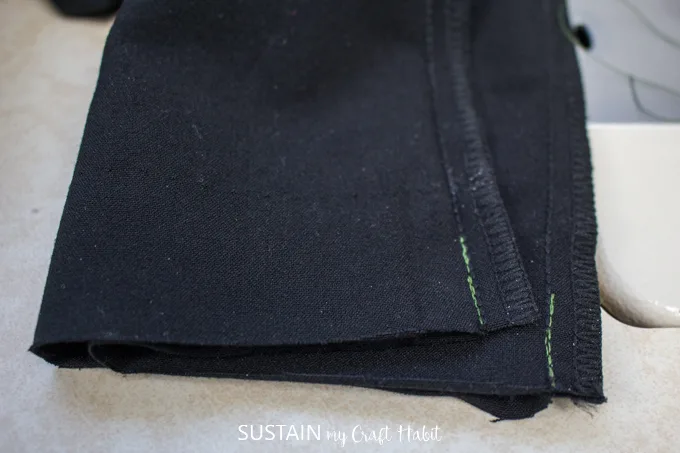
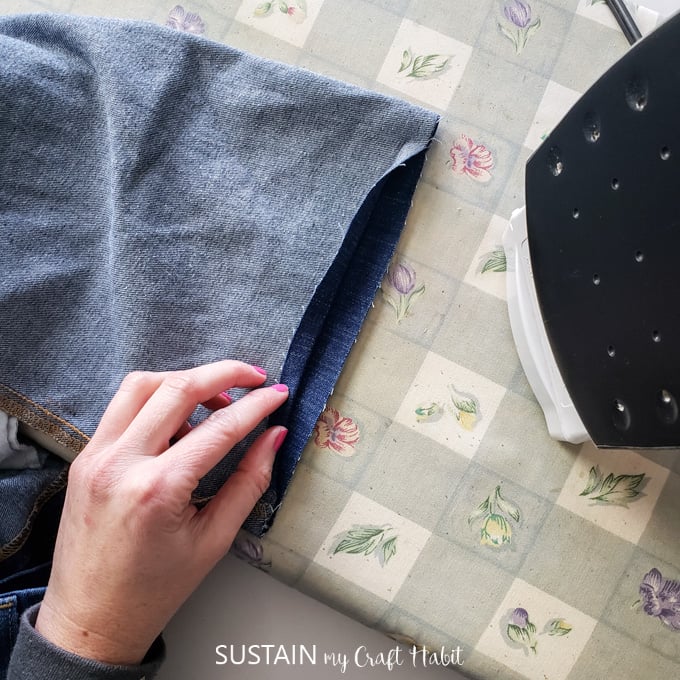
To secure the leg seams after cutting, stitch over the existing seams as shown. I used a contrast color so it is more visible (but best to use a matching thread color:)).
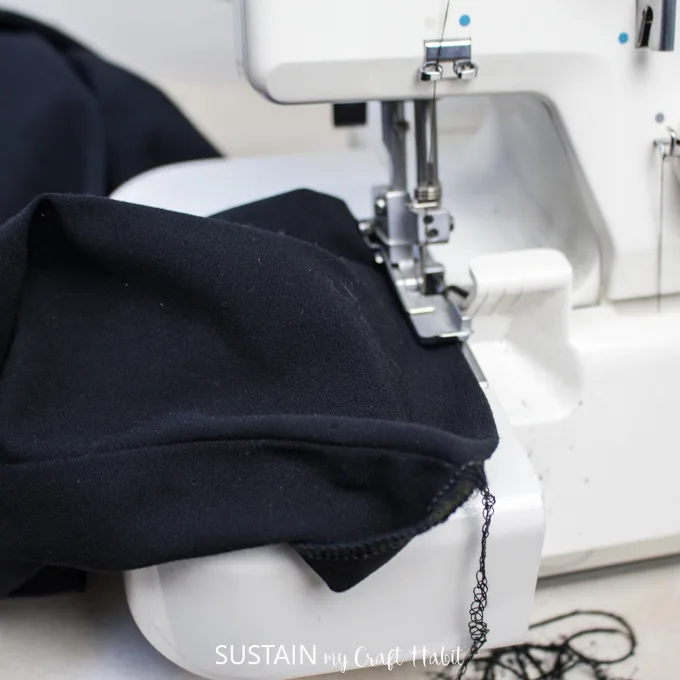
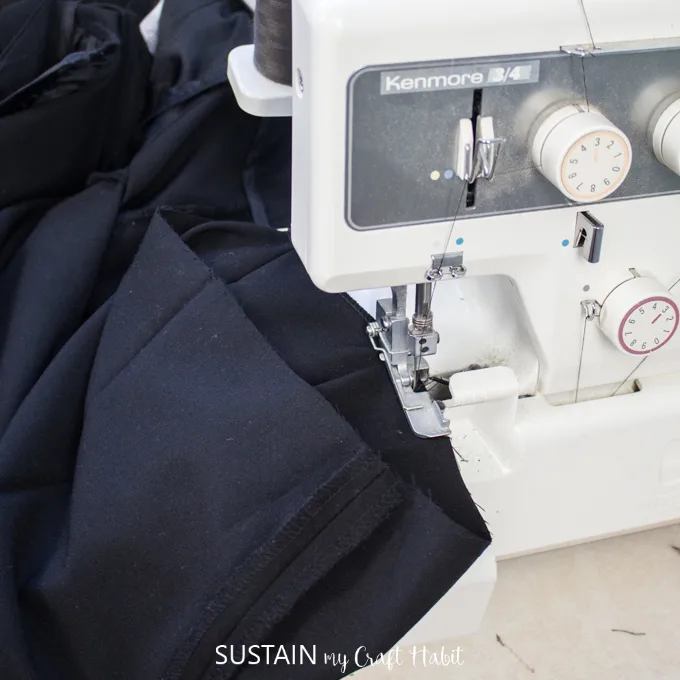
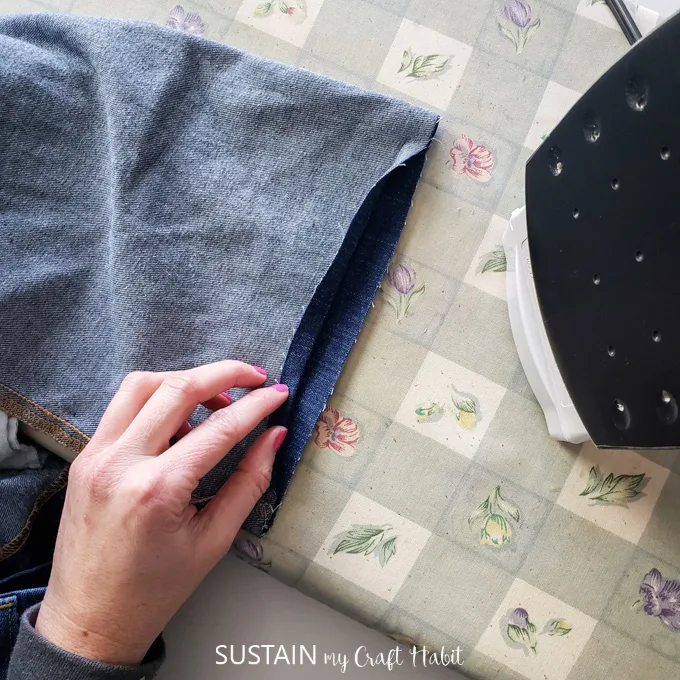
Next, finish the cut edge with either a zig zag stitch from your sewing machine or serge the edge using a serger. This will prevent the fabric from fraying.

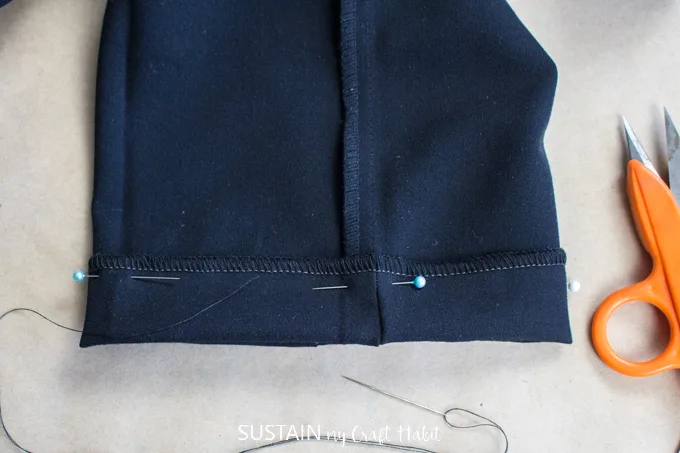
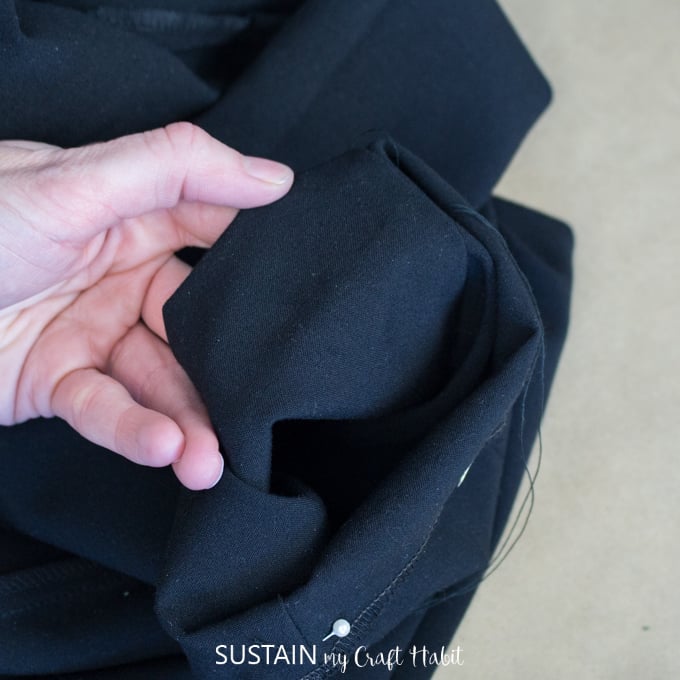
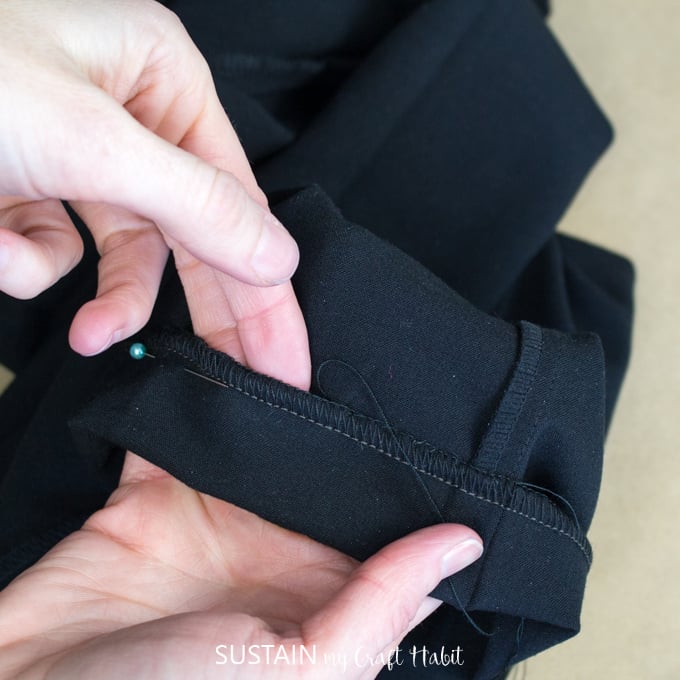
Fold the hem up by 1” (or whatever hem allowance you chose) and pin in place.

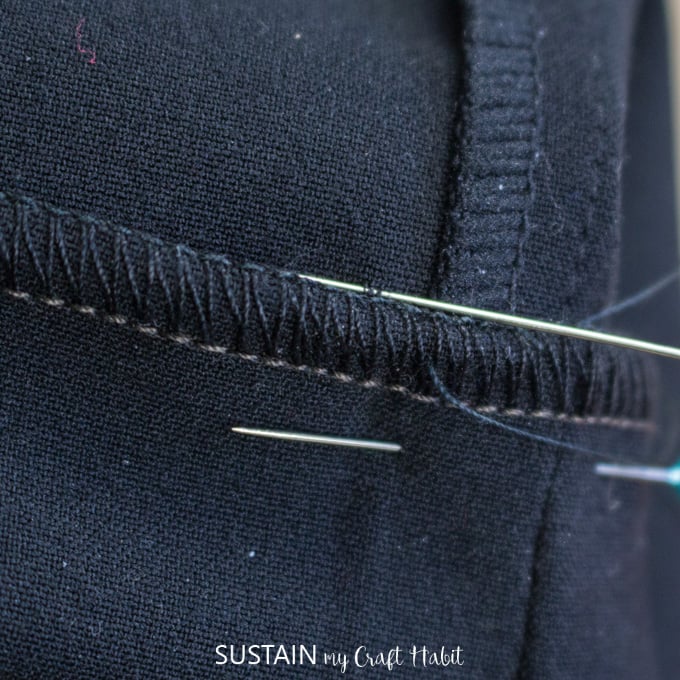
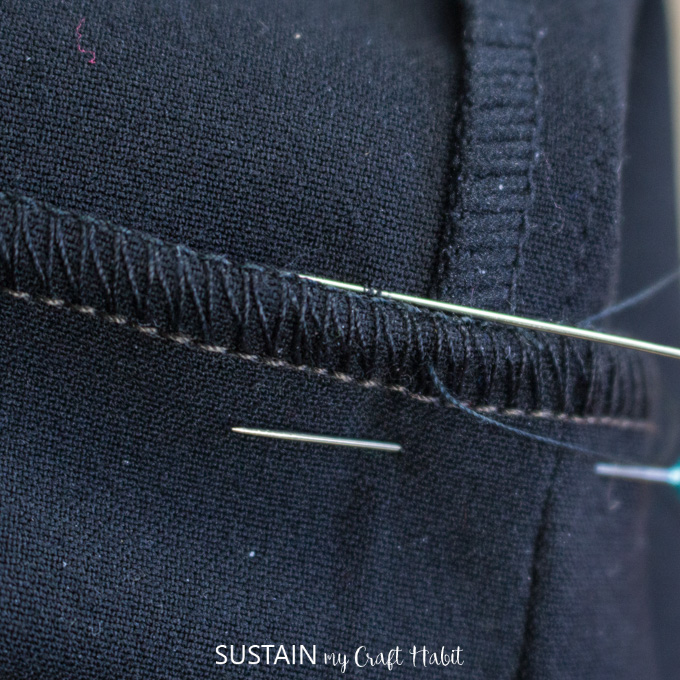
Thread a pointed sewing needle in a matching thread color and begin sewing at the inner leg. Secure the thread end in place on the new folded hem at the inner leg and then moving from right to left sew the hem in place.
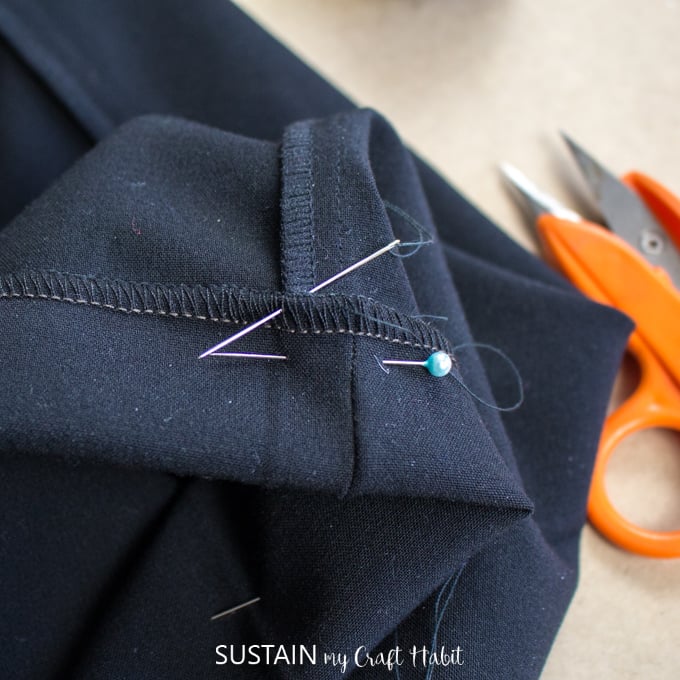

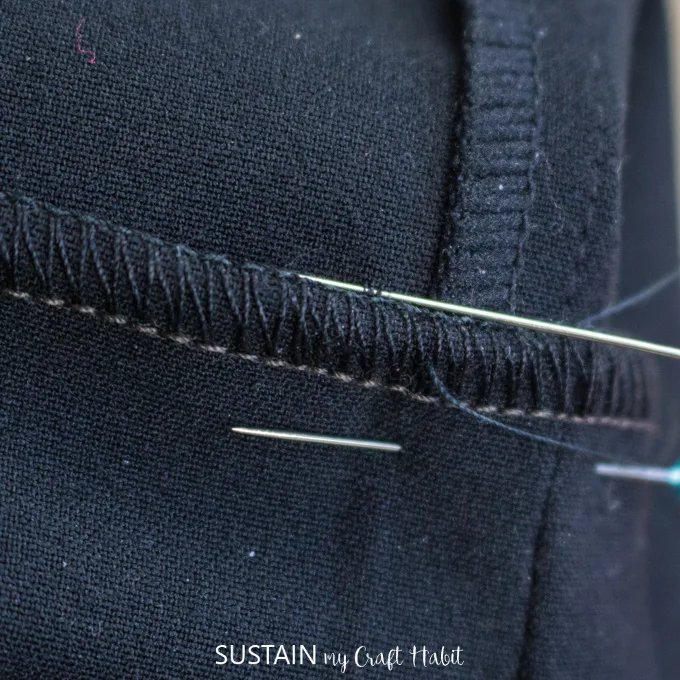
Take extra care to pass the needle through the fabric yarns on the inside only. This way the stitches will NOT be visible on the right side.

Continue until the hem is fully secure.


Press the hem using an iron.
For Flared Leg Pants

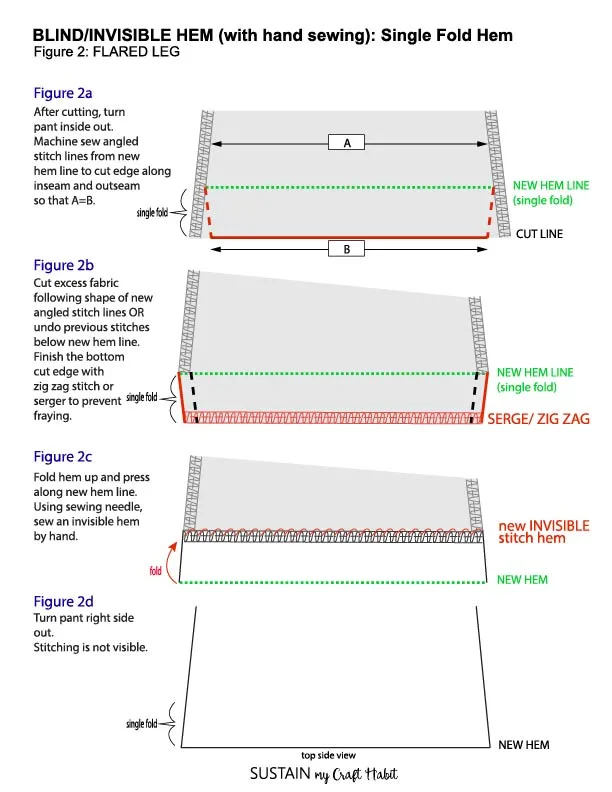
Since the leg shape widens at the bottom, hemming this type of pant is not the same as with a straight leg pant. If you simply try to fold the hem up, you’ll find a lot of puckering when you sew.
To avoid this, you need to adjust the opening amount . Follow these instructions to hem a FLARED leg pant.
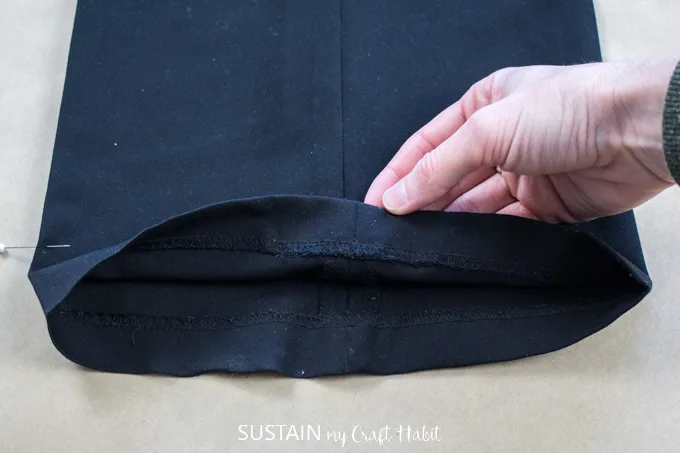
Remember that the marked point or folded edge is the new hem line. Remove the previous stitch and unfold to get the full length if necessary.

I tend to keep the same hem height as the original pant had, which would be 1″ for these pants. But for this example, I increased the hem height to 1.5″ so the method is more clear.
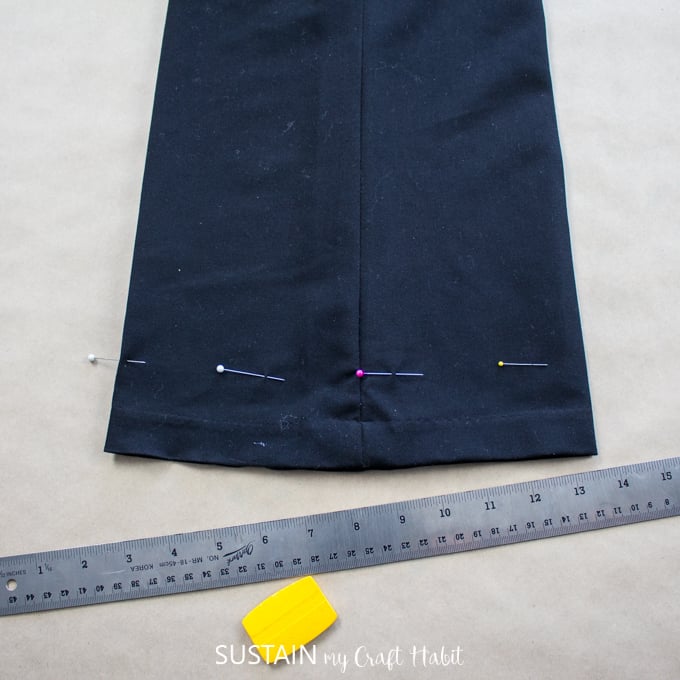
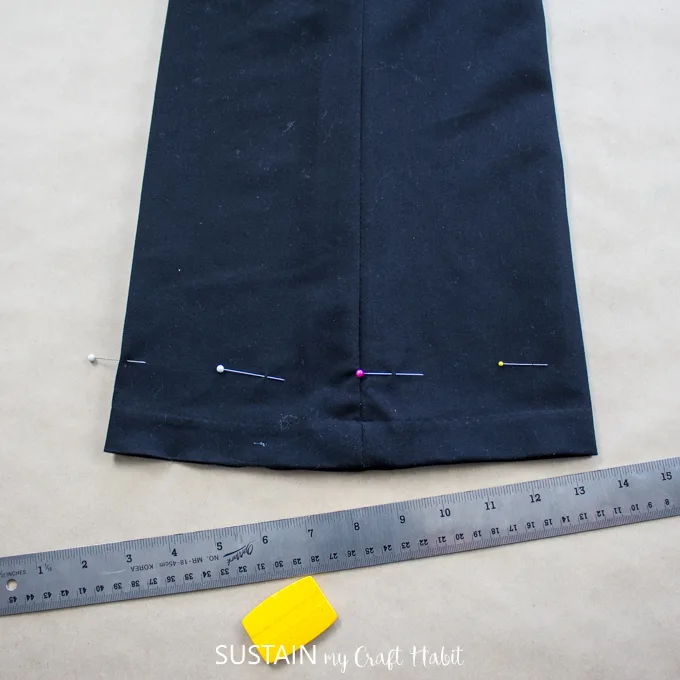
Mark the cut line using a ruler and washable chalk or wax. Cut along the marked line and discard the extra length. Repeat for the other pant leg.
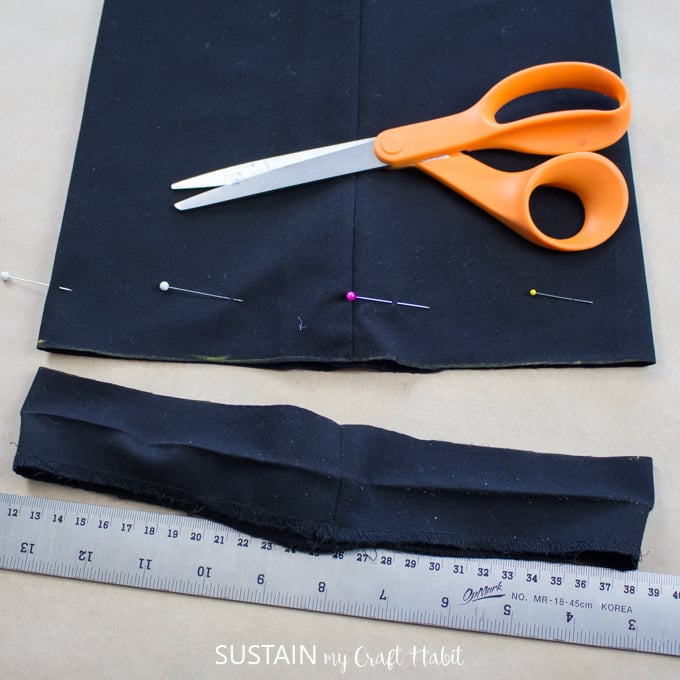

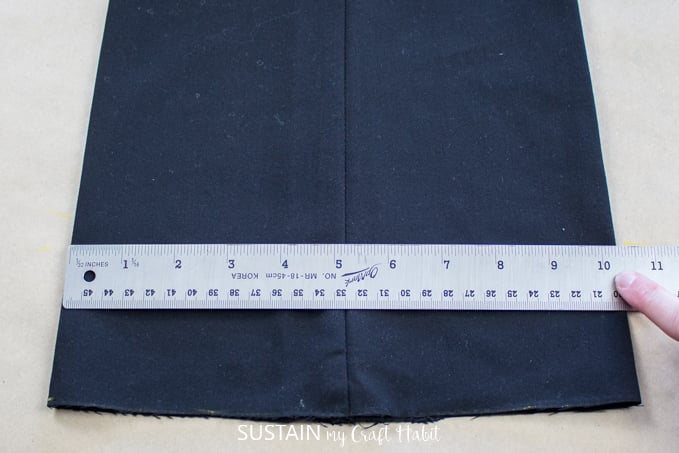
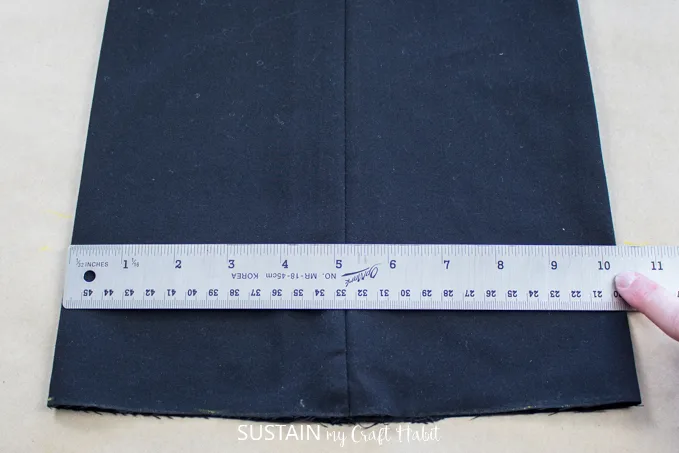
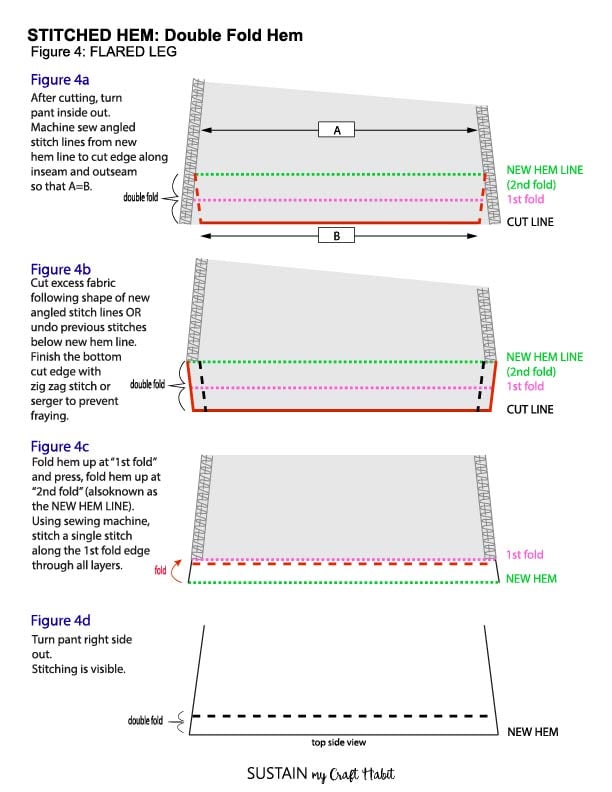
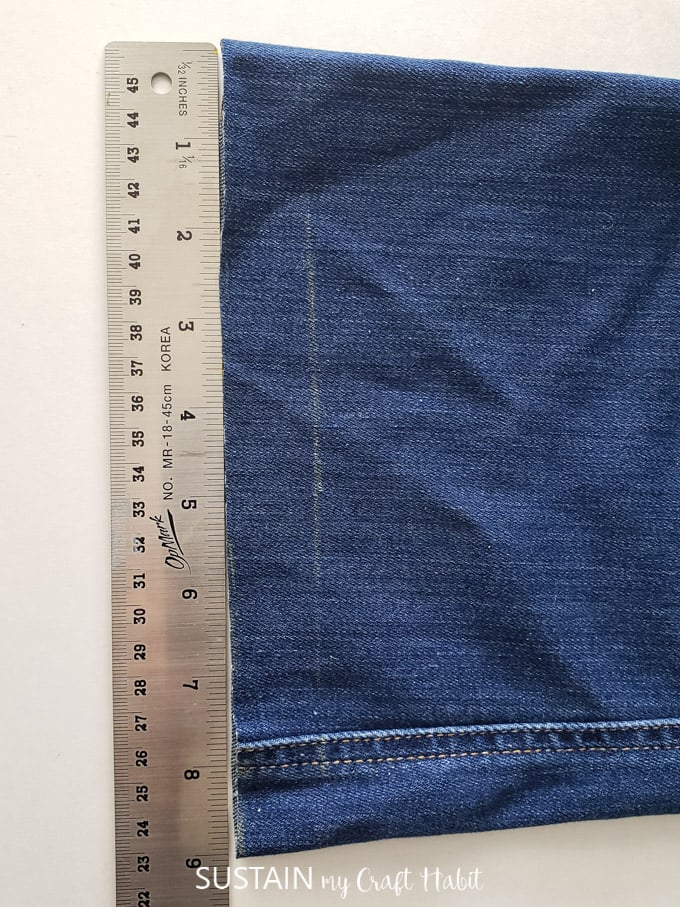
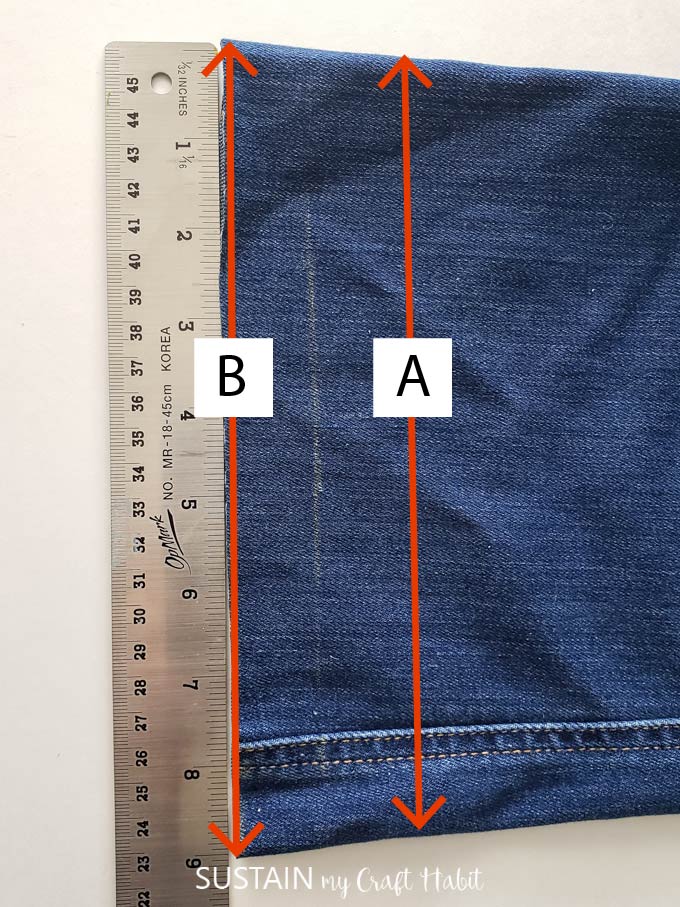
Measure the width along the cut edge. In my case it is 10 ¾” wide. This is Point “B” in the diagram.
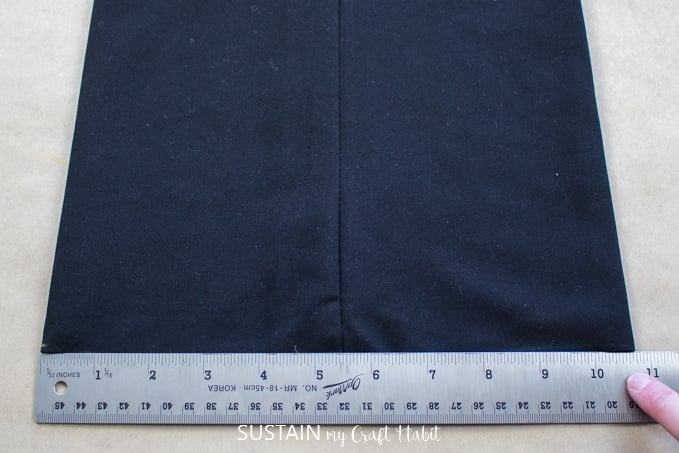
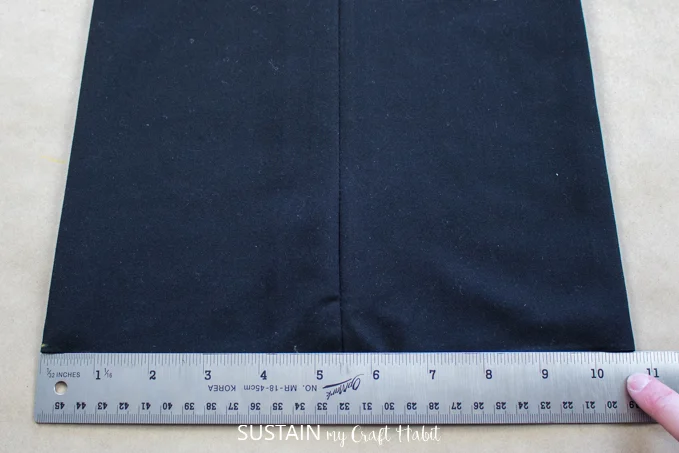
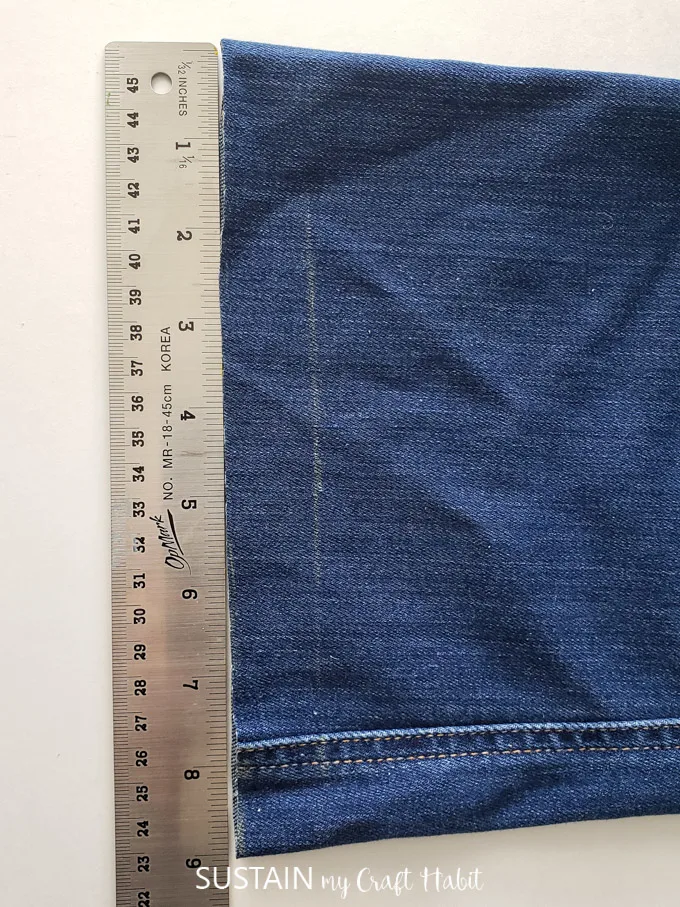
Next, measure up from the cut edge twice the amount of the hem allowance. In my case, I have a 1.5” hem allowance, so I am measuring up 3” from the cut edge. This is Point “A” in the diagram.

Mark this point and measure the leg width across. In my case, it is 10 ¼”.
Record these measurements (“A” and “B”) so you don’t forget them.
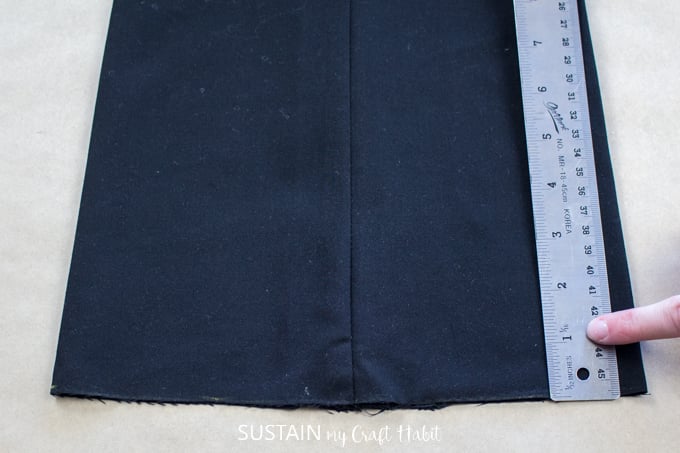
Calculate the difference between the two leg widths to determine how much you need to reduce the leg opening at the cut edge. In my case, I need to reduce the opening width by ½” (10.75” minus 10.25” = ½”).
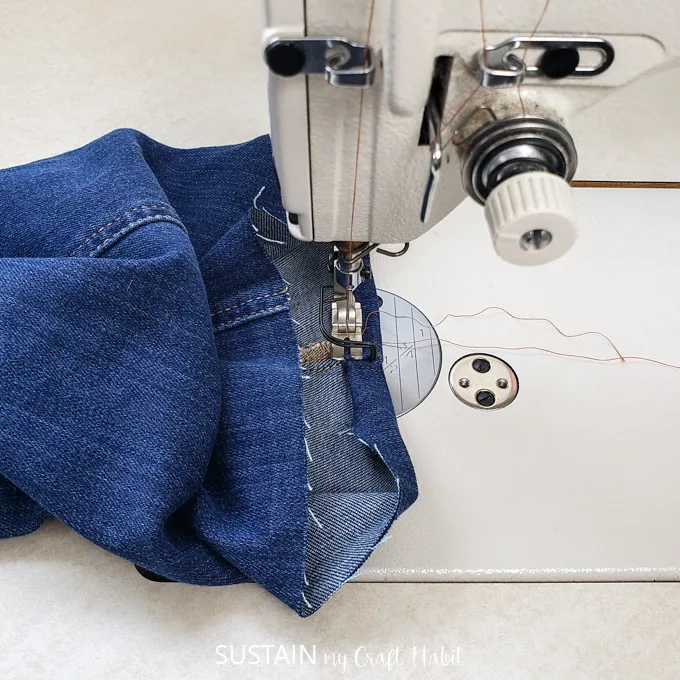
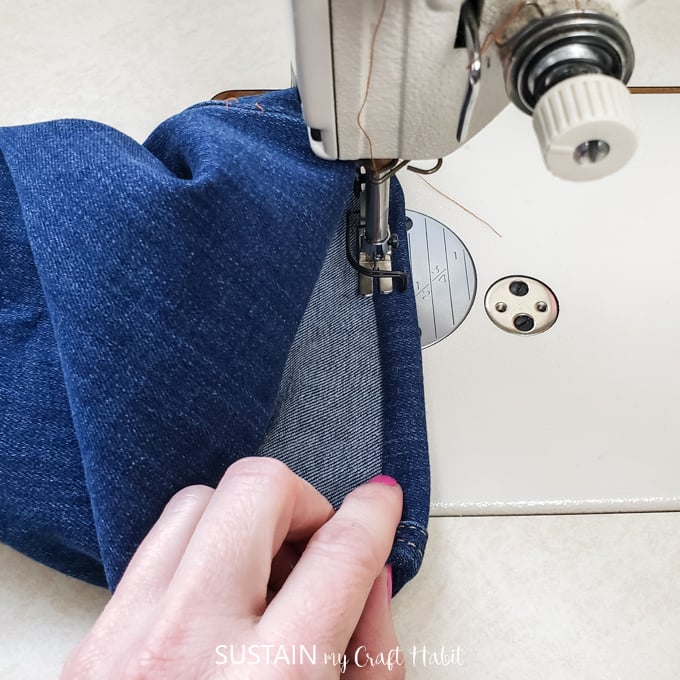
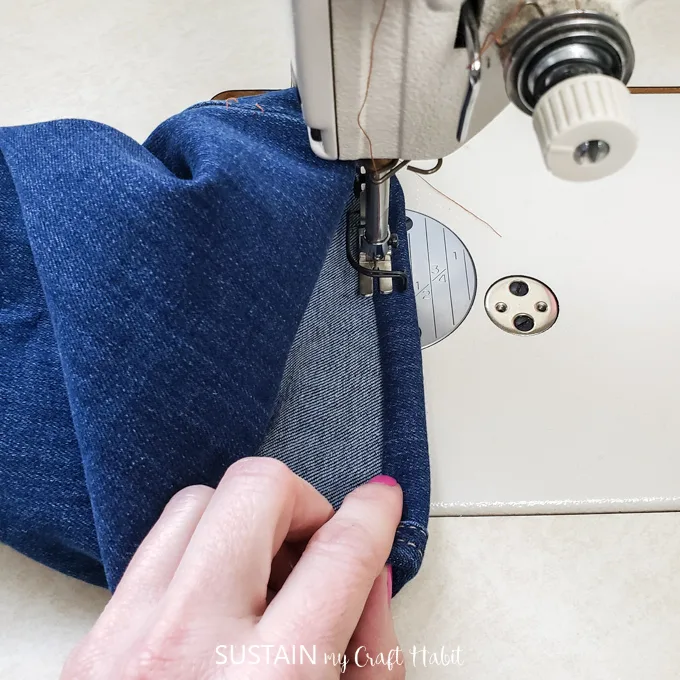
At the sewing machine, reduce the leg width along both sides (inner leg and outer legs) evenly angling towards the original stitch lines at the soon to be new hem line.

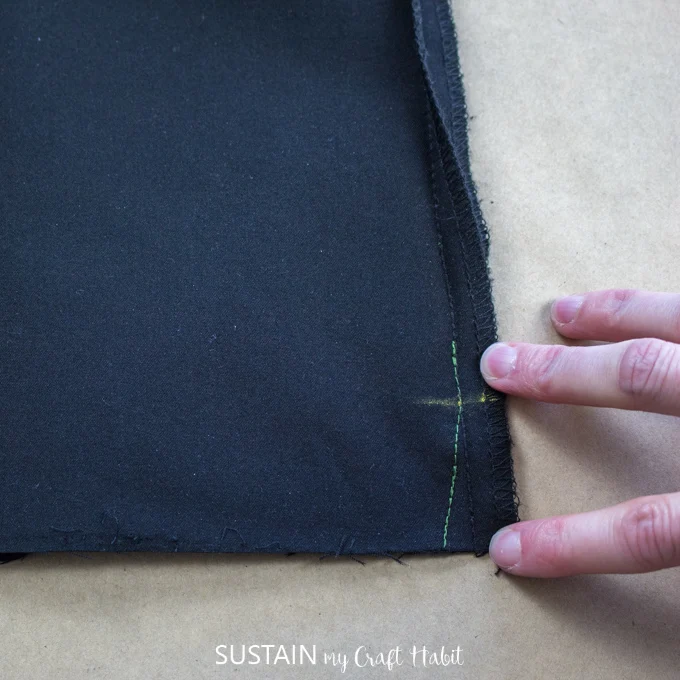
I used a contrast color so it is more visible (but best to use a matching thread color:)).
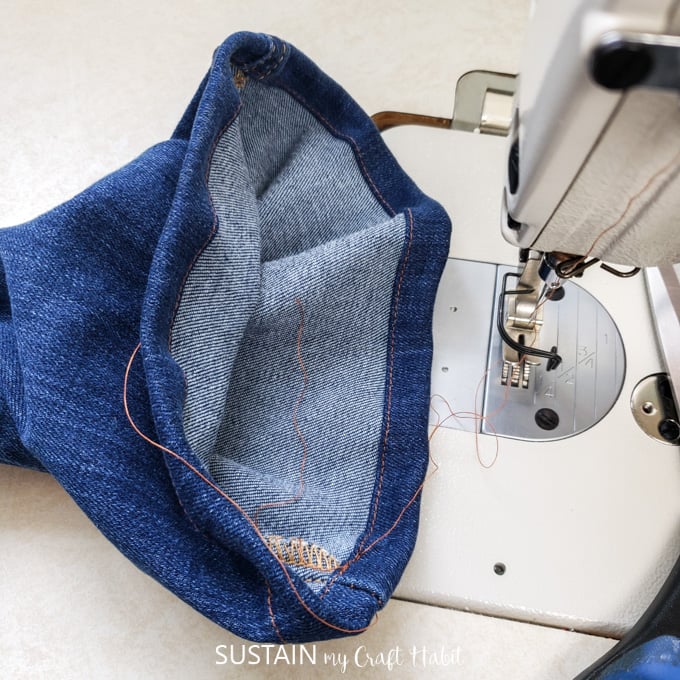
Remove the previous stitches and cut excess fabric if necessary.


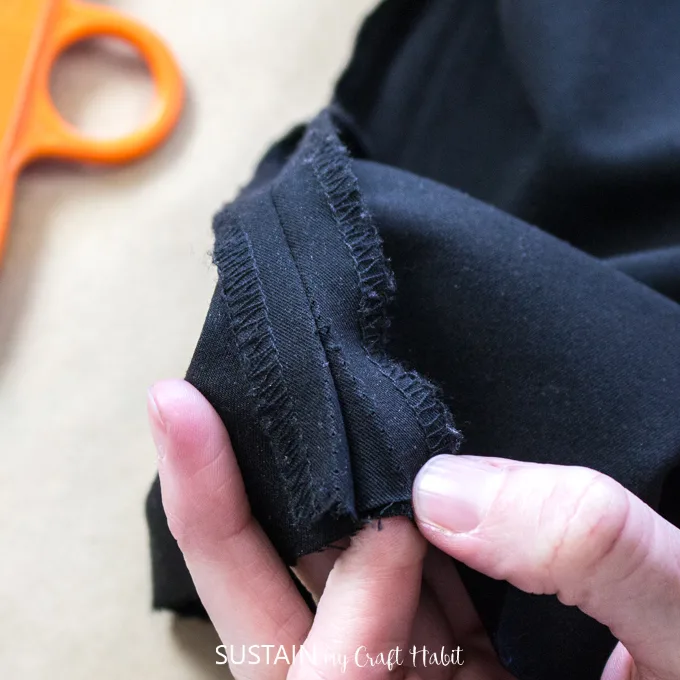
Next, clean finish the bottom cut edge with either a zig zag stitch from your sewing machine or serge the edge using a serger. This will prevent the fabric from fraying.

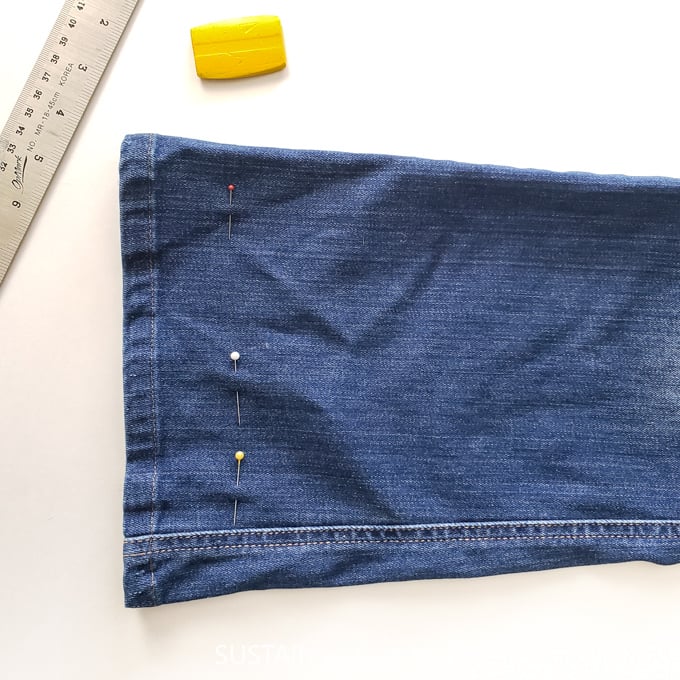
Fold the hem up by 1.5” (or whatever hem allowance you chose) and pin in place.

Thread a pointed sewing needle in a matching thread color and begin sewing at the inner leg. Secure the thread end in place on the new folded hem at the inner leg and then moving from right to left sew the hem in place.


Take extra care to pass the needle through the fabric yarns on the inside only. This way the stitches will NOT be visible on the right side.
Continue until the hem is fully secure and repeat with the other pant leg. Press the hem using an iron to finish.
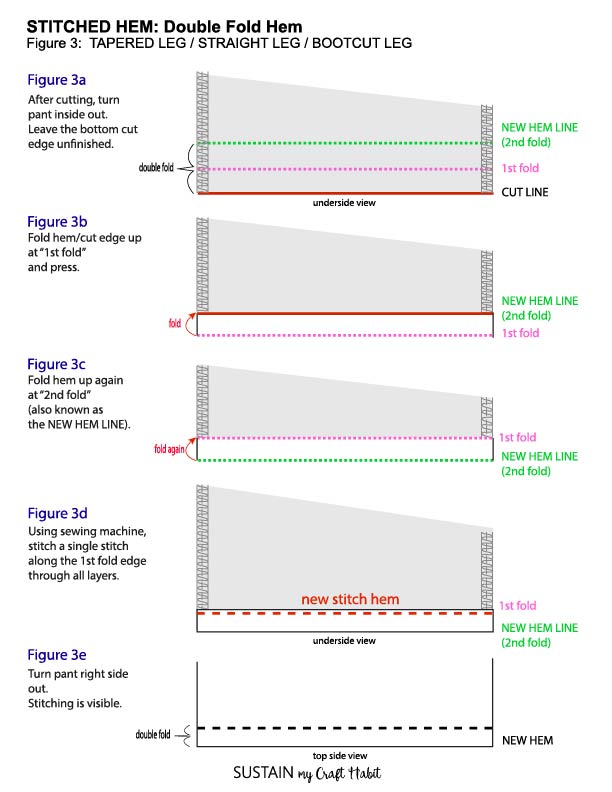
2. How to Make a Stitched Hem with a Sewing Machine
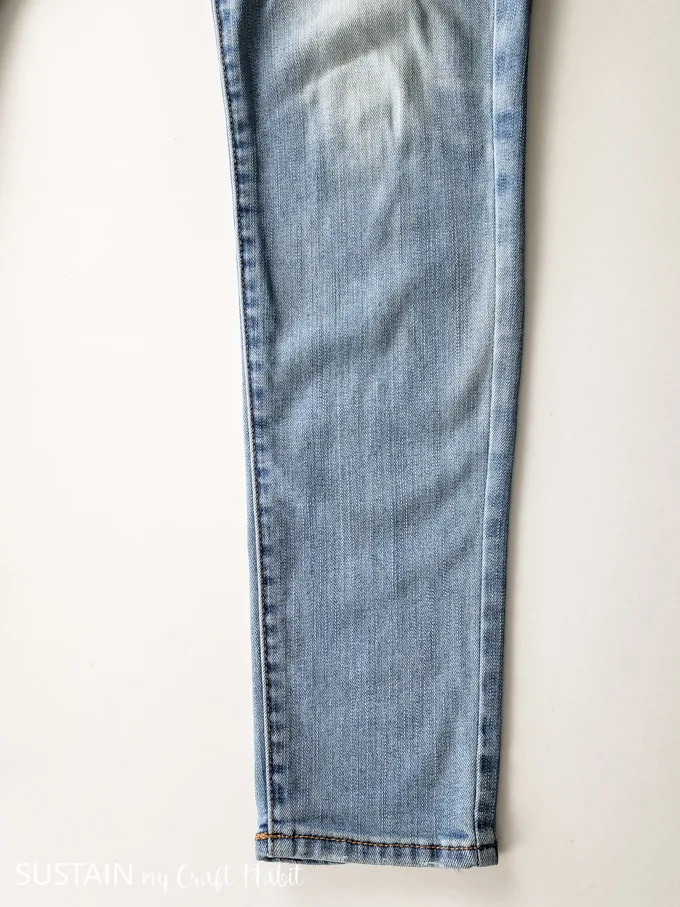
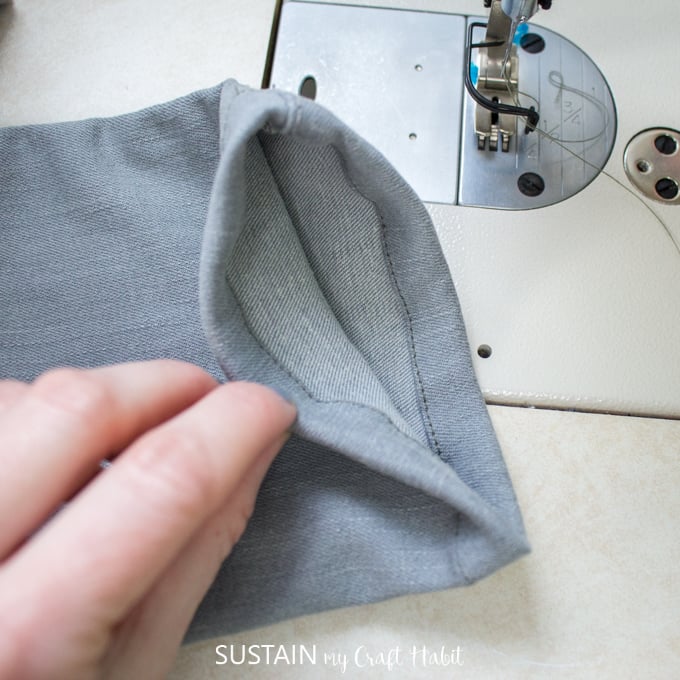
Most often, a pair of pants will have a simple stitched hem. Think about your jeans or other casual pants. If you look at the hem, you’ll see a single stitch line. The hem is typically folded under twice (also known as a double fold hem) and stitched in place.
If you think about a pair of your jeans, you’ll notice the thread type used is thicker and usually in a contrasting color. This can be tough to replicate so another option is to hem jeans by keeping the original hem while still shortening the lengths. If you’re wondering “how do you do that?”, then head over to my post on how to hem jeans with the original hem.
Supplies Needed to Make a Stitched Hem with a Sewing Machine:
- Sewing machine
- Sewing thread in matching color
- Measuring tape or ruler, pins, chalk
- Fabric scissors
Hemming Pants with a Stitched Hem:
As with all hemming, the first step is to figure out where you want your new hem to be. Try the pant on with a pair of shoes. Fold under and pin in place to mark where you want the new hem to be.
Before continuing, ask yourself: “what type of pant leg is it?”
Straight Leg Flared leg
For Tapered / Straight Leg / Bootcut / Wide Leg Pants

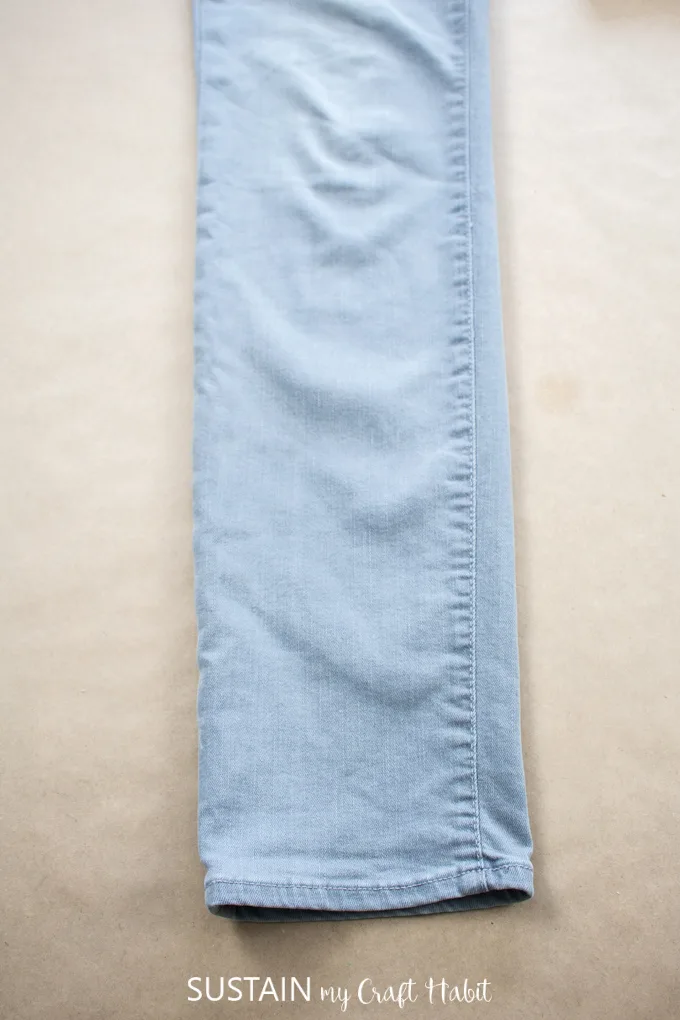
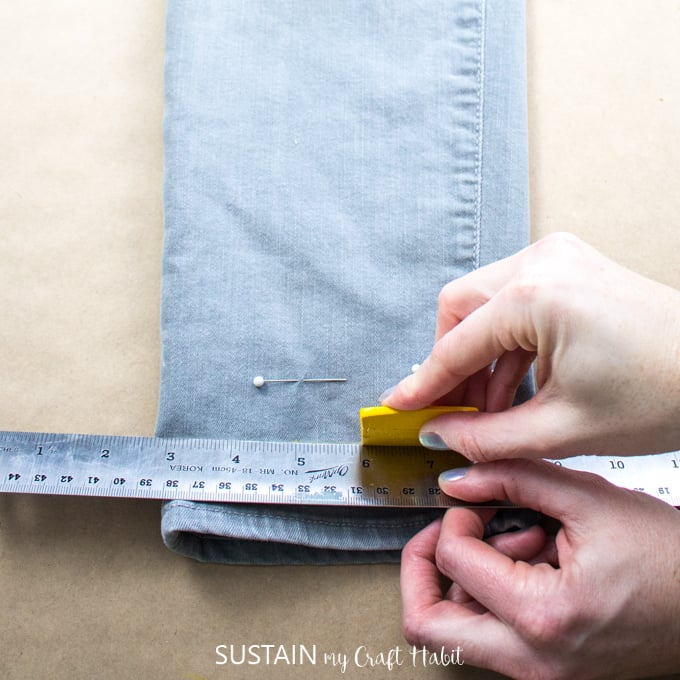
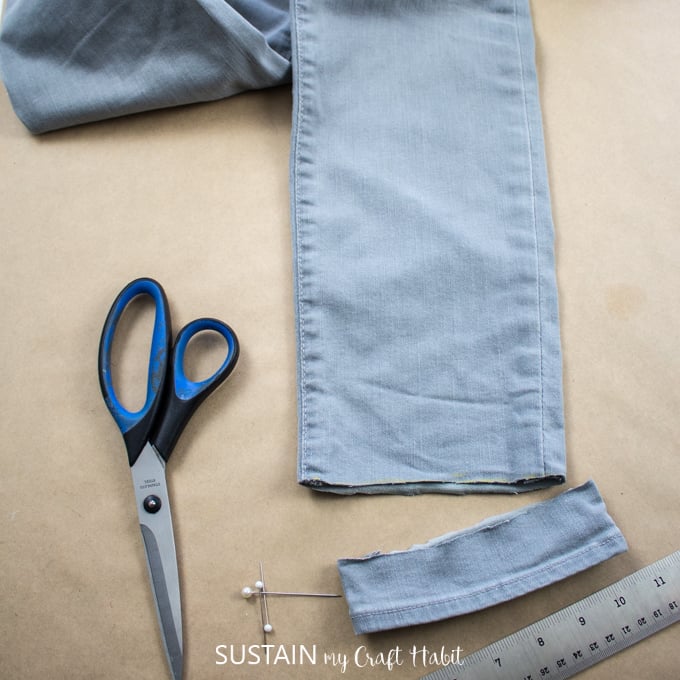
Remember that the marked point or folded edge is the new hem line. Add an extra 1” to the length for the fold-over hem amount. I tend to keep the same hem height as the original pant had. Mark the cut line using a ruler and washable chalk or wax. Cut along the marked line and discard the extra length. Repeat for the other pant leg.


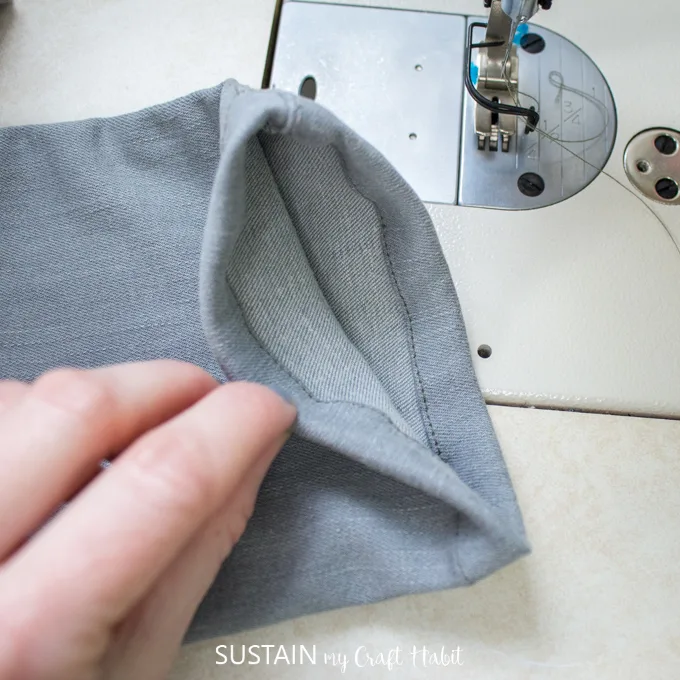
At the sewing machine, fold the hem up by 1/2” (or whatever half the hem allowance you chose is) and press with an iron.
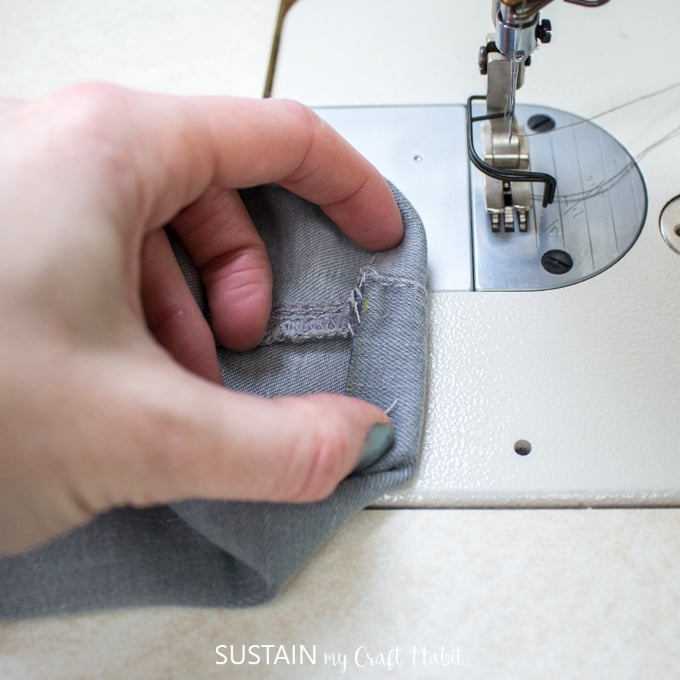
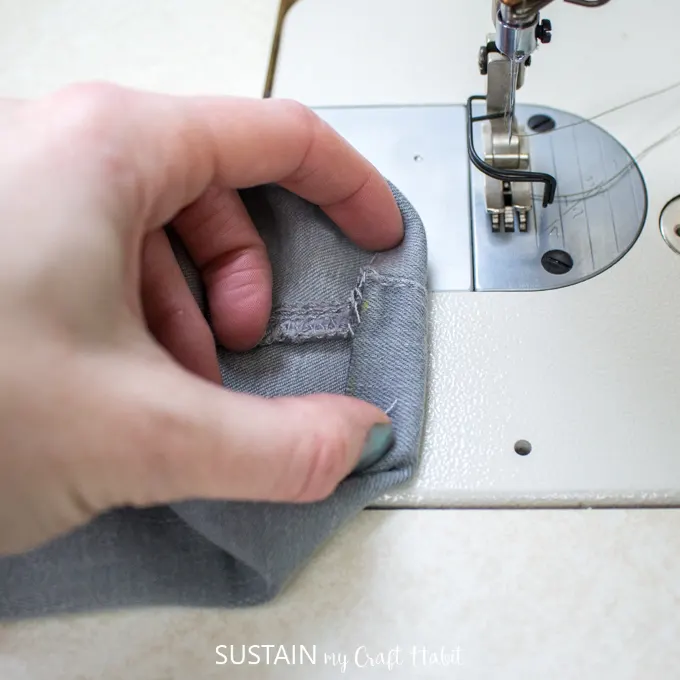
Fold the hem again another ½” and stitch along the edge of the folded hem. If easier, you can also press the folded hem with an iron and pin hem in place before sewing.

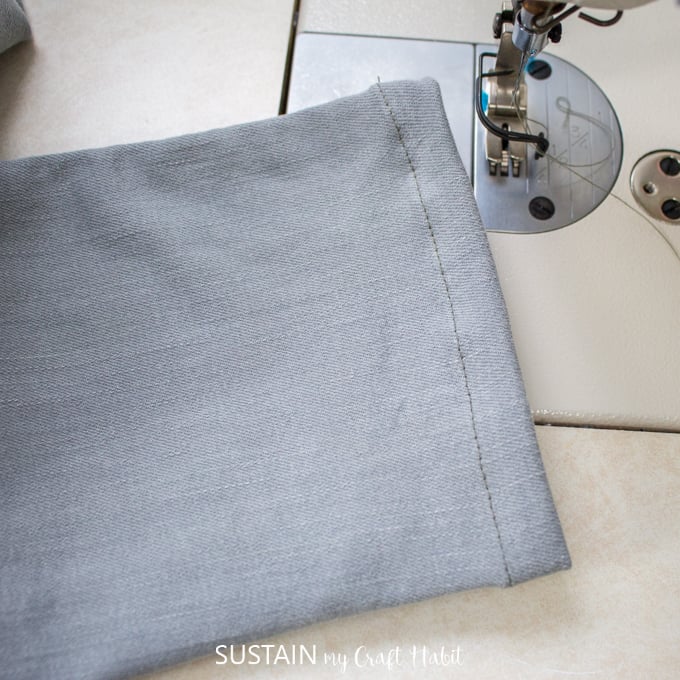
Continue the stitch along the whole hem line and secure the last few stitches with back stitching. Repeat with the other pant leg.

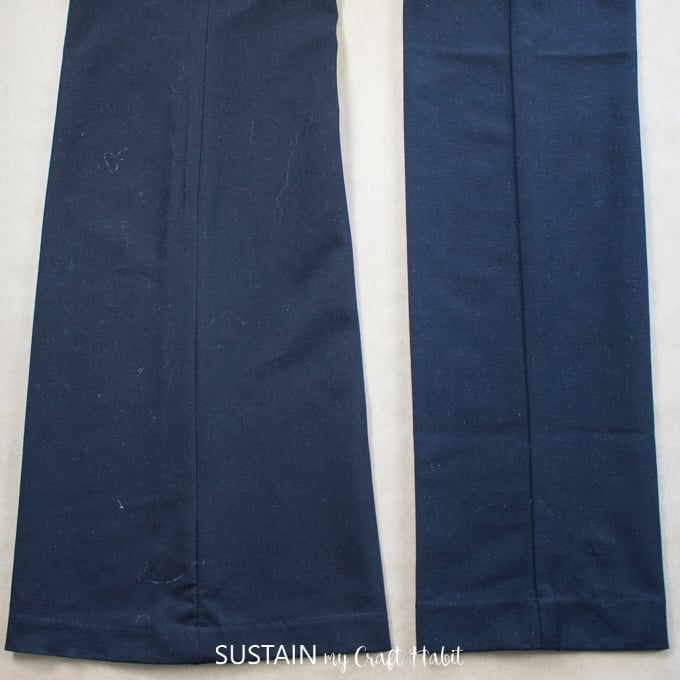
For Flared Leg Pants
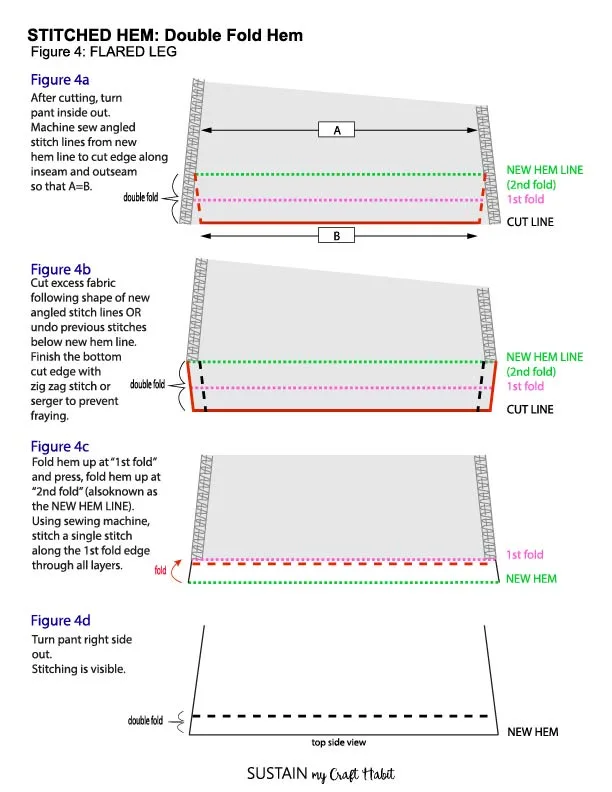
Remember that the marked point or folded edge is the new hem line. Add an extra 1” to the length for the fold-over hem amount. (I tend to keep the same hem height as the original pant had). Mark the cut line using a ruler and washable chalk or wax and with a pair of fabric scissors, cut the line.


Measure the width along the cut edge. In my case it is 9″ wide. This is point “B”.
Next, measure up from the cut edge twice the amount of the hem allowance. In my case, I have a 1″ hem allowance, so I am measuring up 2″ from the cut edge.
Mark this point and measure the leg width across. In my case, it is 8 1/2″. This is point “A”.
Record these measurements (“A” and “B”) so you don’t forget them.
Calculate the difference between the two leg widths to determine how much you need to reduce the leg width at the cut edge. In my case, I need to reduce the width by ½” (9” minus 8.5” = ½”).

At the sewing machine, reduce the leg width along both sides (inner leg and outer legs if possible, otherwise just reduce along one side) angling towards the original stitch lines at the soon to be new hem line.

Fold the hem up by 1/2” (or whatever half the hem allowance you chose is) and press with an iron.
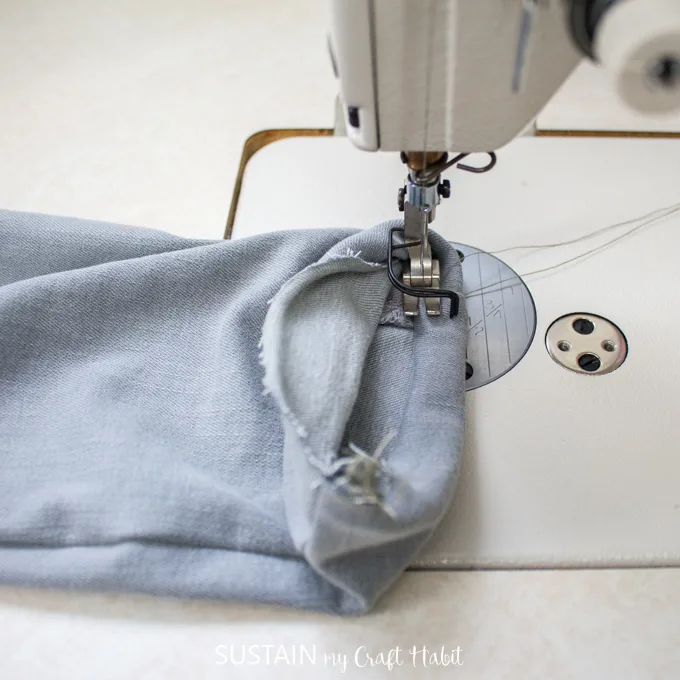
Fold the hem again another ½” at the sewing machine (pin in place if needed). Using a sewing machine set to single needle stitch, start sewing the hem in place at the inner leg. Run the stitch line along the fold edge.

Continue until the hem is fully secure and back stitch in place.

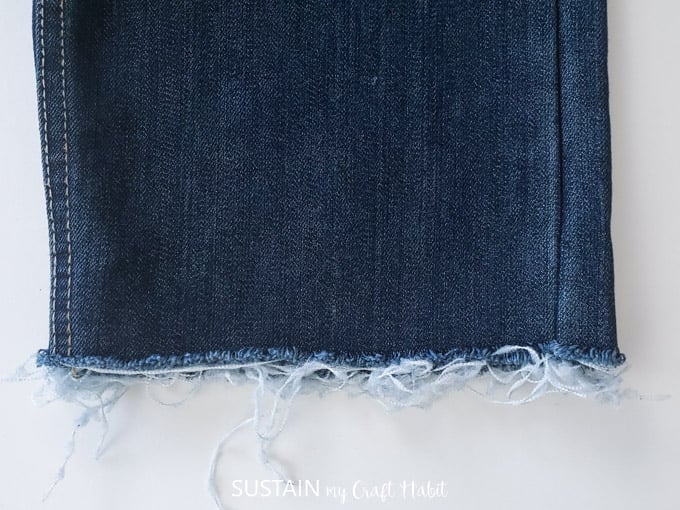
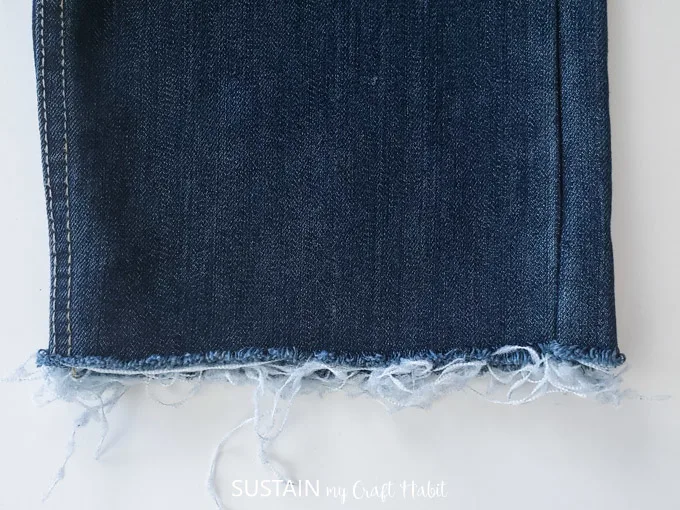
3. Creating a Frayed Hem


There may be a time when you want to create a frayed hem on a pair of pants (or perhaps a skirt).
Supplies Needed to Make a Frayed Hem:
- fabric scissors
- measuring tape, ruler
- chalk or removable wax
How to Make a Frayed Hem:
Try on the pant with a pair of shoes and either fold under to mark the new hem or mark it with some pins. Next, lay the pant on a flat surface.
Add 1/4″ to the length. This will be the cut line for your new hem.

Using a ruler and chalk or removable wax, draw a line across to mark your cut line. Next, cut along the chalk line using a pair of fabric scissors.

Put pant through the wash and dry cycle, the edges will fray. Trim away any loose hanging edges if desired.
You can also add a single stitch line above the cut line which will prevent the edges from fraying excessively over time.
4. Hemming Leather Pants with Tape
Using double sided tape is a simple and professional way of hemming leather pants. Sewing leather is not the same as sewing fabric, for example, the leather is not so forgiving. If you need to undo stitches, the needle will leave holes in the skin that will remain visible.
Supplies Needed to Hem Leather Pants with Tape:
- Sewing machine
- Double Sided Fabric Tape
- Measuring Tape
- Chalk
- Fabric scissors
How to Make a Taped Hem on Leather Pants:
Begin by determining where you want your new hem to be. Try the pant on with a pair of shoes. Fold under and mark placement with a removable wax or chalk. Do not put pins through the leather as you will leave holes in the skin that won’t go away.
For Tapered / Straight / Bootcut / Wide Leg Pants
For Tapered / Straight / Bootcut / Wide Leg Pants

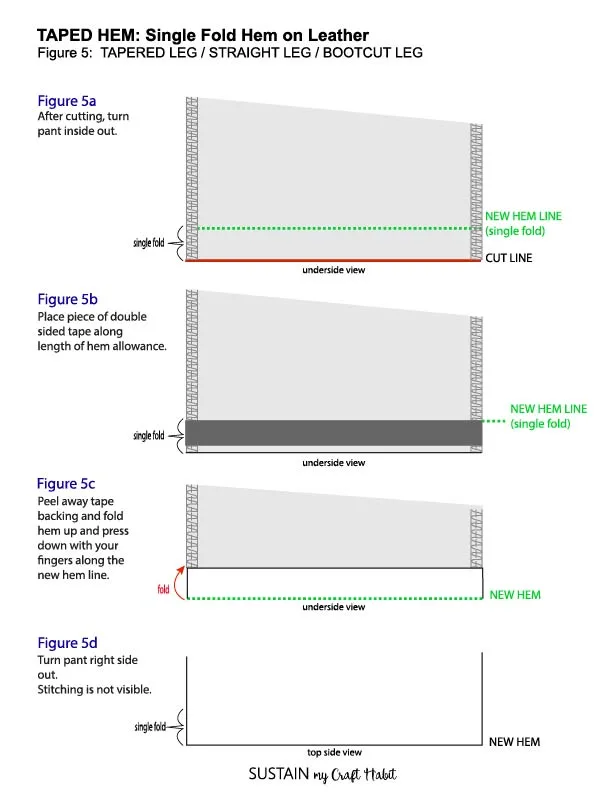
Remember that the marked point or folded edge is the new hem line. Add an extra 3/4” to the length for the fold-over hem amount. Mark the cut line using a ruler and washable chalk or wax. Cut along the marked line and discard the extra length. Repeat for the other pant leg.
Turn the pant inside out and cut a piece of double side tape the length of the leg opening. Place the sticky side of the tape along the cut edge and press in place. Peel away the tape backing and fold the hem up 3/4″ and press the hem in place to secure.
For Flared Leg Pants


Remember that the marked point or folded edge is the new hem line. Add an extra 3/4” to the length for the fold-over hem amount. Mark the cut line using a ruler and washable chalk or wax. Cut along the marked line and discard the extra length. Repeat for the other pant leg.
Measure the width along the cut edge. This is point “B”.
Next, measure up from the cut edge twice the amount of the hem allowance. In my case, I have a 3/4″ hem allowance, so I am measuring up 1 1/2″ from the cut edge.
Mark this point and measure the leg width across. This is point “A”.
Record these measurements (“A” and “B”) so you don’t forget them.
Calculate the difference between the two leg widths to determine how much you need to reduce the leg width at the cut edge.
At the sewing machine, reduce the leg width along both sides (inner leg and outer legs if possible, otherwise just reduce along one side) angling towards the original stitch lines at the soon to be new hem line.
Turn the pant inside out and cut a piece of double side tape the length of the leg opening. Place the sticky side of the tape along the cut edge and press in place. Peel away the tape backing and fold the hem up 3/4″ and press the hem in place to secure.
Let’s stay in touch! Subscribe for our latest sewing patterns, tutorials and tips.
More DIY projects:
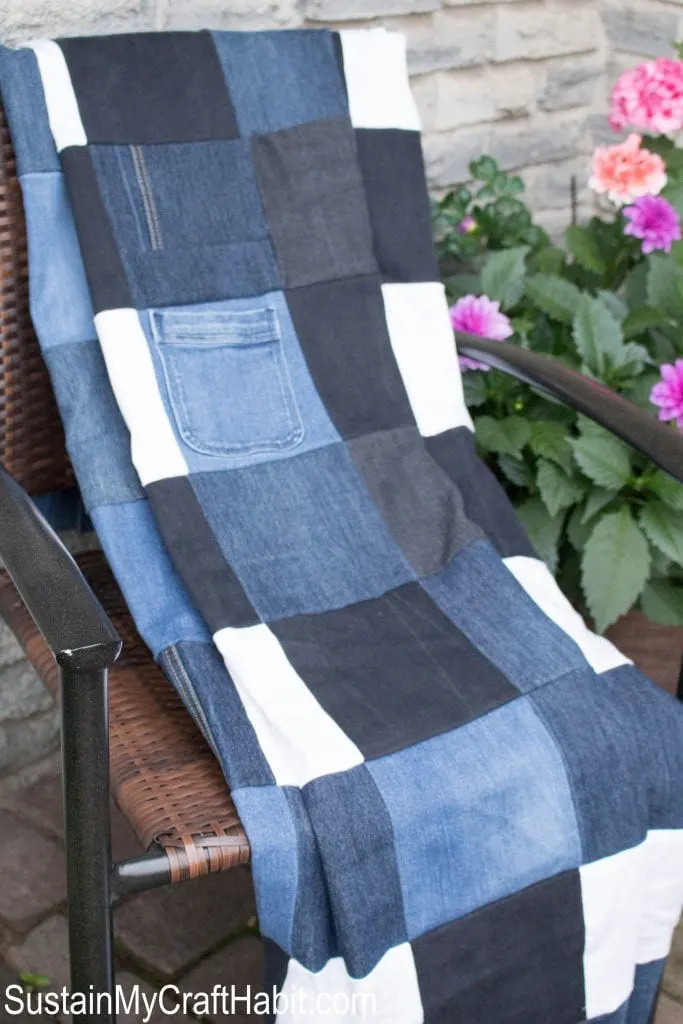
And if you have enough scrap denim left from all your hemming, consider making a recycled denim picnic blanket or scrap fabric wreath!


Like it? Pin it for later!

Ellen G McGoron
Thursday 1st of December 2022
I have been sewing for 60+ years and have never seen such well thought out, precise directions. Thank you. You rock!
Gene
Wednesday 20th of April 2022
Can you show how to extend leg length using 2 pairs of pants to look as professionally done as possible? I am at least a 34in inseam provided that the material doesn't shrink up. It's always the leg up for me but never in the waist or hips. They always stay the same
Jane and Sonja
Tuesday 3rd of May 2022
Hi there Gene, thank you for your suggestion! I will definitely give that some thought and add it to the blog post in the coming months. Kind Regards, Sonja
Alison
Friday 9th of October 2020
Hello! Do you have a fabric tape that you would recommend? I’m considering buying a pair of leather pants and hemming them!
Jane and Sonja
Friday 9th of October 2020
Hello! Thanks for your question. In the past I've always purchased my fabric tape at a tailor's shop but I don't know the brand name. However, if I was to buy online, I would purchase a double sided adhesive that is intended for use on leather - such as Tandy Leather Tanner's Bond Adhesive Tape (comes in a few widths). Here is the affiliate link if you're interested - https://amzn.to/30NGXzm.
Mary
Monday 6th of April 2020
A very thorough guide to what is a pain in the butt problem in my house. Thanks for taking the time to show us all of these different techniques.
Michelle Miller
Sunday 5th of April 2020
Thank you so much for this post!! I swear I'm the only one in my family who doesn't know how to sew. This is so helpful!!!
Jane and Sonja
Monday 6th of April 2020
Thankyou, Michelle! Happy hemming:)