
Learn how to hydro-dip pumpkins for a fun twist on Fall/Halloween Decorations! Grab the supplies to create these cool marble pumpkins!
Have you ever wanted to decorate your Halloween pumpkins in a truly unique way? Instead of carving or painting them, why not try hydro dipping? With this technique, you can transform an ordinary pumpkin into a work of art in just a few simple steps. Not only is hydro dipping an easy and fun way to spruce up your pumpkin, but it also requires just a few basic supplies – perfect for a last-minute do-it-yourself project. So, if you’re ready to transform your pumpkins into works of art, let’s start learning all about hydro dipping.
Check out the EGGS we hydro-dipped for Easter!
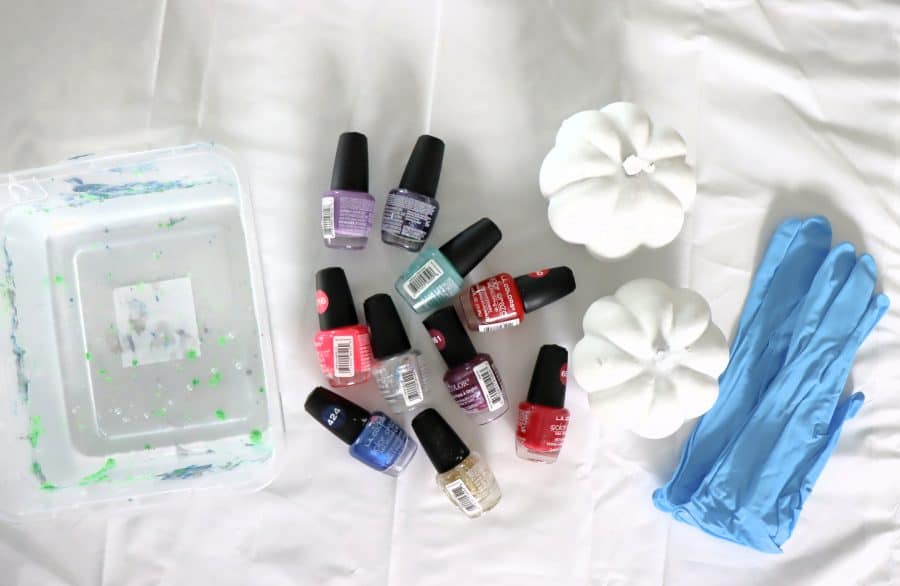
Supplies to Hydro-Dip your pumpkins
Most everything can be found at your local Dollar Tree!
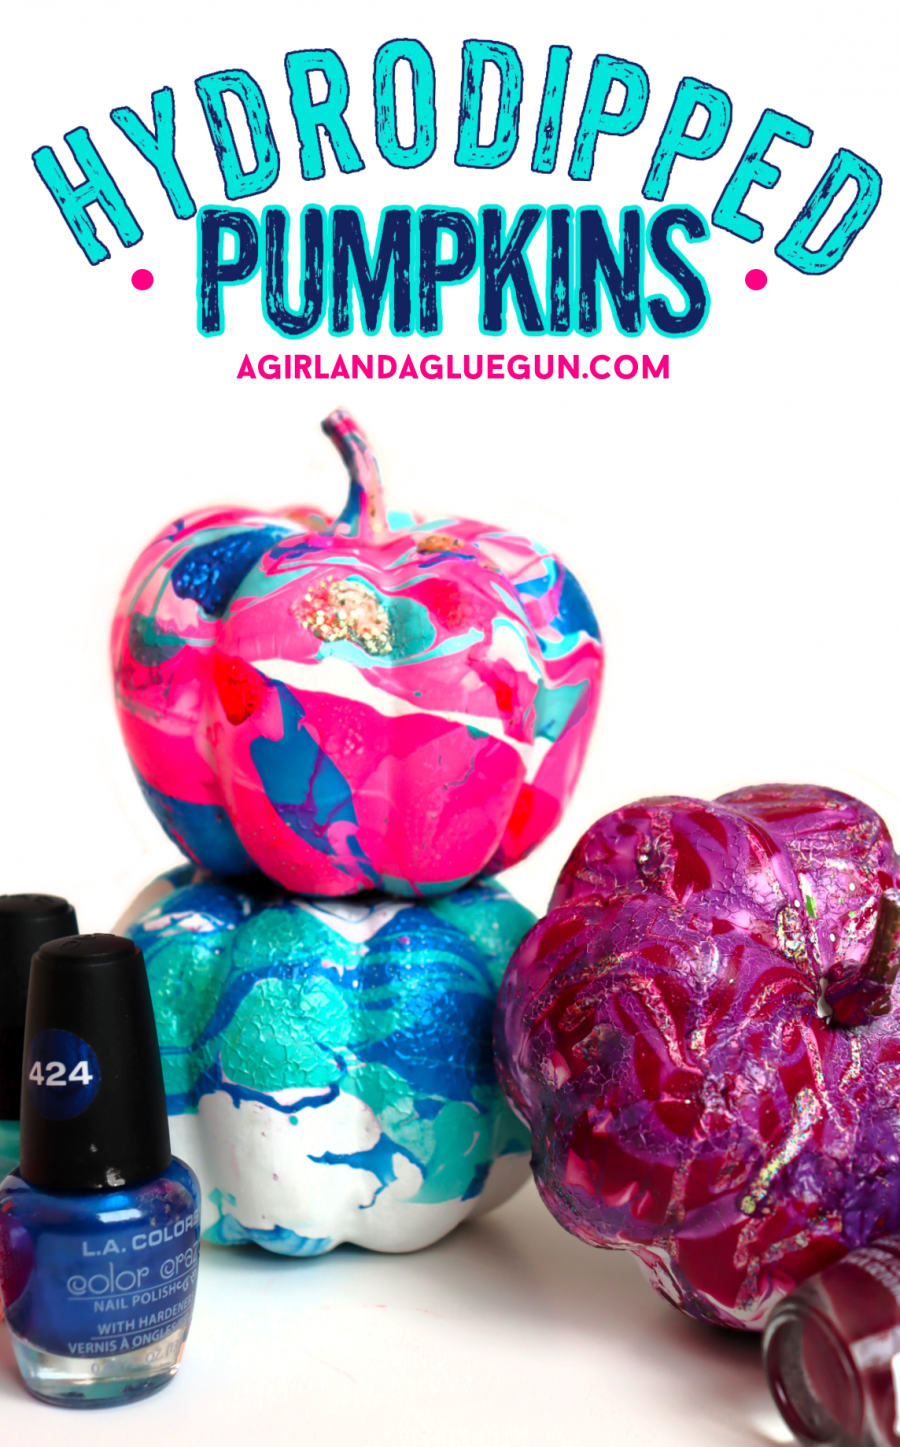
- A Tupperware or tin that holds enough water to dip the pumpkin in (it will get gross so get a disposable one)
- Nailpolish (dollar store!)
- Gloves
- Stick
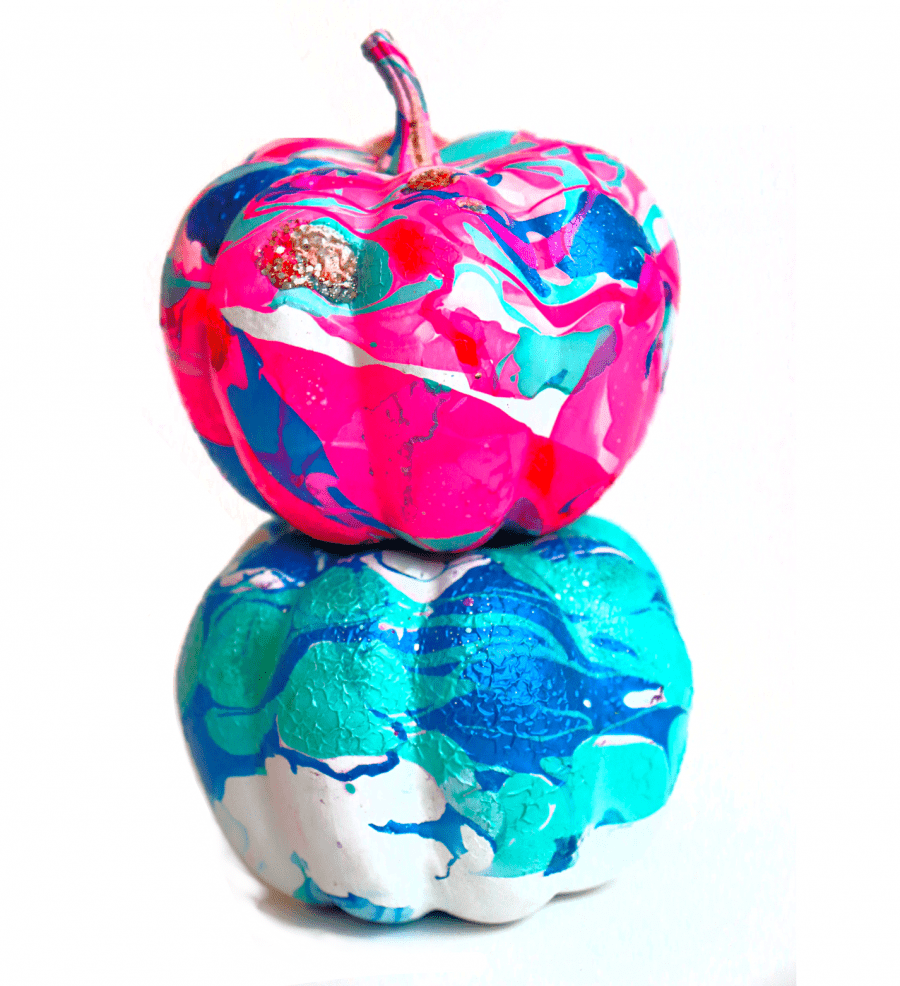
- pumpkins (I bought foam ones from the dollar store and painted them white. But I recommend real little ones! The nail polish kind of eats away at the pumpkins if you have any big blobs. You don’t have to paint white but the colors pop off them so much better!
- tap water
How to Hydro dip a pumpkin
(or how to hydro dip anything really!)
Warning! This project is pretty stinky because of the nail polish! WELL Ventilated is going to be a must!
You will want to work fast since we don’t want the nail polish to dry! So make sure to grab all your supplies before you start!
Prep before you start
Fill the container with room-temperature water. About 3/4 full. You want to be able to put the pumpkin in without it overflowing.
Pick your colors. Glitter nail polish is super clumpy- so keep that in mind!
Place some wax paper or tin foil to place your pumpkin on after you dip it.
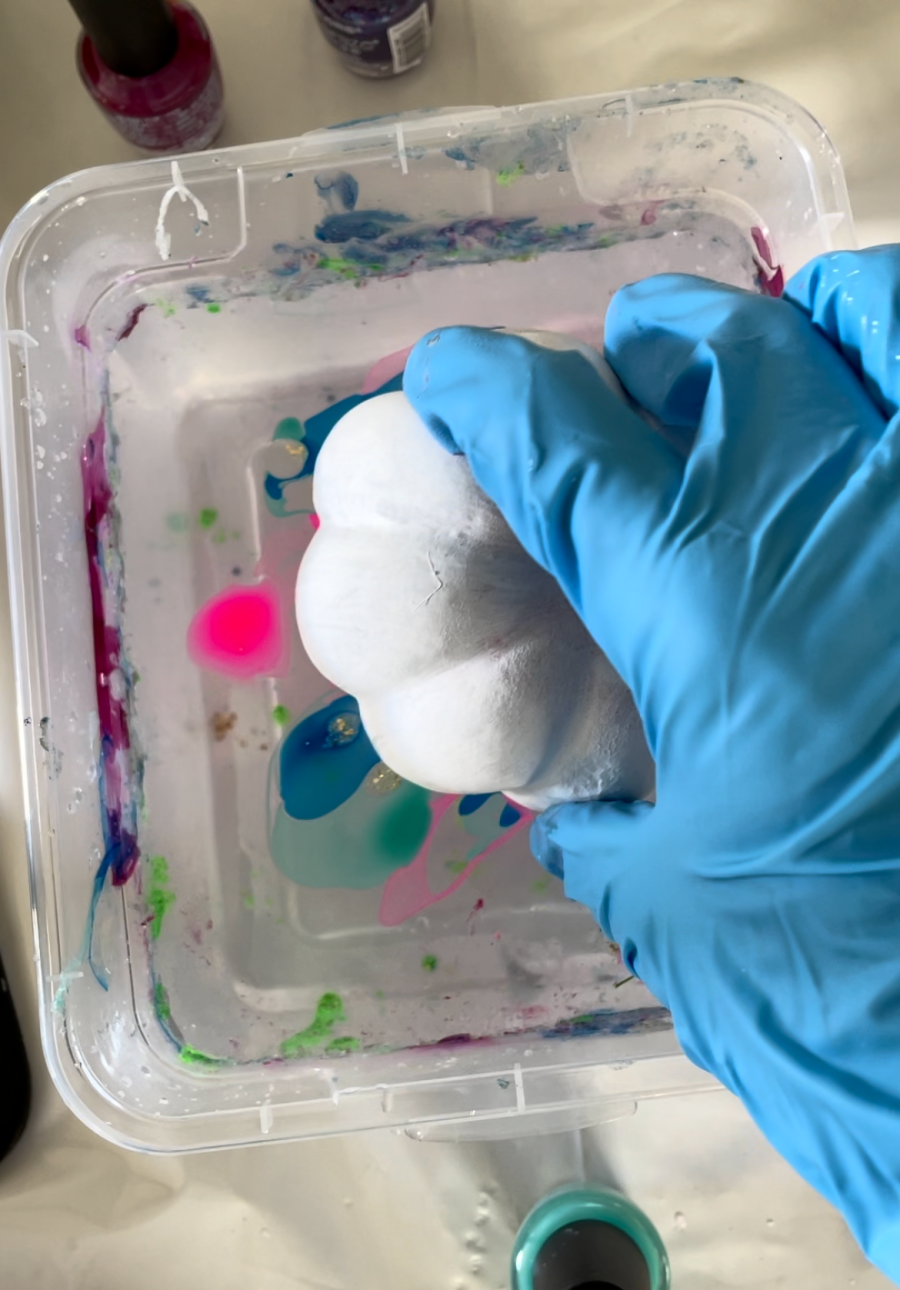
Put on your gloves.
Dipping your pumpkin
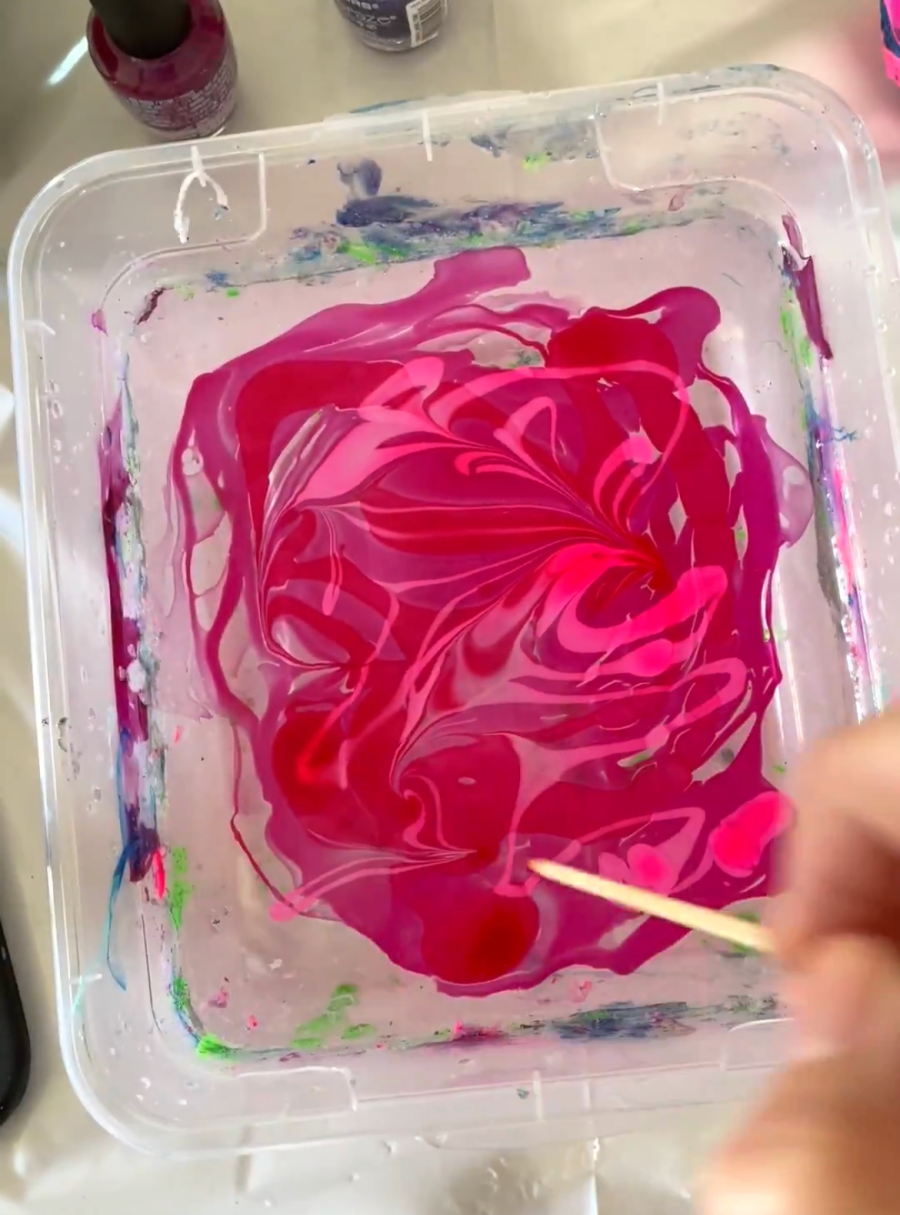
Drizzle the nail polish over the water. There is no rhyme or reason to it. You just add in layers until you think it looks good. You don’t want to heavy hand it because a big clump of nail polish on a pumpkin is not going to dry.
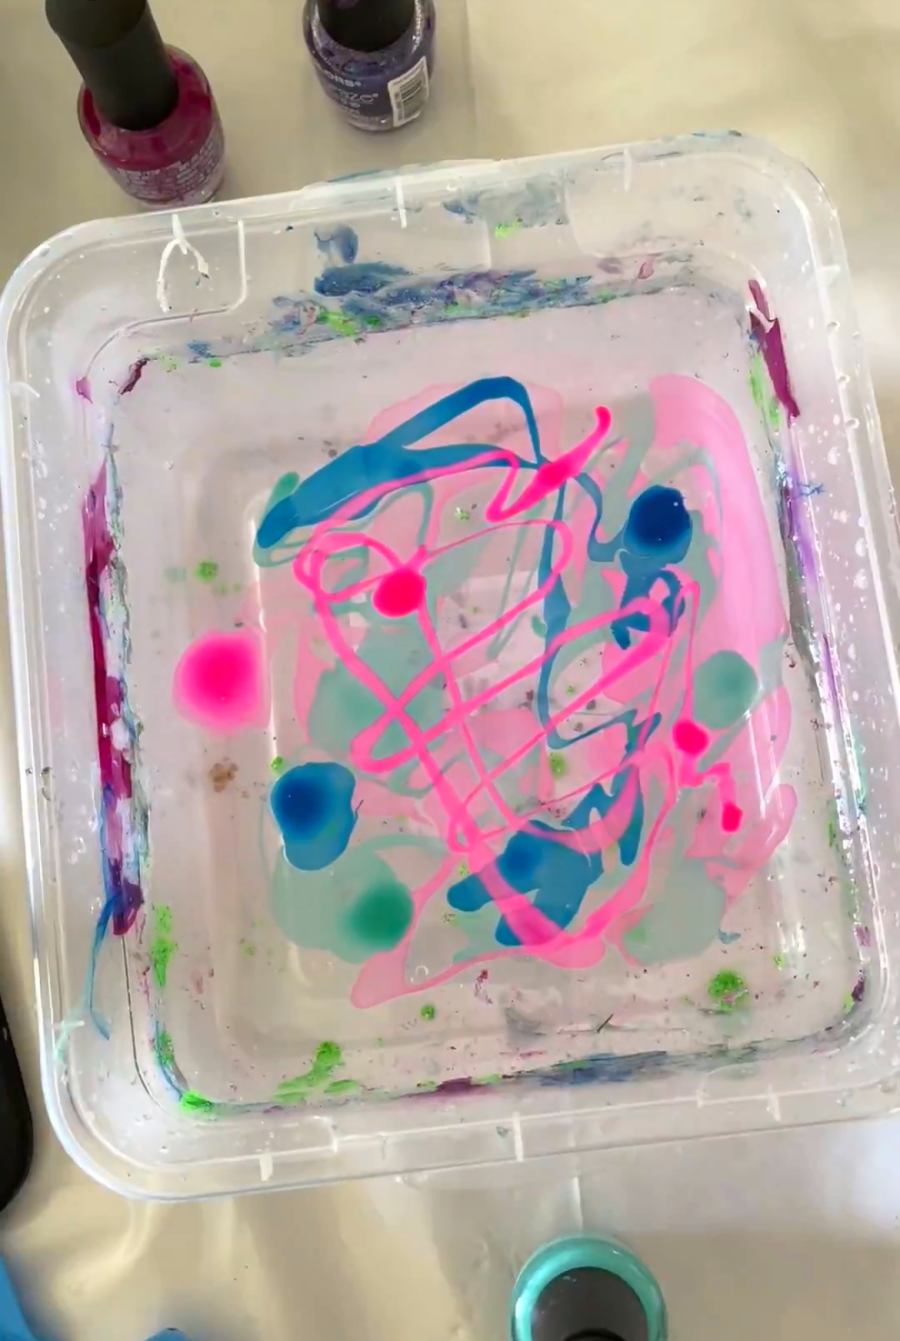
Grab a popsicle stick or toothpick and carefully swirl it and mix the colors for a more marbled look.
Holding the pumpkin from the bottom, you dip the pumpkin and kind of roll it to get the nail polish on all sides of the pumpkin.
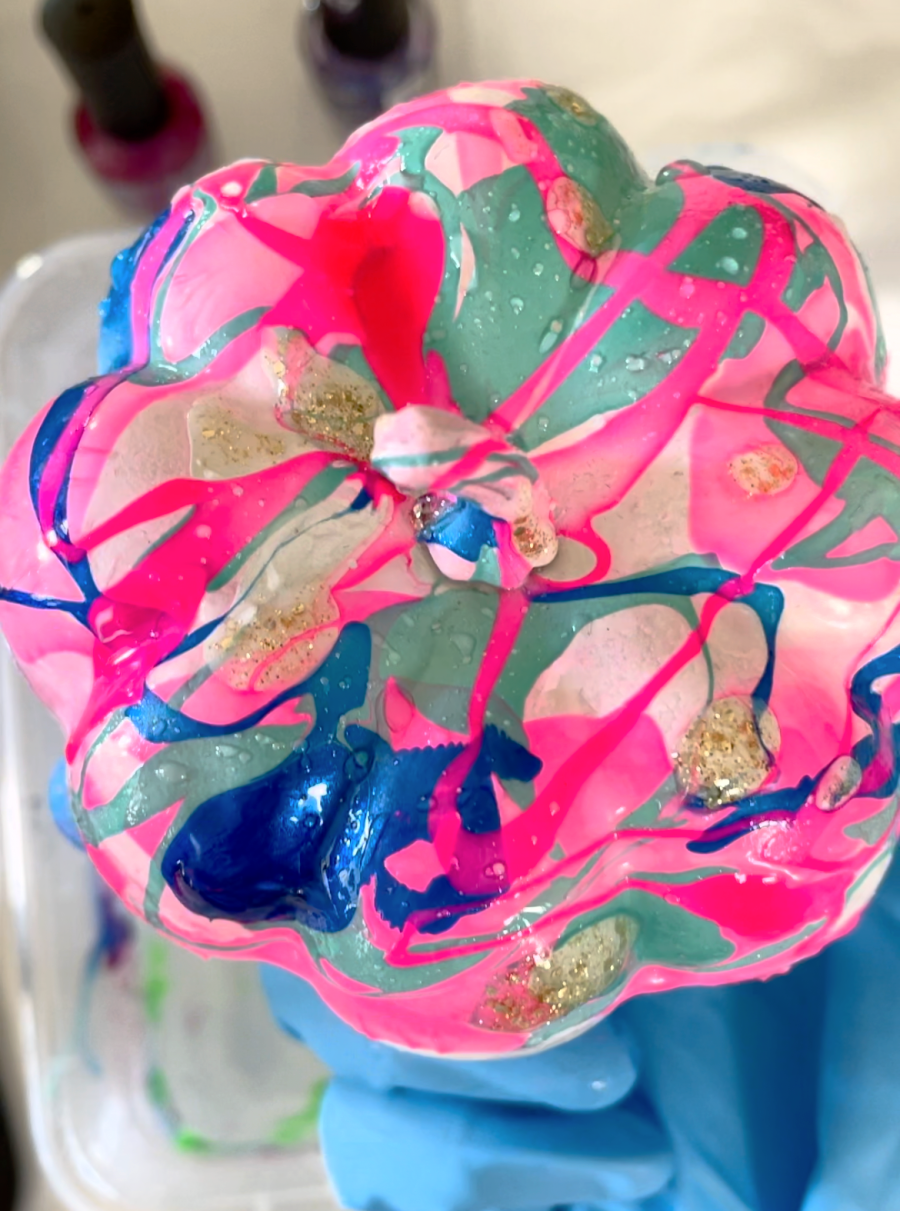
Once the majority of your nail polish is on the pumpkin, pull it up and place it on a rack or paper to dry.
Taking your stick, just swipe all the leftover nail polish in the water to the side before you start your next pumpkin. You don’t need to get new water. You can just start adding in more nail polish for a new color scheme!
When you are done, dump your water on rocks or outside, NOT DOWN YOUR SINKS! There is leftover nail polish in there that you don’t want to dry in your sinks!
TROUBLESHOOTING your Hydro dip project
- Since you hold the bottoms, the bottoms don’t get very much nail polish on them. If you want to add more color, Wait until after they dry and dip again if you want!
- The pumpkins that are Styrofoam sometimes “melt” with too much nail polish. That’s why I recommend real pumpkins! You can see it’s shriveled a little bit. Plastic pumpkins will work okay.
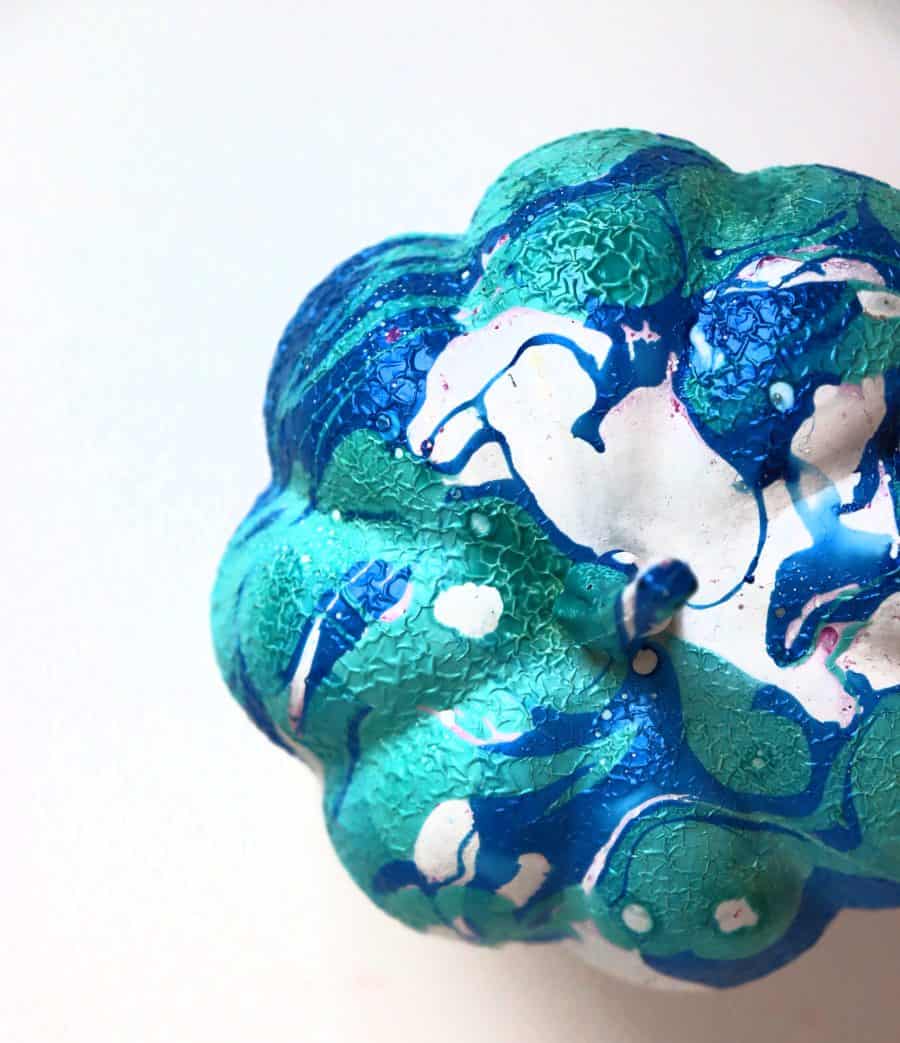
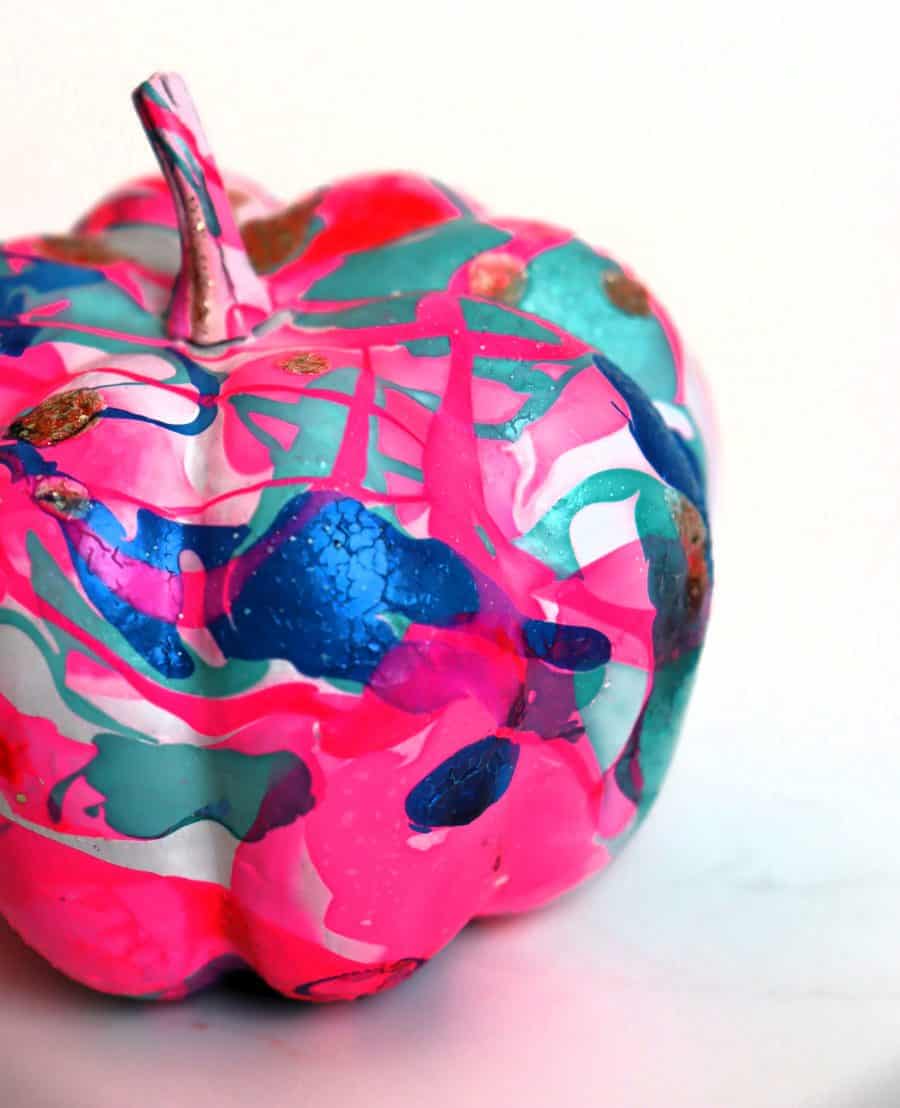
No matter what pumpkin you use, they all turn out looking so cool!
Too busy to get crafting today? No problem! Pin this post to remind yourself about this project later! Sharing my projects helps me reach more people, allowing me to continue sharing free content!
Leave a Reply