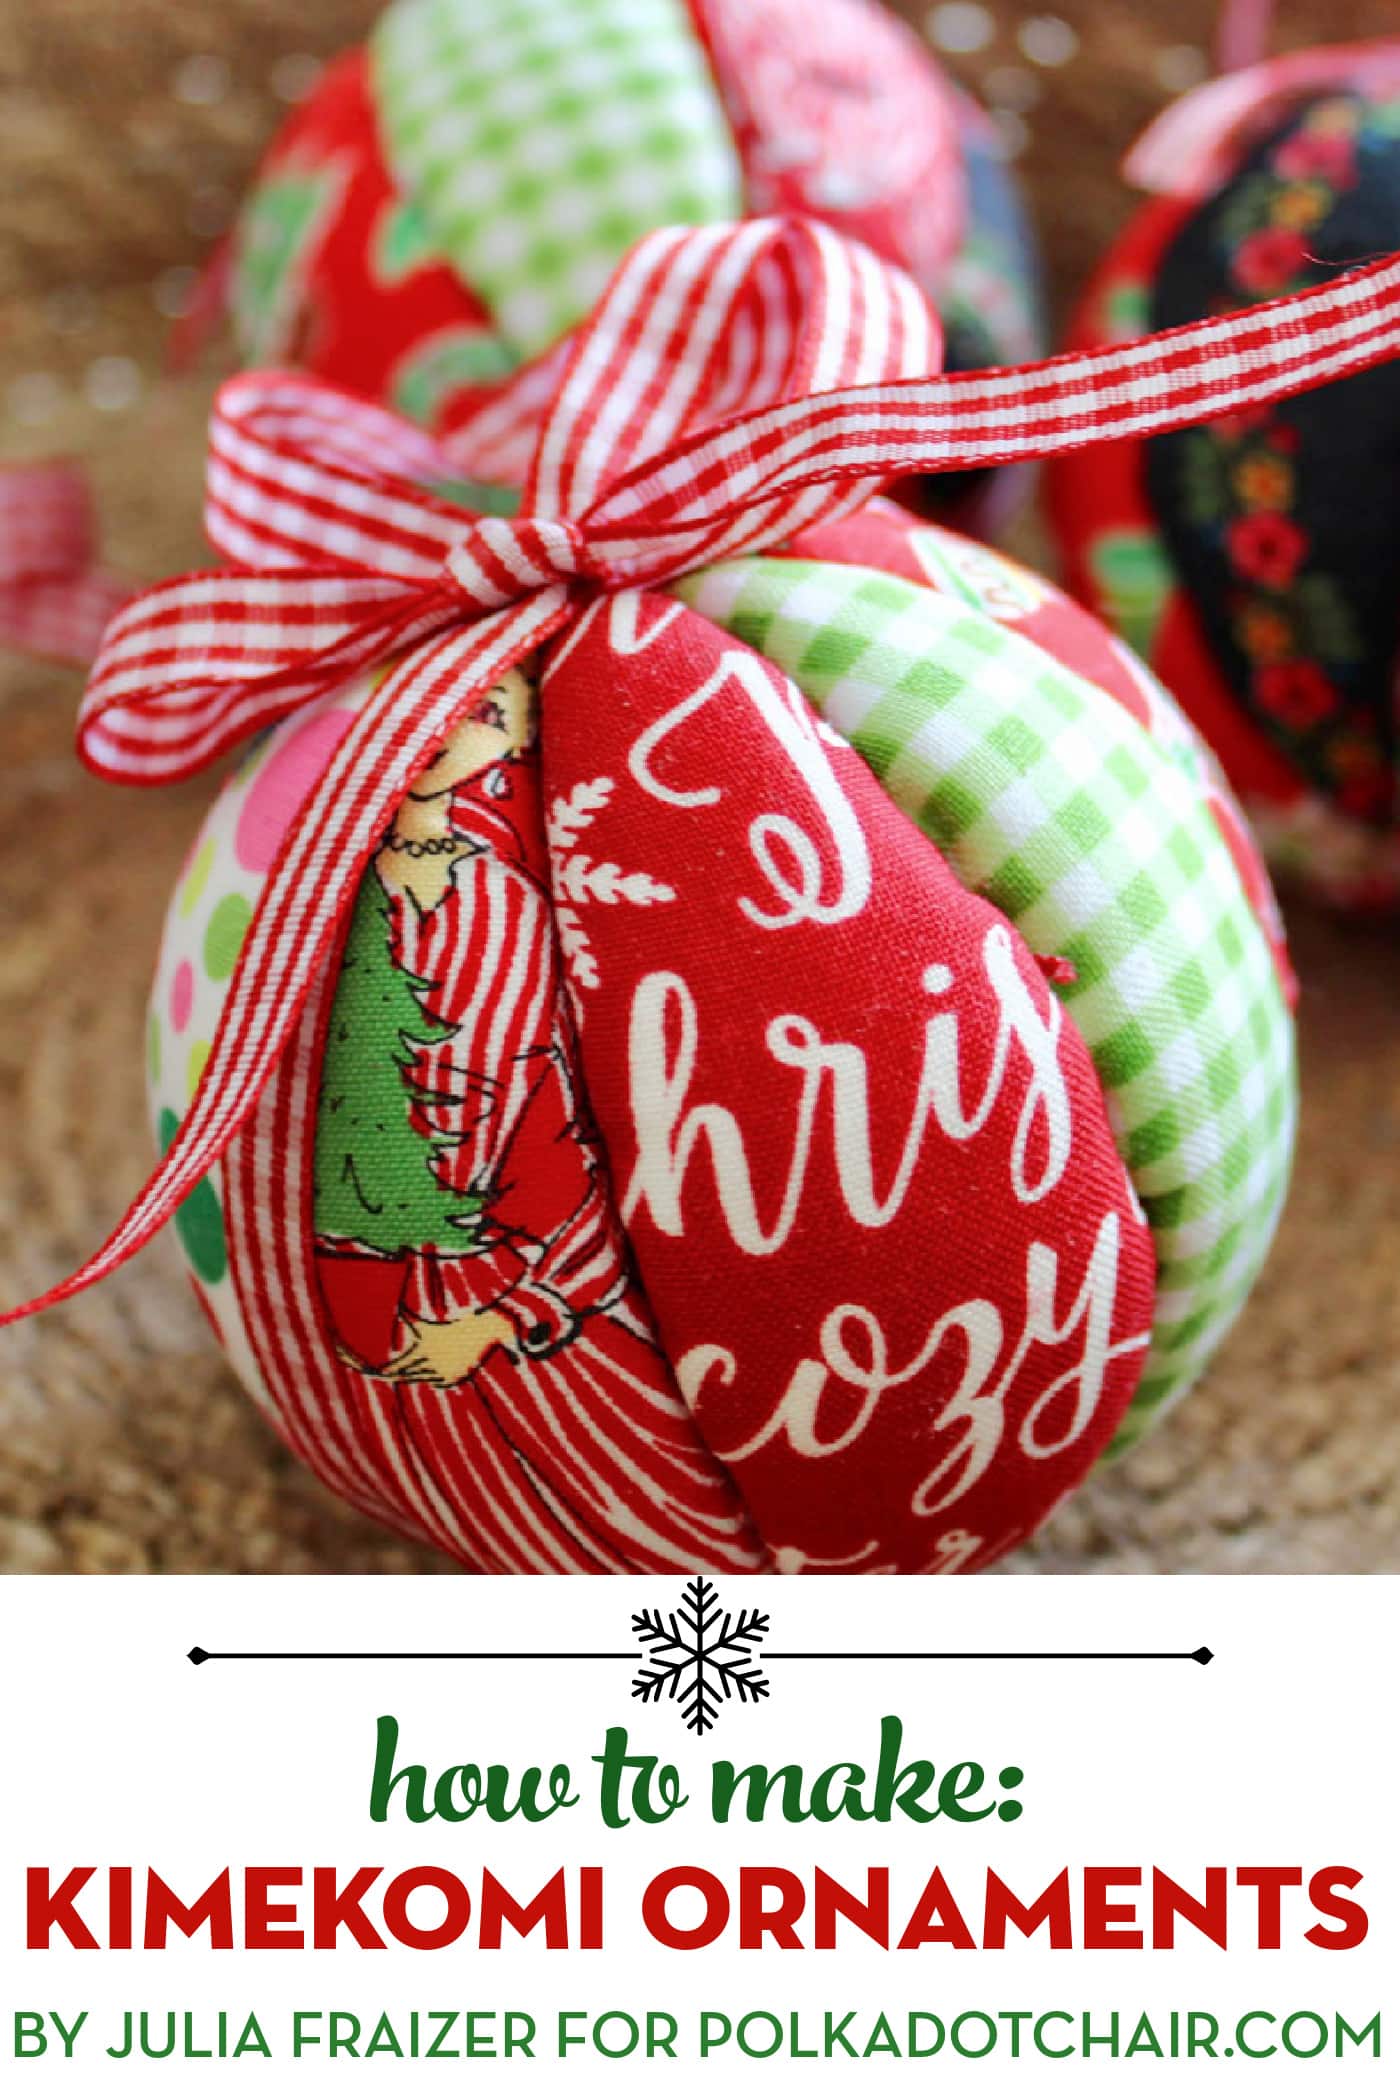
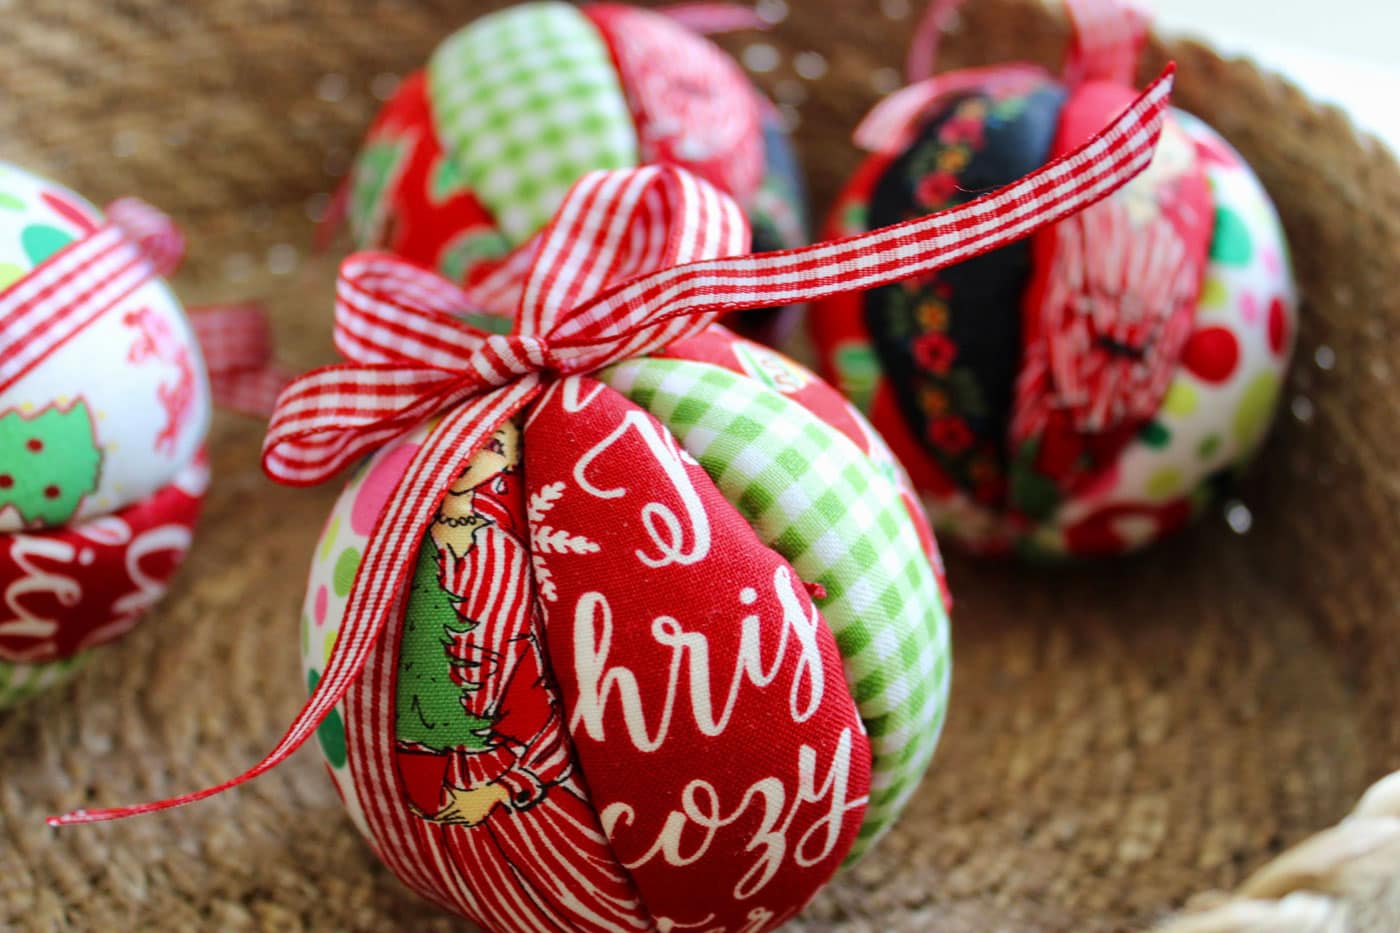
How to Make Fabric Kimekomi Christmas Ornaments
Learn how to create tucked fabric Christmas ornaments using a method called “kimekomi”. These beautiful ornaments are great for using up some Christmas fabric scraps!
Hello, friends! It’s time for another ornament DIY! I have had this ornament in the works for some time, and I am so excited to share it with you finally!
These gorgeous ornaments are easy to make and what’s so special about them is that this specific technique comes from a traditional Japanese doll-making technique called “kimekomi.”
I first became aware of kimekomi ornaments when I was given this ornament my mom made back in the 1970’s. I have always loved this ornament and wondered how she made it, so I started doing a little research and found this technique goes back almost 300 years!
What is Kimekomi?
It is said that the origin of kimekomi dolls began with “Tadashige Takahashi, who worked at Kamigamo Shrine in Kyoto between 1736 and 1741 and made dolls from pieces of wood leftover from making tools used in ceremonies and dressing them in leftover pieces of kimono fabric.”
A doll form was carved in wood, and then thin grooves would be carved into the wood, where the cloth would be inserted to create clothing for the doll. These dolls range from simple to very intricate and have become a fixture in Japanese culture.
About the Ornaments
These ornaments are a simplified, modern spin on traditional kimekomi. We will be using foam instead of wood, but the technique of tucking the fabric into the grooves but the technique of tucking the fabric into grooves to create a design remains the same. Let’s get started!
Supplies
To make one ornament, you will need:
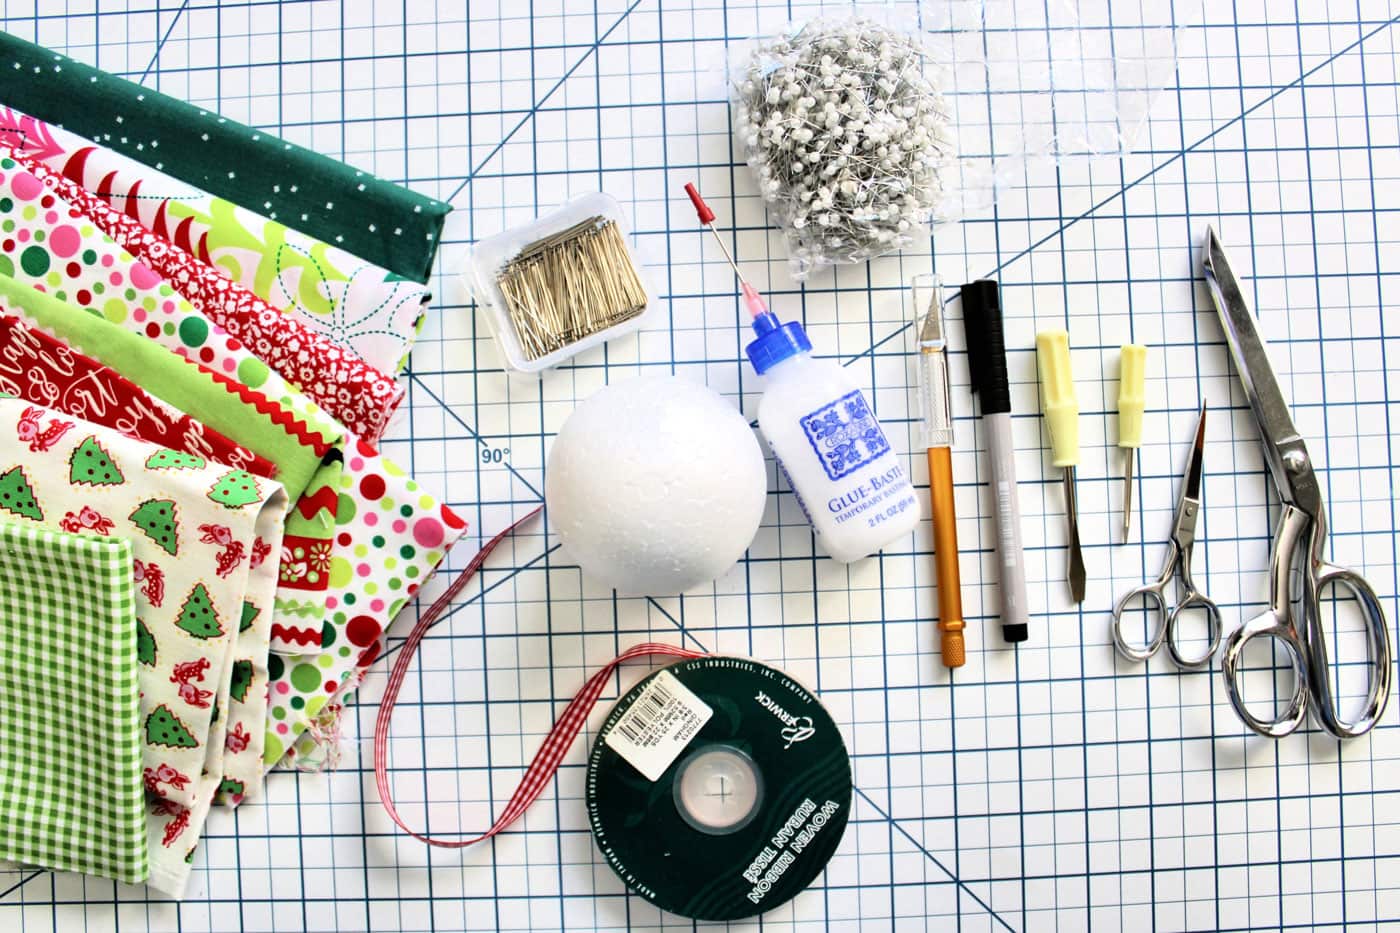
— A foam ball. (I used 3” foam balls. For this beginner, no math method, look for foam balls that have an “equator line” around the middle, and preferable, also have a “north and south pole” spot on each side of the ball. These markings are made in manufacturing the foam balls and are very helpful.)
— Fabric scraps. Your scrap pieces will need to be at least ½” wider and longer than each “orange slice” section. For this ornament, we will use eight different scraps of fabric.
— ⅜” Ribbon
— Straight pins
— A pearl head pin
— Tacky glue or basting glue (optional)
— Exacto knife
— Marker
— Small flat head screwdriver or another tool for tucking the fabric
How to Make a Kimekomi Christmas Ornament
Equipment
- Small flat head screwdriver or another tool for tucking the fabric
- Exacto Knife
supplies
- 1 package 3/8” Ribbon
- 1 package Straight pins
- 1 A pearl head pin
- Tacky glue or basting glue optional
- Marker
- 1 Styrofoam Ball Mine is 3"
- 8 scraps Fabric
Instructions
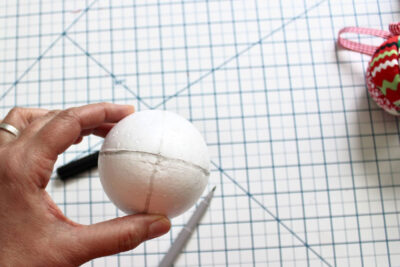
Step 1.
- Use your marker to draw a line around the “equator line” on the foam ball. This line is a product of the manufacturing process, and is a helpful starting point for our project.

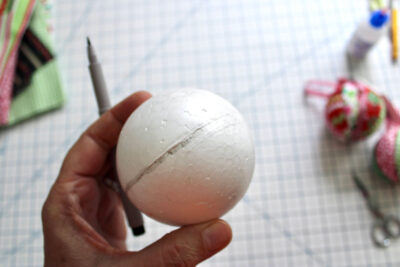
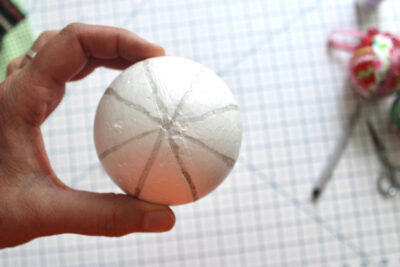
Step 2.
- Now find the “north and south pole” markings. Use the marker to draw a line from the north pole to the south pole, and back up around the ball. You will end up with four sections like this.
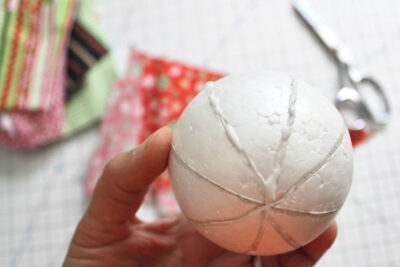
Step 3.
- Draw a line through the center of each section, creating a total of eight sections.
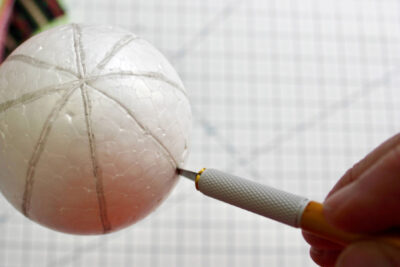
Step 4.
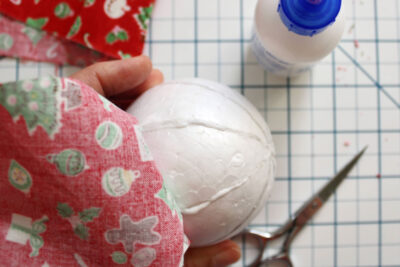
- Use your exact knife to cut along all of the lines. These are the grooves we will be tucking the fabric into.
Step 5.
- Adding glue is optional. If you are adding glue, place a thin bead of glue over half of one section.
Step 6.
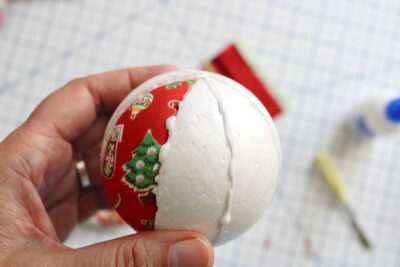
- Using a small screwdriver (I use one that came with my sewing machine) or another tool, begin tucking a piece of fabric into the grooves. Tuck a bit on one side, then on the other side, carefully working your way up to the tip of the orange slice. (Remember, we are just doing half of the slice right now.)
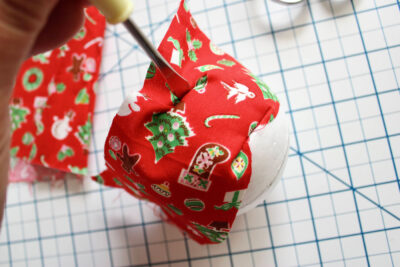
Step 7.
- Trim the fabric as close to the foam ball as possible.
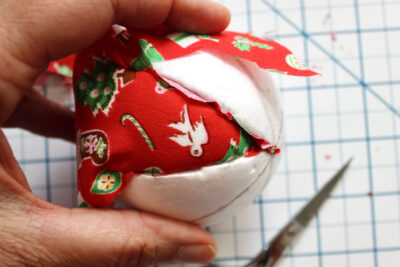
Step 8
- Repeat Steps 5-7 on the other half: add a thin bead of glue,
- tuck the fabric, and trim.

Step 9.
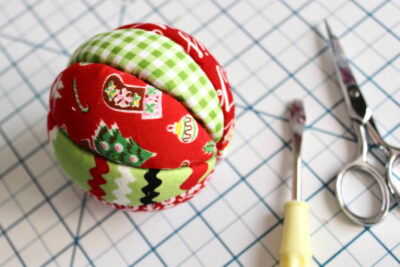
- Go back and tuck in any extra bits of fabric or stray threads.
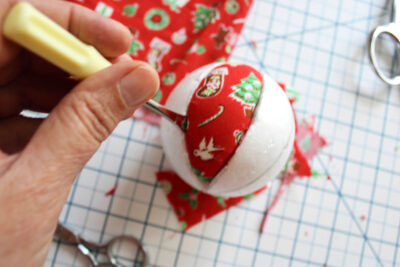
Step 10.
- Start on the section next to the one you just finished. Repeat Steps 5-9. Glue. Tuck. Trim. Glue. Glue. Tuck. Trim.
- Then do a final tuck, concealing extra fabric and stray threads.
- Continue these same steps until all of the sections are finished.

Finishing Touches
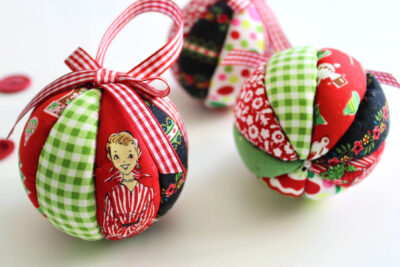
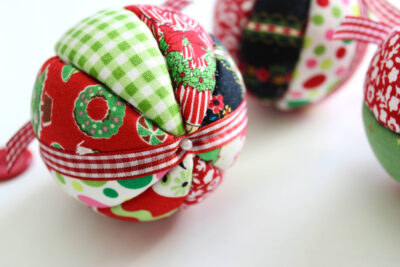
- To add the ribbons, first take a length of ribbon and wrap it around the foam ball. I like to add a dab of blue at the north and south poles before wrapping the ribbon.
- Use the decorative pearl head pin to hold the ribbon in place at the bottom of the ornament. Use a simple straight pin to hold the ends of the ribbon in place at the top of the ornament.
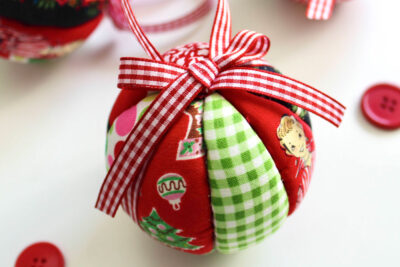
- Cut a 7” length of ribbon to form the loop and pin it in place at the top of the ornament. Add another dap of glue over the pin. Then make a small bow and pin it in place directly over the dab of glue.
Video
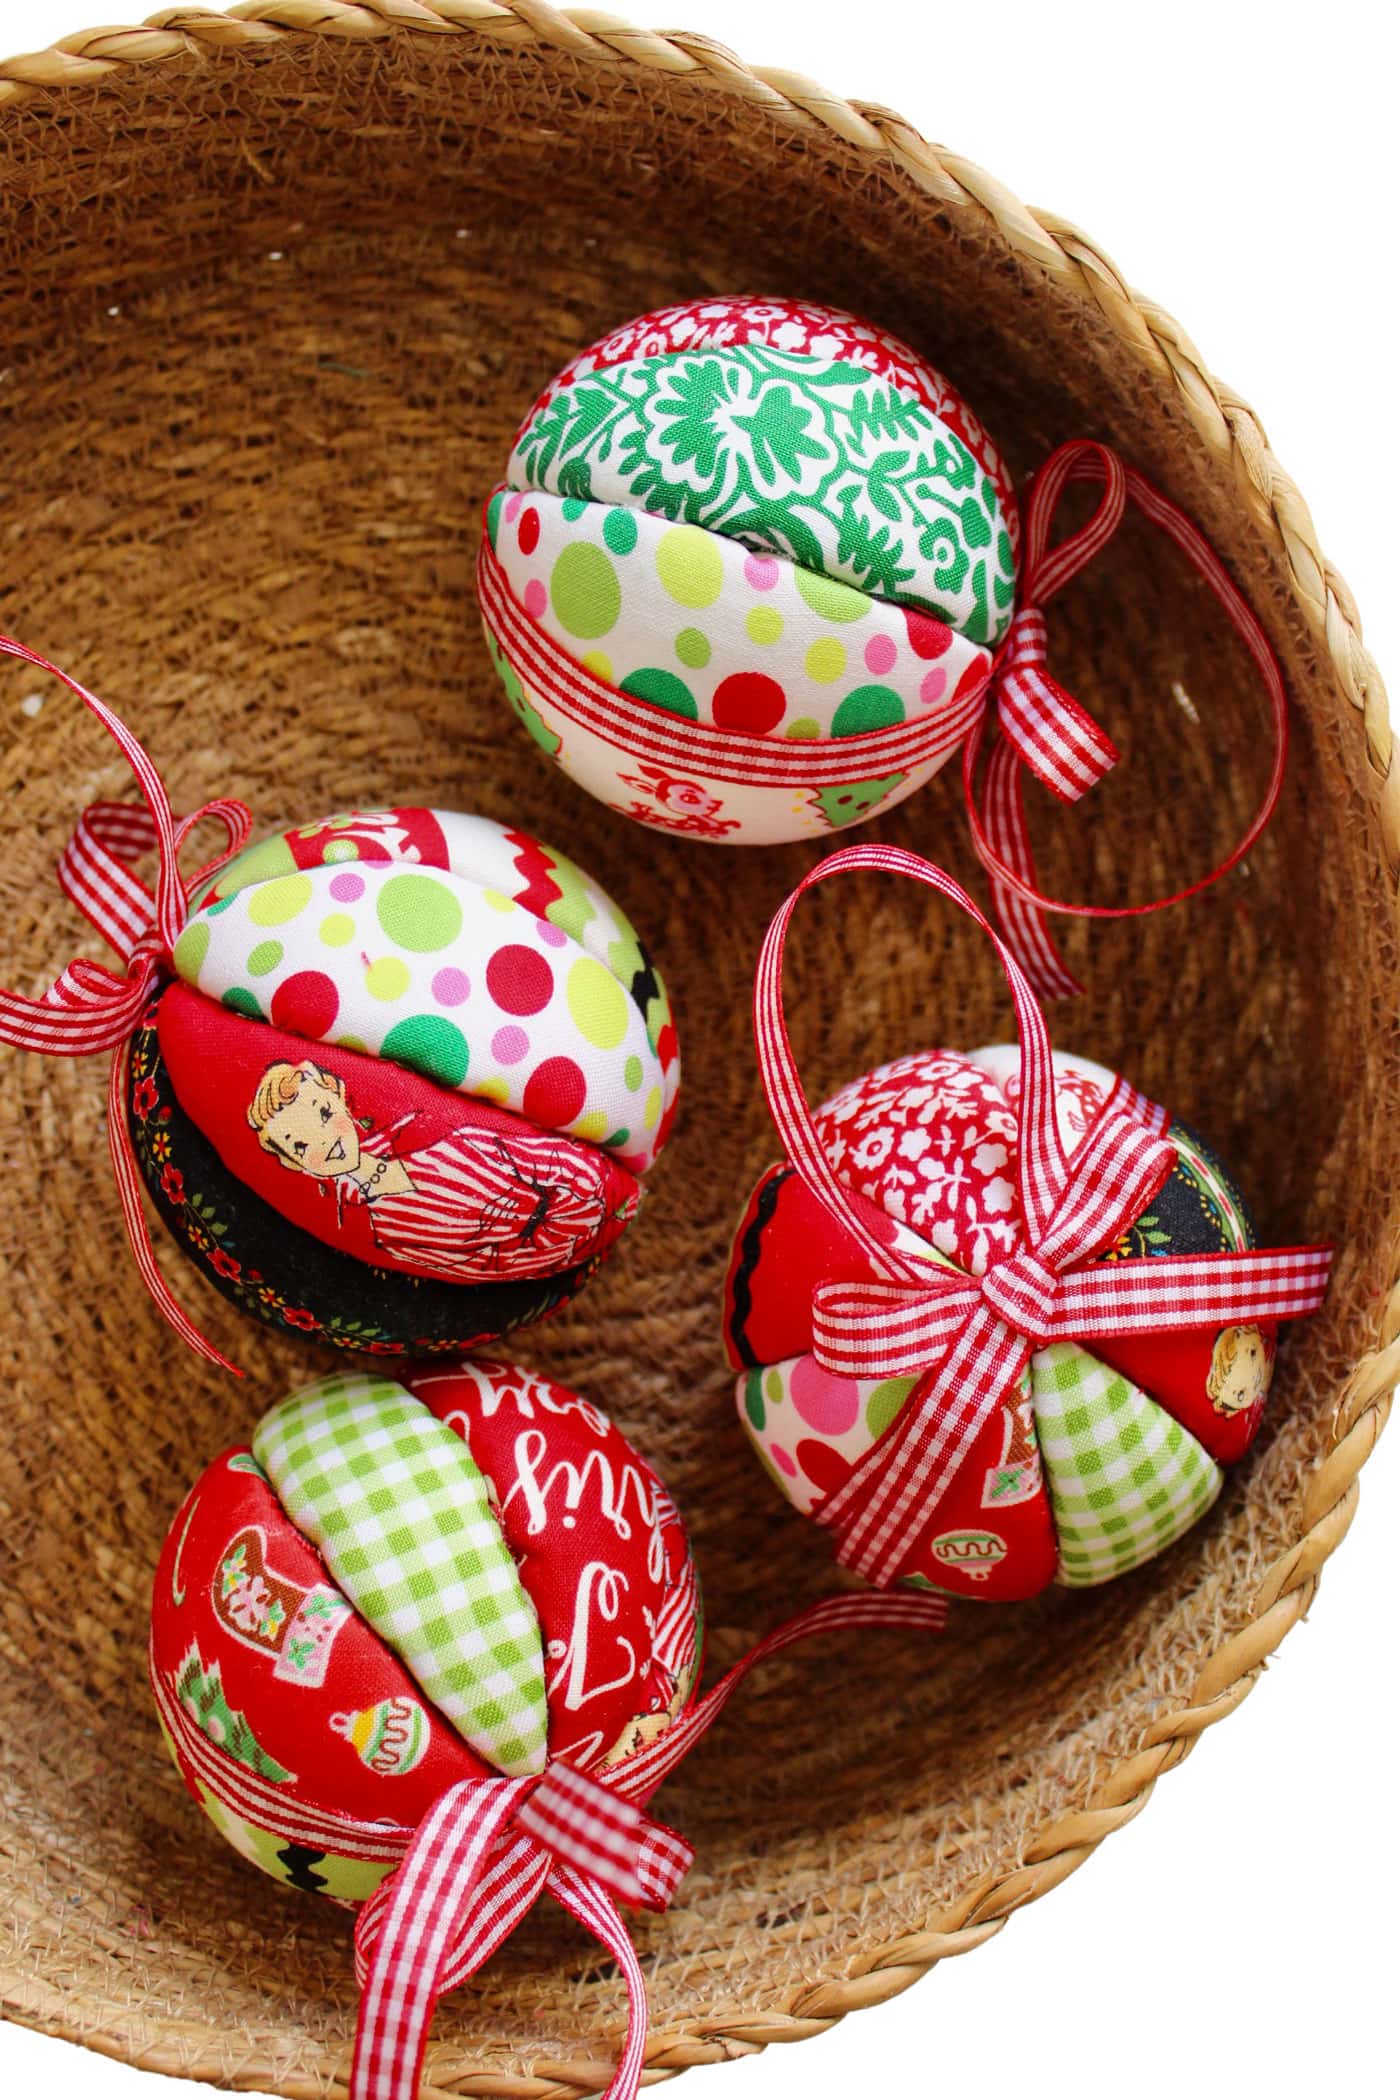
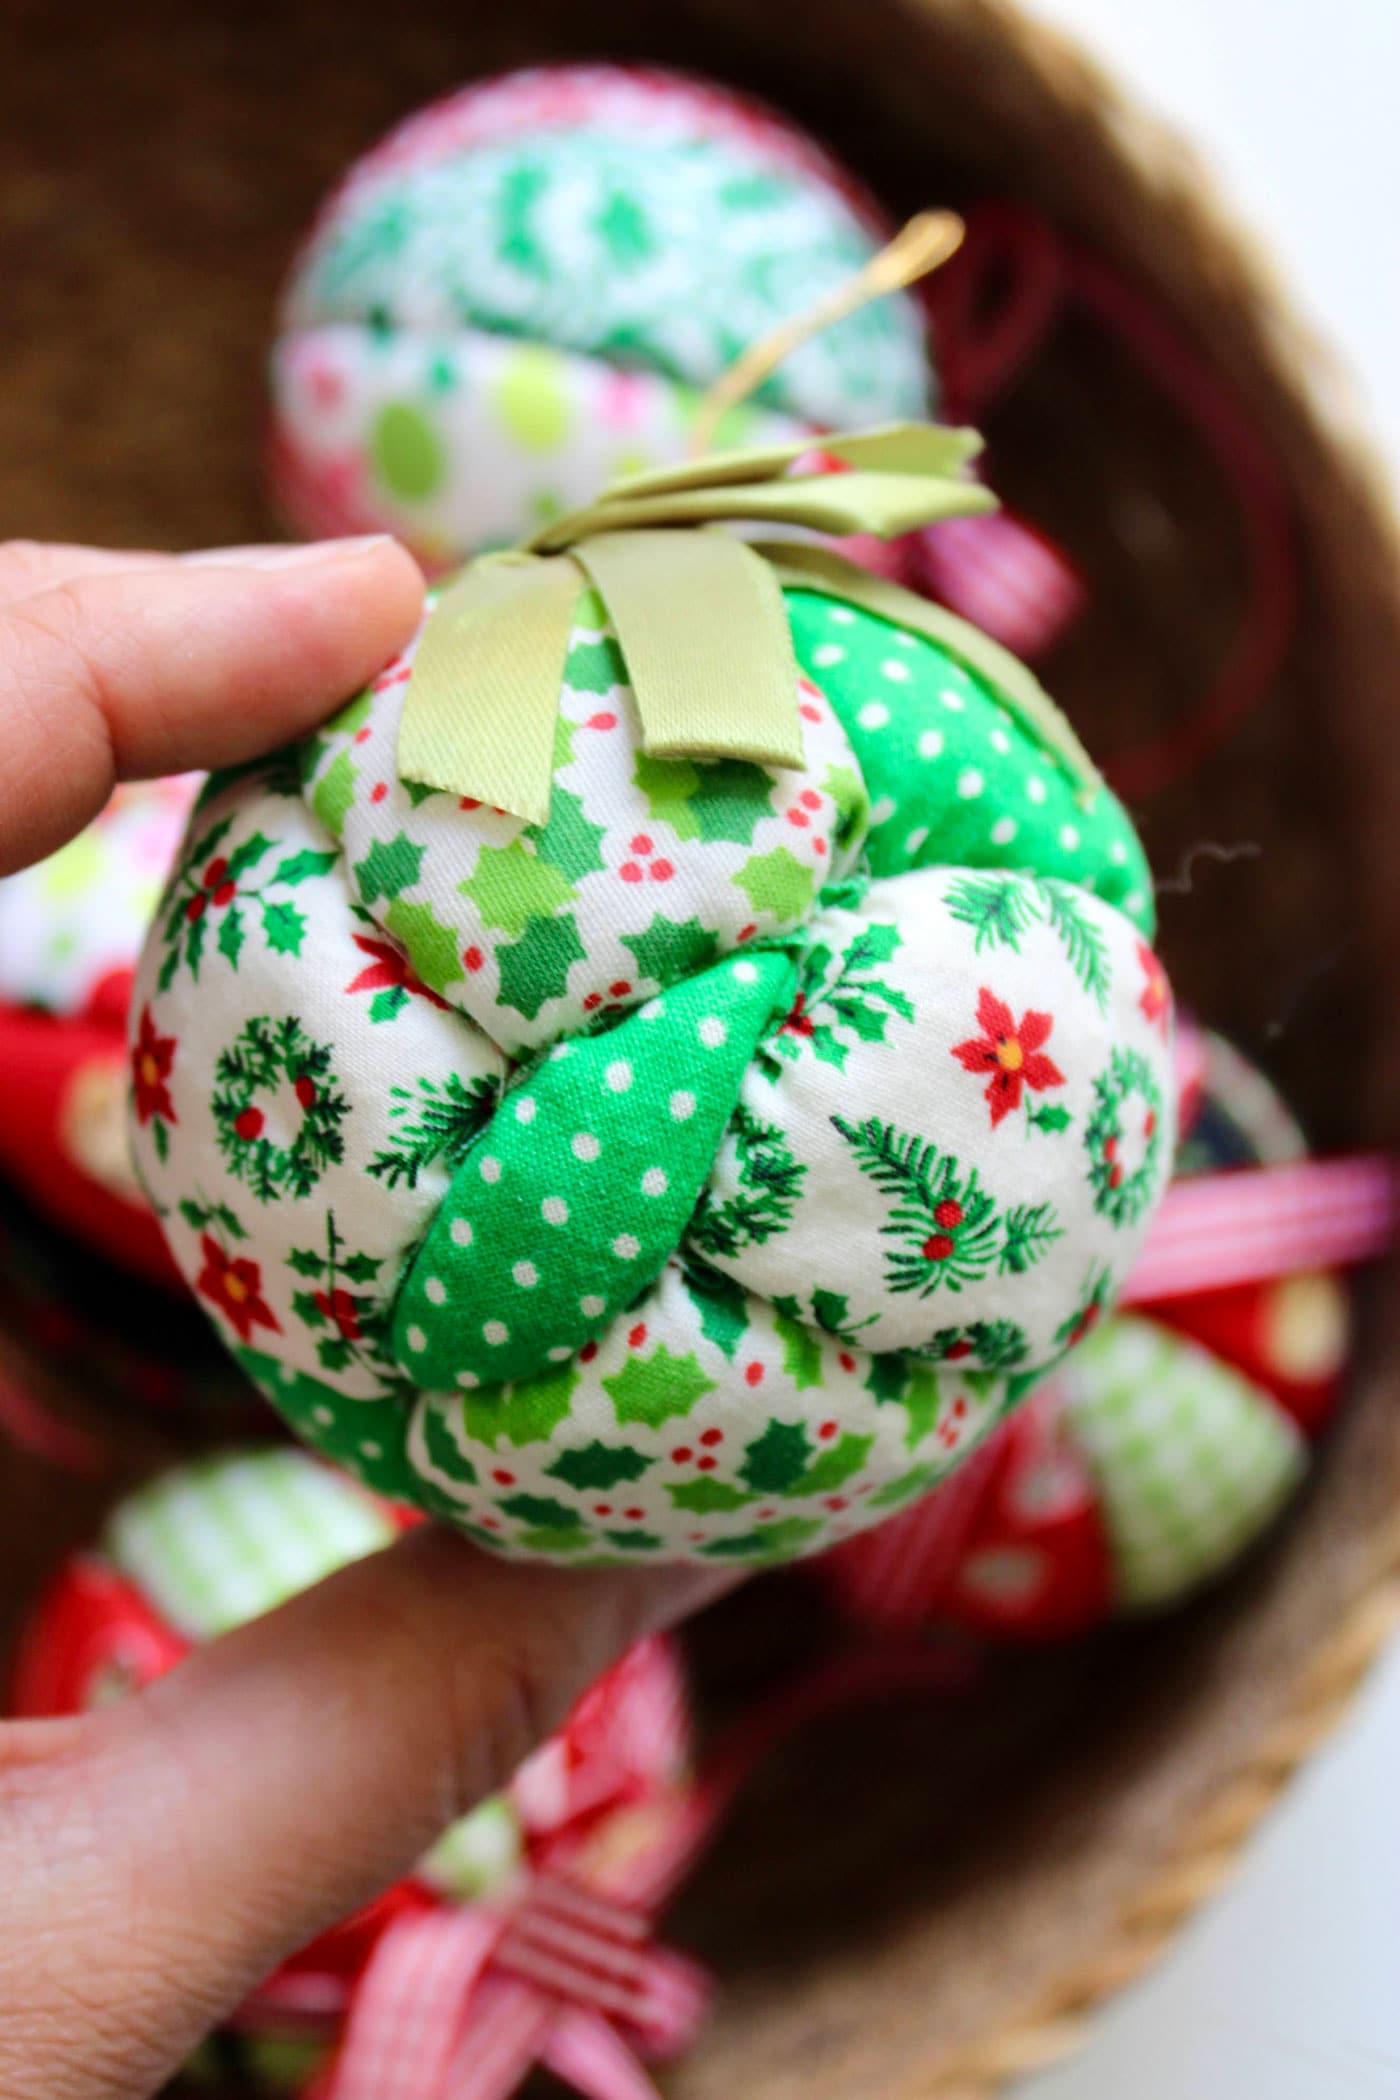
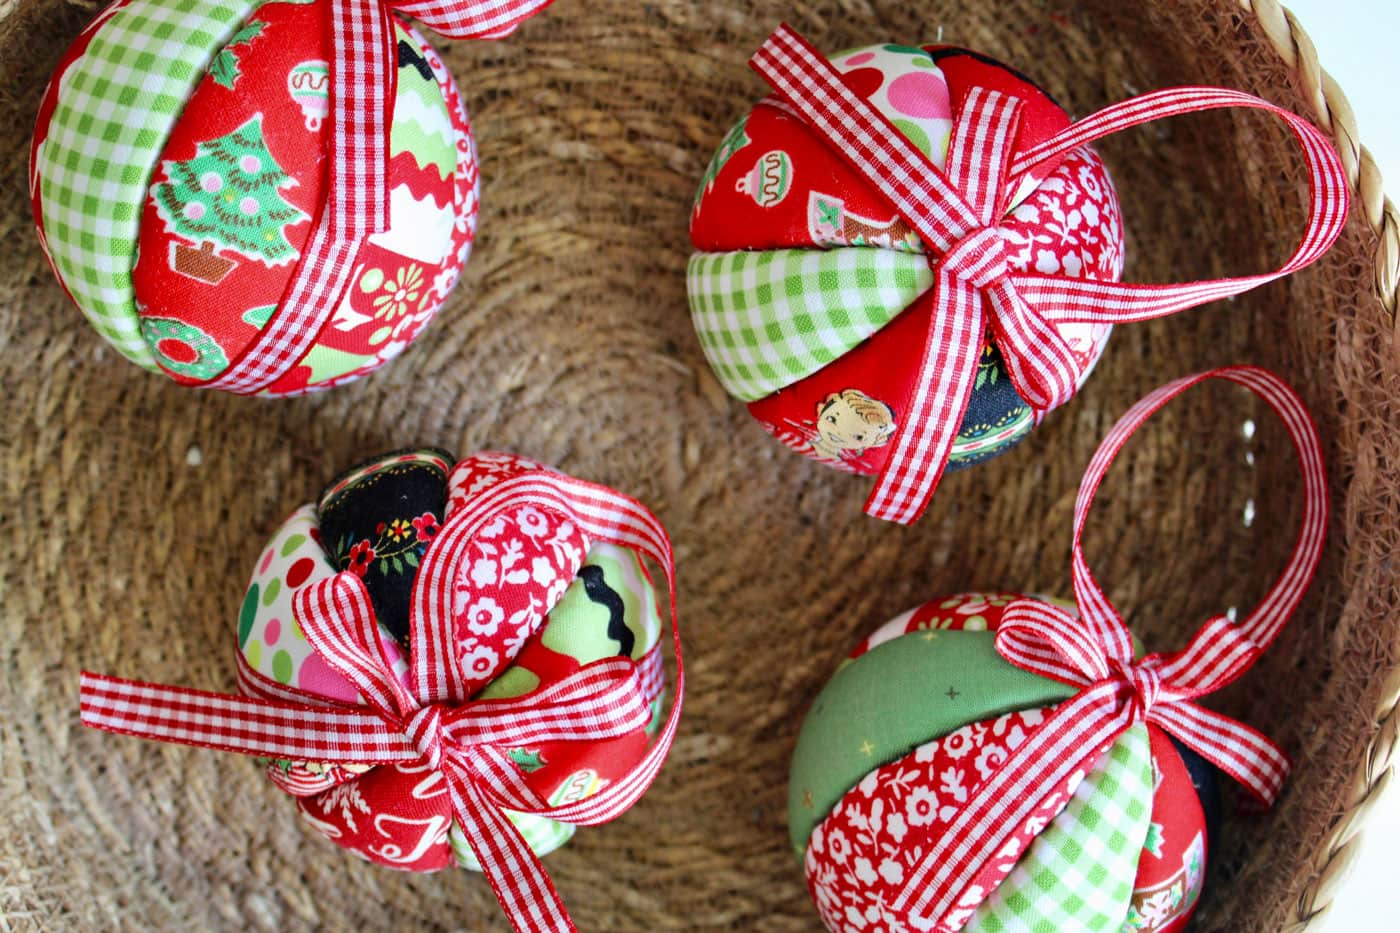
And you are done! Easy and timeless, these ornaments can be customized so they are truly one of a kind. Use fabrics representing a favorite sports team, use baby clothing for baby’s first Christmas, pieces of fabric from grandpa’s old shirts, and so on. The options are endless!
Julia’s Christmas Ornament Tutorials
- July: Paper Poinsettia Ornaments
- August: Paper Memory Christmas Ornaments
- September: Kimekomi Fabric Ornaments
- November: Granny Rocker Christmas Ornaments
- December: String Christmas Ornaments
- January: Retro Diorama Ornaments
- February: DIY Splatter Paint Glass Ornaments
- March: Blown Egg Ornament
- April: Retro Photo Ornament Tutorial
- May: Vintage Folded Fabric Ornament
- June: Patchwork Heart Ornament
- July: Improv Pieced Heart Ornaments
- October: Plastic Canvas Gift Card Holder
- November: Yarn Stitched Jingle Bell Ornament
Join me again next month for another ornament tutorial! Be sure to follow me on Instagram @bayhillstudio and subscribe to my YouTube Channel for more creative content and project inspiration. Have a blessed day!
About the Designer

Julia Frazier is the founder of Bayhill Studio. Julia designs quilts and projects geared toward beginner quilters and crafters. You’ll usually find her at her sewing machine or hiking in the nearby mountains. Follow Julia on Instagram @bayhillstudio, and subscribe to her YouTube channel for new and exciting projects and tutorials. Be sure to check out her Bayhill Studio website for a growing list of tutorials and patterns.