How to use Iron-On Vinyl & the Cricut EasyPress
I’ve shared quite a few iron-on vinyl projects here over the years. Most of the time, I “jump” into the project or share free SVG cut files with you. Today, I thought I’d walk you through the step-by-step process of making an iron-on using a Cricut Machine, Iron-On Vinyl & Cricut EasyPress.
First up, let’s start with a lot of the Frequently Asked Questions I get about working with a Cricut Machine to create Iron-On’s.
Cricut & Cricut EasyPress Frequently Asked Questions
What is a Cricut Machine?
A Cricut Machine is an electronic cutting machine that works with either a computer, phone, or tablet. Think of it as a printer, but instead of printing, it cuts. There are other electronic cutting machines on the market; I, however, do not own any of them and can only speak from experience about a Cricut Machine.
There are 2 main types of Cricut Machines. The Cricut Explore series will cut out vinyl, iron-on vinyl, some leathers, paper, party supplies, etc. It will also draw using a set of Cricut Pens.
The 2nd machine type is the Cricut Maker. It has an adaptable tool system that allows you to cut more materials. You can cut fabric, leather, wood, etc. For more about the Maker, you can see my post on FAQ about the Cricut Rotary Blade.
What is Iron-On Vinyl?
Iron-On Vinyl is a material that comes on a roll. It comes adhered to a plastic transfer sheet. The machine cuts the material (but not the plastic transfer sheet).
The material can be ironed onto items using high heat. It can be used for fabric & wood. There are several types of iron-on vinyl. The type you need depends on what you’re applying the iron-on to. For example, if you are working with “exercise” type fabrics, you want to use Sport-Flex iron-on.
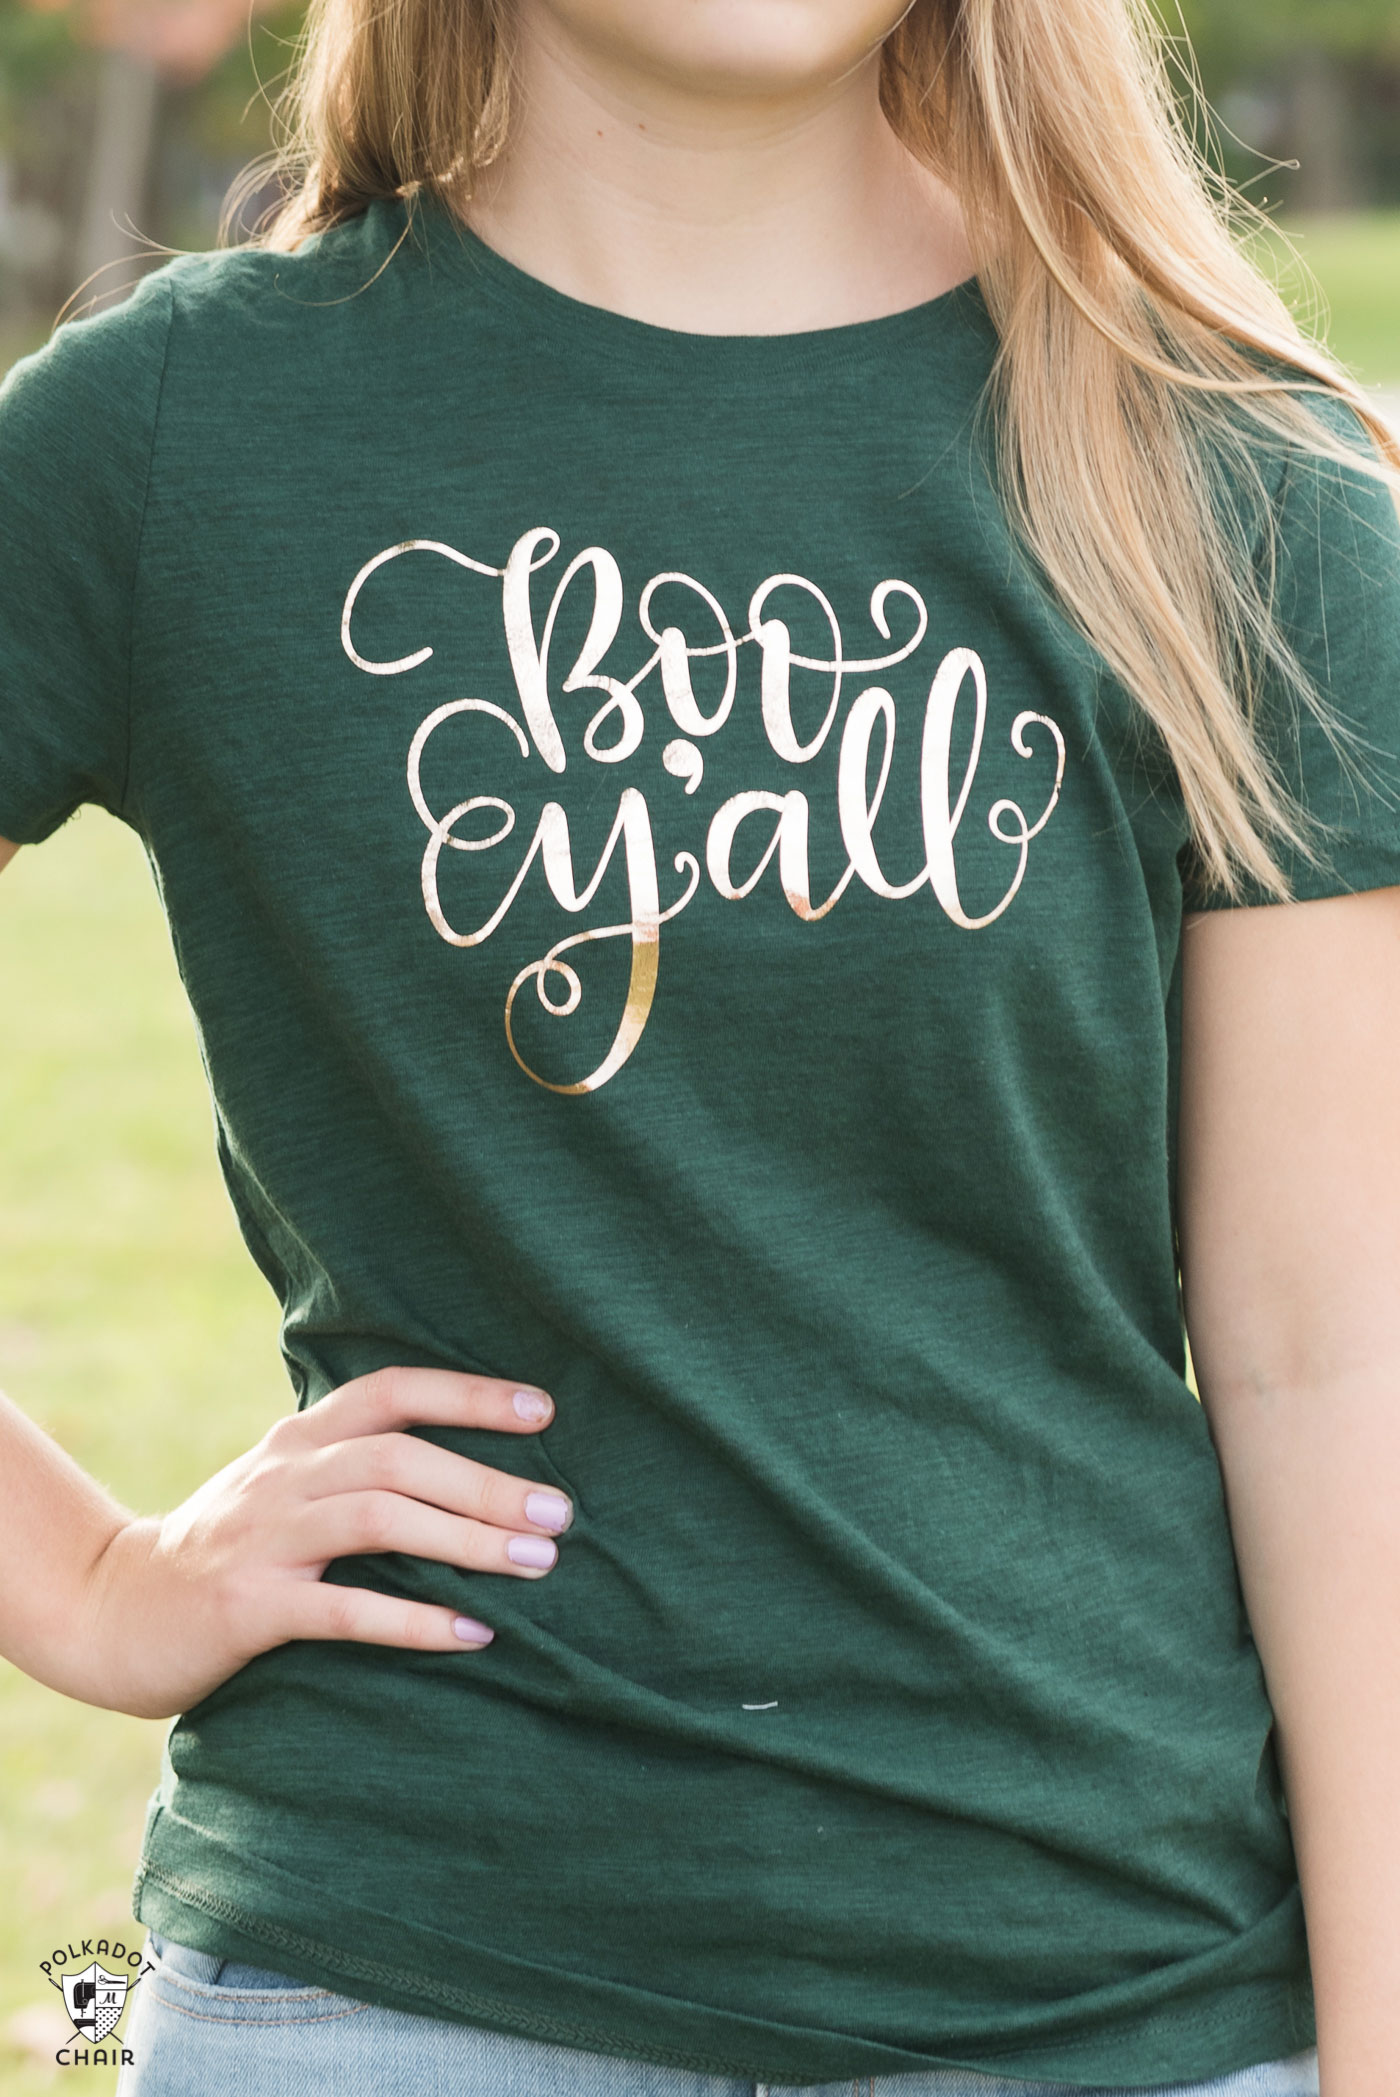
I have used Iron-On to create wood signs, t-shirts, tote bags, pillowcases, graduation caps, even cork boards. Below is a video of the process if you’re curious. I used my Cricut to add Iron to Cork Tiles for my daughter to use in her room.
Why is a Cricut EasyPress better than an Iron when creating iron-on?
A traditional iron is designed to iron clothing. Most are equipped with the option for steam, and the shape (i.e., the pointed end) is well-suited for clothing.
However, most home irons normally don’t feature an even heat distribution through the iron. Spots of the iron are hotter than the others. This does not matter when you’re ironing clothing since you are moving the iron around. However, when you’re working with iron-on vinyl, you are not moving the iron around.
Imagine that if you are trying to adhere iron-on to fabric (or other material) and need an even heat, the iron is not your best choice. The variation in temperature across the plate of iron can be as much as 200 degrees.
This is why, for the most part, iron-on (or heat transfer vinyl) has been applied in the past with large heat presses. These heat presses are huge and not well-suited for home use.
I have been using my Cricut EasyPress for over 2 years and have to tell you the difference between using it and iron is NIGHT AND DAY. The iron-on sticks to the material and stays there. I had previously given up working with iron-on because it was so difficult to get it to adhere to my project.
What Size Cricut EasyPress Should I Buy?

This answer is going to be different for everyone. There are four sizes of EasyPress machines available.
- Large: 12″ x 10
- Medium: 9″ x 9″
- Small: 6″ x 7″
- Mini: 2″ x 3.25″
The photo above shows the Large and Small next to each other for reference. If you think you will primarily be making t-shirts or tote bags. I’d recommend the large one. If you are going to be making a wide variety of projects, I think the Medium size is the most versatile.
If your budget only allows for the small, you will be fine. It works great.
The mini (shown below) is great for small projects and quilting (if you are a quilter). I like to use the mini for baseball hats, shoes, etc. You can see my full review of the EasyPress mini here.
How do I get custom files into Cricut Design Space?
I’m sure you’ve seen all of the blogs around that offer free files for Cricut machines. You may be wondering how you USE those files.
First, follow the directions on the site to purchase or obtain the files. Save the files to your computer’s hard drive. The file type that works best for Cricut machines is SVG. SVG files are not normally used for many other applications. So we don’t need to talk too much about what they are or how they work.
After you have obtained the file, open Cricut Design Space and start a new project. Then select UPLOAD. Please find the file on your computer and upload it. You can then place the file in your project and manipulate it as you would like.
There are ways to use SVG files on an iPad or iPhone. However, Apple software does not support SVG files, and the process is cumbersome and complicated. It is best to use a desktop computer when working with Cricut files from 3rd party sites online.
Okay! Let’s Make an Iron-On!
How to Make an Iron-On with a Cricut Machine
Step One: Select your File.
First, you need to decide what you want to put on your t-shirt. You can pick a file in Cricut Design Space, find one online, or use a simple alphabet and type what you want.
Step Two: Pick your Material
Select the iron-on vinyl type and color that you want to work with. Most of the time, I use Everyday Iron-On. However, I like to use Foil Iron-On or Glitter Iron-On for holiday projects or kids’ projects.
Step Three: Create your Project in Cricut Design Space
Open Cricut Design Space and import your image. Before you cut out your image, you need to do a few things.
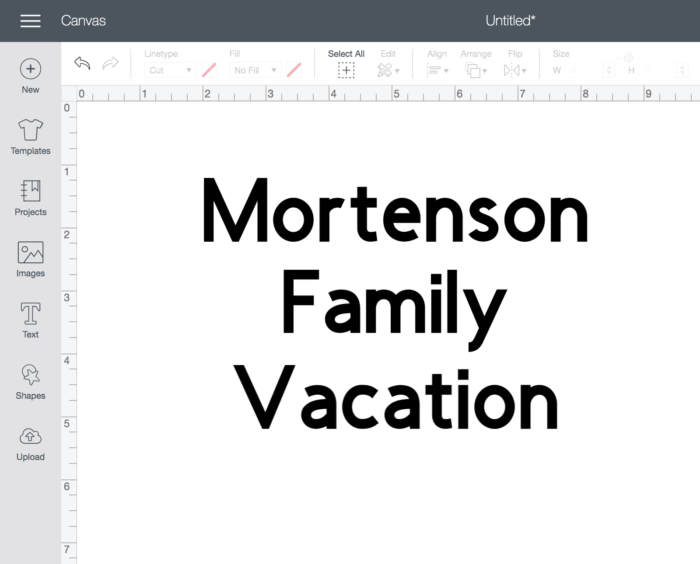
One, if your image contains multiple parts (like a phrase with multiple words), you need to make sure that all of those parts cut at the same spot on your vinyl as they appear on your screen.
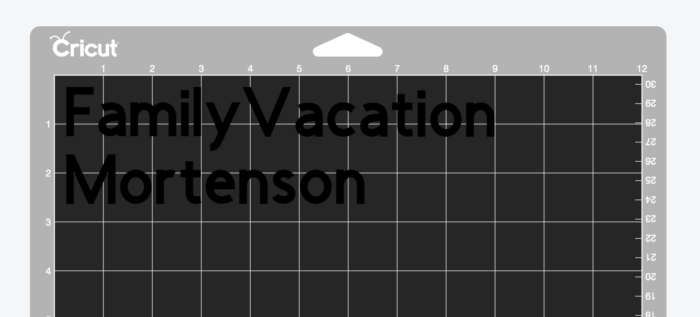
Cricut software is designed to make the most of your materials and will automatically try to fit as many elements on a cut as possible. It will take the words in a phrase and “jumble” them up to fit when it does this. That is NOT good when you’re making a t-shirt. Note how in the image above, my words are cutting out in a line and not on top of each other.
In the Design space, select all the items you are going to cut, then select ATTACH. It is at the bottom right corner of your screen.
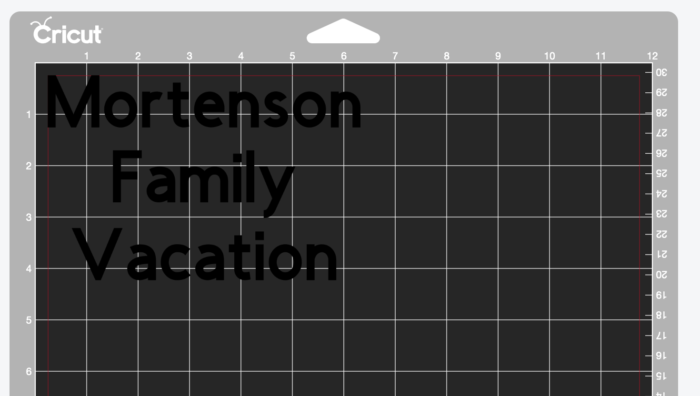
You will notice that now my phrase is set to cut out the same way I see it on my screen.
Step Four: Cut out your Image
When your design is ready, select MAKE IT in Design Space to send your project to the machine. You will notice a few things.
1- There is a toggle on the left side that says “mirror for iron-on”. Select that.
2- There are grid lines on the preview. The gridlines on the preview correspond to the gridlines on your mat. You can see how much of your mat you need to cover with material based on those grid lines.
Apply your Iron-On vinyl to your Cricut mat (use the mat recommended in the packaging materials; most of the time it’s the standard mat). The material will be shiny side down.
In Design Space software, select from the drop-down box the type of material you are cutting.
Make sure you have the correct blade in your machine.
Select the arrow button on the machine to load the mat into the machine. Make sure that it loads straight. If it’s angled when it goes in it will cause problems.
When you’re ready, push the blinking Cricut button on the machine to begin the cut.
Let the machine cut.
Step Five: Prepare the Image for EasyPress
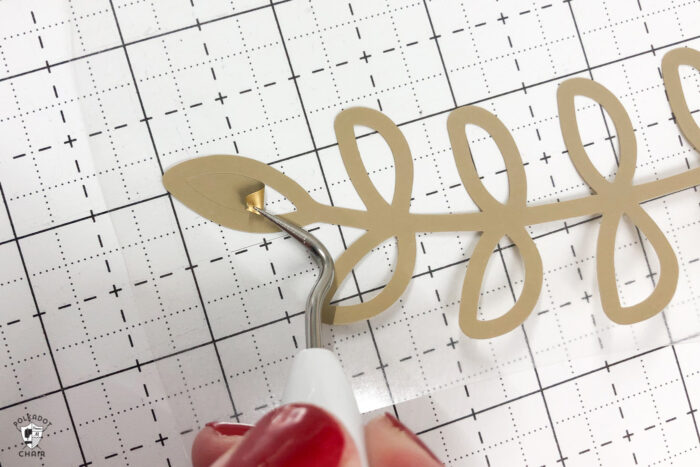
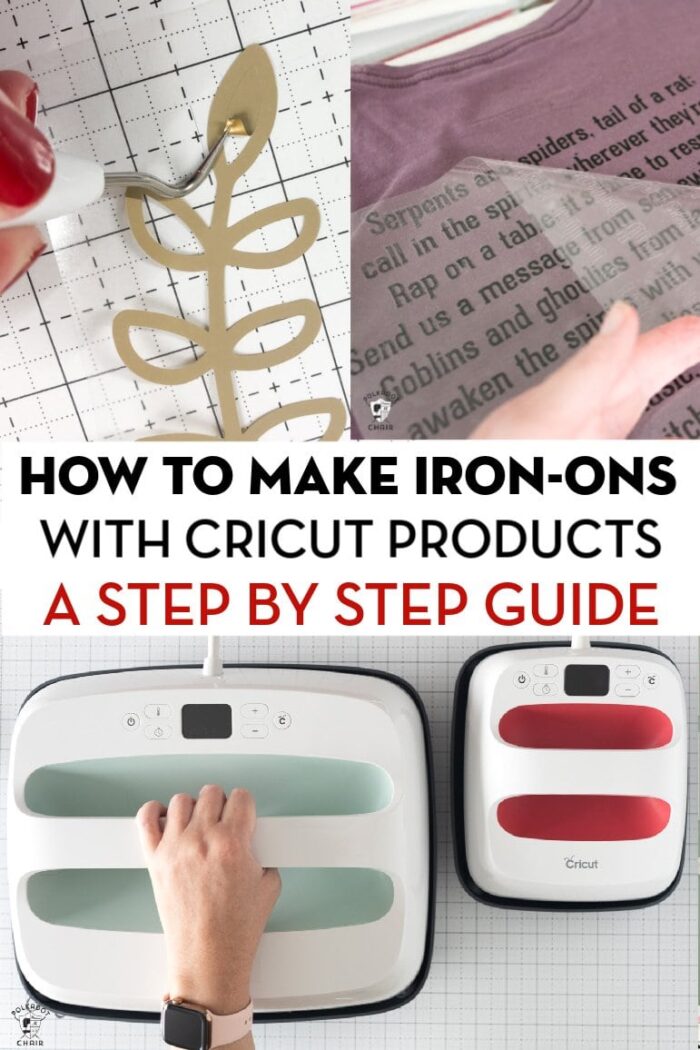
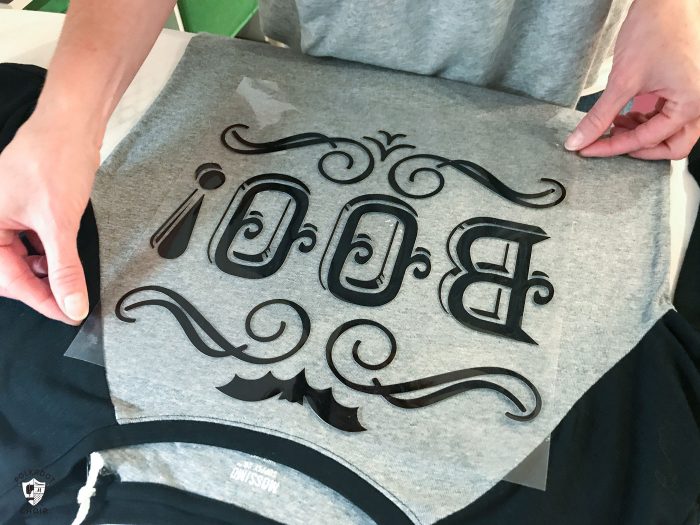
After your image is cut, you need to remove the negative space from around the image. This is called weeding. Once your image is weeded, you are ready to iron it on (or, in this case, PRESS it on).
If you do not have a Cricut EasyPress Mat, lay your t-shirt (or other items) on a towel on a flat surface. Don’t use just an ironing board; it will absorb too much heat. I put a towel on the board, and it worked great for me.
I have a Cricut EasyPress Mat, and I do think it makes a huge difference in the quality of the finished project. But as I said, you can use a towel if you do not have one.
Lay the cutout iron on vinyl on top of your project.
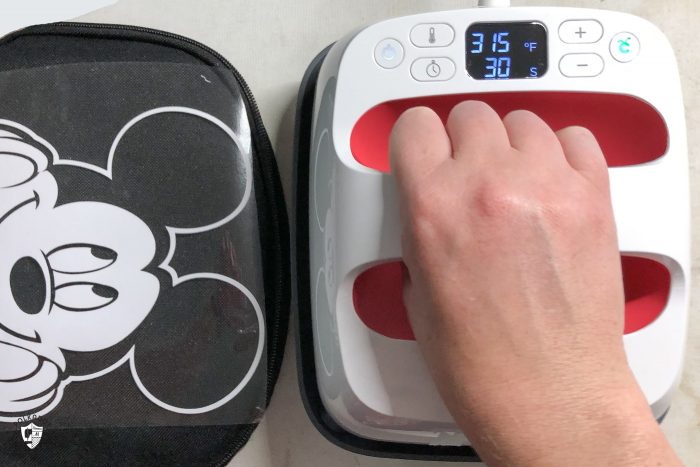
Step Six: Input the Settings into the EasyPress
Using the chart that comes with your EasyPress, set the temperature and time on your machine. Wait for it to heat up. The button will turn green when it’s ready to go.
Step Seven: Use the EasyPress to Adhere the Iron-On
Apply firm pressure (but you don’t need to press firmly) and place the EasyPress on your t-shirt. Don’t move it around like an iron; keep it in one place at a time.
Hit the Cricut button, and the timer will start counting down. Wait for it to finish counting down. When it beeps, move it off your image or to another spot on your shirt (if your image is larger than the EasyPress).
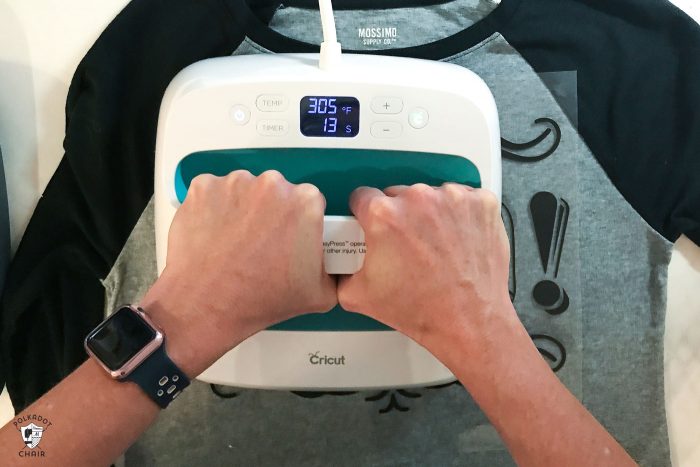
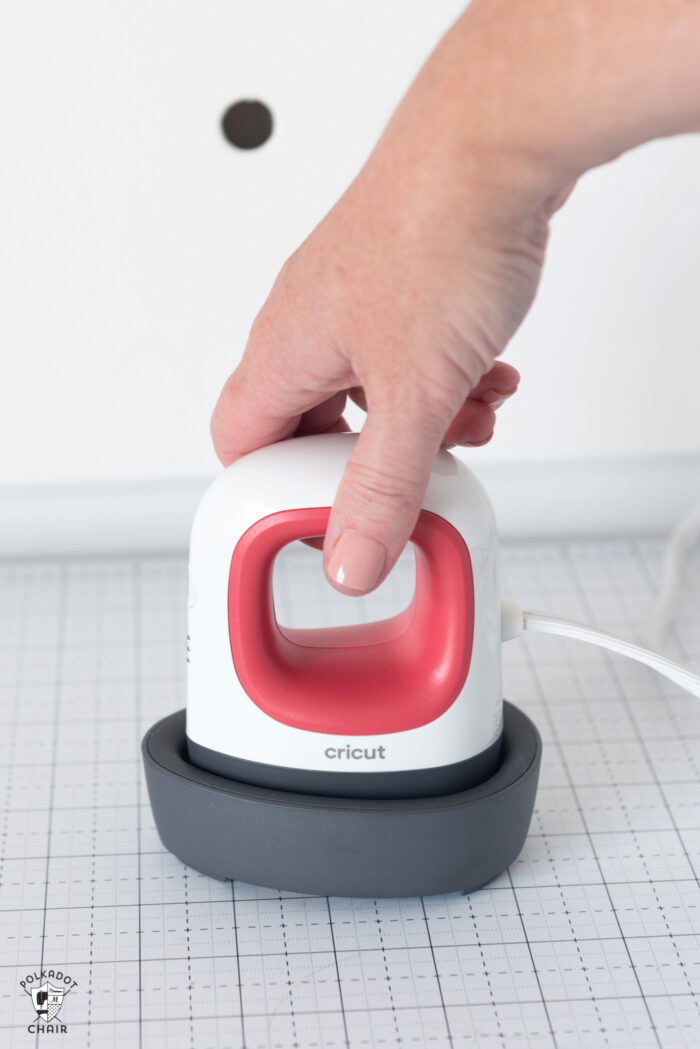
When you’re done, replace the EasyPress on its cradle.
Step Eight: Remove the Plastic Transfer Sheet
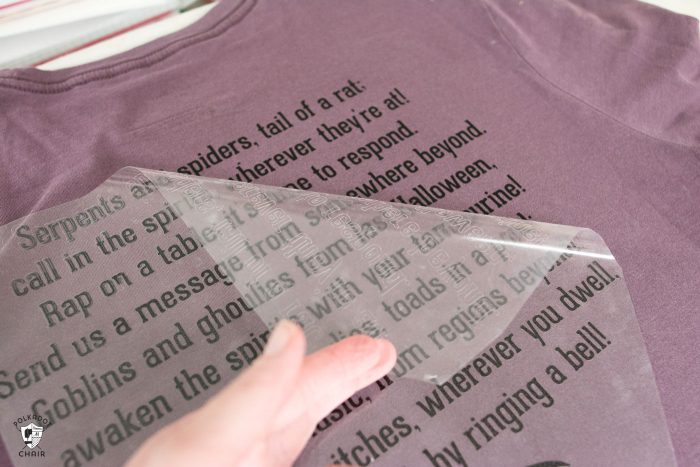
Lastly, peel the transfer sheet off of your image. Refer to the EasyPress chart to know if you should peel the image while it’s warm or cool.
Peel slowly to make sure that all of your transfer is stuck. I like to peel at a diagonal. If you missed a spot, just redo it.
Regarding caring for your shirts, you can wash them but don’t dry them in the dryer. I’ve washed mine, and they came out just fine. The image stayed stuck! I’ve even dried them on accident, and they have been fine! If you want your shirt to last for years, I’d line-dry it.
I hope this helps you out a bit! I have a few Cricut How-To Videos on my YouTube page that you might want to check out. I’m always adding more!
My Favorite Cricut Products
- Cricut Maker 3 (you can get great deals on machine bundles on Cricut.com)
- Roll Holder for Maker 3
- Cricut EasyPress (I like the large size the best): Make sure you get the EasyPress mat as well.
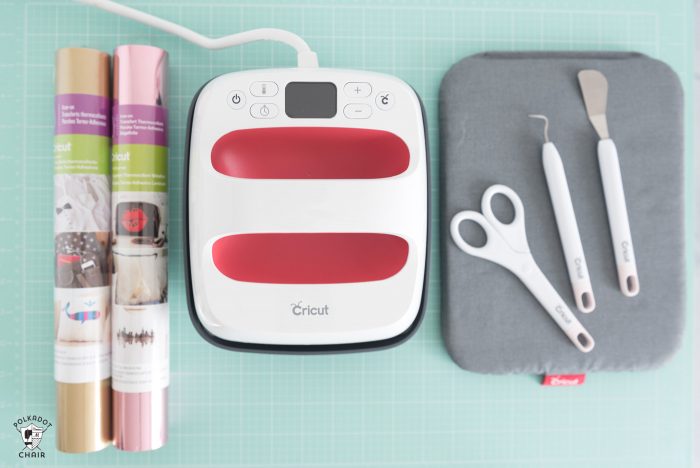
- Cricut Weeding Tools: (I use the small hook tool ALL the time, making weeding vinyl so much easier).
- Cricut BrightPad: A cordless, flat, bright lightbox. I use it to weed Cricut vinyl and use it all the time to trace applique shapes for sewing & quilting.
- Cricut Iron On Vinyl
- Cricut Permanent Vinyl