Free Girls Sweater Crochet Pattern
Want to feel free in a flowing, pretty, comfy cardigan? Me too. I got you covered with this one. 🙂
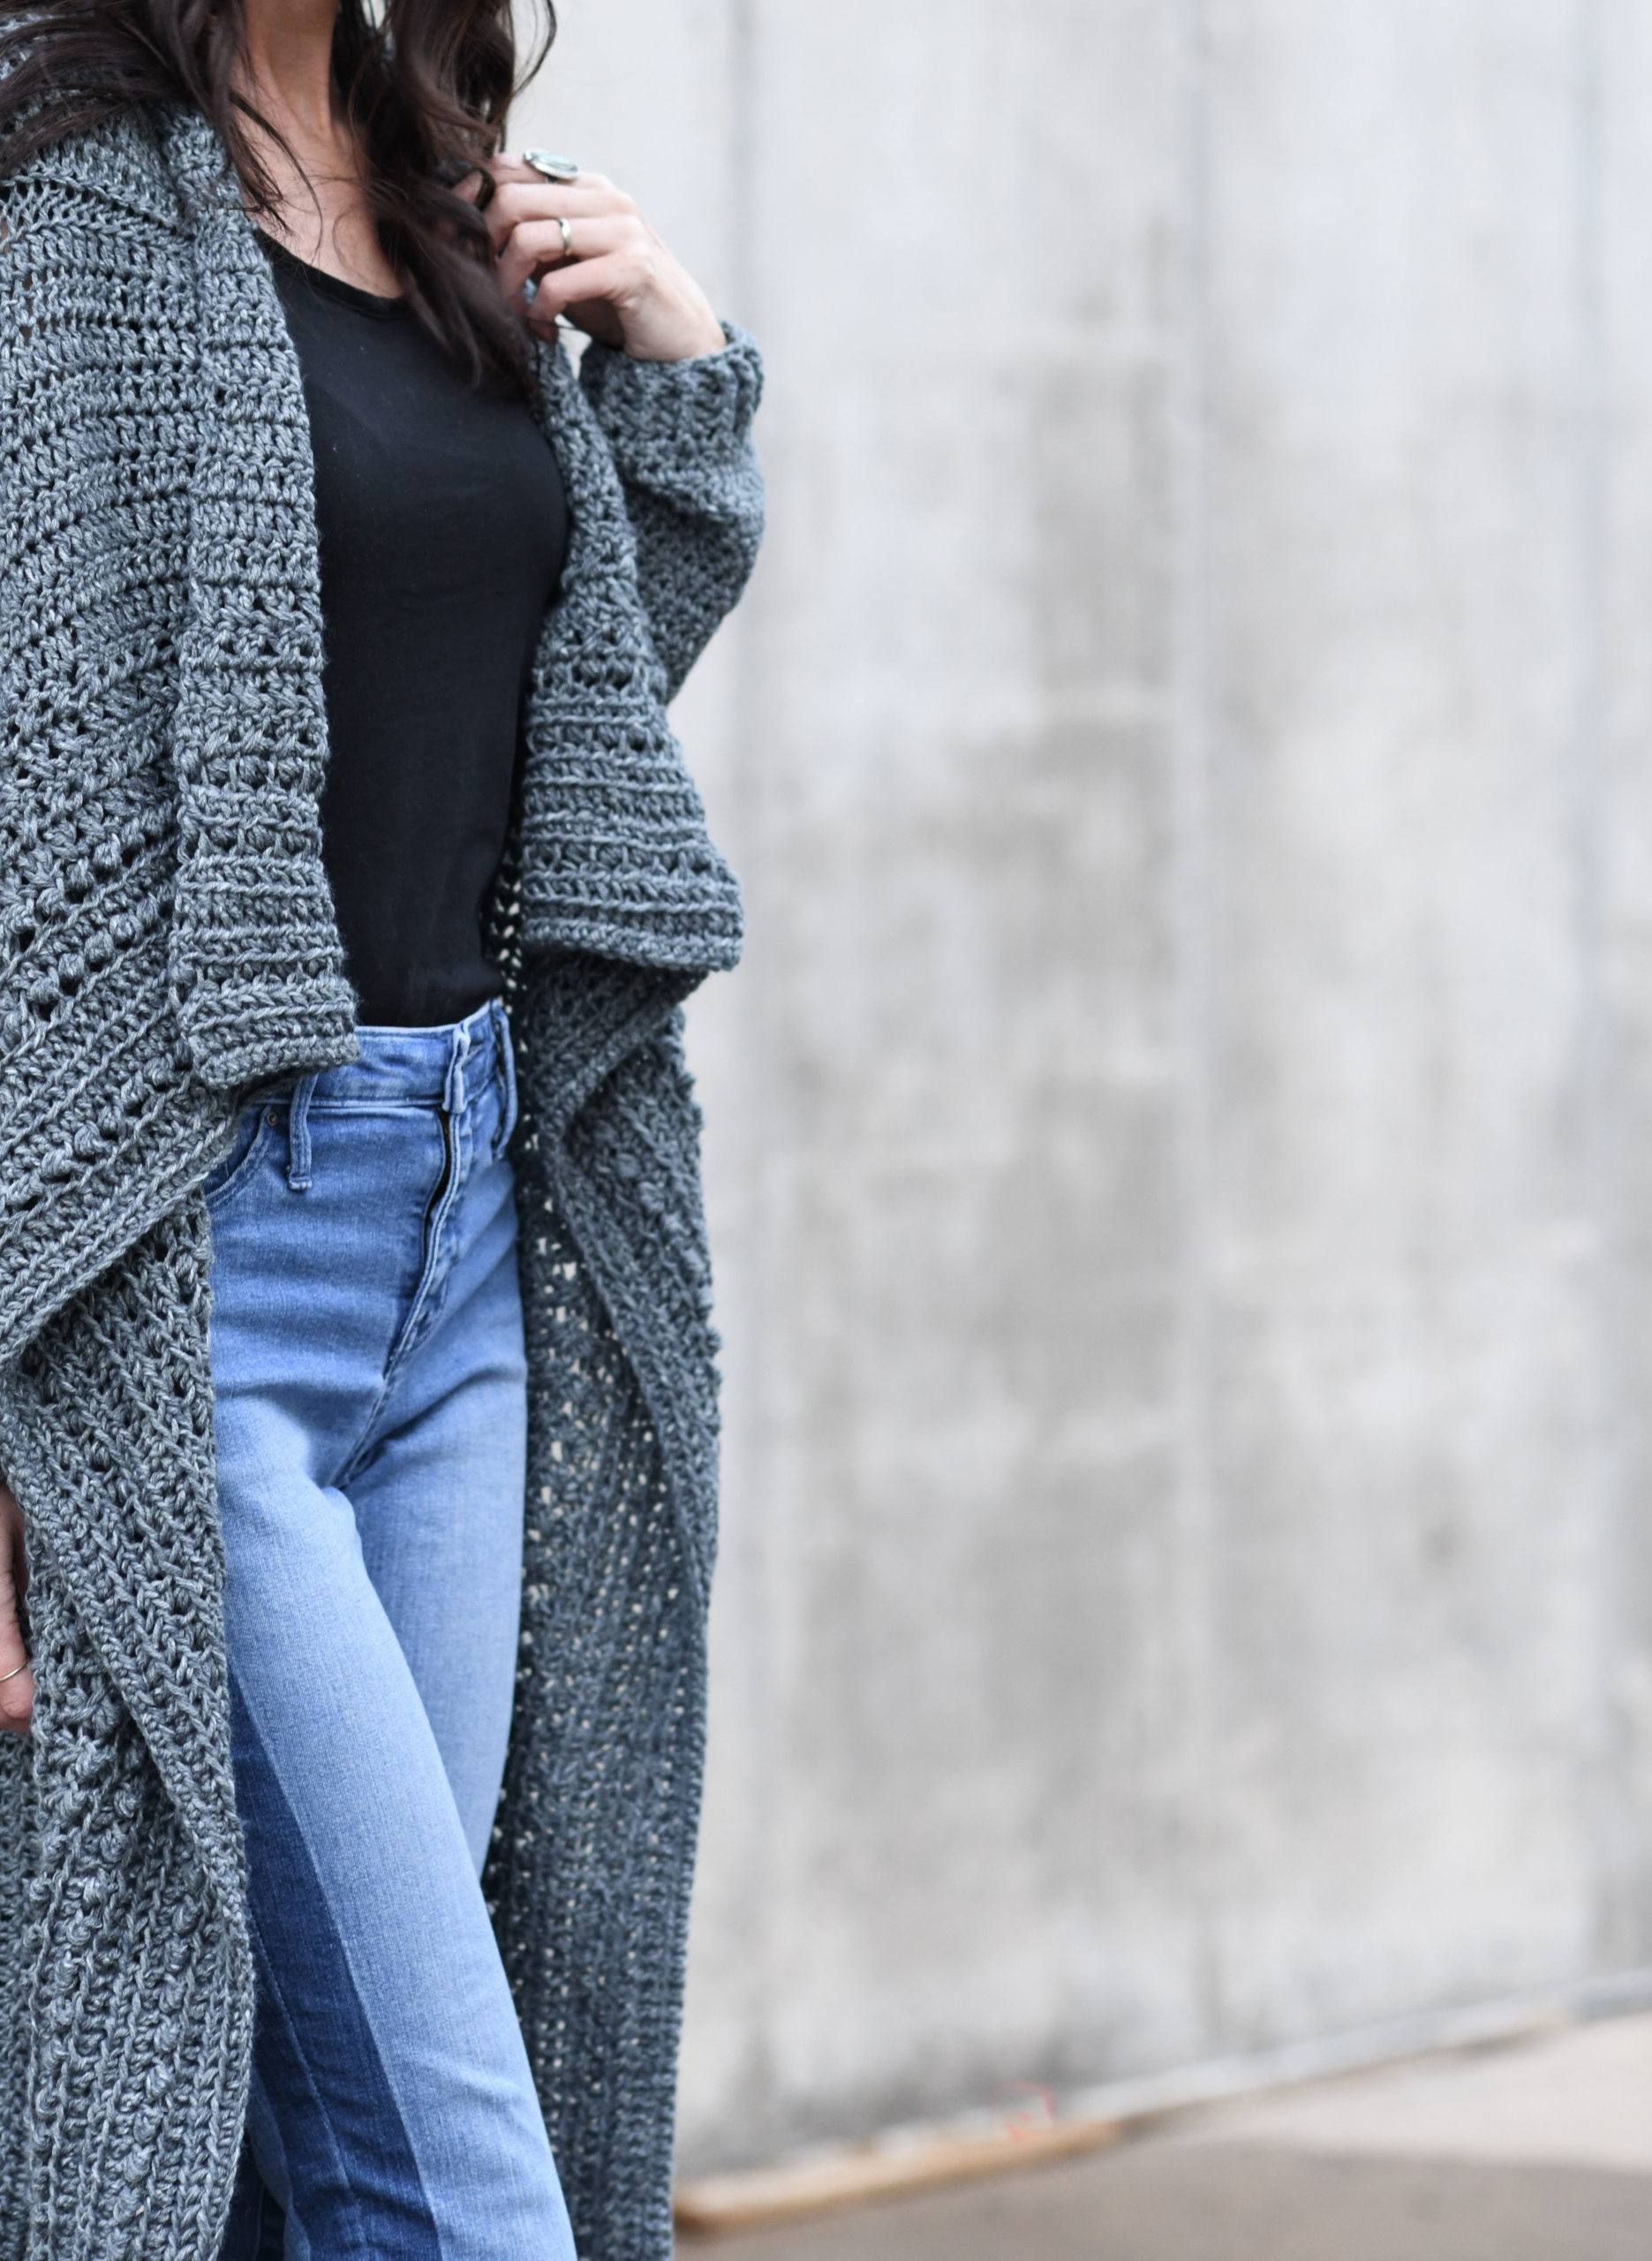
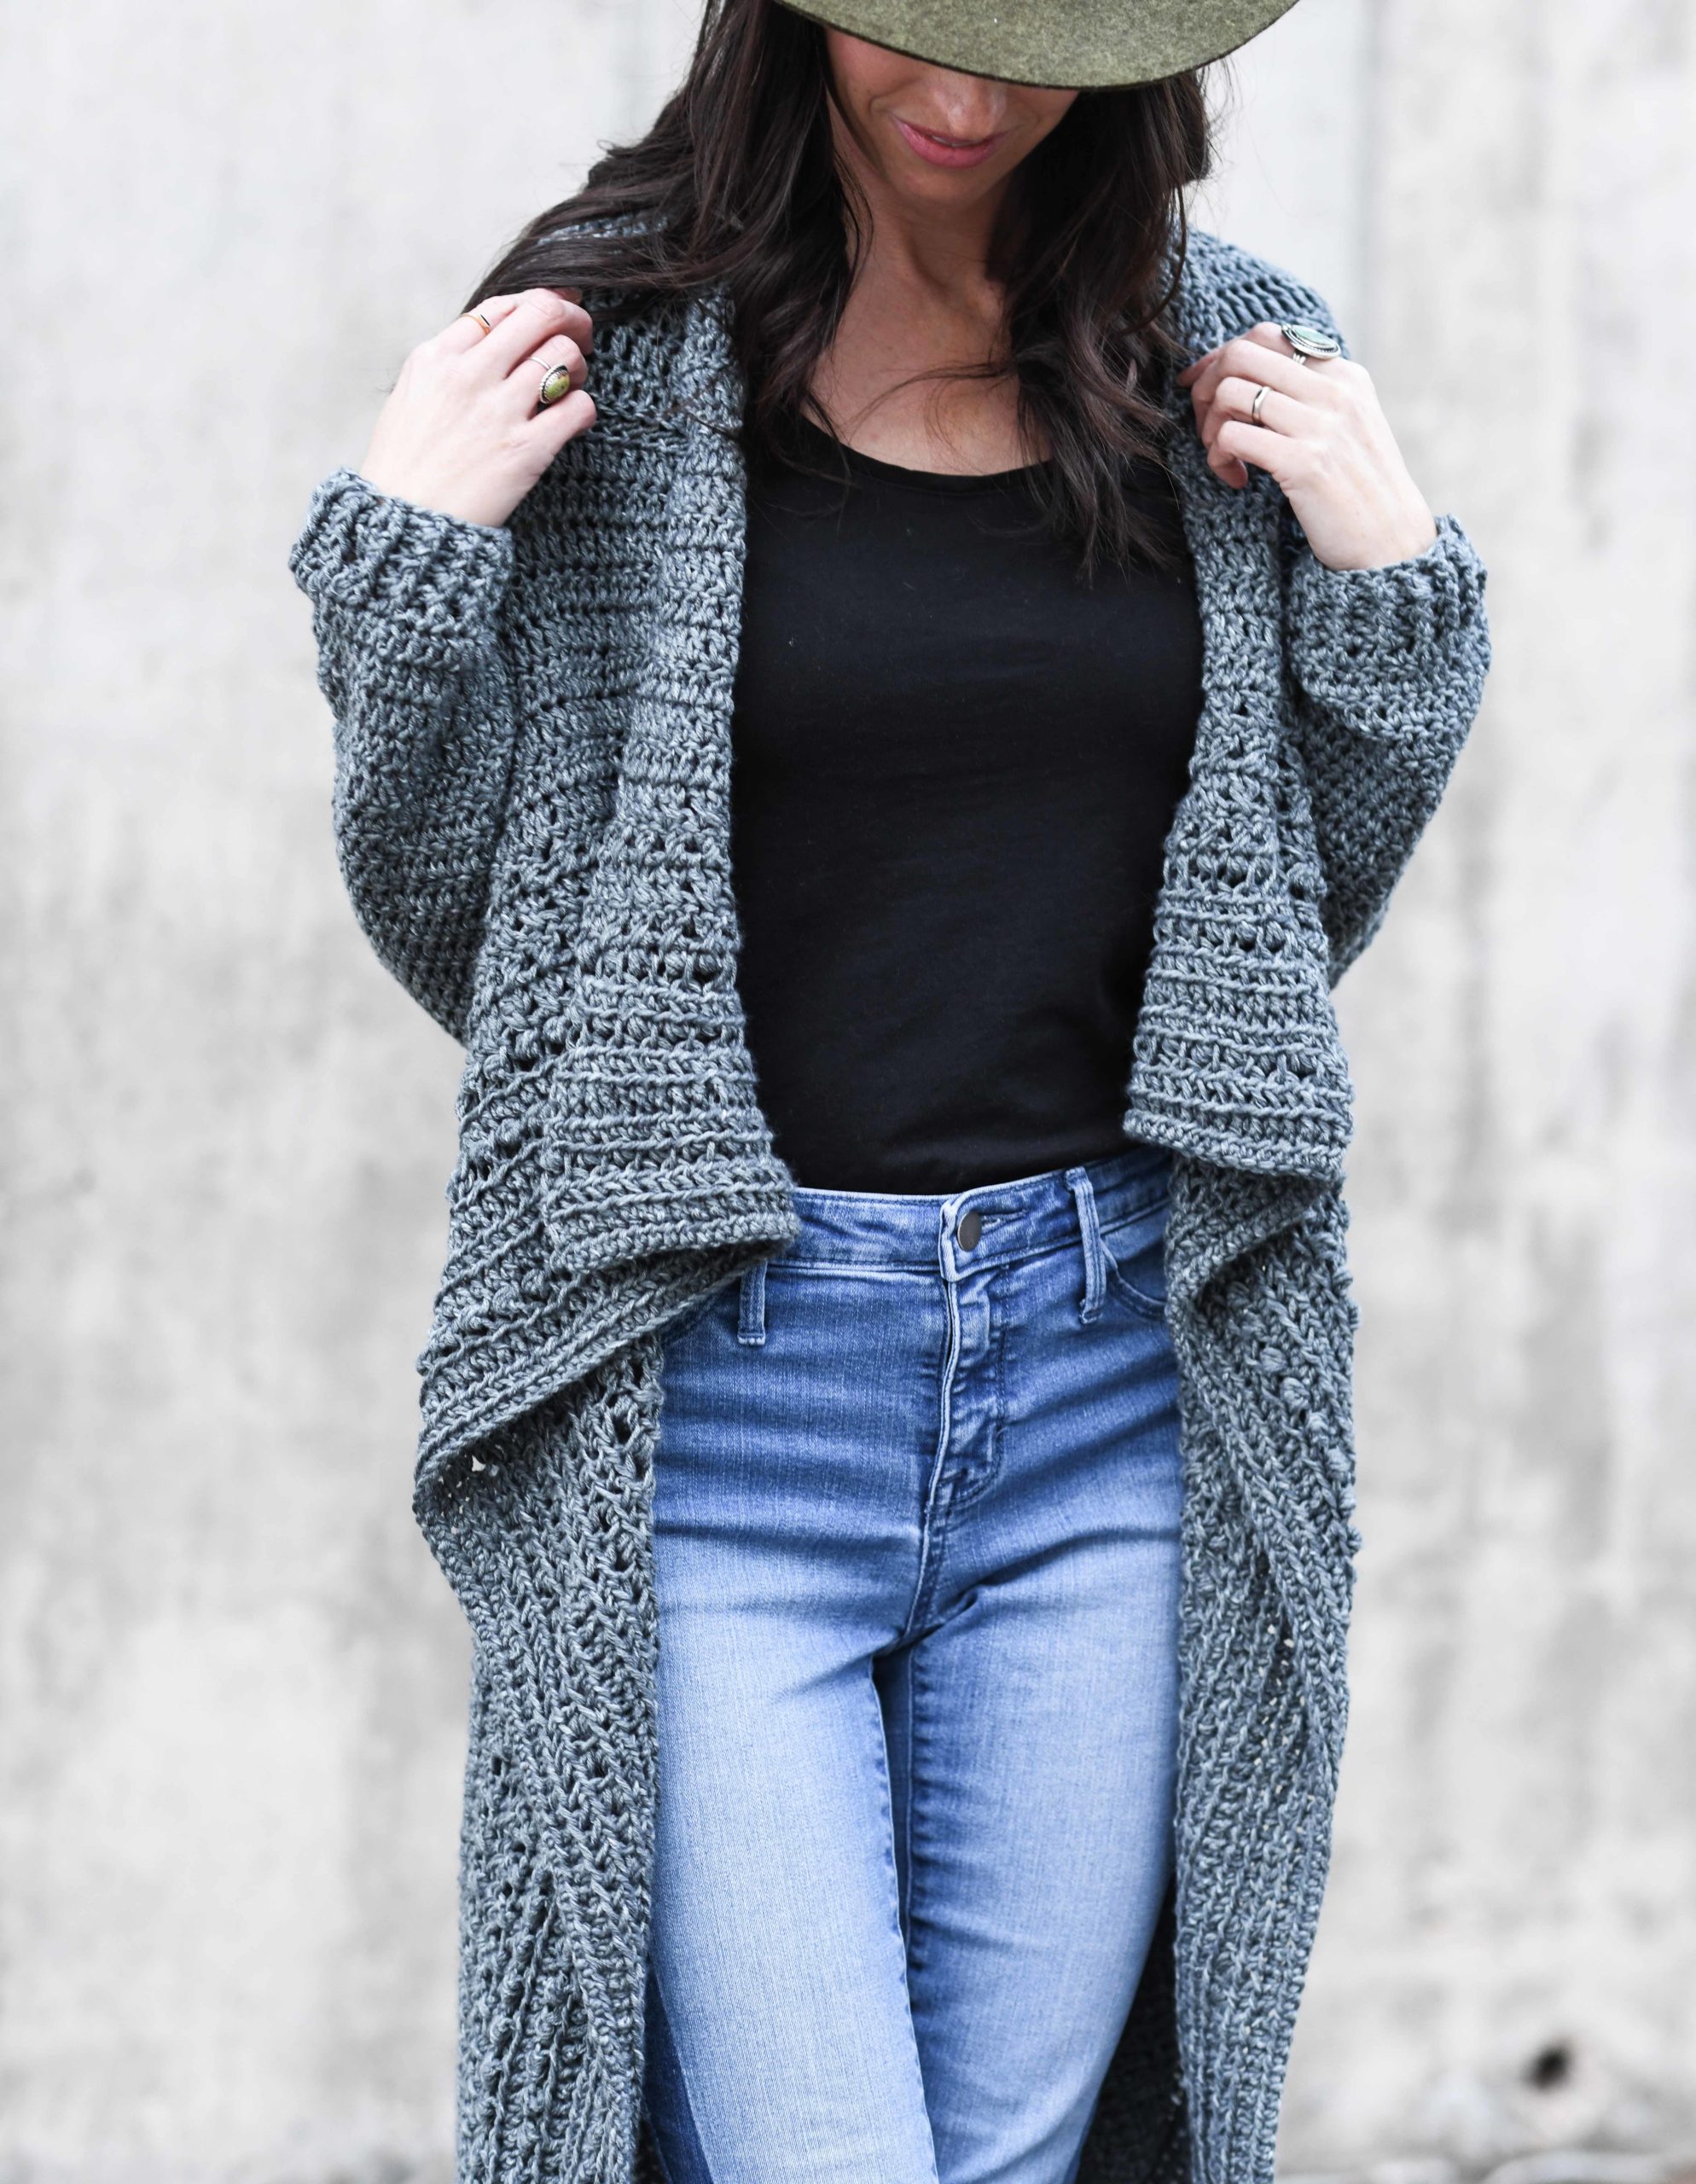
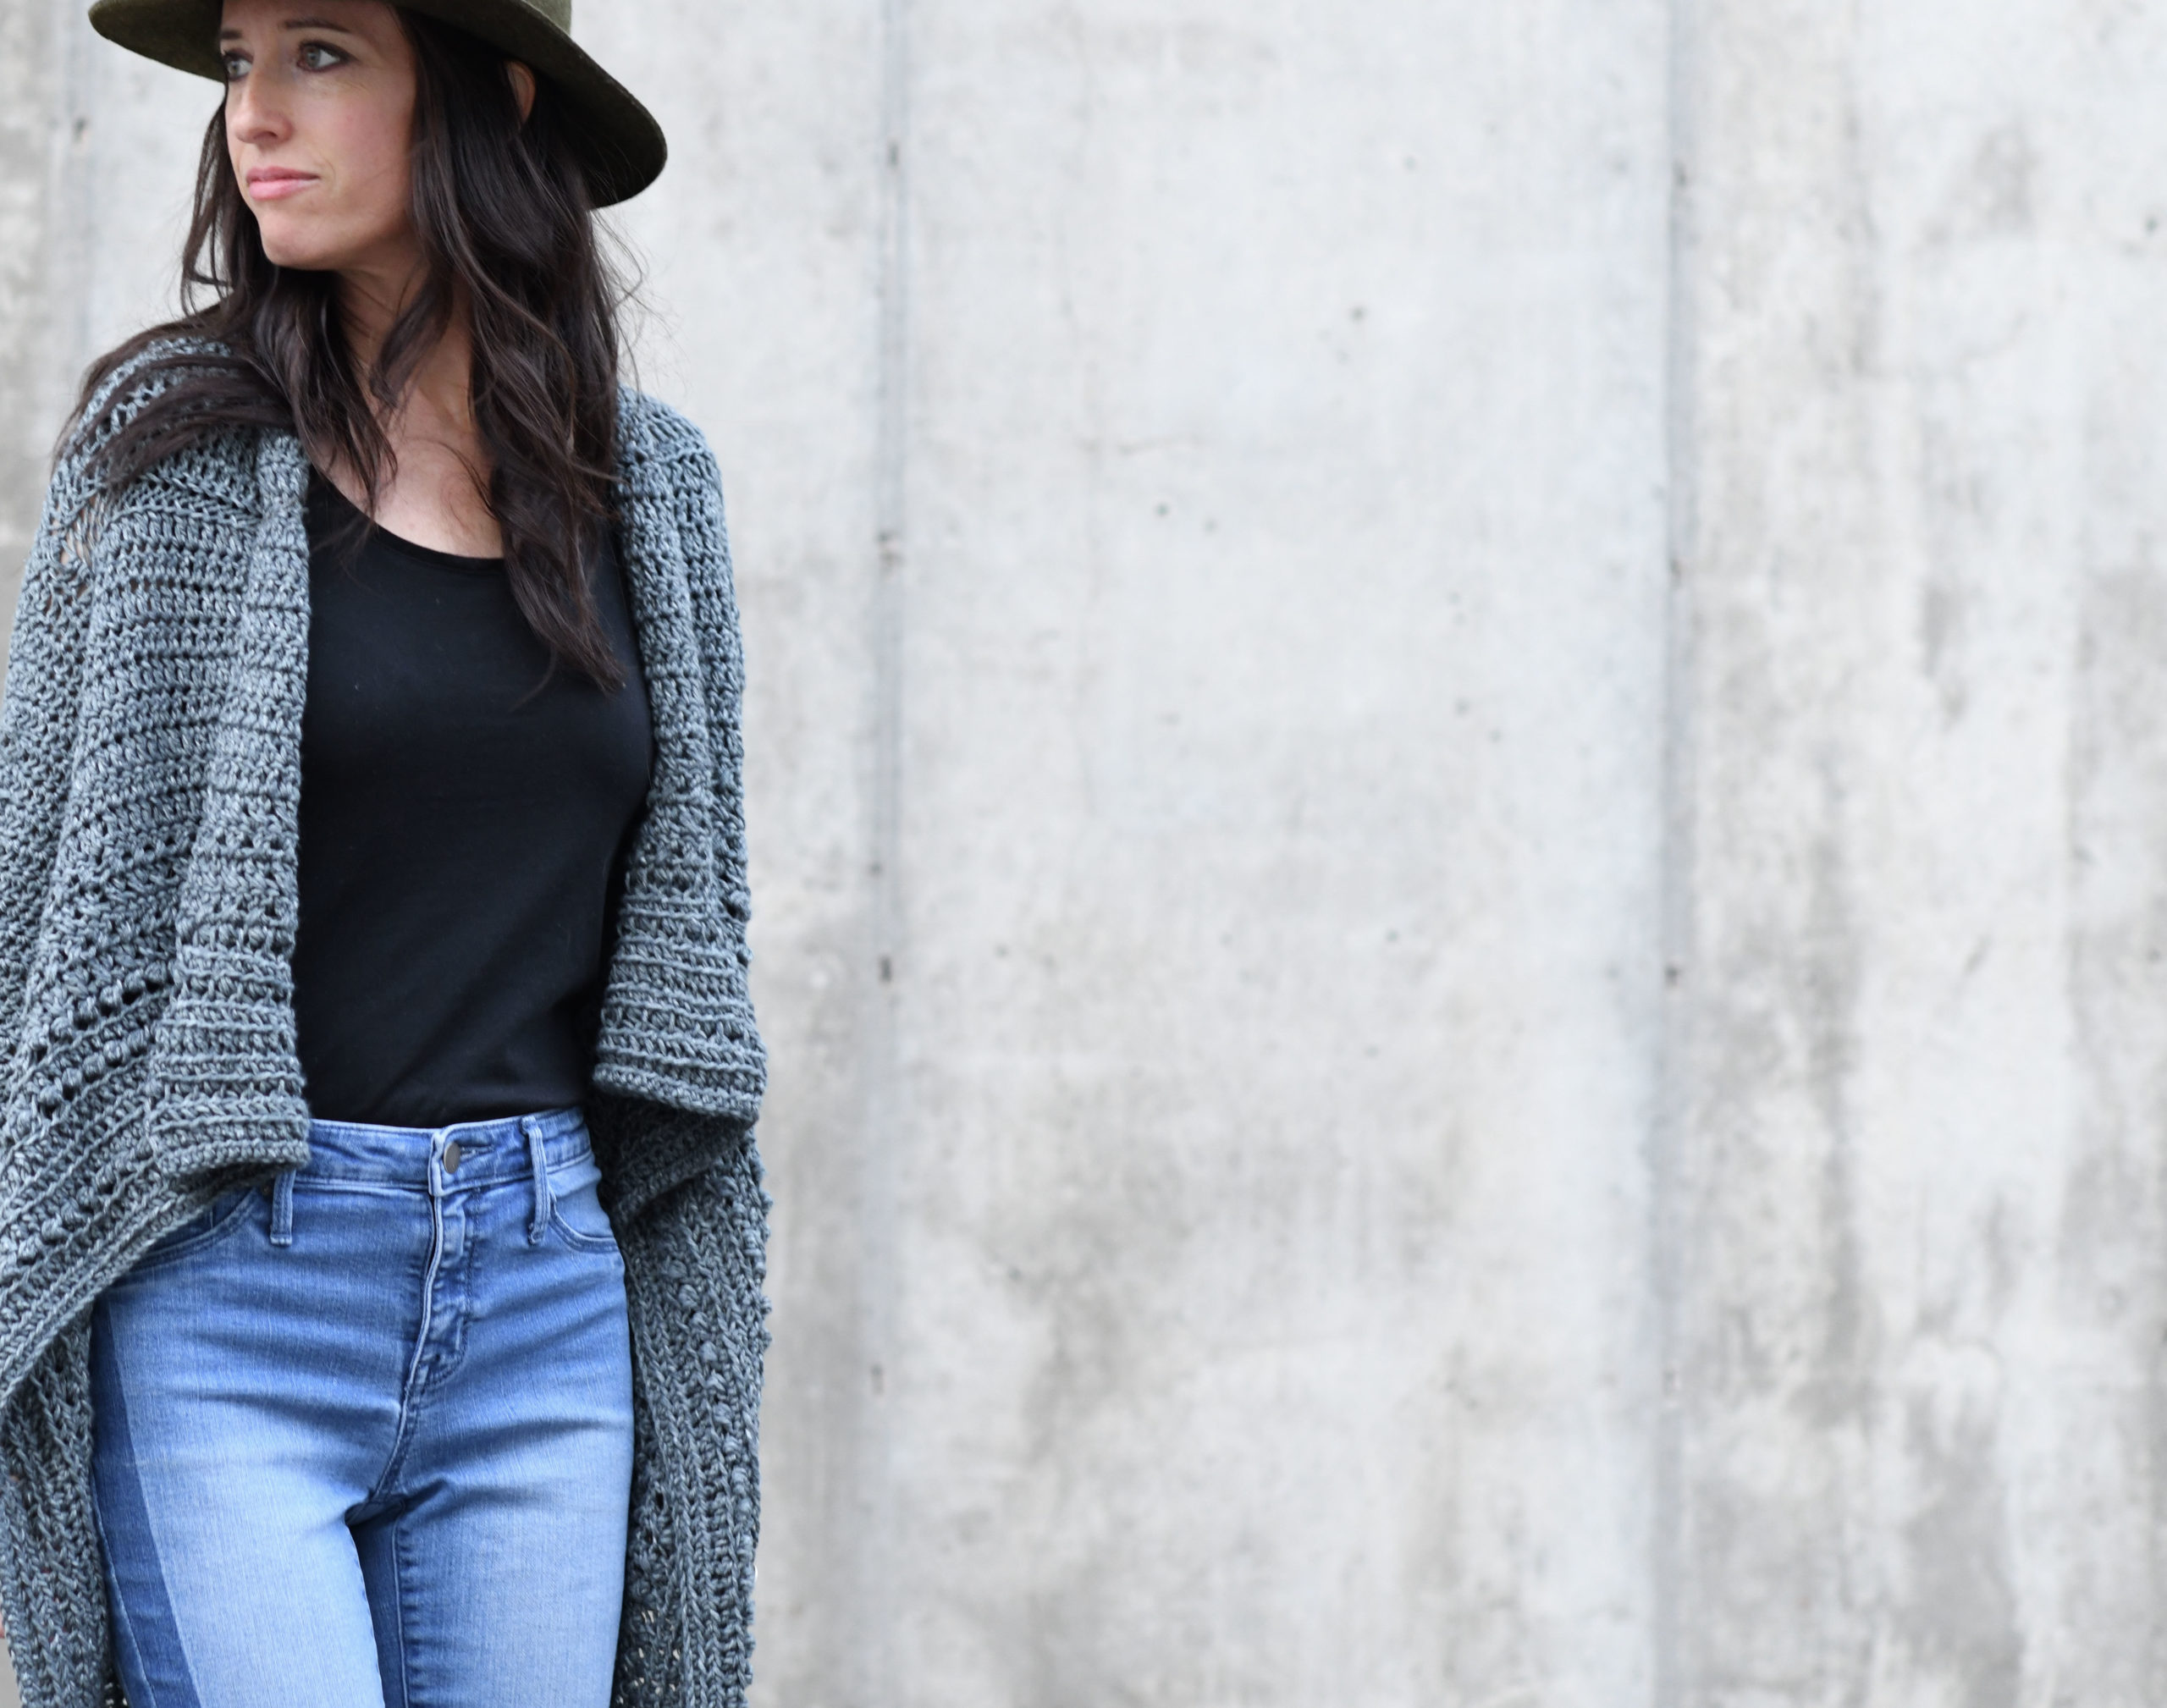
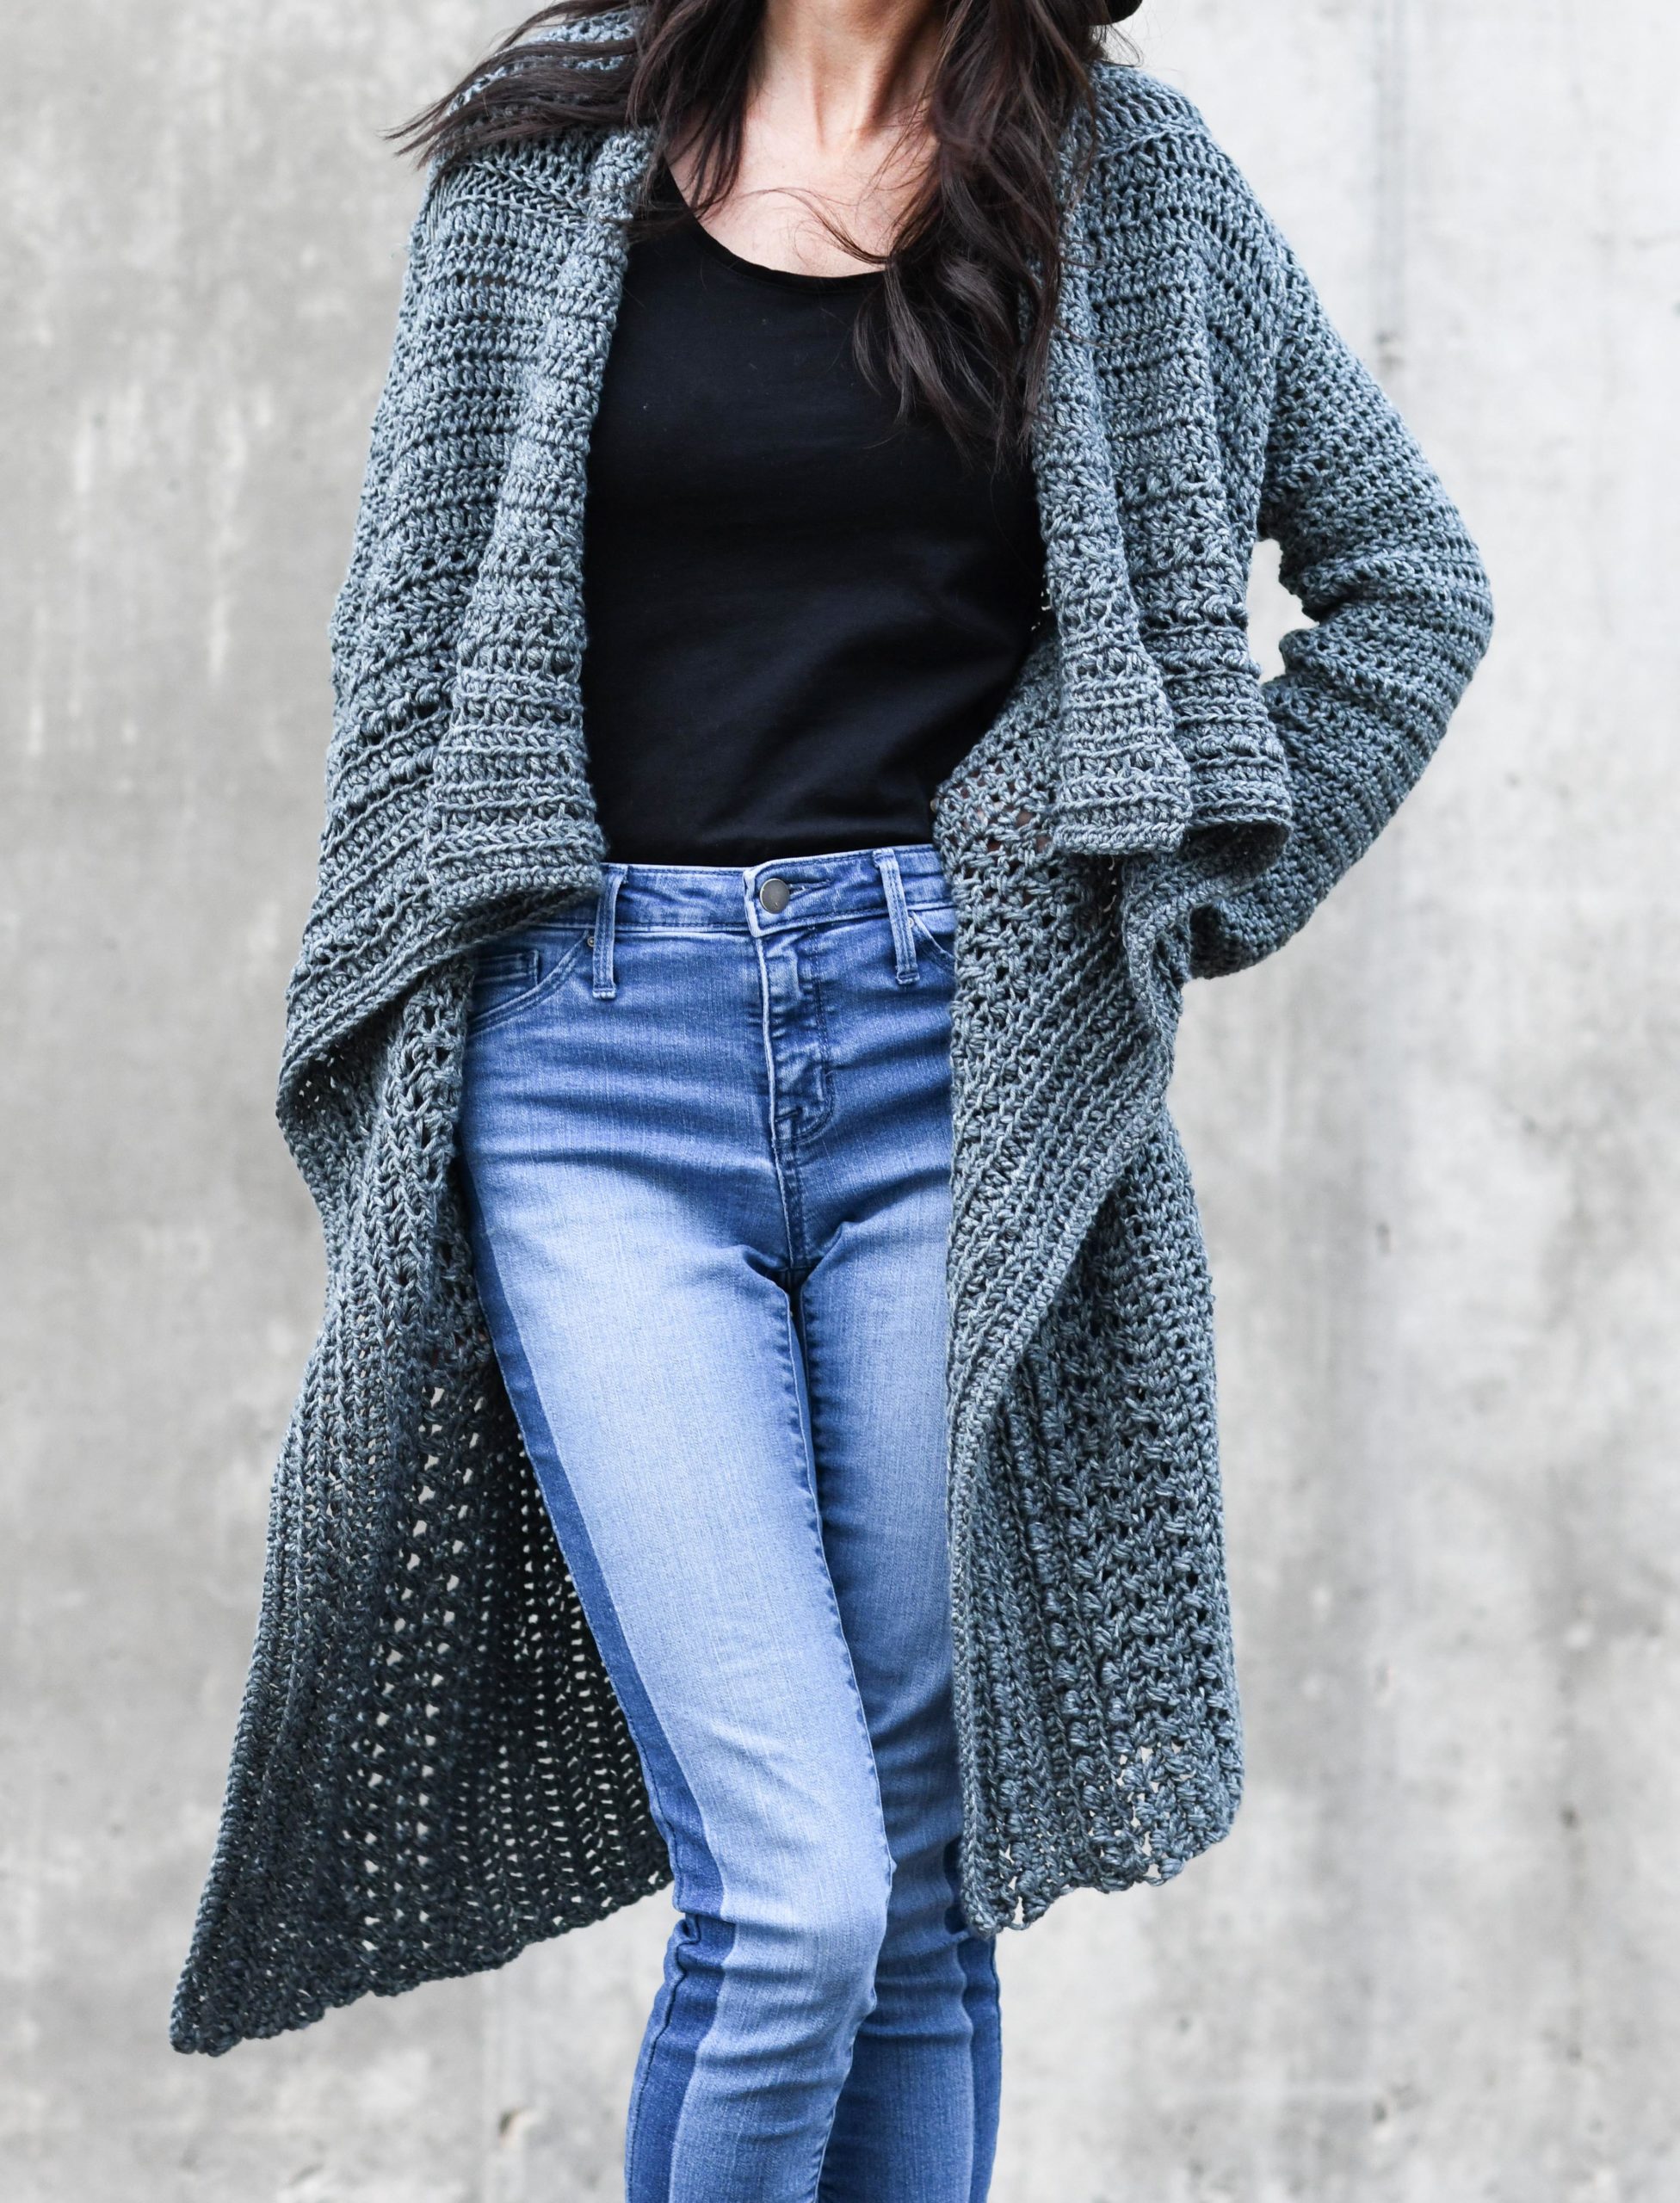
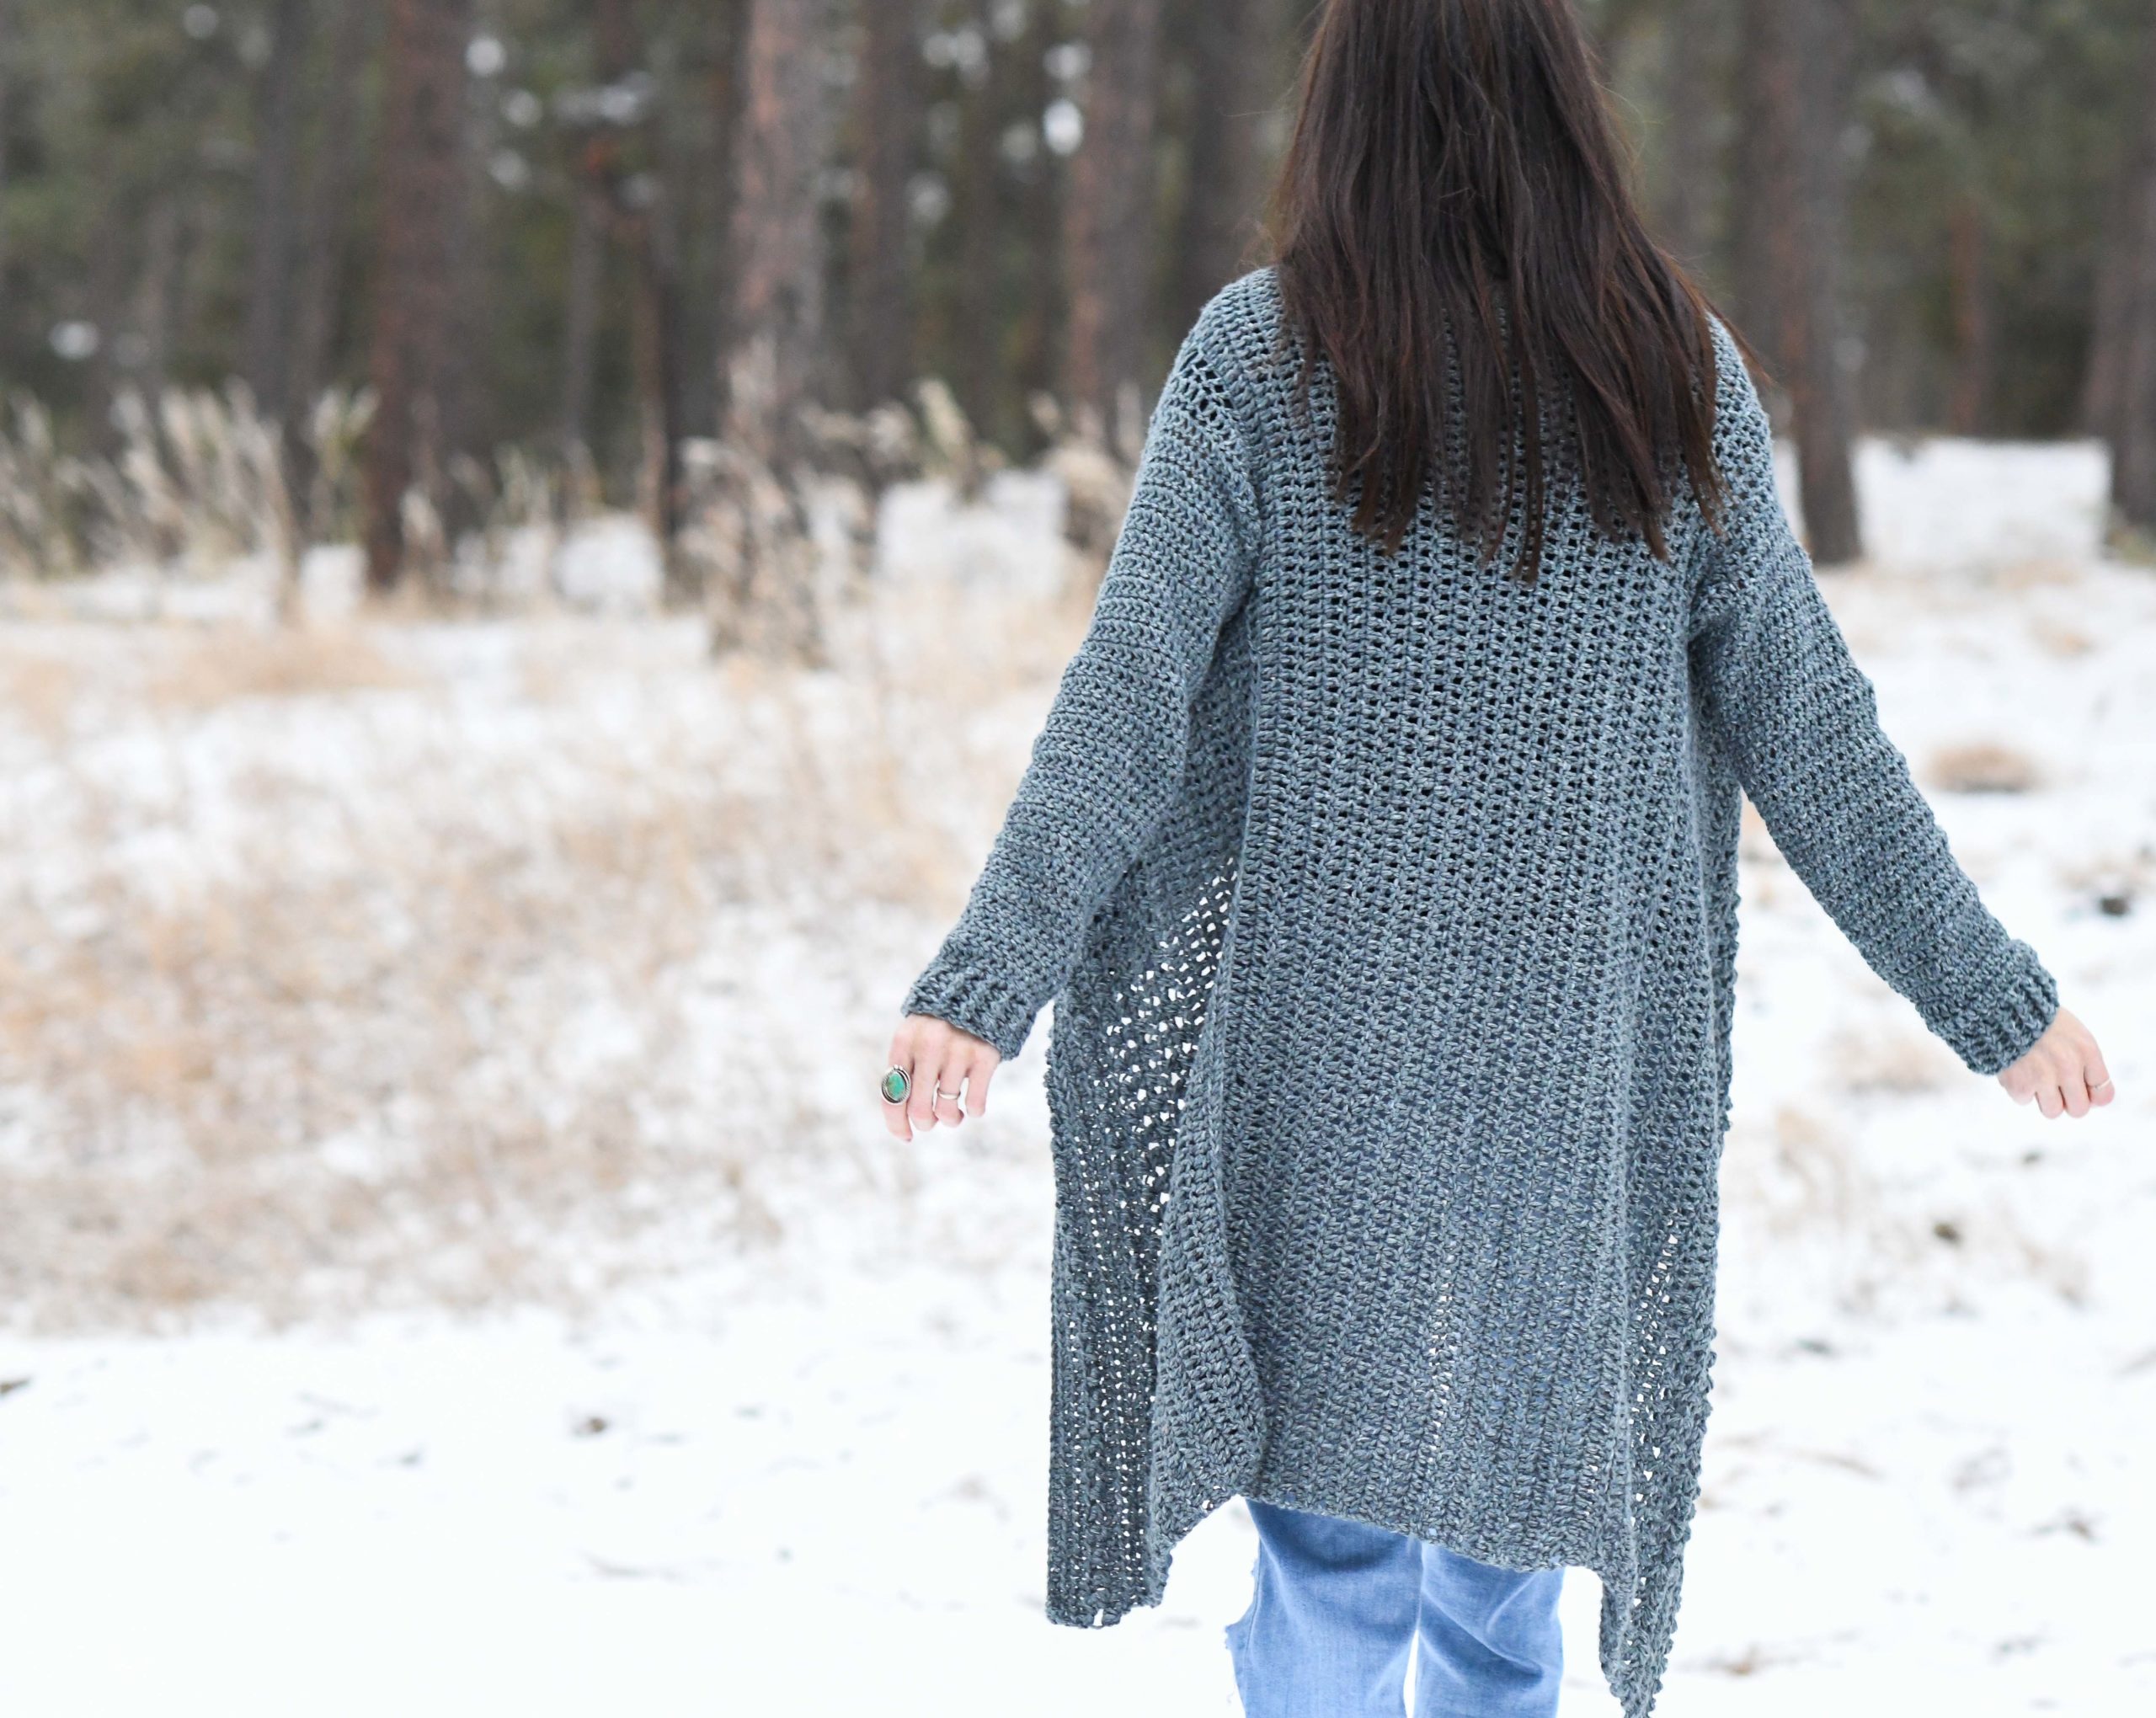
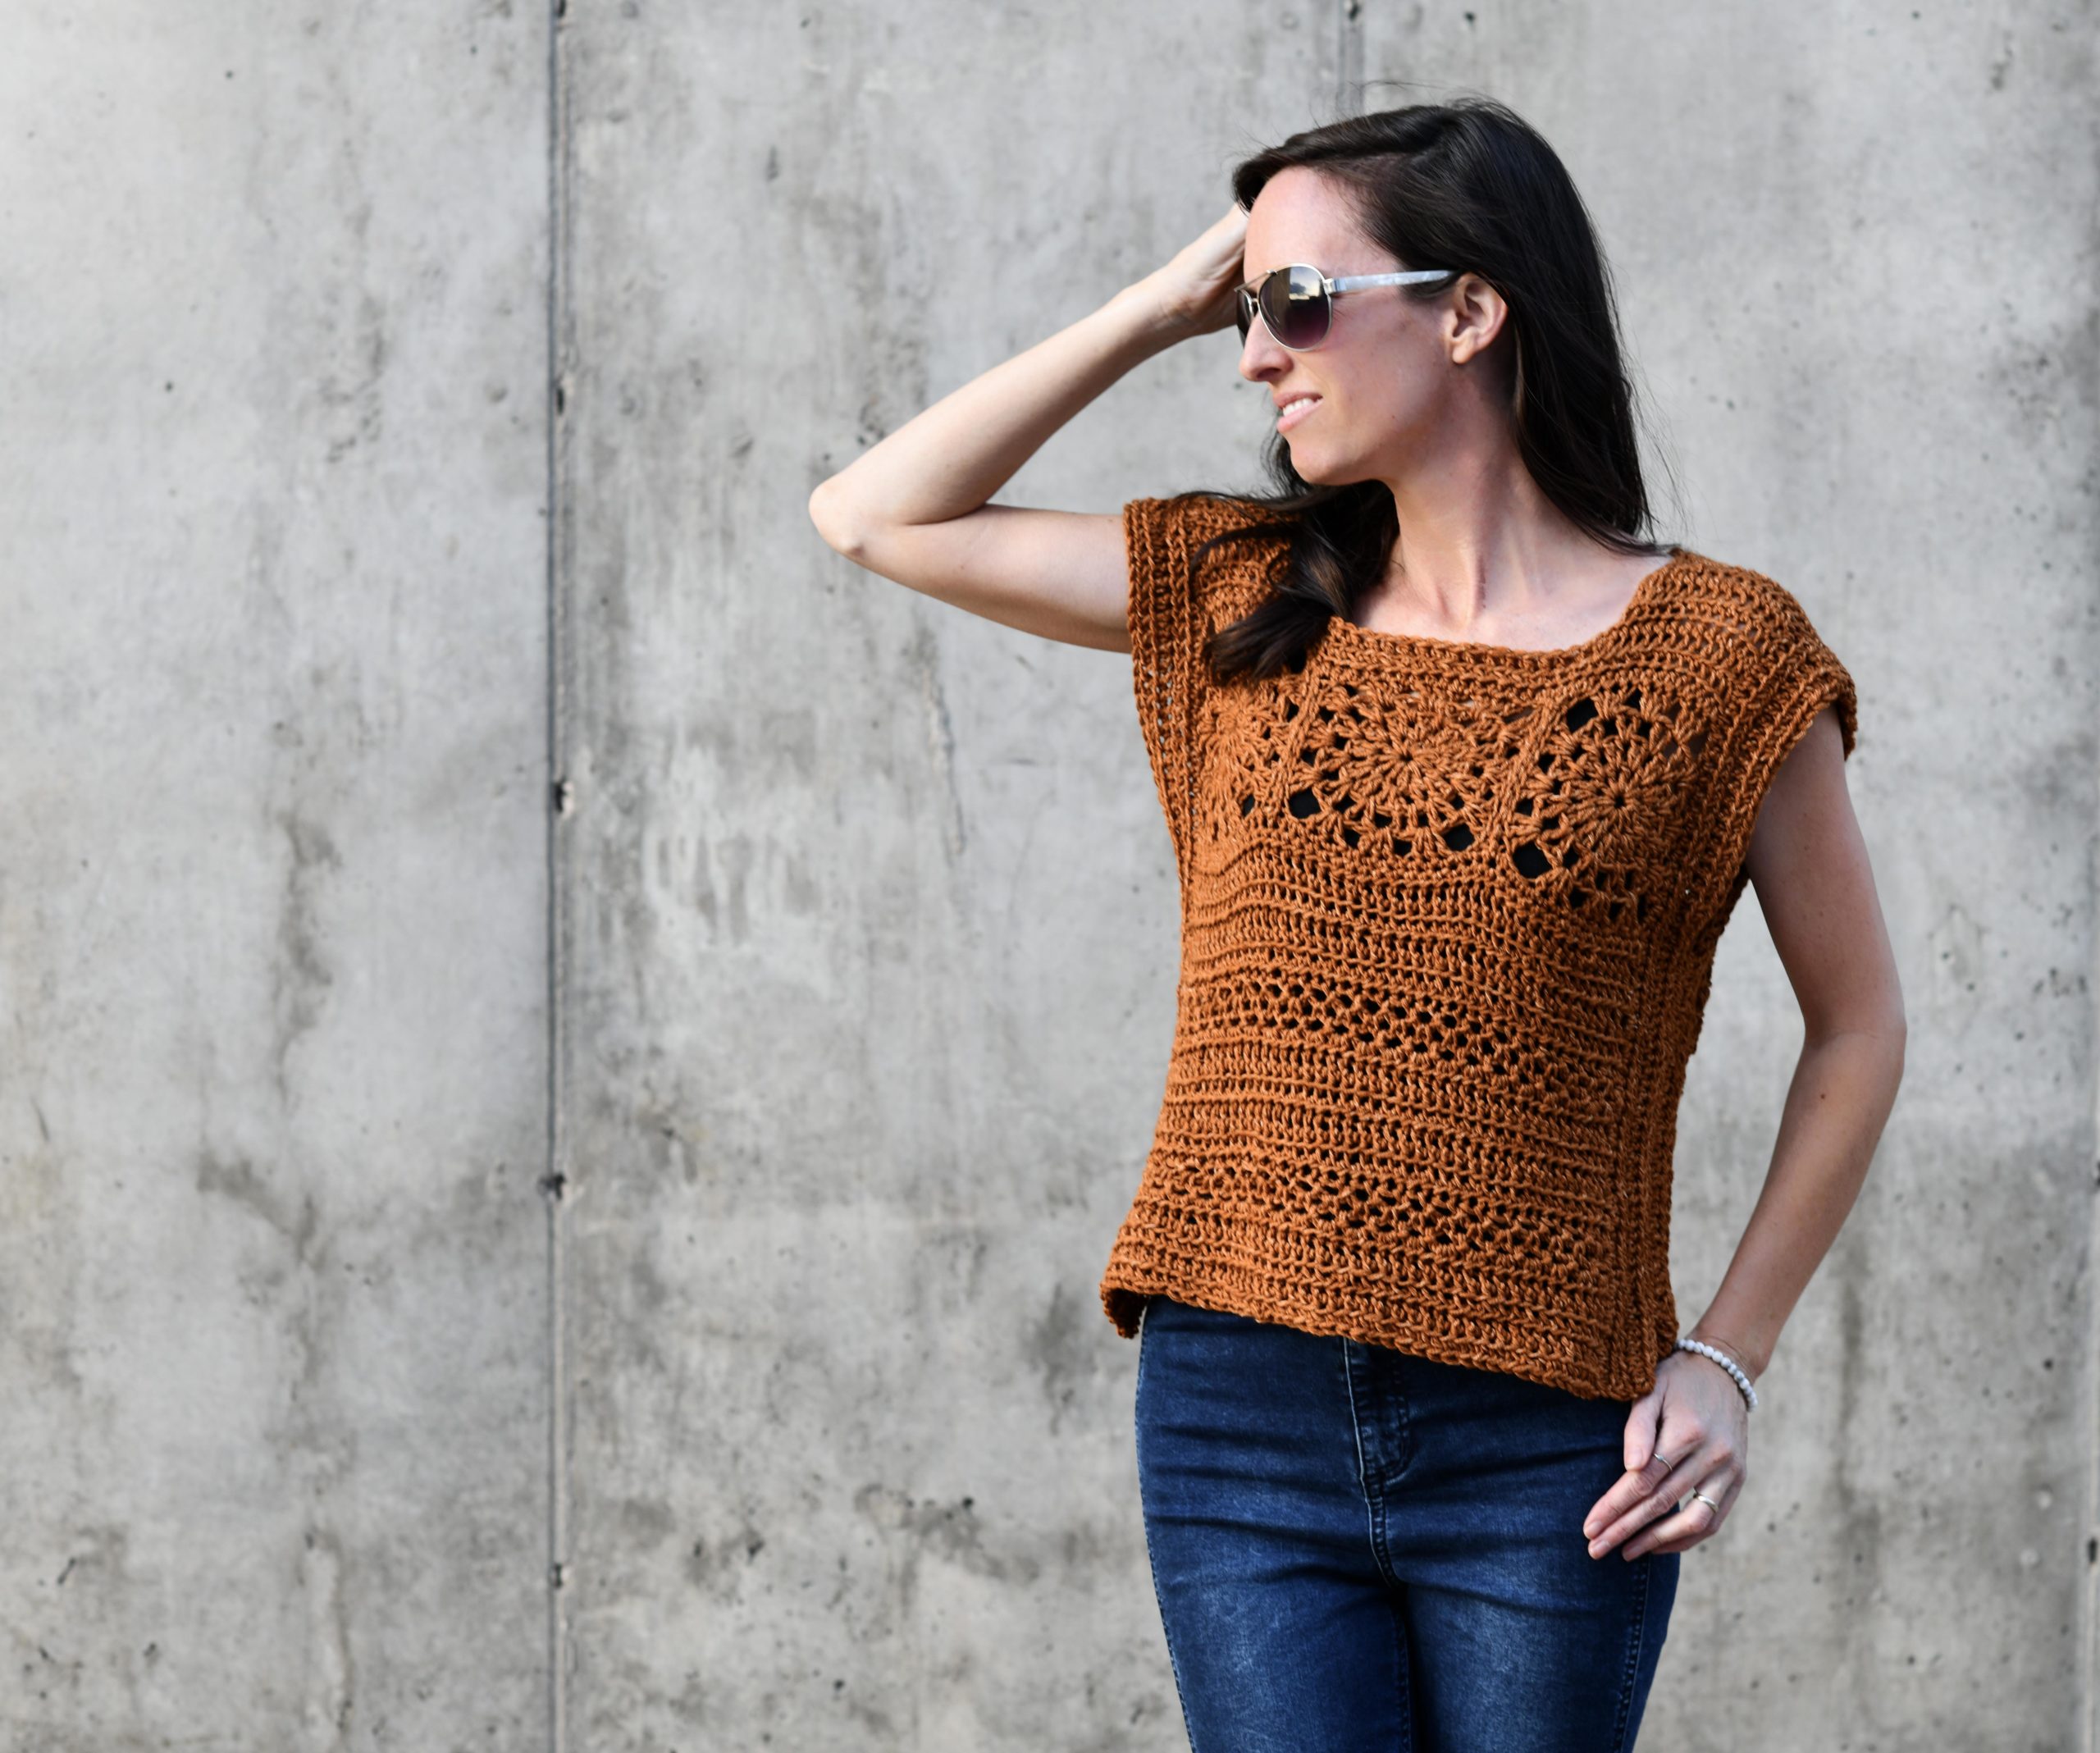
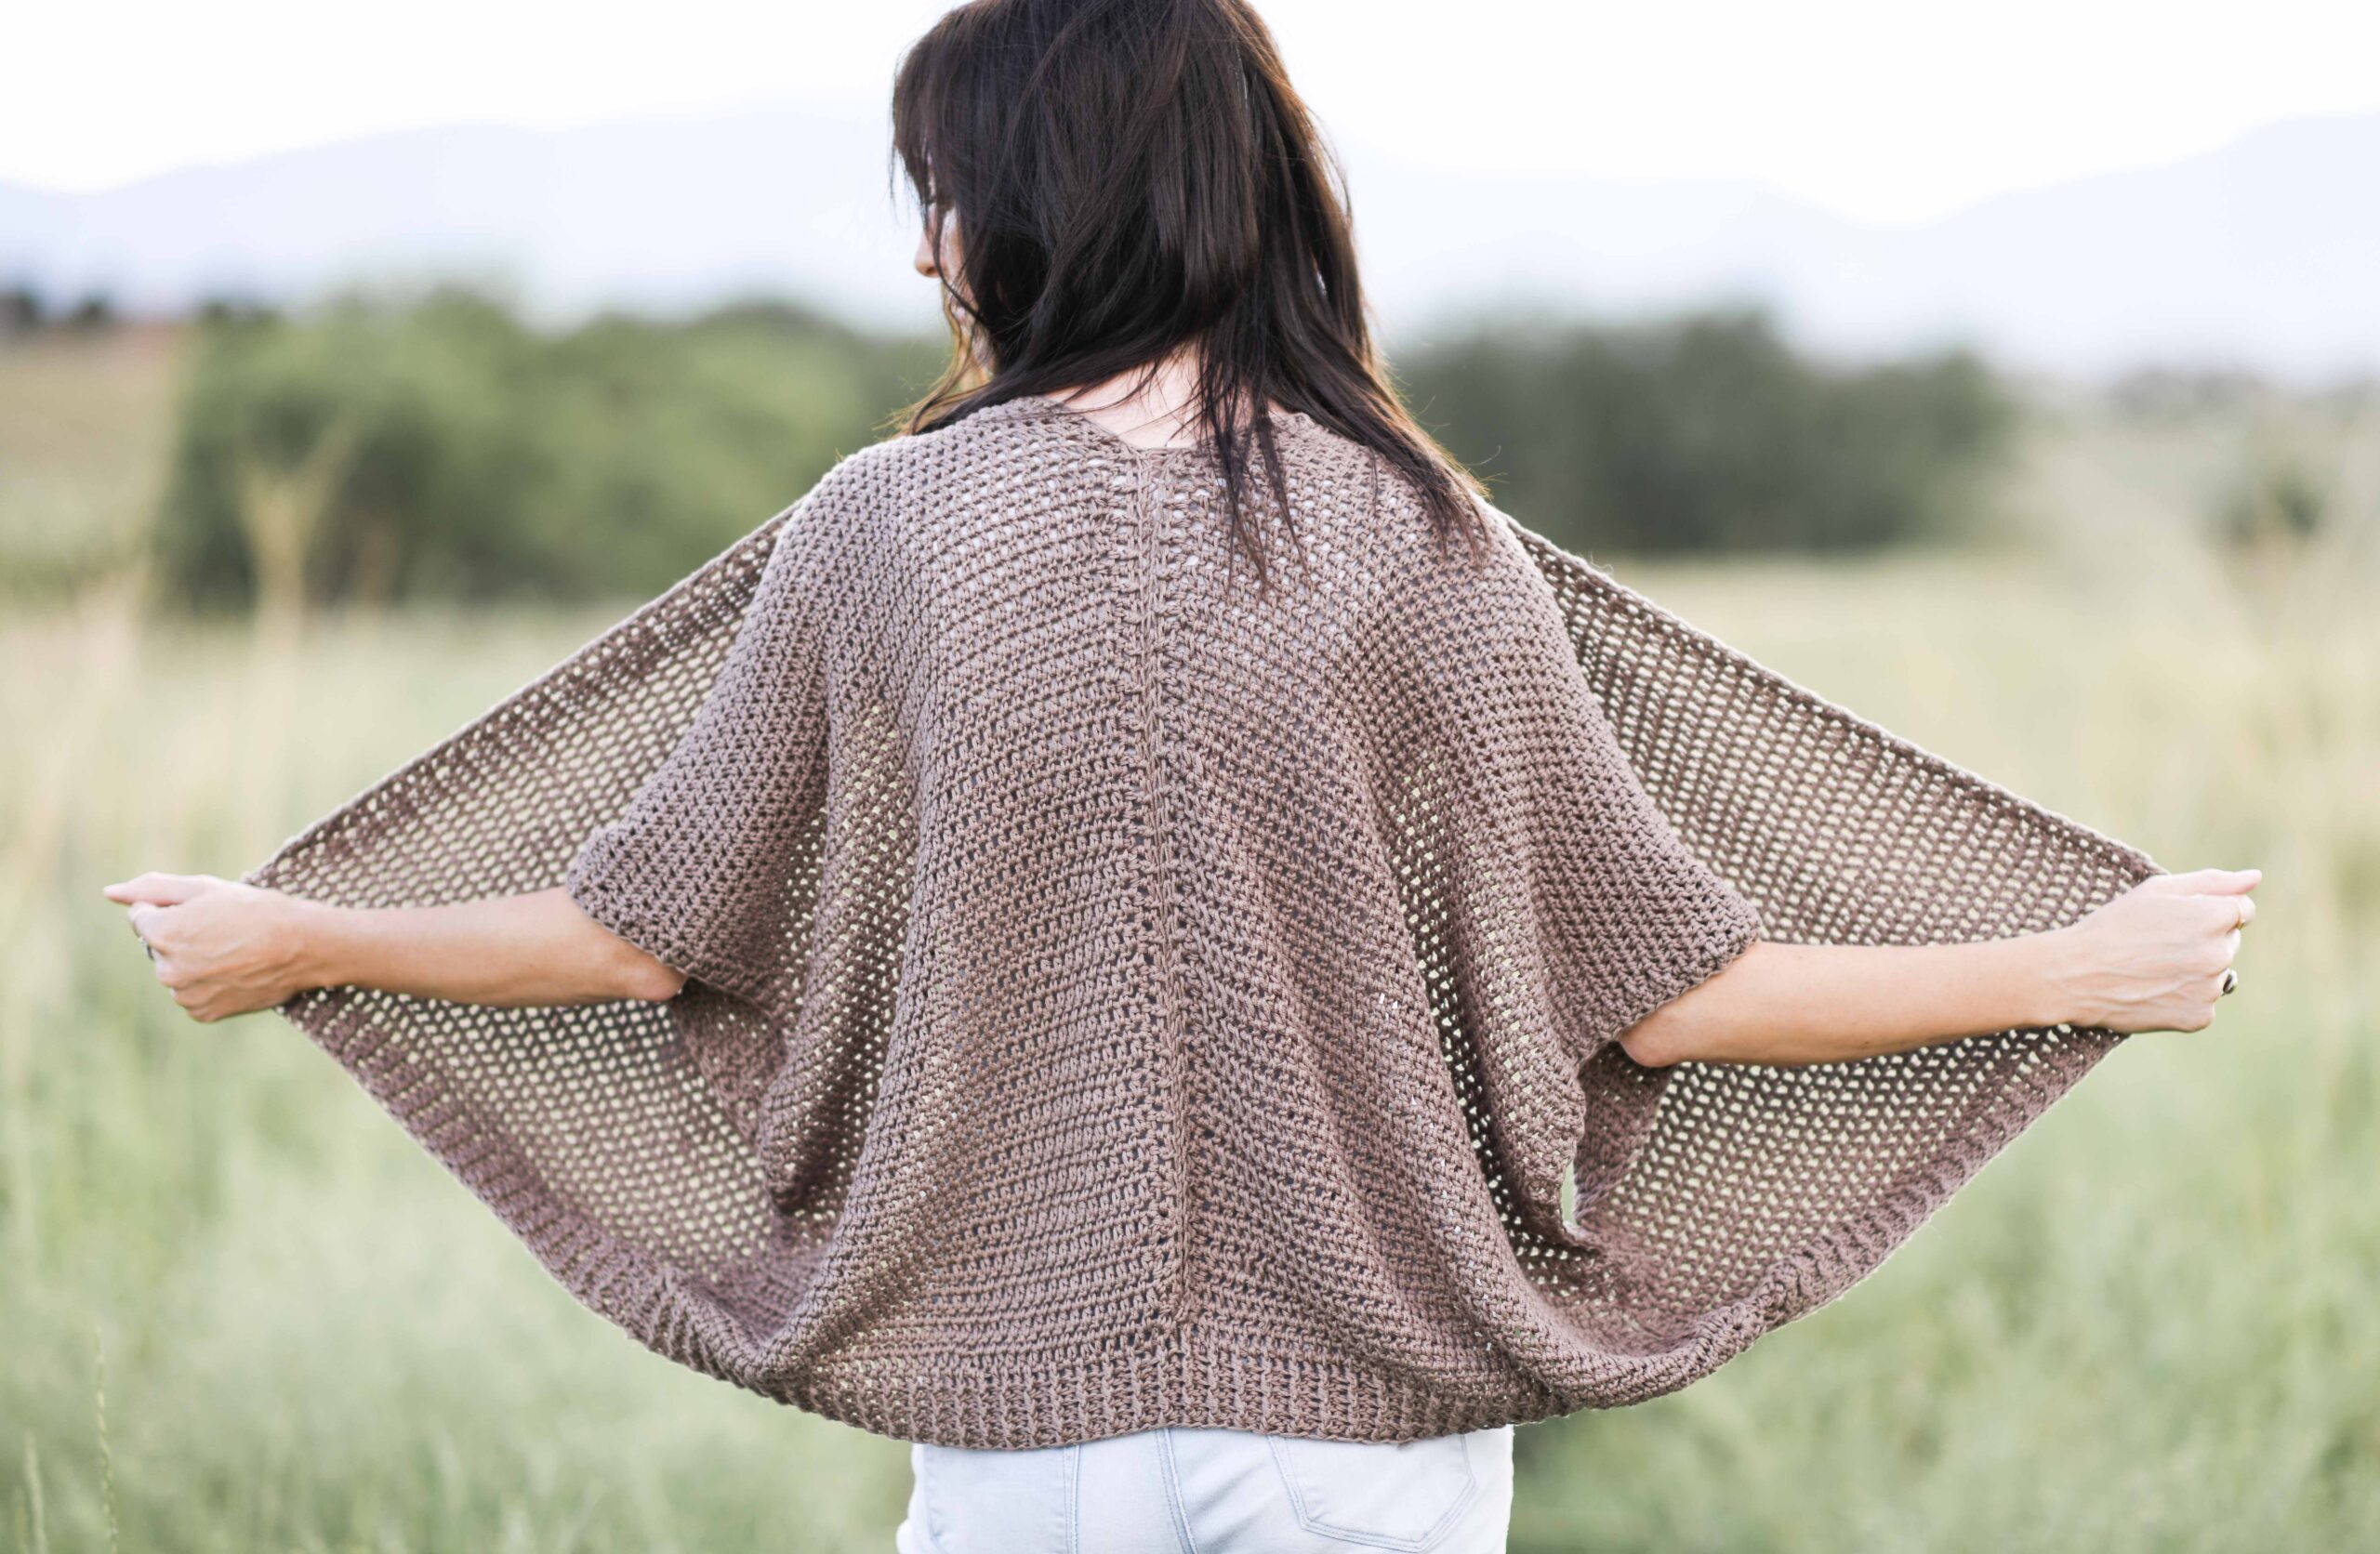
A couple of years ago I shared a pattern for a Cascading Kimono, which was one of the most popular patterns on my blog that year. I thought it would be fun to make something with a similar style, but with the fit of a sweater or cardigan instead. The Cascading Kimono had a similar flowing collar that’s flattering and casual all at the same time. My favorite things about this simple Free-Girls Sweater is the drape of the fabric and the understated boho look. It’s perfect to wear with jeans or leggings! As usual, you can scroll down to see the free pattern below, or you may choose to purchase the kit from Lion Brand HERE or the printable pattern HERE.
This cardigan is simple to crochet and is made with basic shapes and stitch patterns. As you know, I like to keep things as easy as possible, so while there’s no difficult shaping in the body, you will do a little bit of decreasing on the sleeves.
When picking a yarn, I knew it had to be something that feels great when worn on the skin. It also had to create a fabric with a lovely drape so the collar would be breezy and flowy. Lion Brand Jeans, in the color Vintage, fit the bill and worked so perfectly. It’s also a bonus that the yarn’s affordable, making a big project like this more doable for a lot us. You’ve also seen me use this yarn in the Easy Sleeveless Vintage Top and the Azul V Mesh Poncho Pattern.
You can wear this a few different ways. Leave it free and open, add some buttons, or tie it with a belt.
Above: It could be super cute to add a button up there at the top where I’m holding the collar. I’d also place a few down the front for the best look and fit. A belt also goes nicely with this piece as well. 🙂
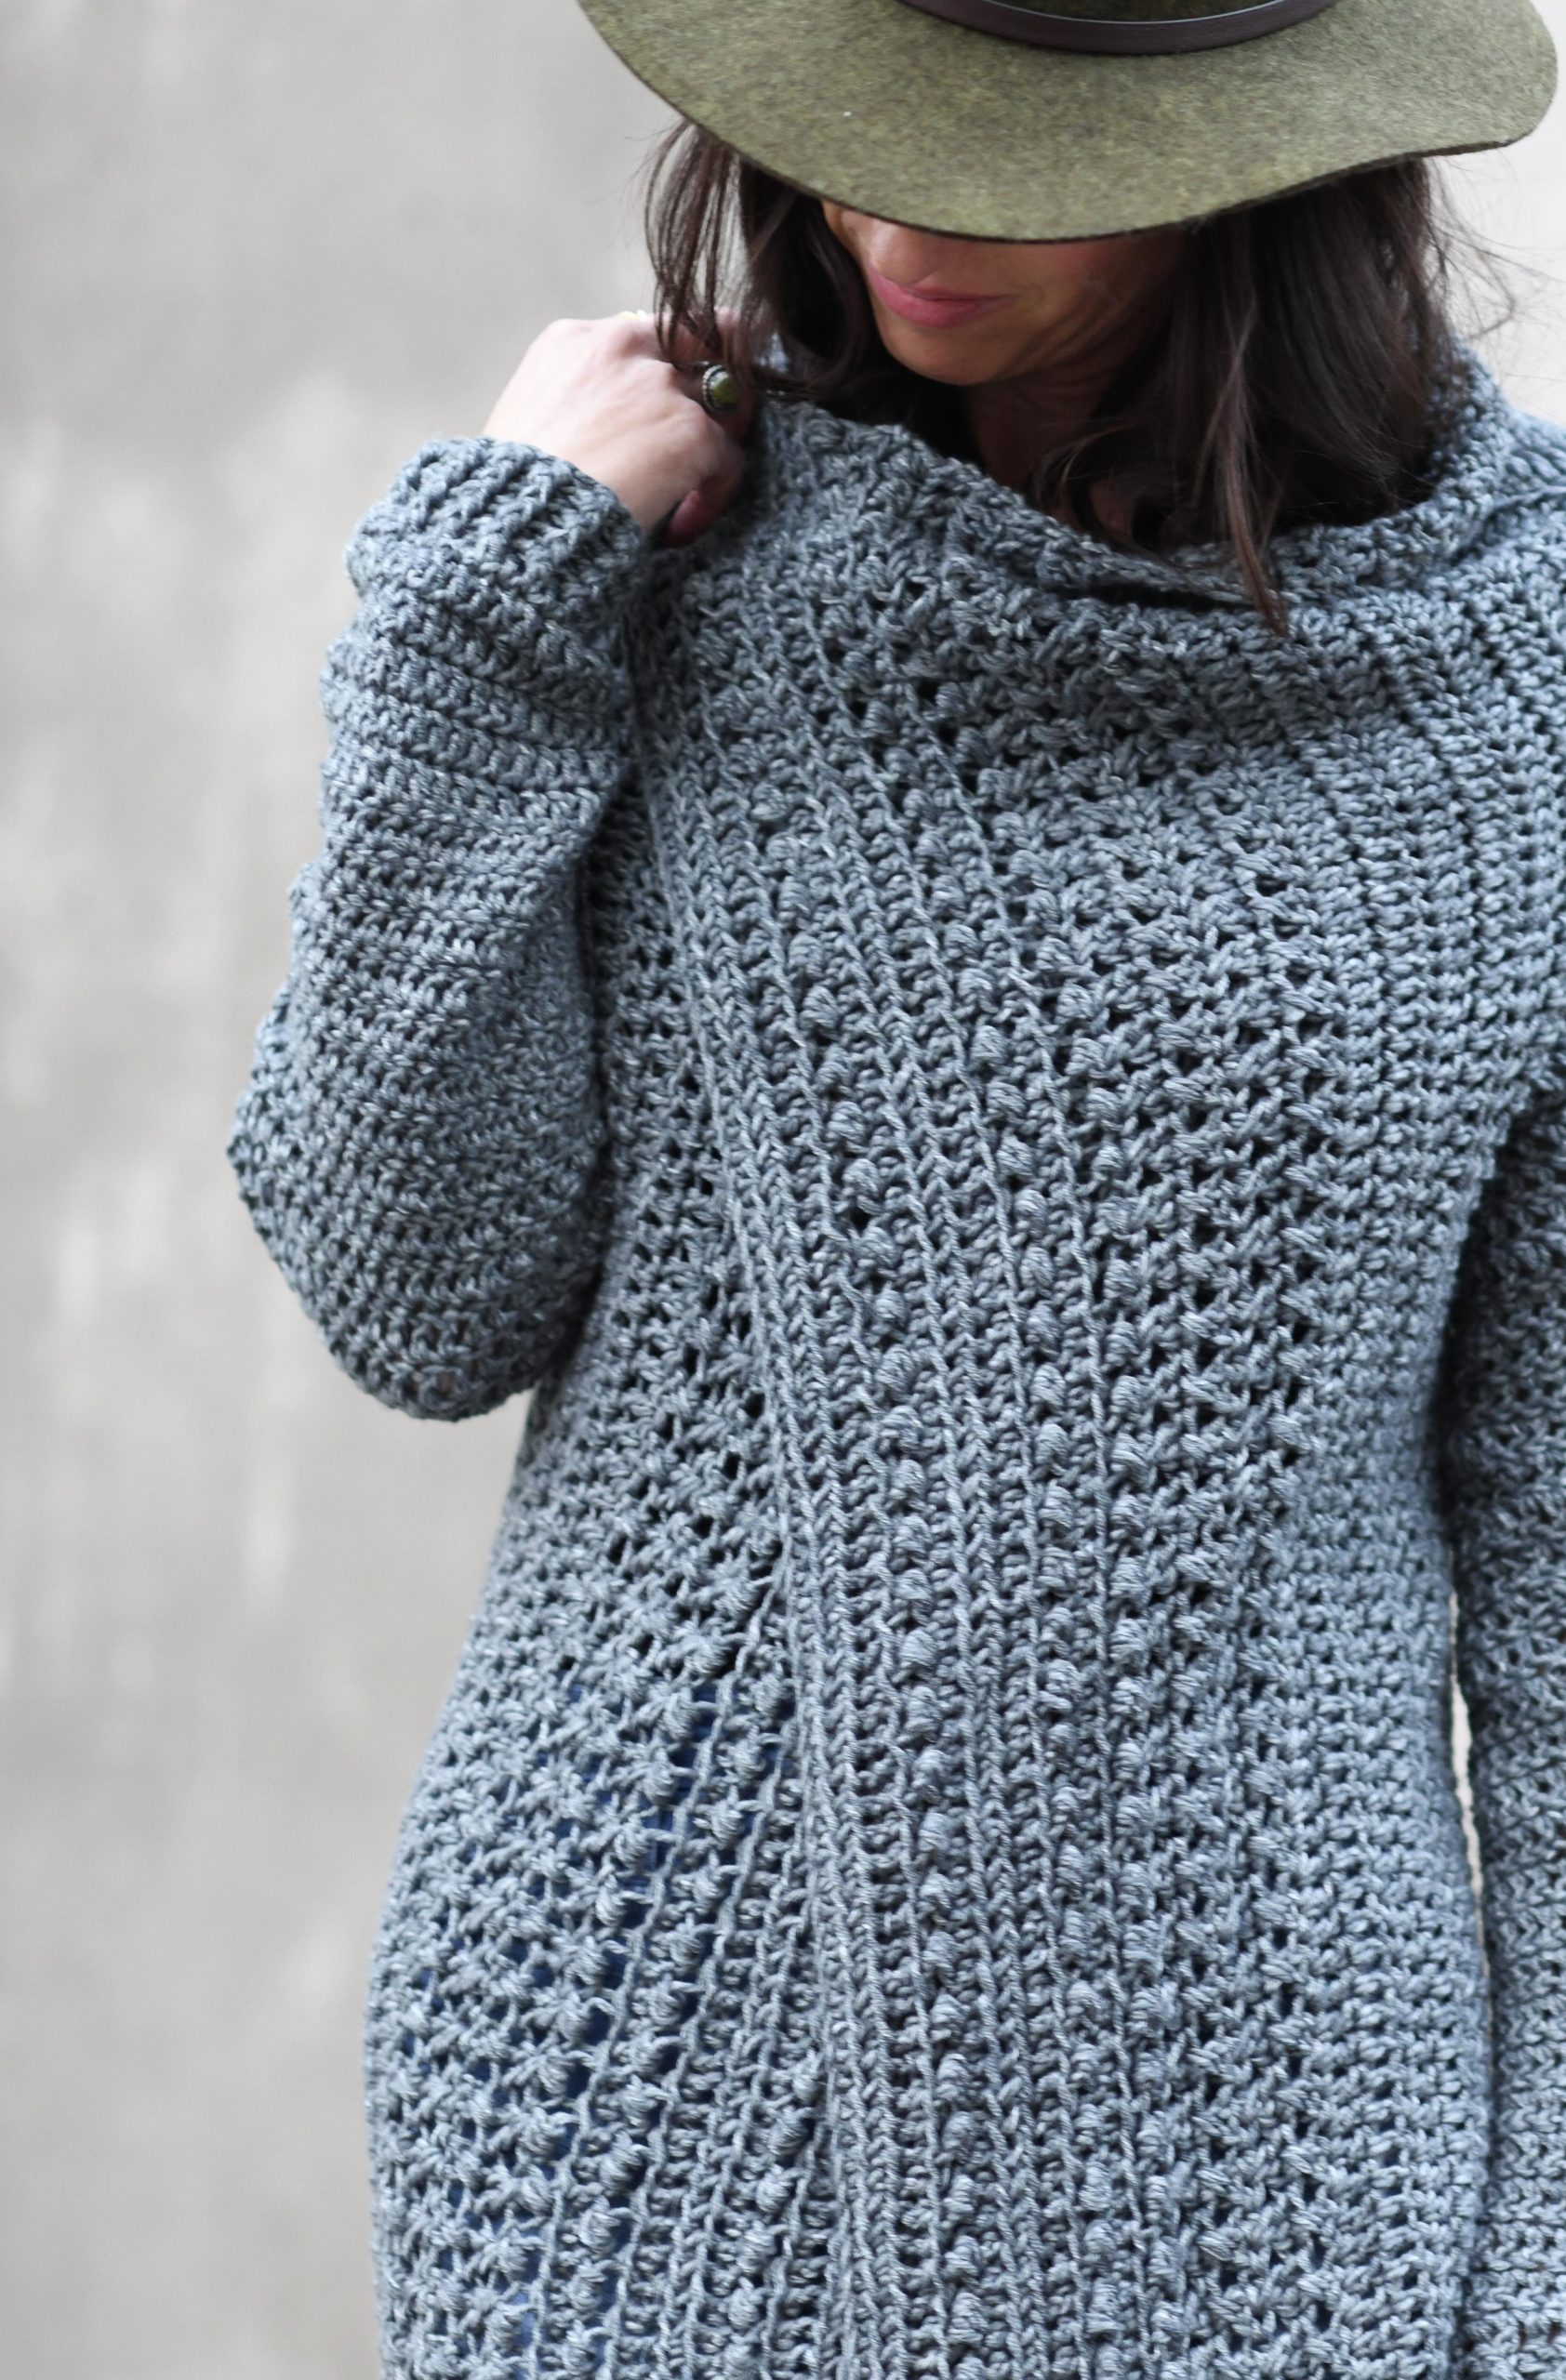
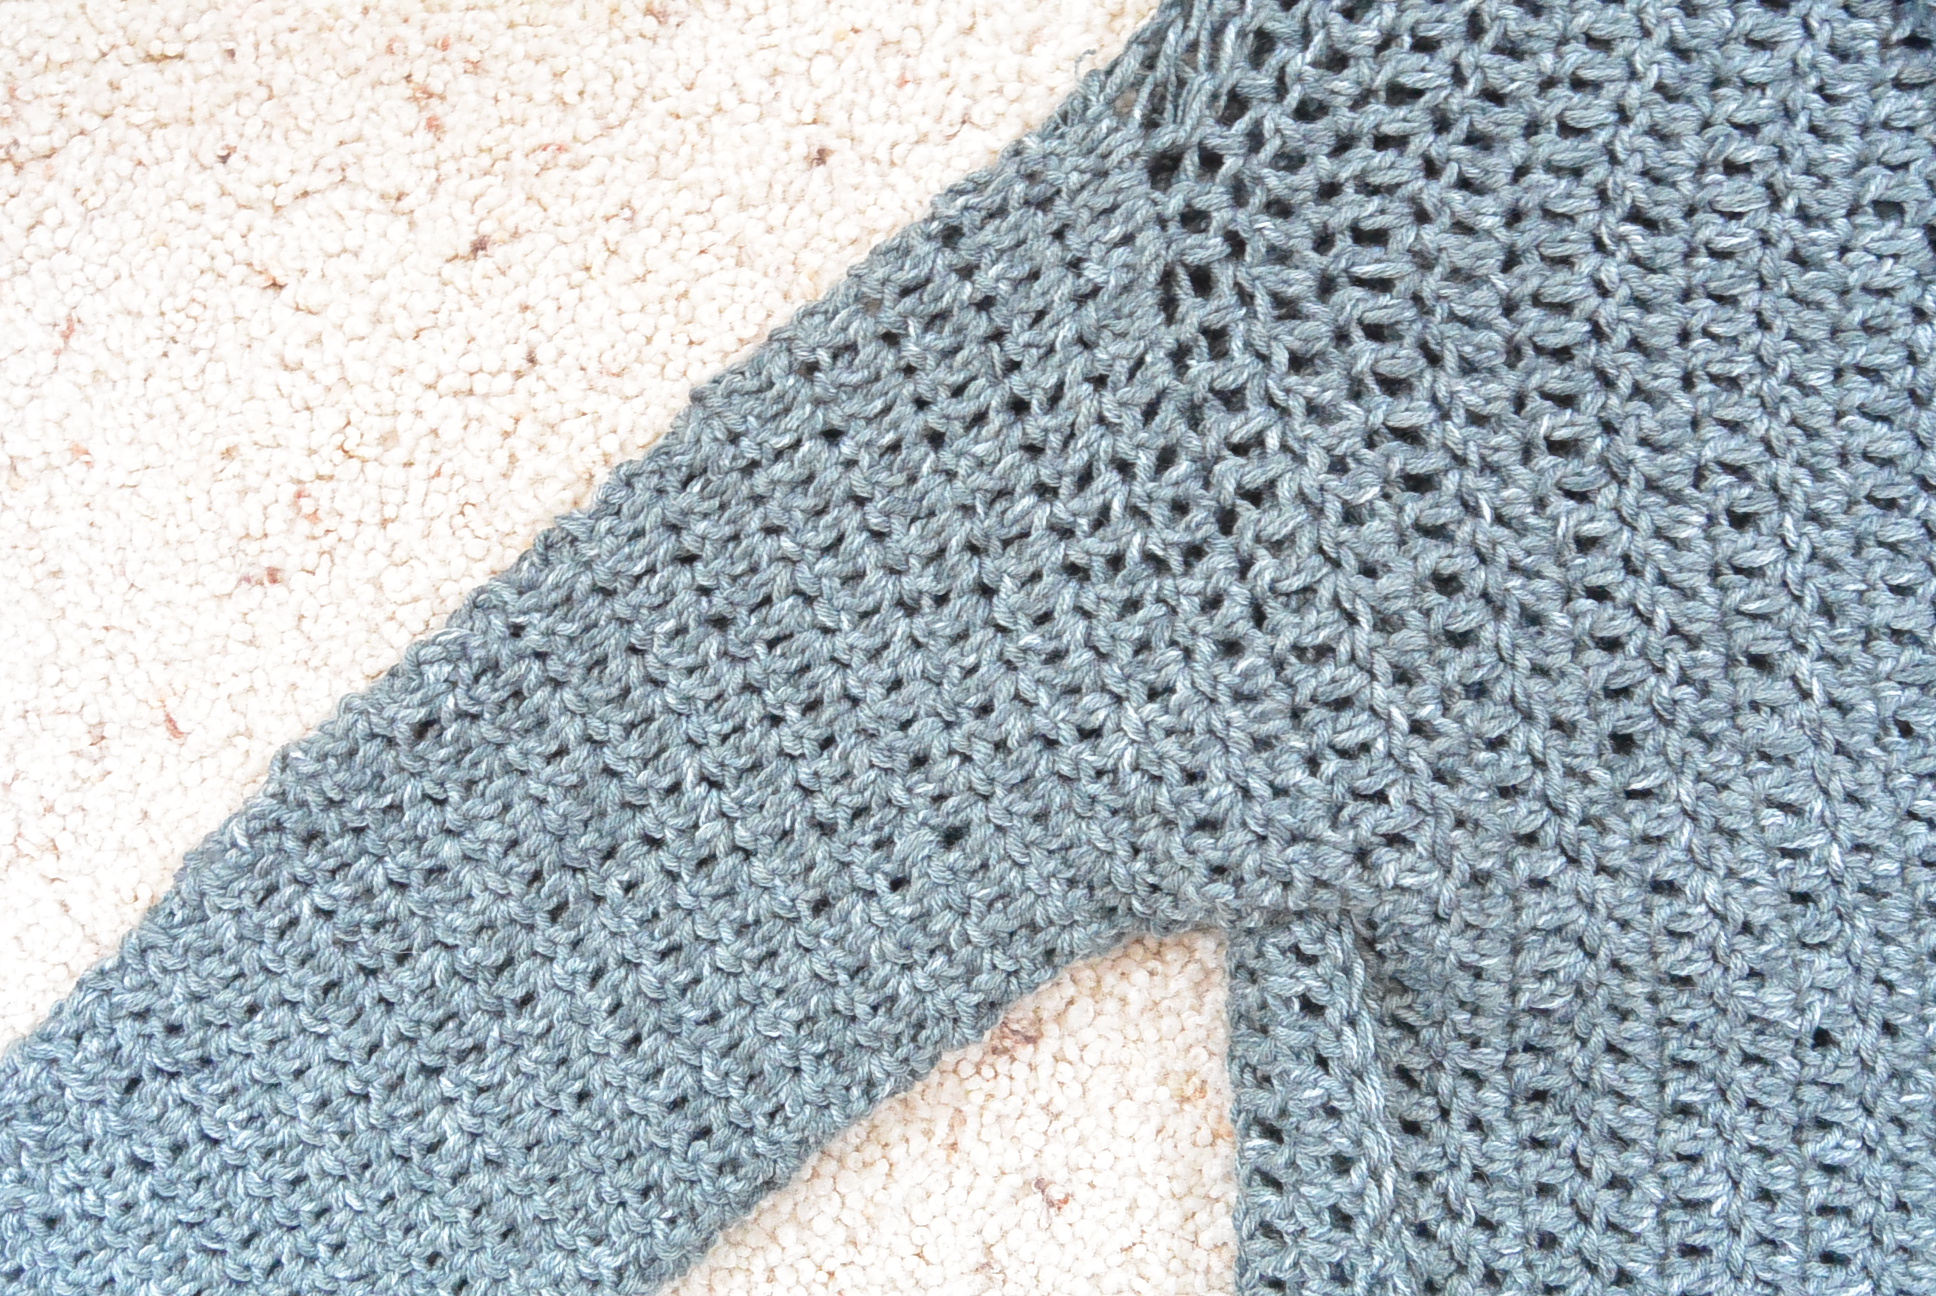
I’m so pleased with how the texture turned out along the collar. 🙂
So, how do we make this sweater?!
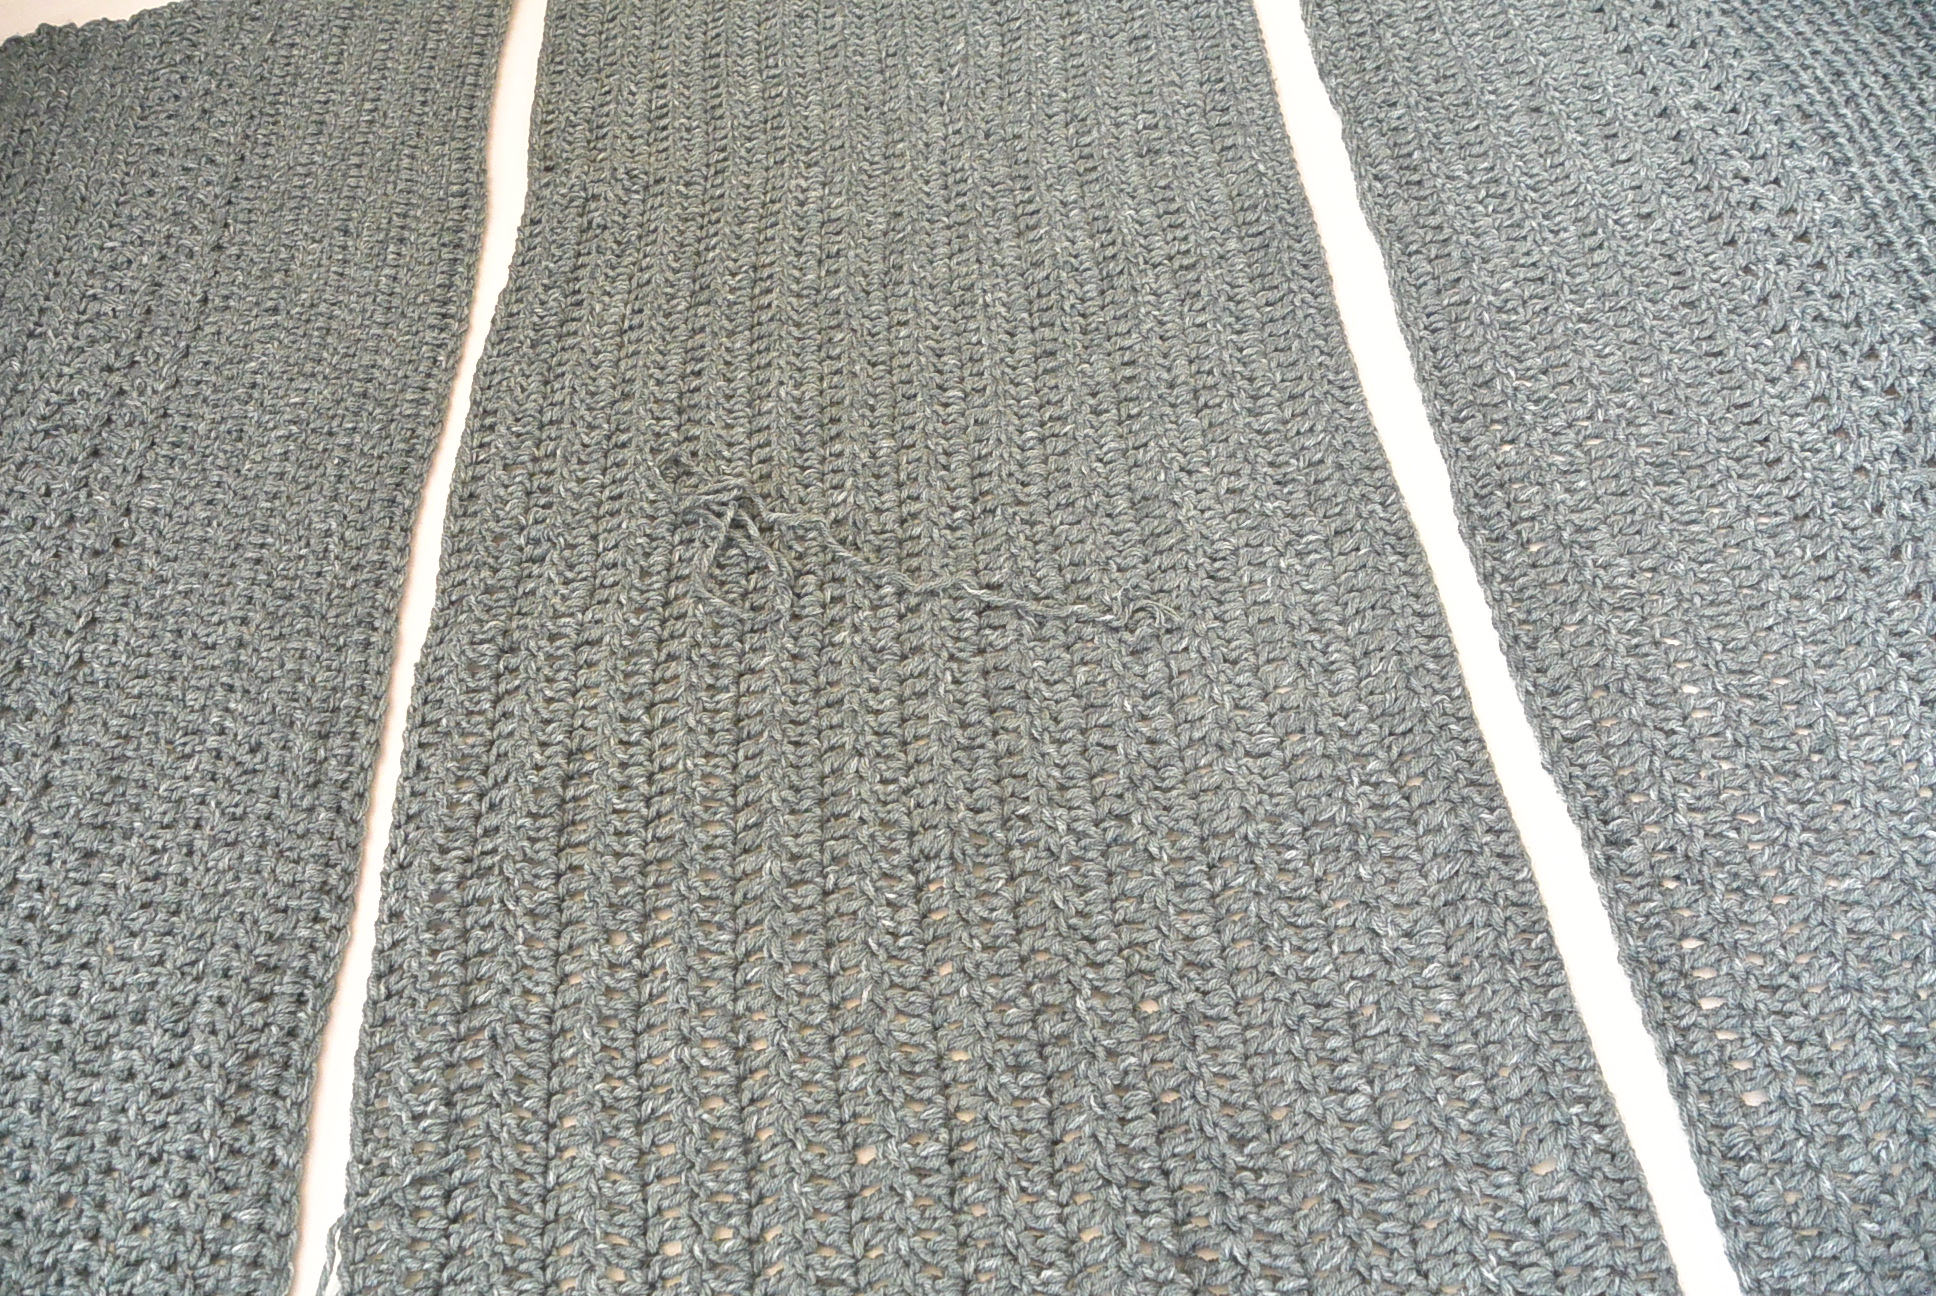
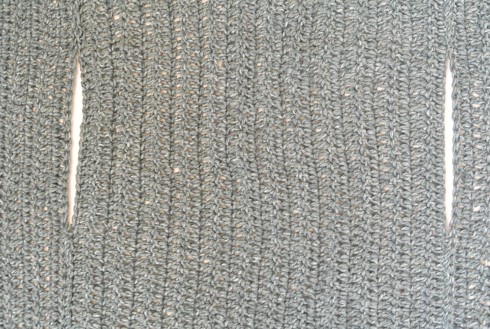
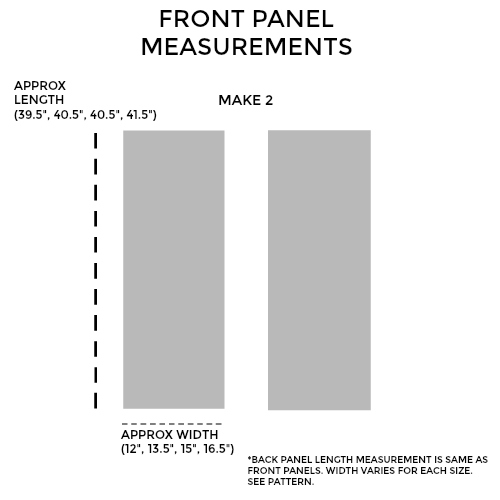
First, you will begin by making two rectangular front panels as well as one rectangular back panel. The front panels are worked with a few different stitches, giving them that super cool texture you see along the collar. The back is simply made with basic double crochet stitches. It’s very easy to adjust the pattern to make the sweater wider in circumference or smaller by crocheting for more or fewer rows on each panel.
Next, you will seam the 3 panels together while leaving openings for the arms.
From there, you will simply attach your yarn to the bottom of each arm opening and crochet the sleeves. That’s it! You’ll also find some helpful pictures at the bottom of this post!!
Scroll down to see the pattern with all the specifics. 🙂
You’ll find the free pattern below, or you may choose to purchase the advertisement-free printable version from my Etsy Shop HERE.
Mamas Makers Members, you can find your download HERE.
Free-Girls Sweater Crochet Pattern
Description:
This unique, boho-inspired sweater is just as comfy as it is cute. You’ll love how soft it is on the skin and how easy it is to crochet! Featuring a flowing collar, textured stitches and a lengthy fit, this cardigan compliments leggings and jeans alike.
Skill Level:
Easy +
Materials:
US Size J, 6.0 mm crochet hook
(6, 7, 8, 9) Lion Brand Jeans Yarn in Vintage (100 g/skein) (Kit available HERE)
Pattern uses approximately (600 g, 686 g, 777 g, 872 g)
Measuring Tape
Tapestry Needle
Scissors
Stitch Markers (optional)
Dimensions (approximate):
Small, Medium, Large, XL
Please follow the key throughout the pattern according to the
size you are crocheting:
(S, M, L, XL)
Bust Circumference:
S – 37.5”
M – 41.5
L – 45.5
XL – 49.5
Cross Back Width
S – 13.5”
M – 14.5”
L – 15.5”
XL – 16.5”
Length (from shoulder down):
S – 30”
M – 31”
L – 32”
XL – 33”
Sleeves Measurements:
Length: (19”, 19”, 19.5”, 19.5”)
Approximate circumference at widest point of upper portion of sleeve: (13”, 15”, 17”, 19”)
Approximate circumference at sleeve cuff: (8”, 10”, 12”, 14”)
Abbreviations & Skills:
ch – chain
dc – double crochet
hdc – half double crochet
hdc flo – half double crochet through the front loop only
yo – yarn over
FPdc – front post double crochet
BPdc – back post double crochet
Special Stitch
Bean Stitch – bean st – Row 1 Ch 2, turn, insert hook in 3rd st from hook, pull up a loop, yo, insert hook in same st, pull up another loop (4 loops on hook) yo, insert hook in same st (6 loops on hook) yo, pull through all 6 loops on hook (bean st made), *ch1, sk st, work bean st in next st; repeat from * across the row.
Gauge:
Approximately 11 ¾ stitches and approximately 7 rows in 4” x 4” of double crochet
Notes:
This cardigan is made up of three rectangular panels which are seamed together at the sides. The sleeves are then crocheted by attaching the yarn to the arm openings and crocheting in rounds. Adjustments to the width of the cardigan can be made by crocheting each panel for more rows.
Pattern Instructions
Rectangular Front Panel of Cardigan (make 2)
Ch (117, 121, 123, 125)
Row 1 Hdc in 3rd st from hook and in each ch st across the row (115, 119, 121, 123)
Row 2 Ch 2 (doesn’t count as st), turn, hdc flo in 3rd st from hook and in each st across the row (115, 119, 121, 123)
Row 3 Repeat row 2
Row 4 Work the bean st pattern across the row (refer to Special Stitch section)
Rows 5 – 7 Repeat row 2 (115, 119, 121, 123) (note: in row 5 you will work in each ch st and st across the row)
Row 8 Work the bean st pattern across the row
Row 9 Repeat row 2
Row 10 Work the bean st pattern across the row
Crossed Double Crochet Section
Rows 11 – 14 Ch 3 (counts as dc here and throughout pattern), turn, dc in next st, *sk st, dc in next st, dc in skipped st; repeat from * across to last st, dc in last st of row. (115, 119, 121, 123)
(note: last st of row in rows 12-14 will be the turn ch of previous row)
Double Crochet Section
Row 15 Ch 3, turn, dc in each st across the row (115, 119, 121, 123)
Rows 16 – (23, 26, 29, 32) or until panel measures approximately (12”, 13.5”, 15”, 16.5”) across, repeat row 15
Tie off and weave in ends.
Rectangular Back Panel
Ch (117, 121, 123, 125)
Row 1 Dc in 4th ch from hook and in each ch st across the row (115, 119, 121, 123)
Row 2 Ch 3 (counts as st here and throughout pattern), turn, dc in next dc st and in each st across the row (115, 119, 121, 123)
Repeat row 2 for approximately (24, 25, 27, 29) rows or until piece measures approximately (13.5”, 14.5”, 15.5”, 16.5”)
Tie off and weave in ends.
Assembly
Next, place each side panel along the long sides of the back panel. The Double Crochet Sections of the front panels should be lined up with each long edge of the back panel. With a length of yarn and a tapestry needle, seam approximately (22”, 23”, 24”, 25”) up each side. Tie off and weave in ends.
Next, leave a space for the arm opening measuring (6.5”, 7.5”, 8.5”, 9.5”) long. Attach yarn at top of arm opening and seam up the remainder of the panels. Tie off and weave in ends. (see picture)
Sleeves (do not turn at end of each round)
Attach yarn to bottom of arm opening
Place stitch marker at beginning of each round
Row 1 Work (38, 44, 49, 55) double crochet stitches evenly around, sl st to join in top of beg ch 3 (don’t turn here or throughout sleeve pattern)
Row 2 Ch 3 (counts as dc), dc in each st around, sl st to join in top of beg ch 3 (38, 44, 49, 55)
Row 3 Ch 3, dc in each st around to last 2 sts, dc2tog (decrease), sl st to join in top of beg ch 3
Row 4 Ch 3 (counts as dc), dc in each st around, sl st to join in top of beg ch 3
Row 5 Ch 3 (counts as dc), dc in each st around, sl st to join in top of beg ch 3
Repeat rows 3 – 5 until sleeve measures approximately (17.5”, 17.5”, 18”, 18”). The stitch count will decrease by one stitch every third row.
Next, you’ll crochet the cuff of the sleeve.
Sleeve Cuff
Ch 3, work FPhdc, followed by BPhdc. Repeat this pattern, alternating a FPhdc st, followed by a BPhdc st around.
Continue working this pattern in rounds, working FPdc stitches in each FPdc st, and BPdc stitches in each BPdc stitch around for a total of about 1.5” – 2” or until you’ve reached your desired length. Tie off and weave in ends. (To make the ribbing work out perfectly, work an even number of stiches around)
Repeat this sleeve pattern for each arm opening.
Finishing
Block to shape and size as necessary.
Optional:
Add a button or two in order to be able to close the front of the sweater. You may also consider adding a belt to secure the sweater when worn.
ENJOY!
Picture Tutorial:
Step 1: Place back panel between two front/side panels
Step 2: Seam them together, leaving openings for the arms

Below: Arm openings where sleeves will be attached
Step 3: Attach yarn and crochet sleeves onto sweater
Below: This is how the sweater looks when it’s laid open and flat.
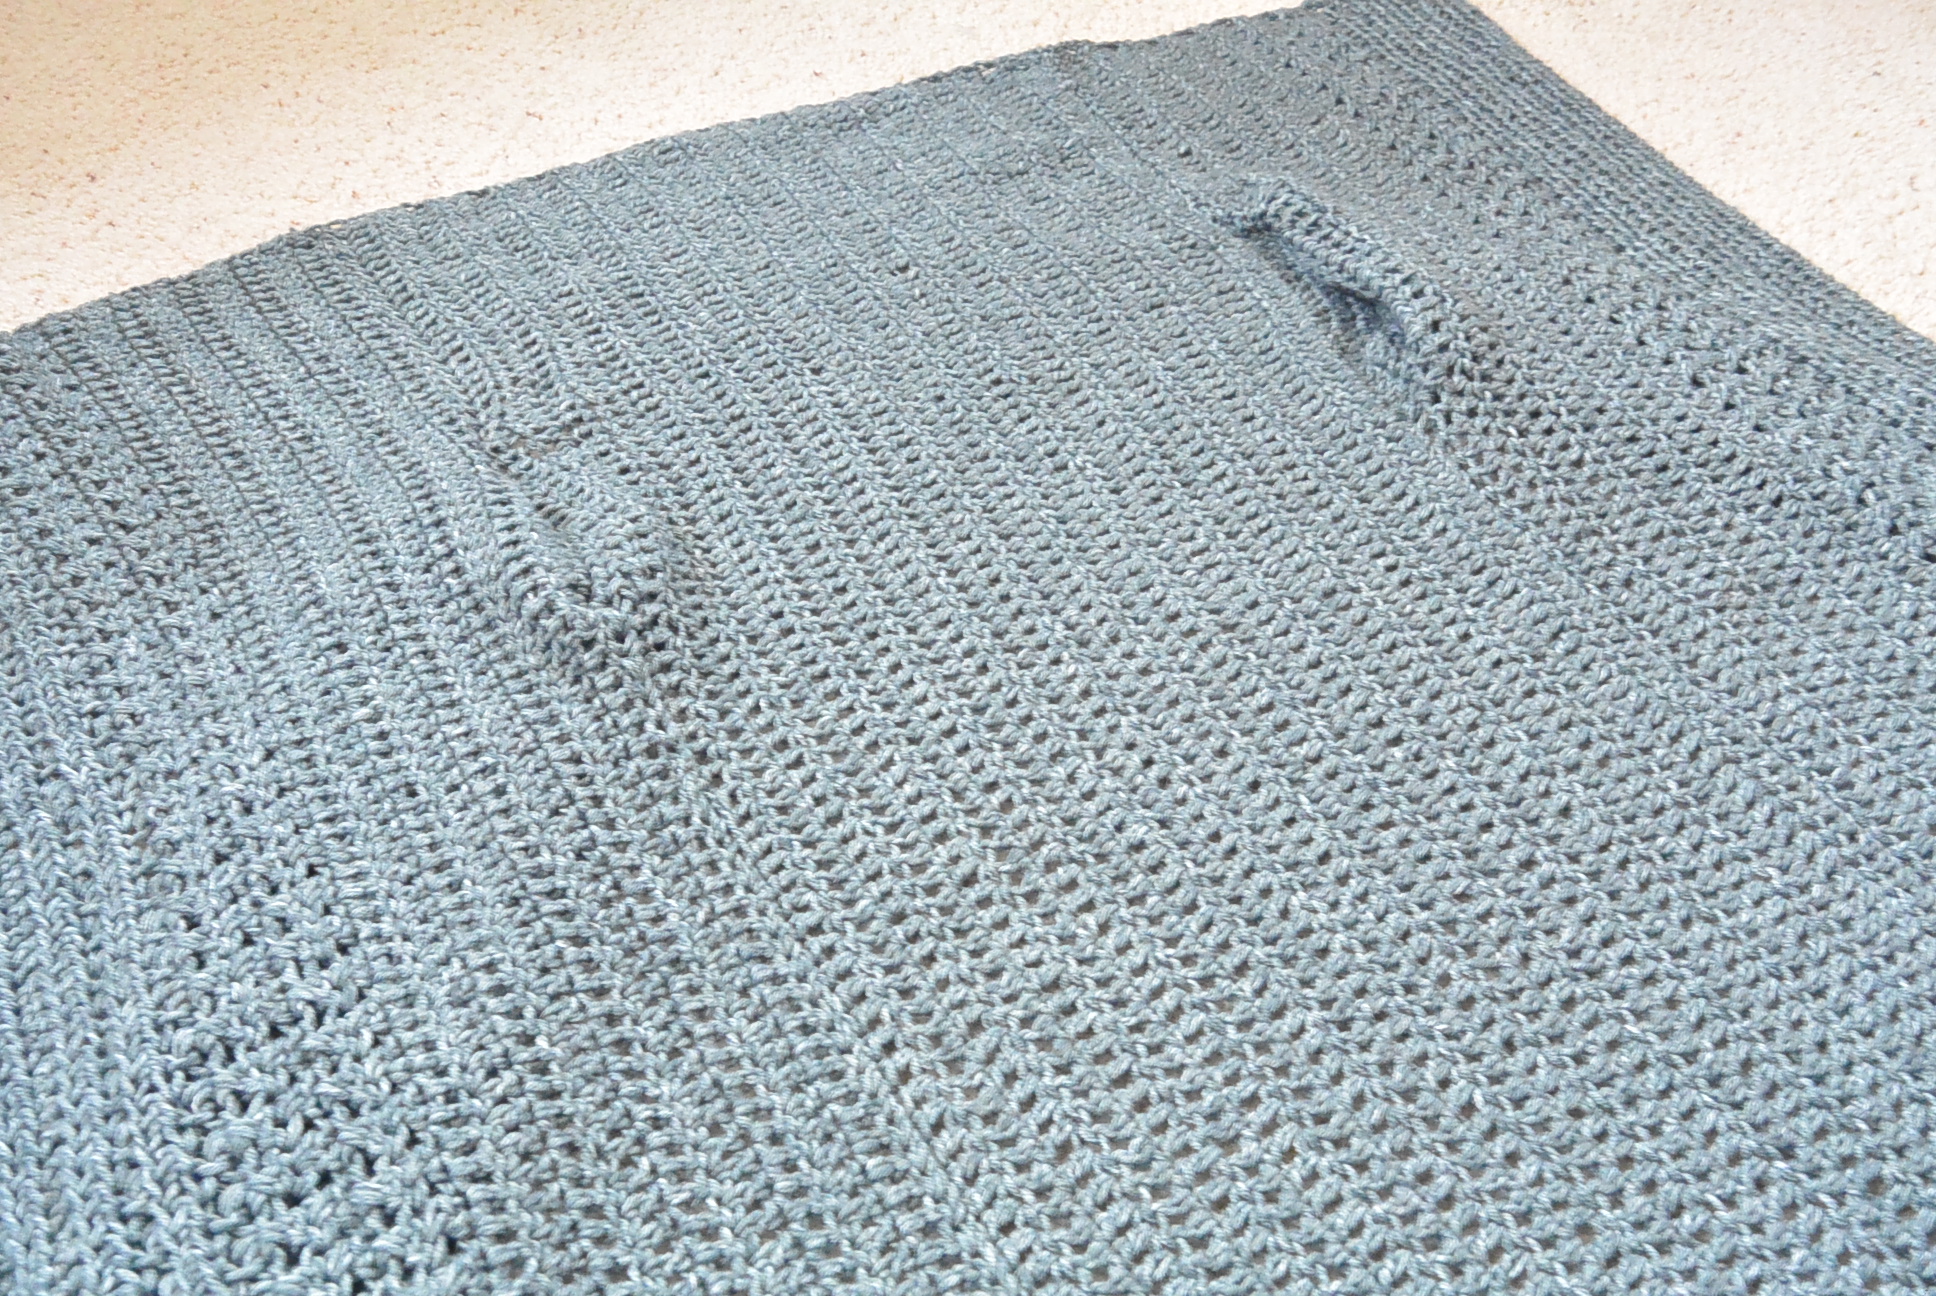

Above: The two front panels (or side panels) are placed along the back panel and seamed. Openings are left for the arms. The yarn is attached to the bottom of the arm opening in order to crochet the sleeves in rounds.
I really hope you enjoyed this pattern as much as I did!

As always, I’d be so happy to see if you made one! Just tag me @mamainastitch #mamainastitch on Instagram or shoot me an email!
XO
Jessica
Pretty, but I’m a knitter
This is off the chain gorgeous! I have so much on my list this just moved to the top! Dont ever stop with your fun and fashion forward designs.
Ahhh thank you Denise!
Any reason not to do some single crochet (or other stitch) around the neck/lapel so it would not stretch and look more finished?
You can modify it any way that you’d like. That would be just fine! 🙂
This looks so warm and cozy. My question is can I substitute a different kind of yarn? Say red heart super saver or red heart soft? Thank you in advance. Also thanks for the lovely sweater pattern.
Yes! You can use any worsted weight #4 yarn. Sorry for the delay on this answer!
Hi Jessica, once again a fabulous pattern!
Is there any ease or is it pretty true to size?
Thanks so much ….
So pretty Jess…..you must never eat or sleep….it seems like you whip out all these pretty patterns and I’m still slogging away at the same old thing
You are truly gifted and I’m glad I found your patterns…..
Merry Christmas to you and your family…(and may visions of more sweaters dance in your head lol)!
Jess in Michigan
wow! what a knockout sweater! Any chance you could do a similar pattern for knitters, maybe with a bulky yarn?
ahhh…it is so perfect!
I’ll keep a knit version in mind, Angela! So happy you like it!
You did it again! I can’t stop admiring your talent to design modern and wearable crochet patterns. I think I’d style this with one of those beautiful shawl pins or brooches instead of buttons. So many options to wear it.
I love the way the sweater looks! Your work is very polished; simple but elegant. Is there anyway to create a similar look by knitting?
Hi Deb! Thanks for the kind words! Yes, you could make a similar sweater with knitting for sure!
Love this pattern! For a size small. Do you have an approximate length on the sleeve openings?
Love this! Any chance you’ll be doing a knit version. I like crochet but I’m really trying to improve my knitting skills.
Love love love this pattern. I’m an avid knitter but actually am really getting back into my crocheting thanks to you
Wow!! This is stunning!! Beautiful job, Jess!
Another winner. I just wish your patterns extended to plus sizes.
Hi Gayle!
I’m hoping to get some help with creating more sizes in the coming year. Thanks for reaching out about it!
I showed this to my 20 year old daughter and she wants me to make this for her. She said she “would wear the h*ll out of it!” I think this pattern is a winner. I will let you know if I am successful!
Hi
I love this pattern and i started right away.
While making this the 29th row seems longer than the first, both are 121 stitches.
Did you have the same problem or is it just me?
I really love it but i so not know if i am on the right way .
You should be just fine – I believe mine was a bit longer as well.
Thank you.
Love this pattern and desire making one for my mom, but she is 4’11”. How many stitches shorter should I make this? (I am thinking the stitch count needs to be divisible by … 3? 5?) Please and thanks!
Another great pattern,dang I need to learn to crochet.
thank you
Hi there, This project is so awesome. Do you have a video revision of the step by step? I want to make it so bad but I have trouble reading instructions as apposed to watching the steps.
Thank you so much. And thank you that it is free.
LM
Just what I have been looking for. A vertical crochet jacket. I will make it shorter, as I am only 5’1″ But the sleeve length seems fine. I’d rather it be a little long than too short. I can always push the sleeves up, or on blustery days pull my hands in for warmth
Love! Love this sweater!!!!
Pkeae tell me there is a pattern for knitting???
Hi!
Love your patterns!! Thank you so much for sharing. I can’t wait to make this for my daughter and one for me. You are truly an inspiration!
Merci pour ce beau tuto ! Cette veste/gilet est superbe ! Je l’ajoute à ma liste des modèles à réaliser.
Hi, just finished front and back panels…can you tell me how far from collar top you left the opening for the sleeves, and how many inches your sleeve hole would be? I don’t want to sew the pieces together, afraid the armholes will be too small can you help?
Please disregard my previous message, i found the instructions, sorry…my Vest is going to look great!
I just started this beautiful sweater but was wondering if you have a video. I am not a beginner however I seem to have difficulty with the beginning stitch skip 3 chains and then coming back to the end stitch the following row where I skipped those stitches – confused
I’m making this for my daughter now my 6 year old granddaughter wants one. Any help in down sizing would be helpful. I think I could do it by measuring her except might have trouble with sleeves. Love your patterns.
Beautiful sweater! I’d like to try it. Regarding the crossed double crochets, are they staggered? Meaning, are they not stacked up straight above one another? I see that the panels are made in an odd number of stitches. This is my first time to use a pattern with mixed types of stitches, and I was wondering about the multiples of the different stitches.
Hello Jessica! We had a little private correspondence about sizing, but this question might be helpful for anyone else struggling with stitch count. I was getting along swimmingly until I started the crossed-double crochet stitches. By counting the chain three as a stitch and putting the next dc next to it before starting the crossed dcs and ending with a single dc, I get two extra stitches — 117 instead of 115 for the small. I have 58 bean stitches each time — is that right? Is the “next stitch” on the first row of the crossed dc actually NOT right next to the chain? Even if I move it one to the left to crochet that single dc before the crossed stitches, I will still have too many. Help! I fear that my 58 bean stitches are the problem. . . which will mean a LOT of frogging. . . but my rows of half dc after each of the bean rows worked out to 115. . . help!
Hi! Really loving the pattern and I can’t wait to wear it – quick question about the sleeve cuff though. You start off by saying – chain 3 then alternate fphdc and bphdc – then you go on to say fpdc and bpdc in the fpdc and bpdc. So after the first round should I switch to DC from hdc or are the all DC/hdc? Thanks!
Hello there-I DEFINITELY have to make this-gorgeous
Yvonne
Im hoping you can tell me how far up to seam for the arm holes with 110 stitches for each panel please help I’ve been working on this for over a month and would love to finish and wear it before its too warm! Thank you for your lovely pattern and any help will be greatly appreciated!
119 stitches i meant
Hey Amy! Thanks for your patience and so glad you like the pattern! So for a medium, you want to seam up the side about 23″, then start your arm opening. You can see it in the assembly instructions where it says “With a length of yarn and a tapestry needle, seam approximately (22”, 23”, 24”, 25”) up each side.”
Hope this helps and feel free to email me with any other questions or if I’m misunderstanding your question!
Please help me with how far to seem up for the 7.5 in arm hole opening…. It doesn’t say in the pattern i would love to finish this please help me out…. I did it in medium so 119 stitches each panel. I appreciate your hard work and the beauty you create its inspiring!
Amy from Michigan
Love your pattern! My effort at making it, though, was a disaster! I’m not overly big, but I am 5’10” & in making the largest size you offered, the length was just below my derriere & the side panels made the front of the sweater hang funky. Would you by chance have a 1x or 2x pattern? Thx!
Sorry to hear that, Brenda! I’m not sure what happened there. I only have the sizes listed available.
Jessica, would you tell us what kind of seaming stitch you used? Whip? Mattress? Something else? I have the panels made and am ready to progress to seaming and sleeves. I absolutely LOVE the front panel detailing — really stunning!
I used a basic whip stitch – if I’m remembering correctly!
You are a very talented designer!
Thank you so much for sharing your designs;
🙂
Adorable crochet design. It’s really amazing and beautiful.giving a creative look to crochet lovers.
This is beautiful. the lovely crochet idea. thanks for the sharing of the pretty idea.
Hi, Jessica, this is a perfect cardigan! Thank you very much.
Only a little help, please!
My yarn is: James C. Brett Marble Chunky.
I have begin the crochet with 5 mm hook but this was a catastrophe – my “cardigan” is too long.
Have you some idea, what kind of hook and what kind of pattern will be good for this yarn? Your pattern is very beautiful but not for this kind of yarn.
Thank you very much!
Have a nice week!
Marianne