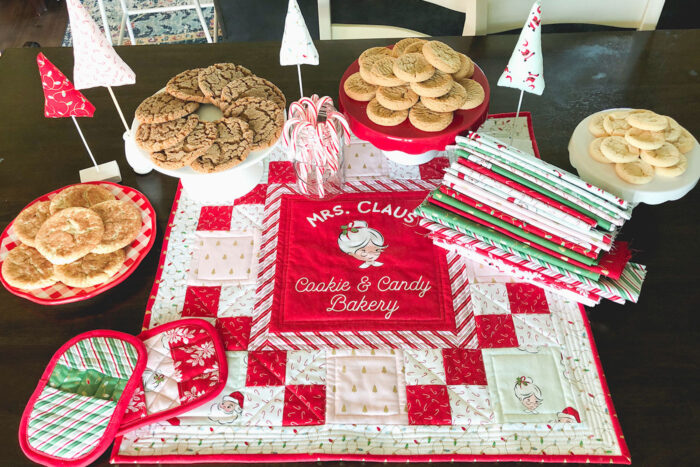
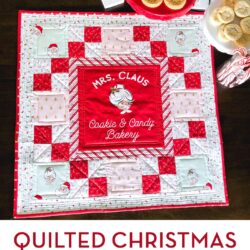
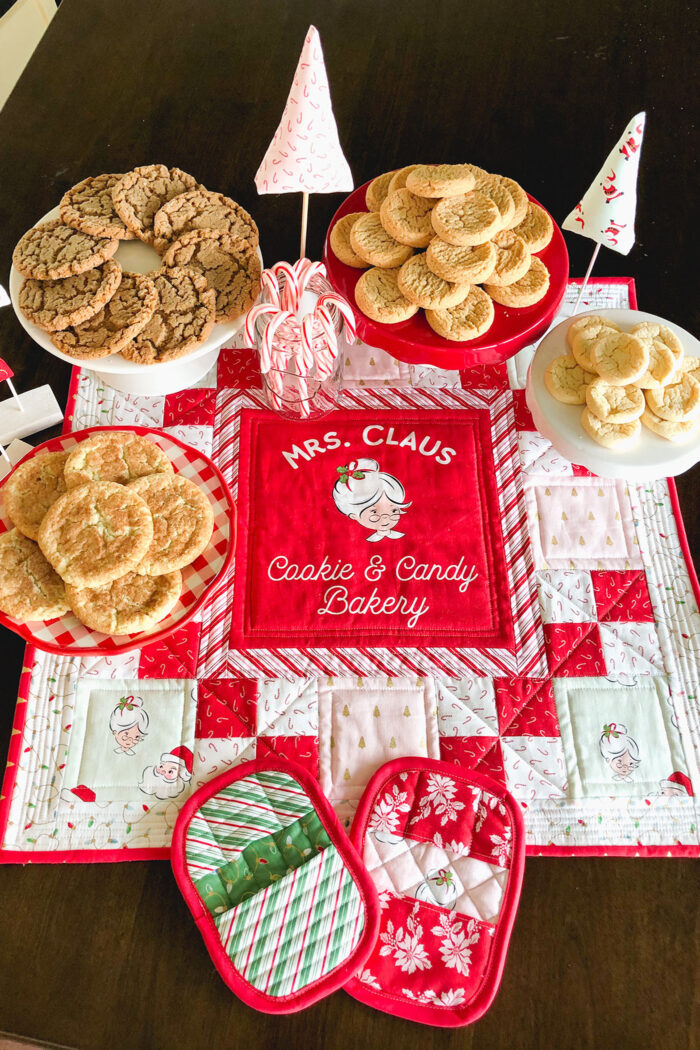
Mrs. Claus Christmas Table Topper Pattern
Amy Chappell is sharing a free tutorial for an adorable Quilted Christmas Table Topper. This fun quilt pattern could easily be used as a mini quilt or a Christmas pillow as well.
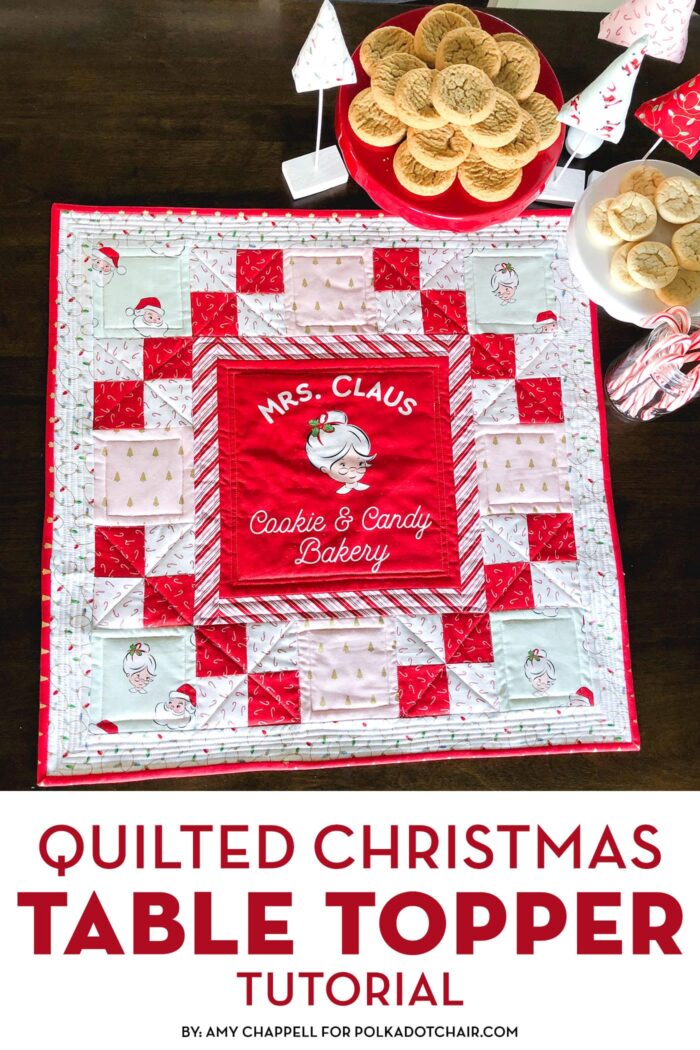
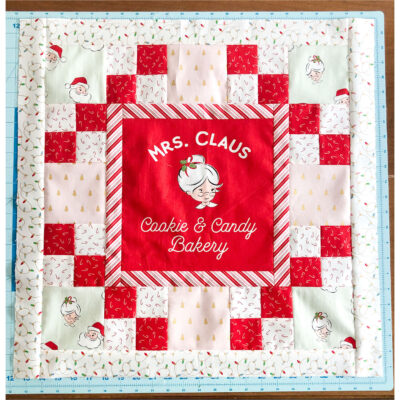
Don’t you just love the table topper that Amy has created for today’s free tutorial? The fabric on the table topper is from my new line with Riley Blake called Santa Claus Lane. Amy is using one of the panels from the line as the center of her table topper!
If you don’t have access to the panel, you can use any other novelty fabric. She lists the dimensions for that piece below.
Mrs. Claus Cookies Christmas Table Topper Pattern
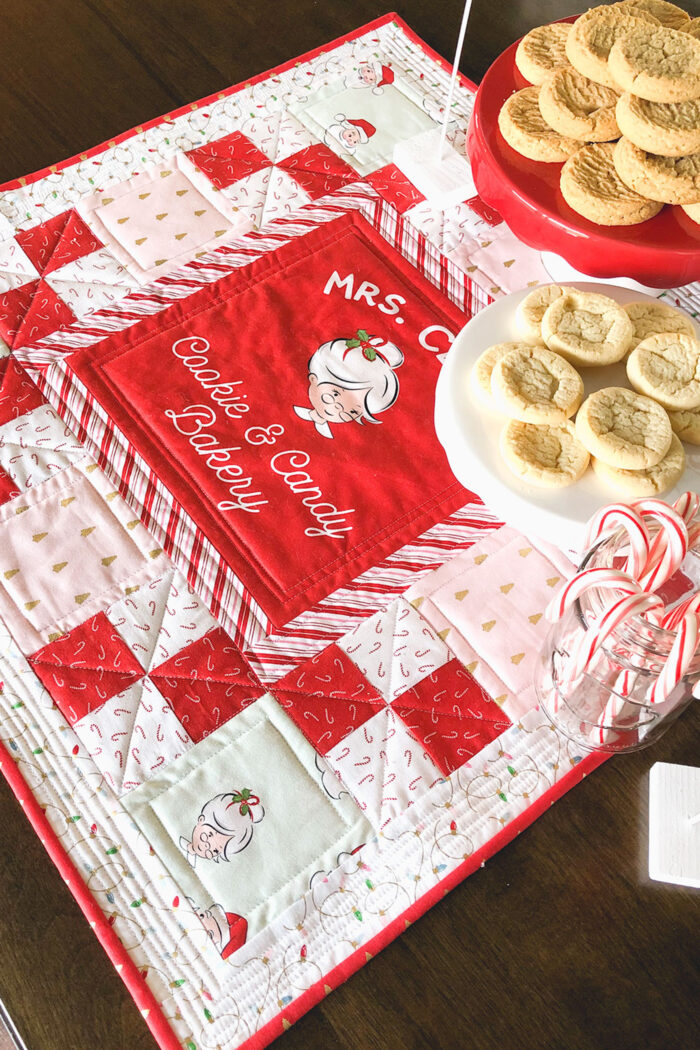
When I saw the panel from Melissa’s new line- Santa Claus Lane, I knew exactly what project I wanted to make with it. This Mrs. Claus Bakery Table topper turned out even cuter than I pictured it! It’s a super simple quilt and quick and easy to make! Ready to sew? Let’s go!!
Note: all seams are ¼”. Please read all directions before beginning.
Quilted Christmas Table Topper Pattern
Equipment
supplies
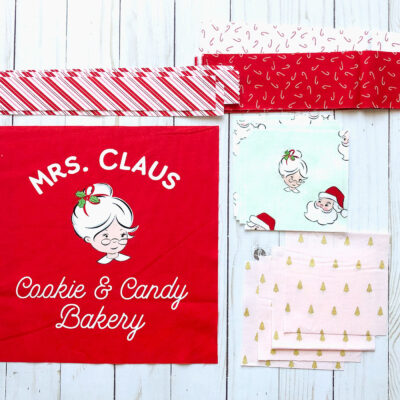
Fabric Requirements:
- 3 fat quarters stripe, pink and mint fabric
- 1 panel Santa Claus Lane fabric
- 1/8 yard each- red and white candy cane fabric
- 1/8 yard white light fabric
- ¼ yard binding fabric
- 1 yard backing fabric
Other:
- 1 piece Batting 25" x 25"
Instructions
Cutting:
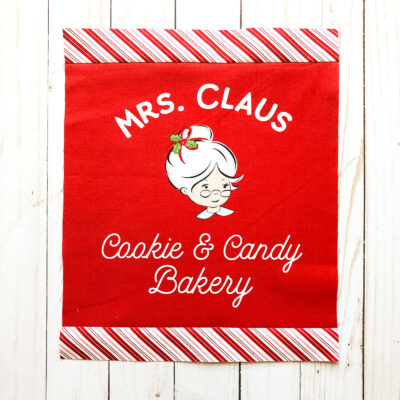
- Cut the Mrs. Claus square from the panel- center the design and cut the square down to 10 ½”

- From the striped border fabric cut (2) strips 1 ½” X 10” and (2) strips 1 ½” X 12 ½”
- From the pink fat quarter cut (4) 4 ½” X 4 ½” squares
- From the mint fat quarter cut (4) 4 ½” X 4 ½” squares
- From both the red and the white candy cane fabric, cut one 2 ½” by WOF (width of fabric) strips.
- From the white light fabric cut (2) 2” X 20 ½” strips and (2) 2” X 23 ½” strips
- Cut binding fabric into (3) 2 ½” X WOF strips
- Cut a 25” X 25” square from the backing fabric
- Cut a 25” X 25” square from the batting.
Sew Center Block:
- To the top and bottom of the 10 ½” square cut from the panel, sew the 1 ½” x 10 ½” strips of striped fabric.
- Press the strips away from the center block.
- To the sides of the panel block, sew the two 1 ½” X 12 ½” strips.
- Press the strips away from the center block.
Create 4-Patch blocks:
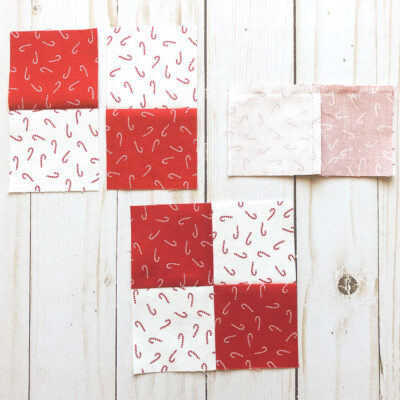
- Take the two 2 ½” X WOF strips of red and white candy cane fabric and sew them together along the length.
- Press the red fabric away from the white fabric.
- Cut this new pieced strip into 2 ½” sections.
- Take two of your pieced sections and place them right sides together so the red squares are opposite each other.
- Sew along the long side of the paired blocks to create a 4 ½” X 4 ½” square 4-patch block. Press one side away from the other.
Combine 4-patch and pink blocks:
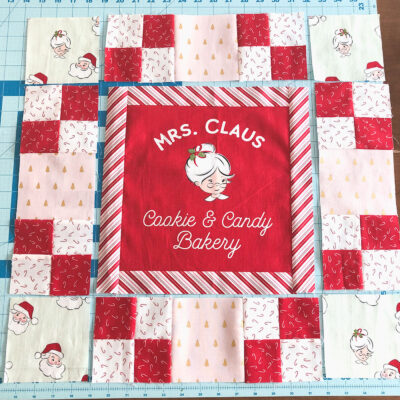
- Arrange the blocks as shown, alternating mint, 4-patch and pink blocks as indicated in the picture. Note the direction of the pink and mint fabrics to ensure they are facing the right direction if necessary.
- (insert sew four patch to tree block picture)
- Sew the 4-patch blocks to either side of the pink block (on the top and bottom row) and to the top and bottom of the pink block (on the left and right side row)
- Sew the mint blocks to either side of the top and bottom rows.
- Sew the left and right side rows with the pink and 4-patch blocks to the center panel block.
- Sew the top and bottom rows to the center row.

Finish Table Topper/Mini Quilt:
- To the top and bottom of the quilt add the 2” X 20 ½” white light border strips. Press the strips away from the quilt.
- To the left and right side of the quilt add the 2” X 23 ½” white light border strips. Press the strips away from the quilt.
- Lay the backing fabric wrong side up, place the batting on top.
- Add the quilt top to the top of the batting and baste in place.
- Quilt the table topper as desired and bind.
Notes
About the Designer:

Hi! My name is Amy Chappell, and I blog over at Ameroonie Designs. I currently live in Wyoming with my husband and six kids. I love being a mom but needed an outlet that would give me something to do that stayed done. Enter sewing and creating. I love the satisfaction of taking fabric and ideas and making something new. I also love that blogging has given me a way to meet new people and find a community of amazing people who love fabric and sewing as much as I do.
xoxo,
Amy
Ameroonie Designs
www.amerooniedesigns.com
More Great Projects by Amy:
Hello Sunshine Box Tutorial & Gift Idea
More Quilted Christmas Sewing Tutorials
Patchwork Quilted Christmas Pillows