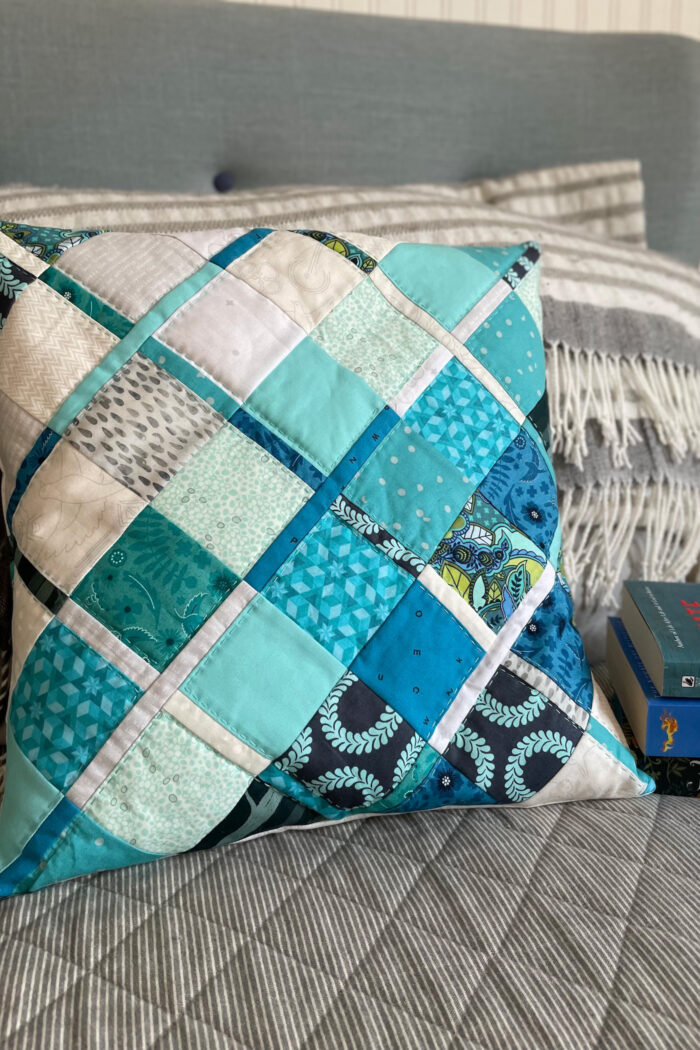
Patchwork Plaid Quilted Pillow Tutorial
I’m excited to introduce a new feature on the blog, a Pillow of the Month series! Each month Amy Ball will be sharing with you a tutorial to make a beautiful quilted pillow! She’s kicking things off this month with a beautiful wintery blue patchwork pillow tutorial!
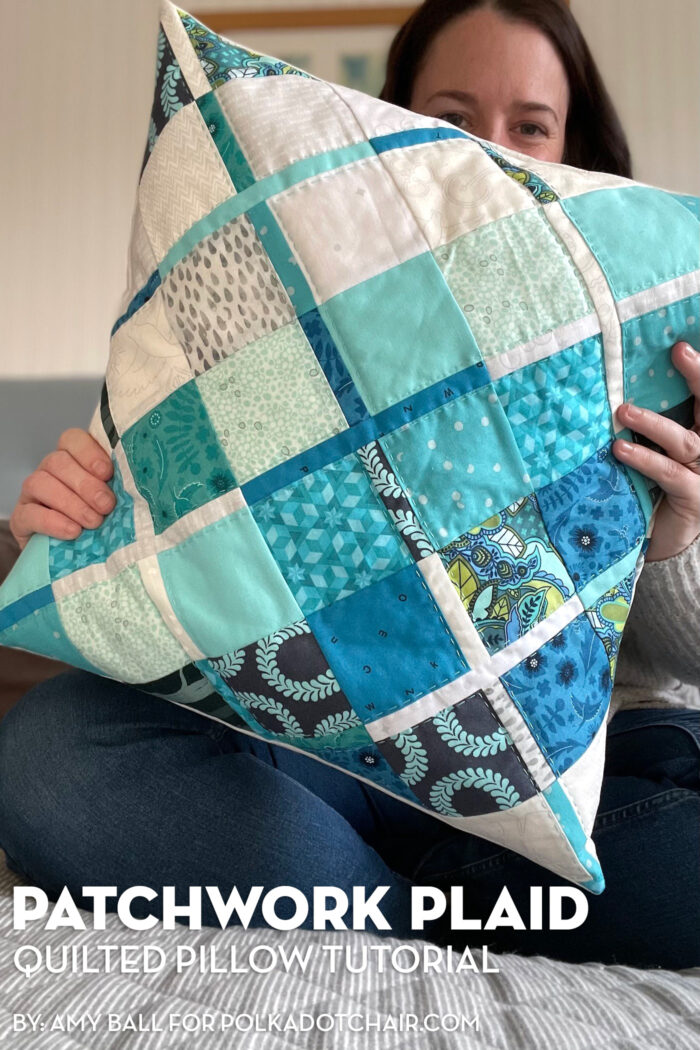
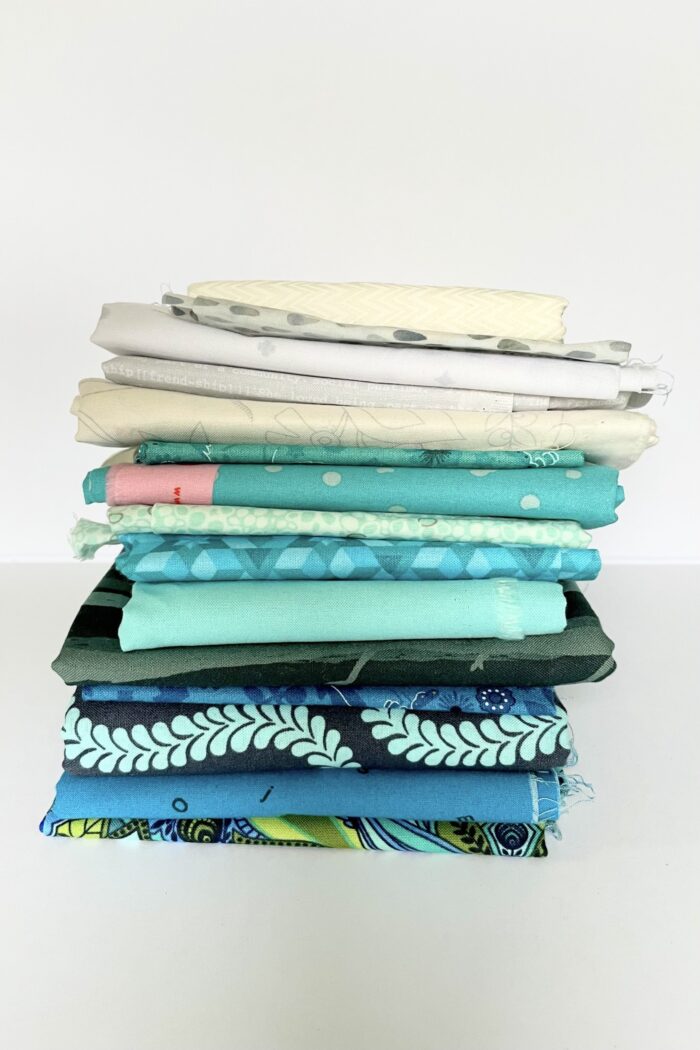
January is always a great time for a sewing room to sort out and, if you’re anything like me, reorganizing your supplies will uncover a whole lot of fabric scraps. This plaid-style patchwork cushion is a great chance to dig through the scrap bin and use up some of your favorites.
Pillow of the Month Patterns
This is the first of our year-long Pillow Tutorial series! Watch for even more projects as the year goes on! Here you can find links to all of the Pillow Patterns designed by Amy so far this year. Watch this list grow throughout 2022!
- January: Patchwork Plaid Pillow
- February: Heart Quilted Pillow
- March: SLEEP Pieced Letters Pillow Pattern
- April: Patchwork Beehive Pillow
- May: Queens Jubilee Celebration Pillow Pattern
- June: Moroccan Tiles Pillow
- July: Prism Paw Quilted Pillow Pattern
- August: Strawberry Fields Patchwork Pillow
- September: Improv Patchwork Pillow Pattern
- October: Twin Pines Quilted Pillow Pattern
- November: Peeking Reindeer Patchwork Pillow
- December: Christmas Presents Pillow
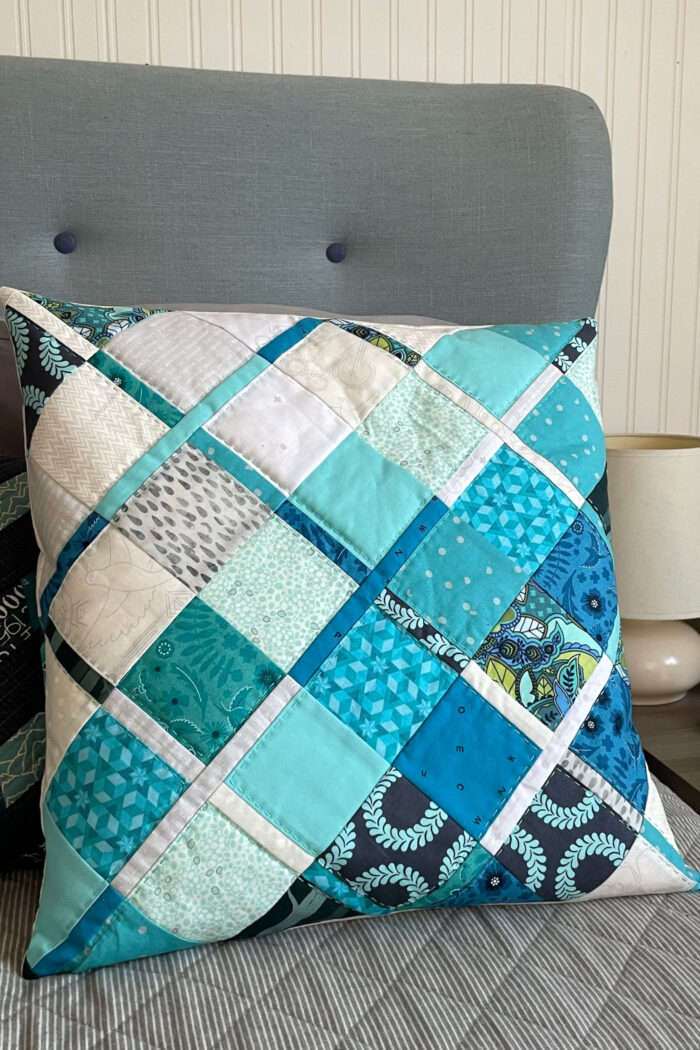
Plaid Patchwork Pillow Pattern
Patchwork Plaid Quilted Pillow Tutorial
Equipment
supplies
Fabrics
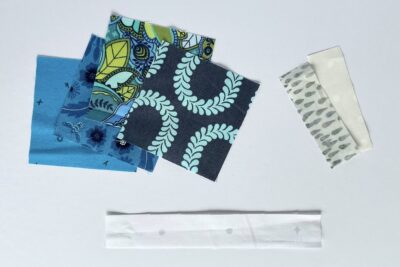
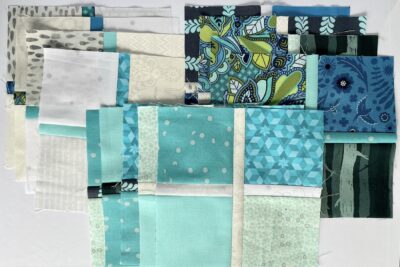
- Selection of fabric scraps separated into three groups
pale, mid, and dark
- 1 piece Light Backing Fabric 18" x 18
- 1 Fat Quarter Fabric for pillow back
Other Materials
- Batting: 18” x 18”
- 1 Pillow Form 17" x 17" (can also use 16" x 16" if you'd like the pillow to be fuller).
Instructions
Cutting:
- From pale fabric (I’m using white/pale grey) cut:3¼” square (16), 3¼” x 1” (8) and 6½” x 1” (4)
- From mid fabric (I’m using turquoise) cut: 3¼” square (20), 3¼” x 1” (8) and 6½” x 1” (4)
- From dark fabric (I’m using blue) cut: 3¼” square (16), 3¼” x 1” (10) and 6½” x 1” (5)
- From Pillow back fabric cut: 17½” x 9” (2)
Block Assembly:
- Use a ¼” seam allowance.
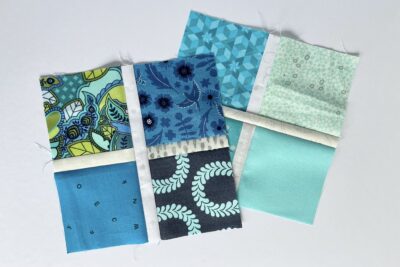
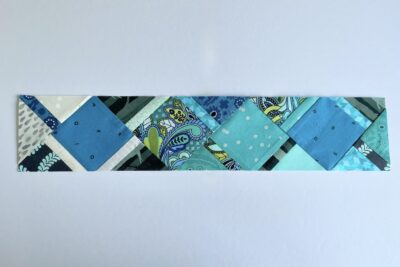
- The cushion design is made up of 6½” square blocks (13) in different two-tone combinations.
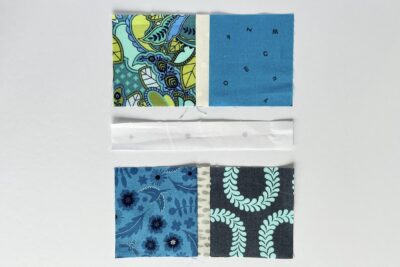
- Take four dark-colour 3¼” squares, two light-colour 3¼” x 1” rectangles, and one light-colour 6½” x 1” rectangle.

- Sew one light-colour 3¼” x 1” rectangle between two dark-colour 3¼” squares and press. Then repeat to create a second unit.
- Sew the light-colour 6½” x 1” rectangle between the two units from step two to complete the square block. Make sure the short rectangles are lined up with each other.
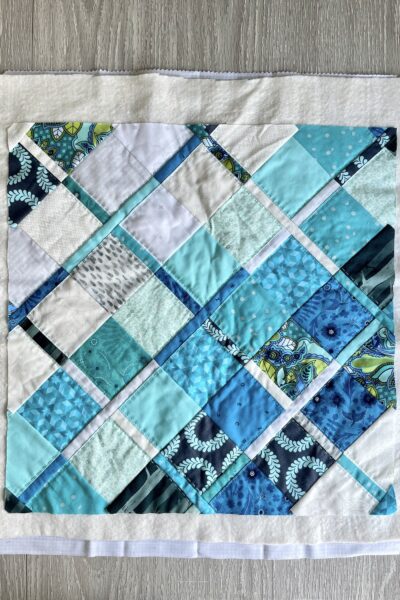
- Repeat steps one to three to make twelve more blocks with the following colour combinations: light with mid strips (2) light with dark strips (2) mid with light strips (2) mid with dark strips (3) dark with light strips (1) dark with mid strips (2)
Construction:
- Arrange the thirteen blocks using the diagram as you guide for positioning the different colours. Rotate any blocks to make sure you don’t have any similar scraps next to each other.

- Sew the blocks together in rows and then sew the rows together. Press well.
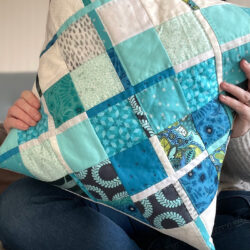
- Trim down to a 17½” square. Save the off-cuts as you’ll need them later.

Quilting:
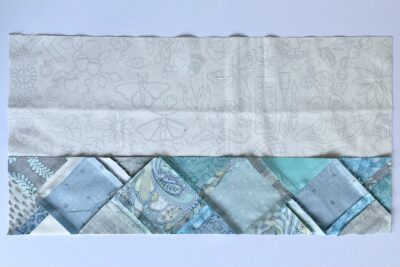
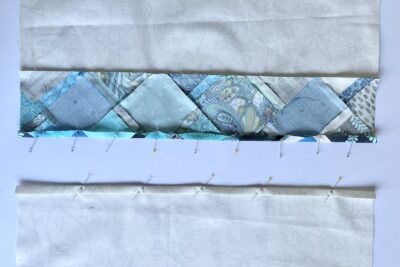
- Now it’s time to make a quilt sandwich. Place your light backing square (right side facing down) with your batting on top, then add the patchwork cushion front with the right side facing towards you. Make sure all the layers are smooth and flat then baste the layers together using your preferred method.

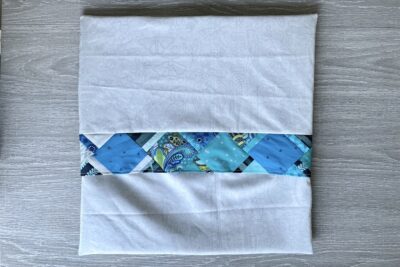
- Quilt as desired. I have hand quilted inside the block strips.
- Once you have finished quilting, trim off excess backing fabric and batting and square up your cushion block if required.
Finishing:
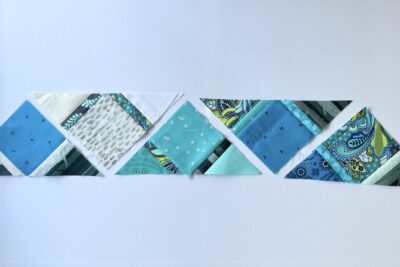
- Take six of the off-cut half square triangles from step seven. Sew them together to create a long strip.
- Then trim the strip down to 17½” x 3½”.
- Take one cushion back 17½” x 9” rectangle and pin the strip from step eleven to one long edge. Sew together then press.
- Take the other cushion back 17½” x 9” rectangle and hem one long edge by pressing the raw edge to the wrong side by ¼” then again by another ¼”. Press well and sew. Set aside.
- Now hem the raw long edge of the strip by pressing the raw edge to the wrong size by ¼” and then sew.
- Pin or clip the cushion back pieces to the quilted block, right sides together, all around the four side. Make sure the cushion back piece you want to appear upper-most once the cushion is turned right side out is underneath the second back piece.
- Sew around all four edges using a ¼” seam allowance, securing the start and finish with some back-stitching.
- Trim the corners, turn the cushion cover the right way out, carefully poke out the four corners and then press.
- Stuff with an 17” cushion pad and enjoy your new Winter Blanket cushion!
About the Designer

Amy lives in the north of England with her husband and son. When she’s not sewing and quilting, Amy can usually be found baking or reading. You can find her on Instagram @amyatthegate
More Projects by Amy
Choosing Fabric Colours | Two & Three Colours
The Ruler Rules: Online course – get the measure of your quilting rulers and learn how to use them with confidence and accuracy.
Seams Perfect: Online course – create spot-on patchwork seams with precision and confidence.